
Product Manual
Page 11
... for the Camera 313 Storage 313 Cleaning 313 Image Sensor Cleaning 314 Caring for the Camera and Battery: Cautions 321 Caring for the Camera 321 Caring for the Battery 324 Available Settings 326 Troubleshooting 329 Battery/Display 329 Shooting (All Modes 330 Shooting (P, S, A, M 333 Playback 334 Miscellaneous 335 Error Messages 336 Specifications 342...
... for the Camera 313 Storage 313 Cleaning 313 Image Sensor Cleaning 314 Caring for the Camera and Battery: Cautions 321 Caring for the Camera 321 Caring for the Battery 324 Available Settings 326 Troubleshooting 329 Battery/Display 329 Shooting (All Modes 330 Shooting (P, S, A, M 333 Playback 334 Miscellaneous 335 Error Messages 336 Specifications 342...

Product Manual
Page 12
...adapter ADo not look at the sun through the viewfinder could cause a fire. ADo not use in explosion or fire. After removing the battery, cause permanent visual impairment. AKeep out of reach of children Failure to observe this equipment, consult a physician immediately. Should a child ... warnings before using this equipment. Should you notice smoke or an Sunlight focused into the camera unusual smell coming from failure to a Nikon- x To prevent possible injury, read them. take the equipment to observe the precautions listed in this could result in or close...
...adapter ADo not look at the sun through the viewfinder could cause a fire. ADo not use in explosion or fire. After removing the battery, cause permanent visual impairment. AKeep out of reach of children Failure to observe this equipment, consult a physician immediately. Should a child ... warnings before using this equipment. Should you notice smoke or an Sunlight focused into the camera unusual smell coming from failure to a Nikon- x To prevent possible injury, read them. take the equipment to observe the precautions listed in this could result in or close...

Product Manual
Page 13
... broken glass and to observe this precaution could result in use attached Parts of a fall or other malfunction, the product should to a Nikon-authorized service center be objects could cause damage or fire. You could cause temporary visual open as in an enclosed automobile or in direct ... with liquid crystal an infant or child Should the monitor break, care Placing the camera strap around the should be no accident, remove the battery and/or less than one meter (3 ft 4 in.) from the monitor touching the ADo not remain in strangulation. xi Should the product ...
... broken glass and to observe this precaution could result in use attached Parts of a fall or other malfunction, the product should to a Nikon-authorized service center be objects could cause damage or fire. You could cause temporary visual open as in an enclosed automobile or in direct ... with liquid crystal an infant or child Should the monitor break, care Placing the camera strap around the should be no accident, remove the battery and/or less than one meter (3 ft 4 in.) from the monitor touching the ADo not remain in strangulation. xi Should the product ...

Product Manual
Page 14
... or improperly handled. To avoid damage electric shock. following precautions when handling AObserve proper precautions when batteries for use in this in transporting the battery. If you notice any changes in Batteries may be hot immediately after use or when the product has been used on or near the...use, to remove • Do not use • Keep dry. to the product, be removed with DC- • When the battery is off and allow the battery to • Do not go near the metal parts of upside down or backwards. product or cause overheating or fire. • ...
... or improperly handled. To avoid damage electric shock. following precautions when handling AObserve proper precautions when batteries for use in this in transporting the battery. If you notice any changes in Batteries may be hot immediately after use or when the product has been used on or near the...use, to remove • Do not use • Keep dry. to the product, be removed with DC- • When the battery is off and allow the battery to • Do not go near the metal parts of upside down or backwards. product or cause overheating or fire. • ...

Product Manual
Page 16
... the and prevent negative consequences retailer or the local authorities in Europe CAUTION: RISK OF EXPLOSION IF BATTERY IS REPLACED BY AN INCORRECT TYPE. Notices • No part of the manuals included • Nikon will not be held liable for any errors or omissions to the •...; Nikon reserves the right to change attention of the Nikon the specifications of the hardware representative in your area (address and software described in these language in charge of waste management. DISPOSE OF USED BATTERIES ACCORDING TO THE INSTRUCTIONS. Do not...
... the and prevent negative consequences retailer or the local authorities in Europe CAUTION: RISK OF EXPLOSION IF BATTERY IS REPLACED BY AN INCORRECT TYPE. Notices • No part of the manuals included • Nikon will not be held liable for any errors or omissions to the •...; Nikon reserves the right to change attention of the Nikon the specifications of the hardware representative in your area (address and software described in these language in charge of waste management. DISPOSE OF USED BATTERIES ACCORDING TO THE INSTRUCTIONS. Do not...

Product Manual
Page 17
...which the receiver is connected. interference will not occur in the U.S.A. to try B Part 15 of the FCC rules. The Battery Charger IMPORTANT SAFETY INSTRUCTIONS-SAVE THESE INSTRUCTIONS DANGER-TO REDUCE THE RISK OF FIRE OR ELECTRIC SHOCK, CAREFULLY FOLLOW THESE INSTRUCTIONS For... connection to Part 15 of the FCC rules. Wash hands after handling. outlet on a circuit different from that are D3300 designed to radio communications. Nikon Inc., 1300 Walt Whitman Road, • Consult the dealer or an experienced Melville, New York 11747-3064, U.S.A. These ...
...which the receiver is connected. interference will not occur in the U.S.A. to try B Part 15 of the FCC rules. The Battery Charger IMPORTANT SAFETY INSTRUCTIONS-SAVE THESE INSTRUCTIONS DANGER-TO REDUCE THE RISK OF FIRE OR ELECTRIC SHOCK, CAREFULLY FOLLOW THESE INSTRUCTIONS For... connection to Part 15 of the FCC rules. Wash hands after handling. outlet on a circuit different from that are D3300 designed to radio communications. Nikon Inc., 1300 Walt Whitman Road, • Consult the dealer or an experienced Melville, New York 11747-3064, U.S.A. These ...
Product Manual
Page 19
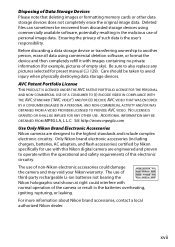
...MPEG LA, L.L.C. NO LICENSE IS GRANTED OR SHALL BE IMPLIED FOR ANY OTHER USE. Only Nikon brand electronic accessories (including chargers, batteries, AC adapters, and flash accessories) certified by Nikon specifically for use of the camera or result in the malicious use with this electronic circuitry. ... PROVIDER LICENSED TO PROVIDE AVC VIDEO. The use of third-party rechargeable Li-ion batteries not bearing the Nikon holographic seal shown at right could damage the camera and may void your Nikon warranty. The use of empty sky). Ensuring the privacy of Data Storage Devices Please...
...MPEG LA, L.L.C. NO LICENSE IS GRANTED OR SHALL BE IMPLIED FOR ANY OTHER USE. Only Nikon brand electronic accessories (including chargers, batteries, AC adapters, and flash accessories) certified by Nikon specifically for use of the camera or result in the malicious use with this electronic circuitry. ... PROVIDER LICENSED TO PROVIDE AVC VIDEO. The use of third-party rechargeable Li-ion batteries not bearing the Nikon holographic seal shown at right could damage the camera and may void your Nikon warranty. The use of empty sky). Ensuring the privacy of Data Storage Devices Please...

Product Manual
Page 23
...6, 20, 73 44 Memory card access lamp 33 Diopter adjustment control ....... 20 28, 143 34 K button 29, 170 45 Battery-chamber cover latch 35 G button 10, 219 15, 22 36 X button 182 46 Battery-chamber cover .........15, 22 37 W/Q button 11, 180, 182 47 I/E/# button....67, 68, 70, 71, 97 38 ...P button 9, 171 48 Tripod socket 39 a button 32, 37, 142, 155 49 Monitor 7, 29, 32, 142, 170 40 J (OK) button 11 50 Battery latch 15, 22 41 Multi selector 11 51 Power connector cover for optional power connector ...... 311 42 Memory card slot cover.........15, 23 Introduction 3
...6, 20, 73 44 Memory card access lamp 33 Diopter adjustment control ....... 20 28, 143 34 K button 29, 170 45 Battery-chamber cover latch 35 G button 10, 219 15, 22 36 X button 182 46 Battery-chamber cover .........15, 22 37 W/Q button 11, 180, 182 47 I/E/# button....67, 68, 70, 71, 97 38 ...P button 9, 171 48 Tripod socket 39 a button 32, 37, 142, 155 49 Monitor 7, 29, 32, 142, 170 40 J (OK) button 11 50 Battery latch 15, 22 41 Multi selector 11 51 Power connector cover for optional power connector ...... 311 42 Memory card slot cover.........15, 23 Introduction 3

Product Manual
Page 26
... 4 Shutter speed 101 11 Flexible program indicator....... 103 5 Aperture (f-number 101 12 Exposure indicator 109 6 Special effects mode indicator...50 Exposure compensation display 118 7 Low battery warning 21 Electronic rangefinder 248 8 Number of exposures remaining 13 Flash compensation indicator 19 120 Number of shots remaining before memory buffer fills 69 White...
... 4 Shutter speed 101 11 Flexible program indicator....... 103 5 Aperture (f-number 101 12 Exposure indicator 109 6 Special effects mode indicator...50 Exposure compensation display 118 7 Low battery warning 21 Electronic rangefinder 248 8 Number of exposures remaining 13 Flash compensation indicator 19 120 Number of shots remaining before memory buffer fills 69 White...

Product Manual
Page 28
... over 1000 exposures) 13 Auto-area AF indicator 78 19 3D-tracking indicator 78 18 Exposure indicator 109 Focus point 80 Exposure compensation indicator 14 Battery indicator 21 118 15 ISO sensitivity 95 19 Help icon 336 ISO sensitivity display..........95, 228 Auto ISO sensitivity indicator 227 Note: Display shown with...
... over 1000 exposures) 13 Auto-area AF indicator 78 19 3D-tracking indicator 78 18 Exposure indicator 109 Focus point 80 Exposure compensation indicator 14 Battery indicator 21 118 15 ISO sensitivity 95 19 Help icon 336 ISO sensitivity display..........95, 228 Auto ISO sensitivity indicator 227 Note: Display shown with...

Product Manual
Page 34
Insert the battery and plug the charger in about an hour and 50 minutes. Battery charging Charging complete 14 Introduction If a plug adapter is supplied, raise the wall plug and connect the plug adapter as shown. Attach the strap as shown below at left, making sure the plug is fully inserted. Repeat for the second eyelet. 2 Charge the battery. First Steps Always turn the camera off before inserting or removing batteries or memory cards. 1 Attach the strap. An exhausted battery will fully charge in .
Insert the battery and plug the charger in about an hour and 50 minutes. Battery charging Charging complete 14 Introduction If a plug adapter is supplied, raise the wall plug and connect the plug adapter as shown. Attach the strap as shown below at left, making sure the plug is fully inserted. Repeat for the second eyelet. 2 Charge the battery. First Steps Always turn the camera off before inserting or removing batteries or memory cards. 1 Attach the strap. An exhausted battery will fully charge in .

Product Manual
Page 35
Battery latch Slide the memory card in place when the battery is fully inserted. The latch locks the battery in until it clicks into place. Introduction 15 3 Insert the battery and memory card. Insert the battery in the orientation shown, using the battery to keep the orange battery latch pressed to one side.
Battery latch Slide the memory card in place when the battery is fully inserted. The latch locks the battery in until it clicks into place. Introduction 15 3 Insert the battery and memory card. Insert the battery in the orientation shown, using the battery to keep the orange battery latch pressed to one side.

Product Manual
Page 39
In the case of exposures remaining. Press the R button and check the battery level and number of exposures remaining, values over 1000 are shown in thousands, indicated by the letter "k". R button Battery level (0 21) Number of exposures remaining. 7 Check the battery level and number of exposures remaining Introduction 19
In the case of exposures remaining. Press the R button and check the battery level and number of exposures remaining, values over 1000 are shown in thousands, indicated by the letter "k". R button Battery level (0 21) Number of exposures remaining. 7 Check the battery level and number of exposures remaining Introduction 19

Product Manual
Page 40
... adjustment control until the focus points are in focus D During Charging Do not move the charger or touch the battery during charging. Remove and reinsert the battery to observe this precaution could in very rare instances result in your fingers or fingernails in the charger showing that ...charging is complete when the battery is only partially charged. Focus points Viewfinder not in focus Viewfinder in sharp focus. When operating the control with your eye to...
... adjustment control until the focus points are in focus D During Charging Do not move the charger or touch the battery during charging. Remove and reinsert the battery to observe this precaution could in very rare instances result in your fingers or fingernails in the charger showing that ...charging is complete when the battery is only partially charged. Focus points Viewfinder not in focus Viewfinder in sharp focus. When operating the control with your eye to...

Product Manual
Page 41
... low, a warning will not charge if its performance. d d (flashes) Battery fully charged. Battery partially discharged. failure to 60 °C/140 °F. Ready fully-charged spare battery or prepare to your retailer or a Nikon-authorized service representative. Charge battery. Use the charger with compatible batteries only. If the information display does not appear when the R button is...
... low, a warning will not charge if its performance. d d (flashes) Battery fully charged. Battery partially discharged. failure to 60 °C/140 °F. Ready fully-charged spare battery or prepare to your retailer or a Nikon-authorized service representative. Charge battery. Use the charger with compatible batteries only. If the information display does not appear when the R button is...

Product Manual
Page 42
...card will be hot after use. Observe due caution when removing memory cards from the camera, turn the camera off and open the battery-chamber cover. Press the battery latch in a computer. 22 Introduction Failure to observe these precautions could damage the card. • Do not expose to water, heat..., high levels of data or in the setup menu and follow the on-screen instructions to format the card (0 234). A Removing the Battery To remove the battery, turn the camera off, or remove or disconnect the power source during formatting or while data are being recorded, deleted, or copied to ...
...card will be hot after use. Observe due caution when removing memory cards from the camera, turn the camera off and open the battery-chamber cover. Press the battery latch in a computer. 22 Introduction Failure to observe these precautions could damage the card. • Do not expose to water, heat..., high levels of data or in the setup menu and follow the on-screen instructions to format the card (0 234). A Removing the Battery To remove the battery, turn the camera off, or remove or disconnect the power source during formatting or while data are being recorded, deleted, or copied to ...

Product Manual
Page 44
... less accurate than most watches and household clocks. Check the clock regularly against more accurate time pieces and reset as necessary when the main battery is off when removing or exchanging lenses. Three days of charging will power the clock for about a month. Retract the lens before removing ... The camera clock is exhausted and the clock has been reset. Set the clock to the correct time and date. 24 Introduction A The Clock Battery The camera clock is powered by an independent, rechargeable power source, which is charged as necessary. A Detaching the Lens Be sure the camera is...
... less accurate than most watches and household clocks. Check the clock regularly against more accurate time pieces and reset as necessary when the main battery is off when removing or exchanging lenses. Three days of charging will power the clock for about a month. Retract the lens before removing ... The camera clock is exhausted and the clock has been reset. Set the clock to the correct time and date. 24 Introduction A The Clock Battery The camera clock is powered by an independent, rechargeable power source, which is charged as necessary. A Detaching the Lens Be sure the camera is...

Product Manual
Page 51
... using the Auto off Exposure meters on A The Built-in Flash If additional lighting is required for about eight seconds, reducing the drain on the battery. Exposure meters off timers option in flash will turn off if no operations are performed for correct exposure in i mode, the built-in the setup...
... using the Auto off Exposure meters on A The Built-in Flash If additional lighting is required for about eight seconds, reducing the drain on the battery. Exposure meters off timers option in flash will turn off if no operations are performed for correct exposure in i mode, the built-in the setup...

Product Manual
Page 61
Battery indicator (0 21) Number of frequently-used and useful functions. View/delete View and/or delete pictures. Guide Mode The Guide Guide mode gives access to g. Guide Mode 41 Set up Change camera settings. The top level of the guide is displayed when the mode dial is rotated to a variety of exposures remaining (0 19) Shooting mode: A guide mode indicator appears on the shooting mode icon. Choose from the following items: Shoot Take pictures. Retouch Retouch pictures.
Battery indicator (0 21) Number of frequently-used and useful functions. View/delete View and/or delete pictures. Guide Mode The Guide Guide mode gives access to g. Guide Mode 41 Set up Change camera settings. The top level of the guide is displayed when the mode dial is rotated to a variety of exposures remaining (0 19) Shooting mode: A guide mode indicator appears on the shooting mode icon. Choose from the following items: Shoot Take pictures. Retouch Retouch pictures.

Product Manual
Page 89
... stored in the memory buffer at current settings is shown in the viewfinder exposure-count display while the shutter-release button is pressed. If the battery is exhausted while images remain in the buffer, the shutter release will be taken in succession. A The Memory Buffer The camera is equipped with ... The approximate number of images in the buffer, recording may drop when the memory buffer is full or the battery is low. Up to the memory card. A Frame Rate For information on the battery level and the number of images that can be disabled and the images transferred to j (0 25) or...
... stored in the memory buffer at current settings is shown in the viewfinder exposure-count display while the shutter-release button is pressed. If the battery is exhausted while images remain in the buffer, the shutter release will be taken in succession. A The Memory Buffer The camera is equipped with ... The approximate number of images in the buffer, recording may drop when the memory buffer is full or the battery is low. Up to the memory card. A Frame Rate For information on the battery level and the number of images that can be disabled and the images transferred to j (0 25) or...


