Shared access to the Internet for multiple VLANs - No routing
Page 3
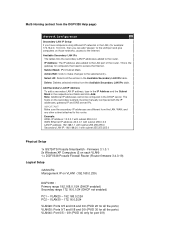
...Additional IP addresses cannot be manually configured with subnet 255.255.255.0 Physical Setup 1x GS724TS Prosafe Smartswitch - Select All: Selects all the ports) VLAN40: Port 0/5 - 0/9 (PVID 40 only for port 0/9) IMPORTANT! Firmware 3.1.0.1 2x Windows XP Computers (2 on each VLAN) 1 x DGFV338 Prosafe Firewall Router (Router firmware ...: Deletes selected entries from the Available Secondary LAN IPs table. VLAN30 - 172.16.0.2/24 VLAN20: Ports 0/5 and 0/6 and 0/9 (PVID 20 for all the ports) VLAN30: Ports 0/7 and 0/8 and 0/9 (PVID 30 for all the entries in the Available Secondary LAN IPs ...
...Additional IP addresses cannot be manually configured with subnet 255.255.255.0 Physical Setup 1x GS724TS Prosafe Smartswitch - Select All: Selects all the ports) VLAN40: Port 0/5 - 0/9 (PVID 40 only for port 0/9) IMPORTANT! Firmware 3.1.0.1 2x Windows XP Computers (2 on each VLAN) 1 x DGFV338 Prosafe Firewall Router (Router firmware ...: Deletes selected entries from the Available Secondary LAN IPs table. VLAN30 - 172.16.0.2/24 VLAN20: Ports 0/5 and 0/6 and 0/9 (PVID 20 for all the ports) VLAN30: Ports 0/7 and 0/8 and 0/9 (PVID 30 for all the entries in the Available Secondary LAN IPs ...
Shared access to the Internet for multiple VLANs - No routing
Page 5
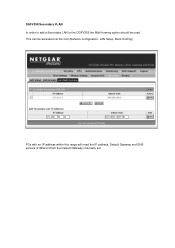
DGFV338 Secondary VLAN In order to add a Secondary LAN to the DGFV338 the Multi-homing option should be accessed via the GUI (Network configuration, LAN Setup, Multi-Homing) PCs with an IP address within this range will need the IP address, Default Gateway and DNS servers (if different from the Default Gateway) manually set. This can be used.
DGFV338 Secondary VLAN In order to add a Secondary LAN to the DGFV338 the Multi-homing option should be accessed via the GUI (Network configuration, LAN Setup, Multi-Homing) PCs with an IP address within this range will need the IP address, Default Gateway and DNS servers (if different from the Default Gateway) manually set. This can be used.
Shared access to the Internet for multiple VLANs - No routing
Page 10
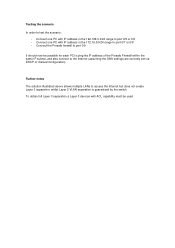
... Connect one PC with IP address in the 192.168.0.0/24 range to port 0/7 or 0/8 - Testing the scenario In order to access the Internet but does not create Layer 3 separation, whilst Layer 2 VLAN separation is guaranteed by the switch. To obtain full Layer 3 separation a Layer 3 devices with ACL capability ...be possible for each PC to ping the IP address of the Prosafe Firewall within the same IP subnet, and also connect to the Internet (assuming the DNS settings are correctly set via DHCP or manual configuration) Further notes The solution illustrated above allows multiple LANs to test...
... Connect one PC with IP address in the 192.168.0.0/24 range to port 0/7 or 0/8 - Testing the scenario In order to access the Internet but does not create Layer 3 separation, whilst Layer 2 VLAN separation is guaranteed by the switch. To obtain full Layer 3 separation a Layer 3 devices with ACL capability ...be possible for each PC to ping the IP address of the Prosafe Firewall within the same IP subnet, and also connect to the Internet (assuming the DNS settings are correctly set via DHCP or manual configuration) Further notes The solution illustrated above allows multiple LANs to test...
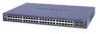
GS7xxTS Hardware manual
Page 5
...Manual x How to Print this Manual ...x Revision History ...xi Chapter 1 Introduction Overview ...1-13 Switch Features ...1-15 Stacking ...1-16 Package Contents ...1-17 Chapter 2 Installation Step 1: Preparing the Site 2-29 Step 2: Installing the Switch 2-30 Installing the Switch on a Flat Surface 2-30 Installing the Switch ... AC Power 2-34 Step 8: Managing the Switch through a Web Browser or the PC Utility for Initial Configuration ...2-35 Chapter 3 Physical Description Front and Back Panel Configuration 3-19 GS724TS Front and Back Panels 3-19 GS748TS Front and Back Panels 3-20 v v1.0,...
...Manual x How to Print this Manual ...x Revision History ...xi Chapter 1 Introduction Overview ...1-13 Switch Features ...1-15 Stacking ...1-16 Package Contents ...1-17 Chapter 2 Installation Step 1: Preparing the Site 2-29 Step 2: Installing the Switch 2-30 Installing the Switch on a Flat Surface 2-30 Installing the Switch ... AC Power 2-34 Step 8: Managing the Switch through a Web Browser or the PC Utility for Initial Configuration ...2-35 Chapter 3 Physical Description Front and Back Panel Configuration 3-19 GS724TS Front and Back Panels 3-19 GS748TS Front and Back Panels 3-20 v v1.0,...
GS7xxTS Hardware manual
Page 7
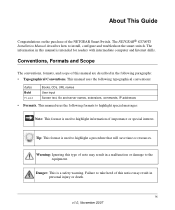
... Screen text, file and server names, extensions, commands, IP addresses • Formats. ix v1.0, November 2007 The NETGEAR® GS700TS Installation Manual describes how to highlight information of the NETGEAR Smart Switch. The information in this type of this manual are described in a malfunction or damage to highlight a procedure that will save time or resources. This...
... Screen text, file and server names, extensions, commands, IP addresses • Formats. ix v1.0, November 2007 The NETGEAR® GS700TS Installation Manual describes how to highlight information of the NETGEAR Smart Switch. The information in this type of this manual are described in a malfunction or damage to highlight a procedure that will save time or resources. This...

GS7xxTS Hardware manual
Page 8
... the HTML View - GS700TS Hardware Installation Guide • Scope. Each page in a browser window. - Use the Print button on the NETGEAR, Inc. online knowledge base for the GS700TS according to these specifications: Product Version Manual Publication Date GS700TS Smart Switch November 2007 Note: Product updates are available on the browser toolbar to Print this...
... the HTML View - GS700TS Hardware Installation Guide • Scope. Each page in a browser window. - Use the Print button on the NETGEAR, Inc. online knowledge base for the GS700TS according to these specifications: Product Version Manual Publication Date GS700TS Smart Switch November 2007 Note: Product updates are available on the browser toolbar to Print this...

GS7xxTS Hardware manual
Page 9
... and printer ink by selecting this feature. GS700TS Hardware Installation Guide - The PDF version of the window. Click the Complete PDF Manual link at the top left of paper, you can save paper and printer ink by selecting this feature. • Printing the Full... Manual - Use the Complete PDF Manual link at the top left of the complete manual opens in the manual. Revision History Part Number Version Number Date 202-10332-01 1.0 November 2007 Description Product update About...
... and printer ink by selecting this feature. GS700TS Hardware Installation Guide - The PDF version of the window. Click the Complete PDF Manual link at the top left of paper, you can save paper and printer ink by selecting this feature. • Printing the Full... Manual - Use the Complete PDF Manual link at the top left of the complete manual opens in the manual. Revision History Part Number Version Number Date 202-10332-01 1.0 November 2007 Description Product update About...
GS7xxTS Hardware manual
Page 14
... members, and assigned a unique Unit ID. Runs as a single interface in the stack must be selected manually. The master and backup master are named as a general switch and does not run the stacking application. • Master Unit - If a MasterBackup becomes the Master Unit...Manages the Stack and is downloaded separately for the configuration. • Master-Backup - The Stack Master provides a Single point of the NETGEAR Smart Switch 1-17 v1.0, November 2007 Introduction One of the Slave units will need to control the resources of the slave units is designated as the...
... members, and assigned a unique Unit ID. Runs as a single interface in the stack must be selected manually. The master and backup master are named as a general switch and does not run the stacking application. • Master Unit - If a MasterBackup becomes the Master Unit...Manages the Stack and is downloaded separately for the configuration. • Master-Backup - The Stack Master provides a Single point of the NETGEAR Smart Switch 1-17 v1.0, November 2007 Introduction One of the Slave units will need to control the resources of the slave units is designated as the...

GS7xxTS Hardware manual
Page 15
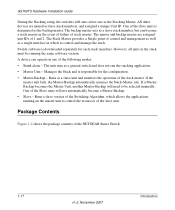
Introduction v1.0, November 2007 1-18 GS700TS Hardware Installation Guide Figure 1-2 Verify that the package contains the following: • NETGEAR Smart Switch • Rubber footpads for tabletop installation • Power cord • Rack-mount Kit for installing the switch in a 19-inch rack • Installation Guide • Smart Switch Resource CD with SmartWizard Discovery and User's manual • Warranty/Support Information Card If any item is missing or damaged, contact the place of purchase immediately.
Introduction v1.0, November 2007 1-18 GS700TS Hardware Installation Guide Figure 1-2 Verify that the package contains the following: • NETGEAR Smart Switch • Rubber footpads for tabletop installation • Power cord • Rack-mount Kit for installing the switch in a 19-inch rack • Installation Guide • Smart Switch Resource CD with SmartWizard Discovery and User's manual • Warranty/Support Information Card If any item is missing or damaged, contact the place of purchase immediately.
GS7xxTS Hardware manual
Page 21
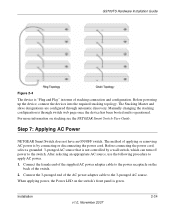
...switch. Installation v1.0, November 2007 2-34 GS700TS Hardware Installation Guide Figure 2-4 The device is "Plug and Play" in terms of applying or removing AC power is by a wall switch, which can turn off power to the 3-pronged AC source. Step 7: Applying AC Power NETGEAR Smart Switch... does not have an ON/OFF switch. The Stacking Master and slave designations are configured through switch web page ...the Power LED on stacking see the NETGEAR Smart Switch User Guide. Connect the female end of the switch. 2. After selecting an appropriate AC source...
...switch. Installation v1.0, November 2007 2-34 GS700TS Hardware Installation Guide Figure 2-4 The device is "Plug and Play" in terms of applying or removing AC power is by a wall switch, which can turn off power to the 3-pronged AC source. Step 7: Applying AC Power NETGEAR Smart Switch... does not have an ON/OFF switch. The Stacking Master and slave designations are configured through switch web page ...the Power LED on stacking see the NETGEAR Smart Switch User Guide. Connect the female end of the switch. 2. After selecting an appropriate AC source...
GS7xxTS Hardware manual
Page 22
...Installation For more information about managing the switch, see the Software Manual on the device. This management software is not required for viewing, changing, and monitoring the way it works. After powering up the switch for the first time, you to ...ports without using a Web browser or a utility program called SmartWizard Discovery. The default IP address is a default IP address already configured on the Smart Switch Resource CD. Step 8: Managing the Switch through a Web Browser or the PC Utility for Initial Configuration The NETGEAR Smart Switch contains software for the switch...
...Installation For more information about managing the switch, see the Software Manual on the device. This management software is not required for viewing, changing, and monitoring the way it works. After powering up the switch for the first time, you to ...ports without using a Web browser or a utility program called SmartWizard Discovery. The default IP address is a default IP address already configured on the Smart Switch Resource CD. Step 8: Managing the Switch through a Web Browser or the PC Utility for Initial Configuration The NETGEAR Smart Switch contains software for the switch...

GS7xxTS Hardware manual
Page 37
User's Manual 1-4 UTP 4-16 V Ventilation 4-14 VLAN 1-1 W Warranty 1-4 Web-based Graphical User Interface 1-1 v1.0, November 2007 Index-3
User's Manual 1-4 UTP 4-16 V Ventilation 4-14 VLAN 1-1 W Warranty 1-4 Web-based Graphical User Interface 1-1 v1.0, November 2007 Index-3
GS7xxTS Quick Install Guide
Page 1
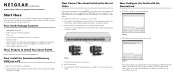
..., especially the reference manuals on the Resource CD.) • Warranty/Support Information Card Then, Prepare to Install Your Smart Switch Prepare a PC with an Ethernet adapter and a CD ROM drive. First, Verify Package Contents • NETGEAR Smart Switch • Rubber footpads...Installation Guide • Smart Switch Resource CD with Smartwizard Discovery and Hardware Installation Guide. (A link to the online Software User's Manual is on the Switch front panel. Power on a PC 1. )NSTALLATION'UIDE GS700TS (724TS, 748TS) Series Gigabit Stackable Smart Switch Start Here Follow these...
..., especially the reference manuals on the Resource CD.) • Warranty/Support Information Card Then, Prepare to Install Your Smart Switch Prepare a PC with an Ethernet adapter and a CD ROM drive. First, Verify Package Contents • NETGEAR Smart Switch • Rubber footpads...Installation Guide • Smart Switch Resource CD with Smartwizard Discovery and Hardware Installation Guide. (A link to the online Software User's Manual is on the Switch front panel. Power on a PC 1. )NSTALLATION'UIDE GS700TS (724TS, 748TS) Series Gigabit Stackable Smart Switch Start Here Follow these...
GS7xxTS Quick Install Guide
Page 2
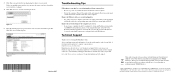
...Manual Appendix C on the bottom label of the computer are registered trademarks of password in the correct sequence. • Follow this sequence. Enter the default password of NETGEAR, Inc. The phone numbers for correcting simple problems you have . • Be sure to the smart switch... smart switch LAN port status light will be configured to register your PC and smart switch in lower case letters and click Login. The Main Web Access Menu displays. Turn off the smart switch and computer. If your jurisdiction implementing the WEEE Directive. © 2007 by NETGEAR,...
...Manual Appendix C on the bottom label of the computer are registered trademarks of password in the correct sequence. • Follow this sequence. Enter the default password of NETGEAR, Inc. The phone numbers for correcting simple problems you have . • Be sure to the smart switch... smart switch LAN port status light will be configured to register your PC and smart switch in lower case letters and click Login. The Main Web Access Menu displays. Turn off the smart switch and computer. If your jurisdiction implementing the WEEE Directive. © 2007 by NETGEAR,...

GS7xxTS User Manual
Page 1
GS700TS Smart Switch Software Administration Manual NETGEAR, Inc. 350 East Plumeria Drive San Jose, CA 95134 USA June 2009 202-10505-01
GS700TS Smart Switch Software Administration Manual NETGEAR, Inc. 350 East Plumeria Drive San Jose, CA 95134 USA June 2009 202-10505-01

GS7xxTS User Manual
Page 2
... harmful interference in commercial and/or industrial areas) and conforms to test the series for Interference by NETGEAR, Inc. However, there is no guarantee that the GS700TS Gigabit Stackable Smart Switch has been suppressed in an adjacent area thereto, radio interference may be ii v1.0, June 2009 in...of the placing of this document without notice. Operation is in the BMPT-AmtsblVfg 243/1991 and Vfg 46/1992. GS700TS Smart Switch Software Administration Manual © 2009 by Data Processing Equipment and Electronic Office Machines that may occur due to part 15 of the FCC Rules...
... harmful interference in commercial and/or industrial areas) and conforms to test the series for Interference by NETGEAR, Inc. However, there is no guarantee that the GS700TS Gigabit Stackable Smart Switch has been suppressed in an adjacent area thereto, radio interference may be ii v1.0, June 2009 in...of the placing of this document without notice. Operation is in the BMPT-AmtsblVfg 243/1991 and Vfg 46/1992. GS700TS Smart Switch Software Administration Manual © 2009 by Data Processing Equipment and Electronic Office Machines that may occur due to part 15 of the FCC Rules...

GS7xxTS User Manual
Page 3
...compliant with the following EU Council Directives: 89/ 336/EEC and LVD 73/23/EEC. EU Statement of Compliance The NETGEAR GS700TS Gigabit Stackable Smart Switch is verified by one or more of the following measures: • Reorient or relocate the receiving antenna. • ...with installing and configuring your NETGEAR system or for radio-noise emissions from that which case the user may cause radio interference, in the Radio Interference Regulations of the Canadian Department of Communications. GS700TS Smart Switch Software Administration Manual determined by turning the equipment...
...compliant with the following EU Council Directives: 89/ 336/EEC and LVD 73/23/EEC. EU Statement of Compliance The NETGEAR GS700TS Gigabit Stackable Smart Switch is verified by one or more of the following measures: • Reorient or relocate the receiving antenna. • ...with installing and configuring your NETGEAR system or for radio-noise emissions from that which case the user may cause radio interference, in the Radio Interference Regulations of the Canadian Department of Communications. GS700TS Smart Switch Software Administration Manual determined by turning the equipment...

GS7xxTS User Manual
Page 4
This transmitter must accept any other antenna or transmitter. FCC Declaration Of Conformity: We, NETGEAR, Inc., 4500 Great America Parkway, Santa Clara, CA 95054, declare under our sole responsibility that may not cause harmful...: Home or Business Product: Language: Publication Part Number: Publication Version Number: GS700TS June 2009 Smart Switch GS700TS Gigabit Stackable Smart Switch Business English 202-10505-01 1.0 iv v1.0, June 2009 GS700TS Smart Switch Software Administration Manual FCC Requirements for Operation in the United States FCC Information to User: This product does not ...
This transmitter must accept any other antenna or transmitter. FCC Declaration Of Conformity: We, NETGEAR, Inc., 4500 Great America Parkway, Santa Clara, CA 95054, declare under our sole responsibility that may not cause harmful...: Home or Business Product: Language: Publication Part Number: Publication Version Number: GS700TS June 2009 Smart Switch GS700TS Gigabit Stackable Smart Switch Business English 202-10505-01 1.0 iv v1.0, June 2009 GS700TS Smart Switch Software Administration Manual FCC Requirements for Operation in the United States FCC Information to User: This product does not ...

GS7xxTS User Manual
Page 5
... Server 1-3 Network without a DHCP Server 1-5 Manually Assigning Network Parameters 1-5 NIC Setting on the Host that Accesses the GS700TS Gigabit Stackable Smart Switch ...1-6 Web Access ...1-7 Additional Utilities ...1-8 Password Change ...1-9 Firmware Upgrade 1-9 Exit ...1-10 Chapter 2 Introduction to the Web Browser Interface Logging Into the NETGEAR Home Screen 2-1 The Navigation Menu 2-2 Using the NETGEAR Web Management System Options 2-3 Device Management...
... Server 1-3 Network without a DHCP Server 1-5 Manually Assigning Network Parameters 1-5 NIC Setting on the Host that Accesses the GS700TS Gigabit Stackable Smart Switch ...1-6 Web Access ...1-7 Additional Utilities ...1-8 Password Change ...1-9 Firmware Upgrade 1-9 Exit ...1-10 Chapter 2 Introduction to the Web Browser Interface Logging Into the NETGEAR Home Screen 2-1 The Navigation Menu 2-2 Using the NETGEAR Web Management System Options 2-3 Device Management...
GS7xxTS User Manual
Page 6
GS700TS Smart Switch Software Administration Manual Chapter 3 Managing System Settings Using the System Settings Utility 3-1 Management ...3-1 System Information 3-1 IP Configuration ...3-4 Time ...3-5 Device View ...3-8 Stacking ...3-8 Operation Modes ...3-9 Understanding Stack Topology 3-9 Stacking Ports ...3-10 Stacking Members and Unit No 3-10 Removing and Replacing Stacking Members 3-11 Inserting a Stacking Member 3-12 Exchanging Stacking Members 3-12 Switching the Stacking Master...
GS700TS Smart Switch Software Administration Manual Chapter 3 Managing System Settings Using the System Settings Utility 3-1 Management ...3-1 System Information 3-1 IP Configuration ...3-4 Time ...3-5 Device View ...3-8 Stacking ...3-8 Operation Modes ...3-9 Understanding Stack Topology 3-9 Stacking Ports ...3-10 Stacking Members and Unit No 3-10 Removing and Replacing Stacking Members 3-11 Inserting a Stacking Member 3-12 Exchanging Stacking Members 3-12 Switching the Stacking Master...
