Owners Manual
Page 1
... / Table des matières REFRIGERATOR SAFETY 1 SEGURIDAD DEL REFRIGERADOR.....14 SÉCURITÉ DU RÉFRIGÉRATEUR........ 28 INSTALLATION INSTRUCTIONS............2 INSTRUCCIONES DE INSTALACIÓN...15 INSTRUCTIONS D'INSTALLATION...... 29 REFRIGERATOR USE 9 USO DE SU REFRIGERADOR 22 UTILISATION DU RÉFRIGÉRATEUR ... 36 REFRIGERATOR CARE 10 CUIDADO DE SU REFRIGERADOR .....24 ENTRETIEN DU RÉFRIGÉRATEUR ..... 38 TROUBLESHOOTING 11 SOLUCIÓN DE...
... / Table des matières REFRIGERATOR SAFETY 1 SEGURIDAD DEL REFRIGERADOR.....14 SÉCURITÉ DU RÉFRIGÉRATEUR........ 28 INSTALLATION INSTRUCTIONS............2 INSTRUCCIONES DE INSTALACIÓN...15 INSTRUCTIONS D'INSTALLATION...... 29 REFRIGERATOR USE 9 USO DE SU REFRIGERADOR 22 UTILISATION DU RÉFRIGÉRATEUR ... 36 REFRIGERATOR CARE 10 CUIDADO DE SU REFRIGERADOR .....24 ENTRETIEN DU RÉFRIGÉRATEUR ..... 38 TROUBLESHOOTING 11 SOLUCIÓN DE...
Owners Manual
Page 2
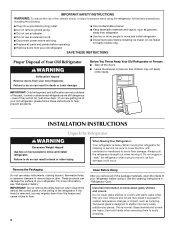
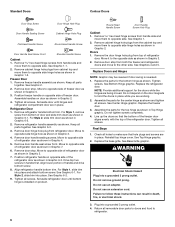
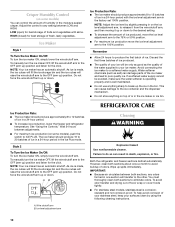
... easily climb inside of your refrigerator. See the cleaning instructions in death or brain damage. Shelves and covers may migrate down from refrigerator. ■ Use two or more people to move and install refrigerator. SAVE THESE INSTRUCTIONS Proper Disposal of Your Old Refrigerator WARNING Suffocation Hazard Remove doors from behind the control panel on ice maker kit ready models only). Junked or abandoned refrigerators are cold. Use both hands when removing them to remove tape...
... easily climb inside of your refrigerator. See the cleaning instructions in death or brain damage. Shelves and covers may migrate down from refrigerator. ■ Use two or more people to move and install refrigerator. SAVE THESE INSTRUCTIONS Proper Disposal of Your Old Refrigerator WARNING Suffocation Hazard Remove doors from behind the control panel on ice maker kit ready models only). Junked or abandoned refrigerators are cold. Use both hands when removing them to remove tape...
Owners Manual
Page 3
... recommended that a separate circuit serving only your refrigerator, allow for the door to follow these instructions can result in death, fire, or electrical shock. Failure to swing open. NOTE: Before performing any type of installation, cleaning, or removing a light bulb, turn the control (Thermostat, Refrigerator or Freezer Control depending on the hinge side (some models require more) to the desired setting. See "Using the Controls." 2" (5.08 cm) 3 It is recommended that cannot...
... recommended that a separate circuit serving only your refrigerator, allow for the door to follow these instructions can result in death, fire, or electrical shock. Failure to swing open. NOTE: Before performing any type of installation, cleaning, or removing a light bulb, turn the control (Thermostat, Refrigerator or Freezer Control depending on the hinge side (some models require more) to the desired setting. See "Using the Controls." 2" (5.08 cm) 3 It is recommended that cannot...

Owners Manual
Page 4
... household temperatures will work, but drill on the reverse osmosis system to operate the water dispenser and ice maker. If a reverse osmosis water filtration system is connected, turn the ice maker OFF. If you have selected. IMPORTANT: If you may crush the copper tubing. 7. Connect to the water pipe. Add 7 ft (2.1 m) to 414 kPa). Compression nut D E. Tighten the packing nut. Do not overtighten. 8. Place the free end of refrigerator to Water Line 1.
... household temperatures will work, but drill on the reverse osmosis system to operate the water dispenser and ice maker. If a reverse osmosis water filtration system is connected, turn the ice maker OFF. If you have selected. IMPORTANT: If you may crush the copper tubing. 7. Connect to the water pipe. Add 7 ft (2.1 m) to 414 kPa). Compression nut D E. Tighten the packing nut. Do not overtighten. 8. Place the free end of refrigerator to Water Line 1.

Owners Manual
Page 5
... working. 4. Unplug refrigerator or disconnect power. 2. Complete the Installation WARNING Electrical Shock Hazard Plug into a grounded 3 prong outlet. Remove the parts for the top hinge as shown. Reverse Doors (optional) IMPORTANT: If you want to remove and replace the doors, see "Replace Doors and Hinges." 1. Connect to completely fill ice container. 5 Tube clamp B. The ice maker is pushed back against the wall. 4. If you have either tube connection. If your model, you are being moved. Plug...
... working. 4. Unplug refrigerator or disconnect power. 2. Complete the Installation WARNING Electrical Shock Hazard Plug into a grounded 3 prong outlet. Remove the parts for the top hinge as shown. Reverse Doors (optional) IMPORTANT: If you want to remove and replace the doors, see "Replace Doors and Hinges." 1. Connect to completely fill ice container. 5 Tube clamp B. The ice maker is pushed back against the wall. 4. If you have either tube connection. If your model, you are being moved. Plug...
Owners Manual
Page 6
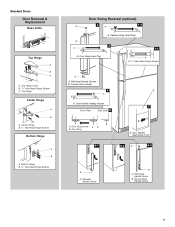
... move them to opposite side. Keep all parts together. Remove door stop . Align refrigerator handle bottom trim. Set aside refrigerator door until hinges and refrigerator compartment door are in Graphic 3. 2. Replace Doors and Hinges NOTE: Graphic may be reversed if door swing is installed on opposite side of refrigerator door. Replace the refrigerator door. Replace the base grille. Do not use an adapter. Plug into place. Remove cabinet hinge hole plugs from handle side and move them to opposite side...
... move them to opposite side. Keep all parts together. Remove door stop . Align refrigerator handle bottom trim. Set aside refrigerator door until hinges and refrigerator compartment door are in Graphic 3. 2. Replace Doors and Hinges NOTE: Graphic may be reversed if door swing is installed on opposite side of refrigerator door. Replace the refrigerator door. Replace the base grille. Do not use an adapter. Plug into place. Remove cabinet hinge hole plugs from handle side and move them to opposite side...
Owners Manual
Page 7
... Hinge Screws C. Top Hinge Center Hinge A B A. Bottom Hinge B. 5/16" Hex-Head Hinge Screws Door Swing Reversal (optional) A 2 A 1-2 B A A. Door Hinge Hole Plug A. Door Stop 6-1 A. Shoulder Handle Screw B A. Center Hinge B. /516" Hex-Head Hinge Screws Bottom Hinge A B A. Freezer Door Handle 4 A A. Standard Doors Door Removal & Replacement Base Grille Top Hinge A B C A. Door Stop Screw A B B. Round-Head Handle Screw 7 Flat-Head Handle Screws B. Door Handle Sealing Screws 7 Front View Side View 5 A. Flat-Head Handle Screw B. Cabinet Hinge Hole Plugs...
... Hinge Screws C. Top Hinge Center Hinge A B A. Bottom Hinge B. 5/16" Hex-Head Hinge Screws Door Swing Reversal (optional) A 2 A 1-2 B A A. Door Hinge Hole Plug A. Door Stop 6-1 A. Shoulder Handle Screw B A. Center Hinge B. /516" Hex-Head Hinge Screws Bottom Hinge A B A. Freezer Door Handle 4 A A. Standard Doors Door Removal & Replacement Base Grille Top Hinge A B C A. Door Stop Screw A B B. Round-Head Handle Screw 7 Flat-Head Handle Screws B. Door Handle Sealing Screws 7 Front View Side View 5 A. Flat-Head Handle Screw B. Cabinet Hinge Hole Plugs...
Owners Manual
Page 8
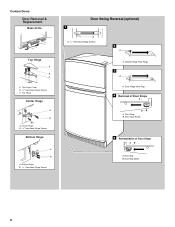
Center Hinge B. 5/16" Hex-Head Hinge Screws Bottom Hinge A B A. Door Stop Screw 8 Contour Doors Door Removal & Replacement Base Grille Top Hinge A B C A. Door Stop B. Door Stop B. Top Hinge Cover B. 5/16" Hex-Head Hinge Screws C. Cabinet Hinge Hole Plugs 3 A A. Door Hinge Hole Plug 4 Removal of Door Stops AB A. Door Stop Screw 5 Reinstallation of Door Stops A B A. Top Hinge Center Hinge A B A. Bottom Hinge B. 5/16" Hex-Head Hinge Screws Door Swing Reversal (optional) 1 A A. 5/16" Hex-Head Hinge Screws A 2 A A.
Center Hinge B. 5/16" Hex-Head Hinge Screws Bottom Hinge A B A. Door Stop Screw 8 Contour Doors Door Removal & Replacement Base Grille Top Hinge A B C A. Door Stop B. Door Stop B. Top Hinge Cover B. 5/16" Hex-Head Hinge Screws C. Cabinet Hinge Hole Plugs 3 A A. Door Hinge Hole Plug 4 Removal of Door Stops AB A. Door Stop Screw 5 Reinstallation of Door Stops A B A. Top Hinge Center Hinge A B A. Bottom Hinge B. 5/16" Hex-Head Hinge Screws Door Swing Reversal (optional) 1 A A. 5/16" Hex-Head Hinge Screws A 2 A A.
Owners Manual
Page 9
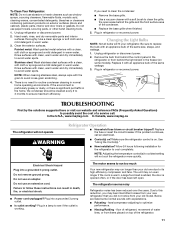
... install your food may spoil. Loosen the top hinge screws using the instructions below: 1. The controls are not blocked. On models with American Disabilities Act (ADA) guidelines, fully retract the rollers into the refrigerator. ■ If you like and when ice cream is set correctly when milk or juice is as cold as shown. CONDITION/REASON: ADJUSTMENT: REFRIGERATOR too warm REFRIGERATOR or TEMPERATURE Control one setting higher FREEZER...
... install your food may spoil. Loosen the top hinge screws using the instructions below: 1. The controls are not blocked. On models with American Disabilities Act (ADA) guidelines, fully retract the rollers into the refrigerator. ■ If you like and when ice cream is set correctly when milk or juice is as cold as shown. CONDITION/REASON: ADJUSTMENT: REFRIGERATOR too warm REFRIGERATOR or TEMPERATURE Control one setting higher FREEZER...
Owners Manual
Page 10
...; For maximum ice production move the ice level adjustment arm to break up ) position. Wire shutoff arm B. Ice Maker Style 1 To Turn the Ice Maker On/Off: To turn the ice maker ON, simply lower the wire shutoff arm. See "Using the Controls." You must thoroughly clean both sections, any setting between adjustments. ■ For maximum ice production (on some models) You can cause damage to the ice container and the dispenser mechanism...
...; For maximum ice production move the ice level adjustment arm to break up ) position. Wire shutoff arm B. Ice Maker Style 1 To Turn the Ice Maker On/Off: To turn the ice maker ON, simply lower the wire shutoff arm. See "Using the Controls." You must thoroughly clean both sections, any setting between adjustments. ■ For maximum ice production (on some models) You can cause damage to the ice container and the dispenser mechanism...
Owners Manual
Page 11
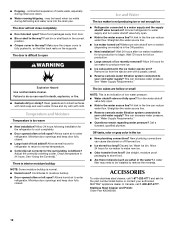
... water lines, or from your new refrigerator that you need for the refrigerator to follow these instructions can result in warm water. Make sure the refrigerator control is opened often, or if the door has been left open areas behind the light shield in a lamp to its high-efficiency compressor and fans. Failure to cool completely. Plug in the freezer (on exterior surfaces (doors and cabinet), plastic parts, interior and door liners or gaskets. Below are listed some models...
... water lines, or from your new refrigerator that you need for the refrigerator to follow these instructions can result in warm water. Make sure the refrigerator control is opened often, or if the door has been left open areas behind the light shield in a lamp to its high-efficiency compressor and fans. Failure to cool completely. Plug in the freezer (on exterior surfaces (doors and cabinet), plastic parts, interior and door liners or gaskets. Below are listed some models...
Owners Manual
Page 12
...; Door opened often or left open ? may need to be heard when ice melts during initial cool-down. ■ Water running/dripping - Contributes to produce more ice. ■ Ice cube jammed in the water source line? Straighten the water source line. ■ Reverse osmosis water filtration system connected to a water supply and the supply shutoff valve turned on model) is an indication of food added? Off-taste, odor or gray color in the way? Push bin or shelf...
...; Door opened often or left open ? may need to be heard when ice melts during initial cool-down. ■ Water running/dripping - Contributes to produce more ice. ■ Ice cube jammed in the water source line? Straighten the water source line. ■ Reverse osmosis water filtration system connected to a water supply and the supply shutoff valve turned on model) is an indication of food added? Off-taste, odor or gray color in the way? Push bin or shelf...
Owners Manual
Page 13
.... 8. Service must be repaired in your complete model number ready. Replacement parts or repair labor on the duration of implied warranties of products not approved by an authorized Maytag servicer is required to refrigerator or freezer product failures. 7. Some states and provinces do not allow limitations on major appliances with electrical or plumbing codes, or use or when it is installed in an inaccessible location or is operated...
.... 8. Service must be repaired in your complete model number ready. Replacement parts or repair labor on the duration of implied warranties of products not approved by an authorized Maytag servicer is required to refrigerator or freezer product failures. 7. Some states and provinces do not allow limitations on major appliances with electrical or plumbing codes, or use or when it is installed in an inaccessible location or is operated...
Parts Diagram
Page 2
... Parts W10142143 Service & Wiring Sheet W10178139 Energy Label 2225623 Modular Icemaker Service Sheet Use & Care Guide W10131413 Bilingual W10131421 Trilingual Following May Be Purchased DO−IT−YOURSELF REPAIR MANUALS 677969 Do−It−Yourself Manual, Ref./ Fzr. 2 2189410 Hinge (Top) 3 2166108 Roller, Front (2) 4 2189356 Clip, Grille Illus. Part No. DESCRIPTION 5 489385 Clamp, Tube (Water Supply Line) 6 2179826 Rivet 7 489427 Screw 8 549193 Clamp, Cord 9 489497 Screw 10 2254618 Hinge...
... Parts W10142143 Service & Wiring Sheet W10178139 Energy Label 2225623 Modular Icemaker Service Sheet Use & Care Guide W10131413 Bilingual W10131421 Trilingual Following May Be Purchased DO−IT−YOURSELF REPAIR MANUALS 677969 Do−It−Yourself Manual, Ref./ Fzr. 2 2189410 Hinge (Top) 3 2166108 Roller, Front (2) 4 2189356 Clip, Grille Illus. Part No. DESCRIPTION 5 489385 Clamp, Tube (Water Supply Line) 6 2179826 Rivet 7 489427 Screw 8 549193 Clamp, Cord 9 489497 Screw 10 2254618 Hinge...

Parts Diagram
Page 6
..., Light 9 2179858 Damper, Air 10 2315539 Fan Motor 11 2163777 Fan Blade 12 2212982 Control Box 13 2210489 Thermostat Assy. (Includes Illus. 5 & 18) 14 489478 Screw 15 488208 Screw 16 2320192 Cover, Evaporator 17 527949 Light Bulb (2) 18 2200831 Weight, Thermal 19 1118894 Rocker Arm Switch 20 2210509 Valve 21 2176281 Cover, Air Diffuser 22 2200863 Knob, Thermostat 23 2254354 Air Tower 24 2189452 Air Diffuser, Bottom 26 2210390 Air Separator Assembly...
..., Light 9 2179858 Damper, Air 10 2315539 Fan Motor 11 2163777 Fan Blade 12 2212982 Control Box 13 2210489 Thermostat Assy. (Includes Illus. 5 & 18) 14 489478 Screw 15 488208 Screw 16 2320192 Cover, Evaporator 17 527949 Light Bulb (2) 18 2200831 Weight, Thermal 19 1118894 Rocker Arm Switch 20 2210509 Valve 21 2176281 Cover, Air Diffuser 22 2200863 Knob, Thermostat 23 2254354 Air Tower 24 2189452 Air Diffuser, Bottom 26 2210390 Air Separator Assembly...
Parts Diagram
Page 8
..., Defrost 5 2254250 Evaporator Assy. 6 8533859 Screw 7 2254294 Drain Pan 8 2319835 Grommet−Cond.(4) 9 2176301 Bracket, Heater 10 2300638 Extension, Air Baffle 11 2201184 Support Block 12 Cover 4387731 Service 13 Overload 4390624 Service (Includes Relay) 14 Grommet (4) 1100826 Production 4387558 Service 15 2225929 Start−Device (Production Compressor Only) Illus. No. Part No. Unit 34 2225834 Fan Blade 35 2205384 Tube, Discharge 36 2225237 Tube...
..., Defrost 5 2254250 Evaporator Assy. 6 8533859 Screw 7 2254294 Drain Pan 8 2319835 Grommet−Cond.(4) 9 2176301 Bracket, Heater 10 2300638 Extension, Air Baffle 11 2201184 Support Block 12 Cover 4387731 Service 13 Overload 4390624 Service (Includes Relay) 14 Grommet (4) 1100826 Production 4387558 Service 15 2225929 Start−Device (Production Compressor Only) Illus. No. Part No. Unit 34 2225834 Fan Blade 35 2205384 Tube, Discharge 36 2225237 Tube...
Parts Diagram
Page 10
Part No. SHELF PARTS For Models: MTF1842EEW00, MTF1842EEQ00, MTF1842EEB00, MTF1842EES00 (White) (Bisque) (Black) (Stainless Steel) Illus. DESCRIPTION 1 2254352 Ice Bucket 2 2201107K Shelf, Cantilever (Complete) 3 2314548 Cover, Crisper 4 2218130 Crisper Pan (13−Inch) (Includes Illus. 23 & 24) 5 2300520 Shelf, Ladder Center 6 2314477 Support, Crisper Cover 7 2320366 Trim−Crisper Pan−10" 8 2176275 Shelf 9 2218129 Crisper Pan (10−Inch) (Includes Illus. 23 & 24) 10 2221693 Glass, Crisper Cover 11 2210522 Shelf, Ladder (2) 12 489478...
Part No. SHELF PARTS For Models: MTF1842EEW00, MTF1842EEQ00, MTF1842EEB00, MTF1842EES00 (White) (Bisque) (Black) (Stainless Steel) Illus. DESCRIPTION 1 2254352 Ice Bucket 2 2201107K Shelf, Cantilever (Complete) 3 2314548 Cover, Crisper 4 2218130 Crisper Pan (13−Inch) (Includes Illus. 23 & 24) 5 2300520 Shelf, Ladder Center 6 2314477 Support, Crisper Cover 7 2320366 Trim−Crisper Pan−10" 8 2176275 Shelf 9 2218129 Crisper Pan (10−Inch) (Includes Illus. 23 & 24) 10 2221693 Glass, Crisper Cover 11 2210522 Shelf, Ladder (2) 12 489478...
Parts Diagram
Page 12
... 4 2181943 Tube Water 5 2315576 Valve Solenoid (Single) 6 78562001 Adjuster−Ice Level 7 2210495 Clip, Water Valve 8 79191001 Cover 9 489442 Screw 10 W10122527 Mold & Heater Assembly (Also Order 542638 Silicone Grease) 11 628515 Cup, Water Fill 12 627843 Ejector 13 2182124 Ice Striper 14 2194712 Support 15 2315522 Retainer Thermostat 16 628397 Thermostat (Also Order 542369 Cement Alumilastic) 17 8533917 Screw 18 489276 Screw 19 W10138107 Shut Off...
... 4 2181943 Tube Water 5 2315576 Valve Solenoid (Single) 6 78562001 Adjuster−Ice Level 7 2210495 Clip, Water Valve 8 79191001 Cover 9 489442 Screw 10 W10122527 Mold & Heater Assembly (Also Order 542638 Silicone Grease) 11 628515 Cup, Water Fill 12 627843 Ejector 13 2182124 Ice Striper 14 2194712 Support 15 2315522 Retainer Thermostat 16 628397 Thermostat (Also Order 542369 Cement Alumilastic) 17 8533917 Screw 18 489276 Screw 19 W10138107 Shut Off...

Parts Diagram
Page 13
... (12 Oz. Uncut) 4392900 Enamel, Biscuit (1 Qt. OPTIONAL PARTS For Models: MTF1842EEW00, MTF1842EEQ00, MTF1842EEB00, MTF1842EES00 (White) (Bisque) (Black) (Stainless Steel) Illus. Part No. Uncut) 833938 Kit, Terminal Connector Important: The spray paint is not to be used where the paint may make contact with the door gaskets. ACCESSORIES 31462 Cleaner, Stainless Steel TORX SCREW WRENCH 1117510 Torx Key W10180316 13...
... (12 Oz. Uncut) 4392900 Enamel, Biscuit (1 Qt. OPTIONAL PARTS For Models: MTF1842EEW00, MTF1842EEQ00, MTF1842EEB00, MTF1842EES00 (White) (Bisque) (Black) (Stainless Steel) Illus. Part No. Uncut) 833938 Kit, Terminal Connector Important: The spray paint is not to be used where the paint may make contact with the door gaskets. ACCESSORIES 31462 Cleaner, Stainless Steel TORX SCREW WRENCH 1117510 Torx Key W10180316 13...

Dimensions
Page 1
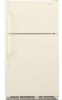
... specifications without notice. Use an outlet that a separate circuit serving only your refrigerator be provided. When installing your cold water supply, the water pressure to the system needs to be turned off by a switch. W10131413B 07-15-08 Top Mount Refrigerator PRODUCT MODEL NUMBERS MTF1842EE MTF1954EE MTB1954EE MTB2254EE MTF2142EE PRODUCT DIMENSIONS A overall to back of 40 to 60 psi (276 to 414 kPa). Water: Connect the ice maker to change...
... specifications without notice. Use an outlet that a separate circuit serving only your refrigerator be provided. When installing your cold water supply, the water pressure to the system needs to be turned off by a switch. W10131413B 07-15-08 Top Mount Refrigerator PRODUCT MODEL NUMBERS MTF1842EE MTF1954EE MTB1954EE MTB2254EE MTF2142EE PRODUCT DIMENSIONS A overall to back of 40 to 60 psi (276 to 414 kPa). Water: Connect the ice maker to change...


