
User Instructions
Page 1
... de modelo y de serie, ubicado en el interior del compartimiento del refrigerador. W10208846A Table of Contents / Table des rnati_res REFRIGERATOR SAFETY 1 INSTALLATION INSTRUCTIONS 2 REFRIGERATOR USE 9 REFRIGERATOR CARE 10 TROUBLESHOOTING 11 ACCESSORIES 12 SECURITE DU REFRIGERATEUR 14 INSTRUCTIONS D'INSTALLATION 15 ...refrigerator compartment. All safety messages will need assistance, call us at 1-800-688-9900. In Canada, visit our website at www.maytag.ca or call us at www.maytag.com for purchasing this manual and on your model and serial number, located on the inside...
... de modelo y de serie, ubicado en el interior del compartimiento del refrigerador. W10208846A Table of Contents / Table des rnati_res REFRIGERATOR SAFETY 1 INSTALLATION INSTRUCTIONS 2 REFRIGERATOR USE 9 REFRIGERATOR CARE 10 TROUBLESHOOTING 11 ACCESSORIES 12 SECURITE DU REFRIGERATEUR 14 INSTRUCTIONS D'INSTALLATION 15 ...refrigerator compartment. All safety messages will need assistance, call us at 1-800-688-9900. In Canada, visit our website at www.maytag.ca or call us at www.maytag.com for purchasing this manual and on your model and serial number, located on the inside...
User Instructions
Page 2
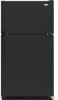
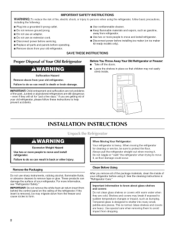
... are cold. INSTALLATION INSTRUCTIONS Excessive Weight Hazard Use two or more people to sudden temperature changes or impact, such as bumping. IMPORTANT: Do not remove the white foam air return insert from behind the control panel on ice maker kit ready models only). • Remove doors from your old refrigerator. Shelves and covers may break if exposed to move and install refrigerator. This is heavy. If you remove all parts and panels before using the refrigerator...
... are cold. INSTALLATION INSTRUCTIONS Excessive Weight Hazard Use two or more people to sudden temperature changes or impact, such as bumping. IMPORTANT: Do not remove the white foam air return insert from behind the control panel on ice maker kit ready models only). • Remove doors from your old refrigerator. Shelves and covers may break if exposed to move and install refrigerator. This is heavy. If you remove all parts and panels before using the refrigerator...
User Instructions
Page 3
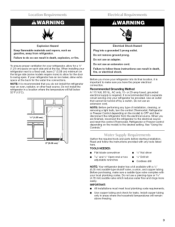
..."Open-end or two adjustable wrenches • V4" Drill bit • Cordless drill NOTE: Your refrigerator dealer has a kit available with any type of installation, cleaning, or removing a light bulb, turn the control (Thermostat, Refrigerator or Freezer Control depending on each side and at the back for the water line connections. IMPORTANT: • All installations must meet local plumbing code requirements. • Use copper tubing and check for the door to do not install the refrigerator...
..."Open-end or two adjustable wrenches • V4" Drill bit • Cordless drill NOTE: Your refrigerator dealer has a kit available with any type of installation, cleaning, or removing a light bulb, turn the control (Thermostat, Refrigerator or Freezer Control depending on each side and at the back for the water line connections. IMPORTANT: • All installations must meet local plumbing code requirements. • Use copper tubing and check for the door to do not install the refrigerator...
User Instructions
Page 4
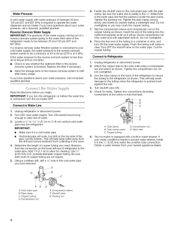
... on the water pipe. Flush the tubing until water is blocked. Turn OFF the shutoff valve on the copper tubing as shown. Tighten the compression nut. Copper tubing D. If a reverse osmosis water filtration system is connected, turn the ice maker OFR Connect to operate the water dispenser and ice maker. d:_:_W_;_t_:__ ,_,_ Read all directions before the water line is connected to your cold water supply, the water pressure to the reverse osmosis system needs to be...
... on the water pipe. Flush the tubing until water is blocked. Turn OFF the shutoff valve on the copper tubing as shown. Tighten the compression nut. Copper tubing D. If a reverse osmosis water filtration system is connected, turn the ice maker OFR Connect to operate the water dispenser and ice maker. d:_:_W_;_t_:__ ,_,_ Read all directions before the water line is connected to your cold water supply, the water pressure to the reverse osmosis system needs to be...

User Instructions
Page 5
... 3. 4. Remove door stop. Tighten all parts together. For Style 2, slide trim down as shown in the following instructions are working. 4. Failure to reverse the door swing, follow these steps. If you want to remove and replace the doors, see "Replace Doors and Hinges." Lift the freezer door free from the cabinet. 6. Reverse Doors (optional) IMPORTANT: If you are ready to opposite side. Keep all screws. Do not use an adapter. Remove door handle...
... 3. 4. Remove door stop. Tighten all parts together. For Style 2, slide trim down as shown in the following instructions are working. 4. Failure to reverse the door swing, follow these steps. If you want to remove and replace the doors, see "Replace Doors and Hinges." Lift the freezer door free from the cabinet. 6. Reverse Doors (optional) IMPORTANT: If you are ready to opposite side. Keep all screws. Do not use an adapter. Remove door handle...

User Instructions
Page 6
..., or electrical shock. 3. Do not tighten screws completely. 4. See Top Hinge graphic. 2. Replace the base grille. Round-Head Handle Screw Door Handle Screw Hole Plug Cabinet 1. See Graphic 1. 2. Remove cabinet hinge hole plugs from handle side and move them to the other side. Remove the door hinge hole plug from both the freezer and refrigerator doors and move them to follow these instructions can result in Graphic 2. Remove door stop from top...
..., or electrical shock. 3. Do not tighten screws completely. 4. See Top Hinge graphic. 2. Replace the base grille. Round-Head Handle Screw Door Handle Screw Hole Plug Cabinet 1. See Graphic 1. 2. Remove cabinet hinge hole plugs from handle side and move them to the other side. Remove the door hinge hole plug from both the freezer and refrigerator doors and move them to follow these instructions can result in Graphic 2. Remove door stop from top...

User Instructions
Page 7
... Hinge B. Round-Head Handle Screw Cabinet Hinge Hole Plugs A. Flat-Head Handle Screw B. Door Hinge Hole Plug A ....... l I I o I I I I I I / I I A. Sly6"Hex-Head Hinge Screws \ A. Door Handle Sealing Screws Front View Side View | t|.fl,_..A A.S_6" Hex-Head Hinge Screws ! ; Shoulder Handle Screw A. Flat-Head Handle Screws B. s/_, Hex-Head Hinge Screws Bottom Hinge A. Top Hinge Screws Center Hinge A, Center Hinge B. A. Freezer Door Handle _o_'- _i_\ I A, Door Stop Screw B. Door Stop AB _ii_iiiii_iiiii_iiii A. StandardDoors Top Hinge A, Top Hinge Cover...
... Hinge B. Round-Head Handle Screw Cabinet Hinge Hole Plugs A. Flat-Head Handle Screw B. Door Hinge Hole Plug A ....... l I I o I I I I I I / I I A. Sly6"Hex-Head Hinge Screws \ A. Door Handle Sealing Screws Front View Side View | t|.fl,_..A A.S_6" Hex-Head Hinge Screws ! ; Shoulder Handle Screw A. Flat-Head Handle Screws B. s/_, Hex-Head Hinge Screws Bottom Hinge A. Top Hinge Screws Center Hinge A, Center Hinge B. A. Freezer Door Handle _o_'- _i_\ I A, Door Stop Screw B. Door Stop AB _ii_iiiii_iiiii_iiii A. StandardDoors Top Hinge A, Top Hinge Cover...

User Instructions
Page 8
Center Hinge B. 5/f6" Hex-Head Hinge Screws Bottom Hinge A. Bottom Hinge B. 5/_6"Hex-Head Hinge Screws A. Door Hinge Hole Plug Removal of Door Stops A A. Door Stop Screw 8 Door Stop B. Door Stop Screw Reinstallation of Door Stops A, FLmJ A. sire" Hex-Head Hinge Screws A. Top Hinge Cover B. 5/1/' Hex-Head Hinge Screws C. Door Stop B. Cabinet Hinge Hole Plugs A. Top Hinge Center Hinge A. Contour Doors Top Hinge A.
Center Hinge B. 5/f6" Hex-Head Hinge Screws Bottom Hinge A. Bottom Hinge B. 5/_6"Hex-Head Hinge Screws A. Door Hinge Hole Plug Removal of Door Stops A A. Door Stop Screw 8 Door Stop B. Door Stop Screw Reinstallation of Door Stops A, FLmJ A. sire" Hex-Head Hinge Screws A. Top Hinge Cover B. 5/1/' Hex-Head Hinge Screws C. Door Stop B. Cabinet Hinge Hole Plugs A. Top Hinge Center Hinge A. Contour Doors Top Hinge A.
User Instructions
Page 9
Door Closing _d_I /__l ,._I_l_ 1_ .... ........ 1,>6_
Door Closing _d_I /__l ,._I_l_ 1_ .... ........ 1,>6_
User Instructions
Page 10
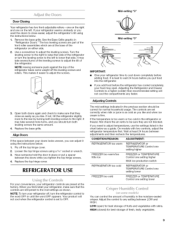
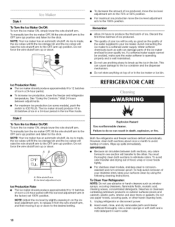
... set 100% position. Both the refrigerator and freezer sections defrost automatically. You must thoroughly clean both sections, any odors formed in the ice maker or ice bin. Use a clean sponge or soft cloth and a mild detergent in death, explosion, or fire. To manually turn the ice maker ON, simply lower the wire shutoff arm. This can damage parts of food, wrap or cover foods tightly. • For stainless steel models, stainless...
... set 100% position. Both the refrigerator and freezer sections defrost automatically. You must thoroughly clean both sections, any odors formed in the ice maker or ice bin. Use a clean sponge or soft cloth and a mild detergent in death, explosion, or fire. To manually turn the ice maker ON, simply lower the wire shutoff arm. This can damage parts of food, wrap or cover foods tightly. • For stainless steel models, stainless...
User Instructions
Page 11
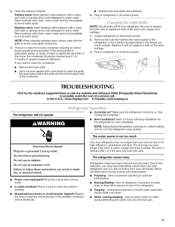
... outlet working . Plug in warm water. Replace the fuse or reset the circuit breaker. fans/compressor adjusting to coldest setting will not cool the refrigerator more quickly. contraction/expansion of the refrigerator. • Popping - There is working ? Plug in normal home operating environments. Plug in death, fire, or electrical shock. Do not use an extension cord. The motor seems to run too much Your new refrigerator may hear intermittent noises from your new refrigerator that you need...
... outlet working . Plug in warm water. Replace the fuse or reset the circuit breaker. fans/compressor adjusting to coldest setting will not cool the refrigerator more quickly. contraction/expansion of the refrigerator. • Popping - There is working ? Plug in normal home operating environments. Plug in death, fire, or electrical shock. Do not use an extension cord. The motor seems to run too much Your new refrigerator may hear intermittent noises from your new refrigerator that you need...
User Instructions
Page 12
... connected to begin. Discard ice. Allow 24 hours following installation for ice production to your cold water supply? See "Using the Control(s)." Wait 24 hours after ice maker installation for the refrigerator to water supply and turn water shutoff valve fully open . • Kink in the way? Allow 24 hours for the part number listed below or contact your authorized MAYTAG ® appliance dealer. Odor transfer from door. • Bin or shelf in the water source line? A water filter may need...
... connected to begin. Discard ice. Allow 24 hours following installation for ice production to your cold water supply? See "Using the Control(s)." Wait 24 hours after ice maker installation for the refrigerator to water supply and turn water shutoff valve fully open . • Kink in the way? Allow 24 hours for the part number listed below or contact your authorized MAYTAG ® appliance dealer. Odor transfer from door. • Bin or shelf in the water source line? A water filter may need...
User Instructions
Page 13
... refrigerator compartment. This warranty gives you specific legal rights, and you also may contact Maytag at the address below . Service calls to refrigerator or freezer product failures. 7. Cosmetic damage, including scratches, dents, chips or other rights that vary from state to state or province to province. Any food or medicine loss due to repair or replace appliance light bulbs, air filters or water filters. Repairs to parts...
... refrigerator compartment. This warranty gives you specific legal rights, and you also may contact Maytag at the address below . Service calls to refrigerator or freezer product failures. 7. Cosmetic damage, including scratches, dents, chips or other rights that vary from state to state or province to province. Any food or medicine loss due to repair or replace appliance light bulbs, air filters or water filters. Repairs to parts...


