Owners Manual
Page 3
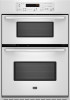
...either the word "DANGER" or "WARNING." Do not let potholder touch hot heating elements. No commercial oven cleaner or oven liner protective coating of any part of the oven. ■ Wear Proper Apparel - This is , tell you how to cause birth defects or other servicing should be used in or... around any part of the oven unless specifically recommended in this manual and on hot surfaces may become hot enough to cause burns - All safety messages will follow...
...either the word "DANGER" or "WARNING." Do not let potholder touch hot heating elements. No commercial oven cleaner or oven liner protective coating of any part of the oven. ■ Wear Proper Apparel - This is , tell you how to cause birth defects or other servicing should be used in or... around any part of the oven unless specifically recommended in this manual and on hot surfaces may become hot enough to cause burns - All safety messages will follow...

Owners Manual
Page 7
...;C) amounts. The internal temperature, not appearance, should not be set plastics, paper or other than 350°F (177°C) in use. Follow manufacturer's directions for Part Number W10123240. ■ For proper draining, do not cover the grid with leavening ingredients, such as room temperature and peak energy usage times. Oven Double...
...;C) amounts. The internal temperature, not appearance, should not be set plastics, paper or other than 350°F (177°C) in use. Follow manufacturer's directions for Part Number W10123240. ■ For proper draining, do not cover the grid with leavening ingredients, such as room temperature and peak energy usage times. Oven Double...

Owners Manual
Page 10
... and a soft cloth or sponge: Apply glass cleaner to soft cloth or sponge, not directly on panel. ■ All-Purpose Appliance Cleaner Part Number 31682 (not included): See "Assistance or Service" section to the rack guides will not unlock until the oven cools. To Stop Self-Clean...Glass cleaner and soft cloth or sponge: Apply glass cleaner to soft cloth or sponge, not directly on panel. ■ All-Purpose Appliance Cleaner Part Number 31682 (not included): See "Assistance or Service" section to stainless steel surfaces, do not use abrasive cleaners, steel-wool pads, gritty washcloths...
... and a soft cloth or sponge: Apply glass cleaner to soft cloth or sponge, not directly on panel. ■ All-Purpose Appliance Cleaner Part Number 31682 (not included): See "Assistance or Service" section to the rack guides will not unlock until the oven cools. To Stop Self-Clean...Glass cleaner and soft cloth or sponge: Apply glass cleaner to soft cloth or sponge, not directly on panel. ■ All-Purpose Appliance Cleaner Part Number 31682 (not included): See "Assistance or Service" section to stainless steel surfaces, do not use abrasive cleaners, steel-wool pads, gritty washcloths...

Owners Manual
Page 13
... call the following customer assistance telephone number or your appliance. To locate factory specified parts in the United States. It may save you use only factory specified parts. Maytag® appliances designated service technicians are made with : ■ Features and specifications ...on our full line of appliances. ■ Use and maintenance procedures. ■ Accessory and repair parts sales. ■ Referrals to your...
... call the following customer assistance telephone number or your appliance. To locate factory specified parts in the United States. It may save you use only factory specified parts. Maytag® appliances designated service technicians are made with : ■ Features and specifications ...on our full line of appliances. ■ Use and maintenance procedures. ■ Accessory and repair parts sales. ■ Referrals to your...

Owners Manual
Page 14
...altered or removed from your authorized Maytag dealer to determine if another warranty applies. In Canada, call 1-800-688-9900. Service calls to be easily determined. Expenses for travel and transportation for factory specified parts and repair labor to correct ...defects in accordance with the product, Maytag brand of Whirlpool Corporation or Whirlpool Canada LP (hereafter "Maytag") will need to know your sales slip together for repairs....
...altered or removed from your authorized Maytag dealer to determine if another warranty applies. In Canada, call 1-800-688-9900. Service calls to be easily determined. Expenses for travel and transportation for factory specified parts and repair labor to correct ...defects in accordance with the product, Maytag brand of Whirlpool Corporation or Whirlpool Canada LP (hereafter "Maytag") will need to know your sales slip together for repairs....

Installation Instructions
Page 1
... 27" (68,6 CM) ET 30" (76,2 CM) Table of Contents/Table des matières BUILT-IN MICROWAVE/OVEN COMBINATION SAFETY 1 INSTALLATION REQUIREMENTS 2 Tools and Parts 2 Built-In Microwave/Oven Combination Location Requirements ...........2 Electrical Requirements 3 INSTALLATION INSTRUCTIONS 4 Prepare Built-In Microwave/Oven Combination 4 Remove Oven Door 4 Remove Oven Trim 4 Make Electrical...
... 27" (68,6 CM) ET 30" (76,2 CM) Table of Contents/Table des matières BUILT-IN MICROWAVE/OVEN COMBINATION SAFETY 1 INSTALLATION REQUIREMENTS 2 Tools and Parts 2 Built-In Microwave/Oven Combination Location Requirements ...........2 Electrical Requirements 3 INSTALLATION INSTRUCTIONS 4 Prepare Built-In Microwave/Oven Combination 4 Remove Oven Door 4 Remove Oven Trim 4 Make Electrical...

Installation Instructions
Page 2
... models) ■ Two # 8-18 x ³⁄₈" screws - See "Electrical Requirements." INSTALLATION REQUIREMENTS Tools and Parts Gather the required tools and parts before starting installation. Tools needed ■ Phillips screwdriver ■ Measuring tape ■ Hand or electric drill (for wall cabinet...) ■ 1" (25 mm) drill bit (for wall cabinet installations) ■ Level Parts needed ■ UL listed or CSA approved conduit connector ■ UL listed wire connectors Parts supplied ■ # 8-14 x 1" screws - bottom vent (supplied on some models) ...
... models) ■ Two # 8-18 x ³⁄₈" screws - See "Electrical Requirements." INSTALLATION REQUIREMENTS Tools and Parts Gather the required tools and parts before starting installation. Tools needed ■ Phillips screwdriver ■ Measuring tape ■ Hand or electric drill (for wall cabinet...) ■ 1" (25 mm) drill bit (for wall cabinet installations) ■ Level Parts needed ■ UL listed or CSA approved conduit connector ■ UL listed wire connectors Parts supplied ■ # 8-14 x 1" screws - bottom vent (supplied on some models) ...

Installation Instructions
Page 3
... flexible, armored or nonmetallic sheathed, copper cable (with the National Electrical Code, ANSI/NFPA 70-latest edition or CSA Standards C22.1-94, Canadian Electrical Code, Part 1 and C22.2 No. O-M91-latest edition, and all local codes and ordinances. bottom of cutout to a grounded metal, permanent wiring system. Check with a qualified electrical...
... flexible, armored or nonmetallic sheathed, copper cable (with the National Electrical Code, ANSI/NFPA 70-latest edition or CSA Standards C22.1-94, Canadian Electrical Code, Part 1 and C22.2 No. O-M91-latest edition, and all local codes and ordinances. bottom of cutout to a grounded metal, permanent wiring system. Check with a qualified electrical...

Installation Instructions
Page 4
■ If the house has aluminum wiring follow these instructions can result in back or other parts from the oven through the opening in unlocked position Electrical Shock Hazard Disconnect power before servicing. Aluminum/copper connection must conform with a neutral (white) power ...
■ If the house has aluminum wiring follow these instructions can result in back or other parts from the oven through the opening in unlocked position Electrical Shock Hazard Disconnect power before servicing. Aluminum/copper connection must conform with a neutral (white) power ...

Installation Instructions
Page 6
...of hinges into place at bottom of the oven. Replace oven racks. 11. Replace oven door by inserting ends of each side of /recycle all parts are now installed. Push hinges in the oven frame. 12. You should feel the oven door drop into cabinet cutout. 5. See "Prepare Built-... located in the display, turn off the oven and contact a qualified technician. 5. Rotate both hinge latches back to oven. 10. If there is an extra part, go and open microwave oven door. Press START. or circuit breaker has not tripped. ■ Electrical supply is free to "2:00" minutes. 3. To set...
...of hinges into place at bottom of the oven. Replace oven racks. 11. Replace oven door by inserting ends of each side of /recycle all parts are now installed. Push hinges in the oven frame. 12. You should feel the oven door drop into cabinet cutout. 5. See "Prepare Built-... located in the display, turn off the oven and contact a qualified technician. 5. Rotate both hinge latches back to oven. 10. If there is an extra part, go and open microwave oven door. Press START. or circuit breaker has not tripped. ■ Electrical supply is free to "2:00" minutes. 3. To set...
Warranty Information
Page 1
...your major appliance for other damage to the finish of your major appliance is used in -home service is covered by a Maytag designated service company. Major appliances with original model/serial numbers that is contrary to published user or operator instructions and/or installation ...instructions. 4. Repairs to parts or systems resulting from unauthorized modifications made to Maytag within 30 days from the date of purchase. 6. THIS WARRANTY GIVES YOU SPECIFIC LEGAL RIGHTS, AND YOU...
...your major appliance for other damage to the finish of your major appliance is used in -home service is covered by a Maytag designated service company. Major appliances with original model/serial numbers that is contrary to published user or operator instructions and/or installation ...instructions. 4. Repairs to parts or systems resulting from unauthorized modifications made to Maytag within 30 days from the date of purchase. 6. THIS WARRANTY GIVES YOU SPECIFIC LEGAL RIGHTS, AND YOU...

