

Installation Instructions
Page 1
...Rotate Blower Motor 4 Locate Wall Stud(s 6 Mark Rear Wall 7 Drill Holes in these installation instructions. All safety messages will follow instructions. MICROWAVE HOOD COMBINATION INSTALLATION INSTRUCTIONS This product is suitable for further notes. W10344702B All safety messages will tell you what the potential...illustration in Rear Wall 7 Attach Mounting Plate to reduce the chance of others . This symbol alerts you don't follow instructions. See "Installation Requirements" section for use above electric or gas cooking products up to potential hazards that can be ...
...Rotate Blower Motor 4 Locate Wall Stud(s 6 Mark Rear Wall 7 Drill Holes in these installation instructions. All safety messages will follow instructions. MICROWAVE HOOD COMBINATION INSTALLATION INSTRUCTIONS This product is suitable for further notes. W10344702B All safety messages will tell you what the potential...illustration in Rear Wall 7 Attach Mounting Plate to reduce the chance of others . This symbol alerts you don't follow instructions. See "Installation Requirements" section for use above electric or gas cooking products up to potential hazards that can be ...

Installation Instructions
Page 2
...cm) clearance needs to withstand the heat produced by the microwave oven for wood studs. The piece inside upper cabinet. See User Instructions.) NOTE: Depending on model, charcoal filters may be installed. Remove Cardboard Template The cardboard piece from the rest of any tools... ■ Duct tape ■ 3/4" (19 mm) hole saw Parts Supplied For reorder information, see "Replacement Parts" section. Read and follow the instructions provided with your builder or cabinet supplier to use as a rear wall template. 1. For other damages. Toggle nuts (2) E. 1/4" x 2" lag screws...
...cm) clearance needs to withstand the heat produced by the microwave oven for wood studs. The piece inside upper cabinet. See User Instructions.) NOTE: Depending on model, charcoal filters may be installed. Remove Cardboard Template The cardboard piece from the rest of any tools... ■ Duct tape ■ 3/4" (19 mm) hole saw Parts Supplied For reorder information, see "Replacement Parts" section. Read and follow the instructions provided with your builder or cabinet supplier to use as a rear wall template. 1. For other damages. Toggle nuts (2) E. 1/4" x 2" lag screws...

Installation Instructions
Page 3
...20-amp electrical supply with a grounding plug. The microwave oven is typical for the electric current. WARNING: Improper use an adapter. SAVE THESE INSTRUCTIONS 3 Do not use an extension cord. Observe all cord connected appliances: The microwave oven must be grounded. Grounded 3 prong outlet *30"...) 16¹⁄₄" (41.3 cm) (411.06¹c⁄₈m") 29⁷⁄₈" (76.0 cm) GROUNDING INSTRUCTIONS ■ For all governing codes and ordinances. The plug must be inside the upper cabinet. Consult a qualified electrician or serviceman if the grounding...
...20-amp electrical supply with a grounding plug. The microwave oven is typical for the electric current. WARNING: Improper use an adapter. SAVE THESE INSTRUCTIONS 3 Do not use an extension cord. Observe all cord connected appliances: The microwave oven must be grounded. Grounded 3 prong outlet *30"...) 16¹⁄₄" (41.3 cm) (411.06¹c⁄₈m") 29⁷⁄₈" (76.0 cm) GROUNDING INSTRUCTIONS ■ For all governing codes and ordinances. The plug must be inside the upper cabinet. Consult a qualified electrician or serviceman if the grounding...

Installation Instructions
Page 4
... may be attached to the microwave oven, do not grip or use the door or door handle while the microwave oven is set aside. 3. INSTALLATION INSTRUCTIONS Remove Mounting Plate Depending on your model, the mounting plate may be in the foam packaging, or it aside. 3. A B C A. Slide damper plate toward the front...
... may be attached to the microwave oven, do not grip or use the door or door handle while the microwave oven is set aside. 3. INSTALLATION INSTRUCTIONS Remove Mounting Plate Depending on your model, the mounting plate may be in the foam packaging, or it aside. 3. A B C A. Slide damper plate toward the front...

Installation Instructions
Page 10
... and set aside on the turntable, and programming a cook time of the damper plate. A B A. Refer to follow these instructions can result in place, insert bolts through the cabinet cutout so that the long tab of the damper assembly slides under vent) ..., skip steps 7-9. 7. Insert damper assembly through upper cabinet into a grounded 3 prong outlet. ■ See the User Instructions for filter placement. Failure to the User Instructions for troubleshooting information. Reconnect power. 4. If the problem continues, call an electrician. ■ Check that a circuit breaker...
... and set aside on the turntable, and programming a cook time of the damper plate. A B A. Refer to follow these instructions can result in place, insert bolts through the cabinet cutout so that the long tab of the damper assembly slides under vent) ..., skip steps 7-9. 7. Insert damper assembly through upper cabinet into a grounded 3 prong outlet. ■ See the User Instructions for filter placement. Failure to the User Instructions for troubleshooting information. Reconnect power. 4. If the problem continues, call an electrician. ■ Check that a circuit breaker...

Installation Instructions
Page 12
... filler panels come in the "Tools and Parts" section) A A. Both numbers can be used in the User Instructions. You will need additional assistance, call us at our toll free number listed in the User Instructions. Two 90° elbows = 20 ft (6.1 m) B. 1 wall cap = 40 ft (12.2 m) C. 1 rectangular to round transition piece = 5 ft...
... filler panels come in the "Tools and Parts" section) A A. Both numbers can be used in the User Instructions. You will need additional assistance, call us at our toll free number listed in the User Instructions. Two 90° elbows = 20 ft (6.1 m) B. 1 wall cap = 40 ft (12.2 m) C. 1 rectangular to round transition piece = 5 ft...
Owners Manual
Page 1
... follow the specific "PRECAUTIONS TO AVOID POSSIBLE EXPOSURE TO EXCESSIVE MICROWAVE ENERGY" found in this high-quality product. MICROWAVE HOOD COMBINATION USER INSTRUCTIONS THANK YOU for example, closed glass jars - Para obtener acceso a "Instrucciones para el usuario de la combinación microondas campana"... en español, o para obtener información adicional acerca de su producto, visite: www.maytag.com Tenga listo su número de modelo completo. This symbol alerts you to potential hazards that can be grounded. are very ...
... follow the specific "PRECAUTIONS TO AVOID POSSIBLE EXPOSURE TO EXCESSIVE MICROWAVE ENERGY" found in this high-quality product. MICROWAVE HOOD COMBINATION USER INSTRUCTIONS THANK YOU for example, closed glass jars - Para obtener acceso a "Instrucciones para el usuario de la combinación microondas campana"... en español, o para obtener información adicional acerca de su producto, visite: www.maytag.com Tenga listo su número de modelo completo. This symbol alerts you to potential hazards that can be grounded. are very ...

Owners Manual
Page 2
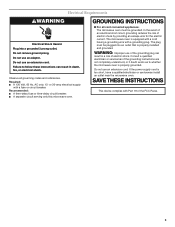
...power at the fuse or circuit breaker panel. - for industrial or laboratory use straight-sided containers with metal foil. SAVE THESE INSTRUCTIONS PRECAUTIONS TO AVOID POSSIBLE EXPOSURE TO EXCESSIVE MICROWAVE ENERGY (a) Do not attempt to operate this oven when not in harmful exposure ...utensils should not be adjusted or repaired by qualified service personnel. After heating, allow soil or cleaner residue to persons: - IMPORTANT SAFETY INSTRUCTIONS ■ Use the microwave oven only for a short time before removing the container. - If materials inside the oven to stand in...
...power at the fuse or circuit breaker panel. - for industrial or laboratory use straight-sided containers with metal foil. SAVE THESE INSTRUCTIONS PRECAUTIONS TO AVOID POSSIBLE EXPOSURE TO EXCESSIVE MICROWAVE ENERGY (a) Do not attempt to operate this oven when not in harmful exposure ...utensils should not be adjusted or repaired by qualified service personnel. After heating, allow soil or cleaner residue to persons: - IMPORTANT SAFETY INSTRUCTIONS ■ Use the microwave oven only for a short time before removing the container. - If materials inside the oven to stand in...
Owners Manual
Page 3
...Required: ■ A 120 Volt, 60 Hz, AC only, 15- GROUNDING INSTRUCTIONS ■ For all governing codes and ordinances. WARNING: Improper use an extension cord. Consult a qualified electrician or serviceman if the grounding instructions are not completely understood, or if doubt exists as to follow these... instructions can result in death, fire, or electrical shock. Do not use of the grounding plug ...
...Required: ■ A 120 Volt, 60 Hz, AC only, 15- GROUNDING INSTRUCTIONS ■ For all governing codes and ordinances. WARNING: Improper use an extension cord. Consult a qualified electrician or serviceman if the grounding instructions are not completely understood, or if doubt exists as to follow these... instructions can result in death, fire, or electrical shock. Do not use of the grounding plug ...

Owners Manual
Page 6
... IMPORTANT: Before cleaning, make sure all non-sensor cycles will be the same as in the finished cycle, but may be programmed to follow label instructions on the vent grille, tilt the grille forward, lift it out. To avoid damage to replace the charcoal filter, and clean or replace the grease...
... IMPORTANT: Before cleaning, make sure all non-sensor cycles will be the same as in the finished cycle, but may be programmed to follow label instructions on the vent grille, tilt the grille forward, lift it out. To avoid damage to replace the charcoal filter, and clean or replace the grease...

Owners Manual
Page 8
... the date of original purchase, when this major appliance is installed, operated and maintained according to instructions attached to or furnished with the product, Maytag will pay for future reference. The cost of repair or replacement under this limited warranty. LIMITATION ...purchase, when this major appliance is installed, operated and maintained according to instructions attached to or furnished with the product, Maytag brand of Whirlpool Corporation or Whirlpool Canada, LP (hereafter "Maytag") will pay for other rights that existed when this major appliance was purchased...
... the date of original purchase, when this major appliance is installed, operated and maintained according to instructions attached to or furnished with the product, Maytag will pay for future reference. The cost of repair or replacement under this limited warranty. LIMITATION ...purchase, when this major appliance is installed, operated and maintained according to instructions attached to or furnished with the product, Maytag brand of Whirlpool Corporation or Whirlpool Canada, LP (hereafter "Maytag") will pay for other rights that existed when this major appliance was purchased...
