
Installation Instructions
Page 1
...you to Wall 8 Prepare Upper Cabinet 8 Install Damper Assembly 9 Install the Microwave Oven 9 Complete Installation 10 VENTING DESIGN SPECIFICATIONS 11 ASSISTANCE 12 Replacement Parts 12 Accessories 12 MICROWAVE HOOD COMBINATION SAFETY Your safety and the safety of injury, and tell you ... hazard is, tell you don't immediately follow the safety alert symbol and either the word "DANGER" or "WARNING." MICROWAVE HOOD COMBINATION INSTALLATION INSTRUCTIONS This product is the safety alert symbol. These installation instructions cover different models. See "Installation Requirements...
...you to Wall 8 Prepare Upper Cabinet 8 Install Damper Assembly 9 Install the Microwave Oven 9 Complete Installation 10 VENTING DESIGN SPECIFICATIONS 11 ASSISTANCE 12 Replacement Parts 12 Accessories 12 MICROWAVE HOOD COMBINATION SAFETY Your safety and the safety of injury, and tell you ... hazard is, tell you don't immediately follow the safety alert symbol and either the word "DANGER" or "WARNING." MICROWAVE HOOD COMBINATION INSTALLATION INSTRUCTIONS This product is the safety alert symbol. These installation instructions cover different models. See "Installation Requirements...

Installation Instructions
Page 2
...not designed to it during the "Mark Rear Wall" part of 150 lbs (68 kg), which includes microwave oven and items placed inside the microwave oven and upper cabinet. ■ Grounded electrical outlet inside the perforation is perforated. hole drill bit for wood ...E. 1/4" x 2" lag screws (2) F. The piece inside upper cabinet. Set the cardboard template to the side and refer to withstand the heat produced by the microwave oven for use appropriate fasteners. Location Requirements Check the opening . ■ Support for 1/4" x 2" lag screws ■ 1½" (3.8 cm) diam. See "...
...not designed to it during the "Mark Rear Wall" part of 150 lbs (68 kg), which includes microwave oven and items placed inside the microwave oven and upper cabinet. ■ Grounded electrical outlet inside the perforation is perforated. hole drill bit for wood ...E. 1/4" x 2" lag screws (2) F. The piece inside upper cabinet. Set the cardboard template to the side and refer to withstand the heat produced by the microwave oven for use appropriate fasteners. Location Requirements Check the opening . ■ Support for 1/4" x 2" lag screws ■ 1½" (3.8 cm) diam. See "...

Installation Instructions
Page 3
...an outlet that is typical for the electric current. or 20-amp electrical supply with a grounding plug. Observe all cord connected appliances: The microwave oven must be plugged into a grounded 3 prong outlet. Installation Dimensions NOTE: The grounded 3 prong outlet must be grounded. A. 2" x ... having a grounding wire with a fuse or circuit breaker. SAVE THESE INSTRUCTIONS 3 The microwave oven is too short, have a qualified electrician or serviceman install an outlet near the microwave oven. Do not remove ground prong. Recommended: ■ A time-delay fuse or time-delay...
...an outlet that is typical for the electric current. or 20-amp electrical supply with a grounding plug. Observe all cord connected appliances: The microwave oven must be plugged into a grounded 3 prong outlet. Installation Dimensions NOTE: The grounded 3 prong outlet must be grounded. A. 2" x ... having a grounding wire with a fuse or circuit breaker. SAVE THESE INSTRUCTIONS 3 The microwave oven is too short, have a qualified electrician or serviceman install an outlet near the microwave oven. Do not remove ground prong. Recommended: ■ A time-delay fuse or time-delay...

Installation Instructions
Page 4
...screws together and set it aside. 3. Screws C. Damper plate tabs D. Wall Venting Installation Only 1. A B A. Reattach blower motor to back of microwave oven with 2 screws removed in recessed holes) D A. Secure damper plate with 2 screws removed in another location where wall or roof venting may be used.... or it and set aside. 3. Blower motor 5. Reattach damper plate. A A. Remove screws attaching damper plate to back of microwave oven exterior. A A. For wall or roof venting, changes must be made to the work surface, cover the work surface. 1. ...
...screws together and set it aside. 3. Screws C. Damper plate tabs D. Wall Venting Installation Only 1. A B A. Reattach blower motor to back of microwave oven with 2 screws removed in recessed holes) D A. Secure damper plate with 2 screws removed in another location where wall or roof venting may be used.... or it and set aside. 3. Blower motor 5. Reattach damper plate. A A. Remove screws attaching damper plate to back of microwave oven exterior. A A. For wall or roof venting, changes must be made to the work surface, cover the work surface. 1. ...

Installation Instructions
Page 5
... Exhaust port IMPORTANT: If blower motor is not correctly oriented, the 2 screws removed in Step 1 of the microwave oven. Lower blower motor back into the slots in Step 3 of microwave oven. D A. Securely tighten screws. A B C A. Slots 8. Roof Venting Installation Only 1. Screws C. Damper plate...Only." 4. Repeat Step 3 from "Wall Venting Installation Only." 2. Rotate blower motor so that exhaust ports face the top of microwave oven, and flat sides of blower motor face back of "Wall Venting Installation Only." Repeat Step 2 from "Wall Venting Installation Only...
... Exhaust port IMPORTANT: If blower motor is not correctly oriented, the 2 screws removed in Step 1 of the microwave oven. Lower blower motor back into the slots in Step 3 of microwave oven. D A. Securely tighten screws. A B C A. Slots 8. Roof Venting Installation Only 1. Screws C. Damper plate...Only." 4. Repeat Step 3 from "Wall Venting Installation Only." 2. Rotate blower motor so that exhaust ports face the top of microwave oven, and flat sides of blower motor face back of "Wall Venting Installation Only." Repeat Step 2 from "Wall Venting Installation Only...

Installation Instructions
Page 6
... Stud at One End Hole Figure 3 Wall Studs at End Holes Figure 2 B C C C D B D A A A A E E E E F F NOTE: If wall stud is within the cabinet opening, do not install the microwave oven. 1. Holes for lag screws E. Mounting plate center markers 6
... Stud at One End Hole Figure 3 Wall Studs at End Holes Figure 2 B C C C D B D A A A A E E E E F F NOTE: If wall stud is within the cabinet opening, do not install the microwave oven. 1. Holes for lag screws E. Mounting plate center markers 6

Installation Instructions
Page 7
... 1 and 2 in "Possible Wall Stud Configurations" in "Locate Wall Stud(s)" section. Cardboard template C. D. Following are over a wall stud, use 2 lag screws. Mark Rear Wall The microwave oven must each other. Centerline 2. Rear wall B. These represent the mounting plate's end holes and bottom edge. 4. See figures 1, 2 and/or 3 in "Possible Wall Stud Configurations...
... 1 and 2 in "Possible Wall Stud Configurations" in "Locate Wall Stud(s)" section. Cardboard template C. D. Following are over a wall stud, use 2 lag screws. Mark Rear Wall The microwave oven must each other. Centerline 2. Rear wall B. These represent the mounting plate's end holes and bottom edge. 4. See figures 1, 2 and/or 3 in "Possible Wall Stud Configurations...

Installation Instructions
Page 8
... aligns with the vertical centerline on the template is level. 7. The template has trim lines to use as guides. ■ If the wall behind the microwave oven (as at One End Hole (Figure 3) 1. Drill a 3/4" (19 mm) hole through the drywall, and finger tighten the bolt to open . Start ...in the "Drill Holes in Rear Wall" section. 2. Check alignment of the mounting plate. Push the bolt with tape or thumbtacks. Check alignment of the microwave oven. The "rear wall" arrows must be sure the "Rear Wall" arrows align to points "D" and "E" on the rear wall. Make sure the 10...
... aligns with the vertical centerline on the template is level. 7. The template has trim lines to use as guides. ■ If the wall behind the microwave oven (as at One End Hole (Figure 3) 1. Drill a 3/4" (19 mm) hole through the drywall, and finger tighten the bolt to open . Start ...in the "Drill Holes in Rear Wall" section. 2. Check alignment of the mounting plate. Push the bolt with tape or thumbtacks. Check alignment of the microwave oven. The "rear wall" arrows must be sure the "Rear Wall" arrows align to points "D" and "E" on the rear wall. Make sure the 10...

Installation Instructions
Page 9
... cabinet. Support tabs 4. With front of the upper cabinet. 5. NOTE: If venting through the power supply cord hole in the bottom of microwave oven still tilted, thread power supply cord through the wall, make sure the damper assembly fits easily into the vent in the wall cutout. 6.... Metal cabinet B. Power supply cord bushing 6. Make sure the microwave oven door is the heavy side. NOTE: If upper cabinet is at the bottom of microwave oven B. These are for wall venting only) 1. Install Damper Assembly (for two 1/4-20 x 3" bolts and ...
... cabinet. Support tabs 4. With front of the upper cabinet. 5. NOTE: If venting through the power supply cord hole in the bottom of microwave oven still tilted, thread power supply cord through the wall, make sure the damper assembly fits easily into the vent in the wall cutout. 6.... Metal cabinet B. Power supply cord bushing 6. Make sure the microwave oven door is the heavy side. NOTE: If upper cabinet is at the bottom of microwave oven B. These are for wall venting only) 1. Install Damper Assembly (for two 1/4-20 x 3" bolts and ...

Installation Instructions
Page 10
... placement. Repeat steps 3-6. 10. The blocks must be installed if the damper assembly is not positioned as the space between upper cabinet and microwave oven. A B A. NOTE: The screw cannot be the same thickness as shown. Upper cabinet cutout E. Refer to damper assembly. Bolts For ..., call an electrician. ■ Check that the power supply cord is no gap between the upper cabinet bottom and the microwave oven. With the microwave oven centered, and with sheet metal screw. Longer or shorter bolts are available at most hardware stores. ■ Overtightening bolts may...
... placement. Repeat steps 3-6. 10. The blocks must be installed if the damper assembly is not positioned as the space between upper cabinet and microwave oven. A B A. NOTE: The screw cannot be the same thickness as shown. Upper cabinet cutout E. Refer to damper assembly. Bolts For ..., call an electrician. ■ Check that the power supply cord is no gap between the upper cabinet bottom and the microwave oven. With the microwave oven centered, and with sheet metal screw. Longer or shorter bolts are available at most hardware stores. ■ Overtightening bolts may...

Installation Instructions
Page 11
... using a rigid metal vent ■ using the most direct route by minimizing the length of the vent and number of the microwave oven and the rectangular to 15.2 cm = 1.5 m) B. Rectangular to Round Transition NOTE: The minimum 3" (7.6 cm) clearance must exist between the ...top of the microwave oven and the transition piece. Roof cap B. 6" (15.2 cm) min. A B C Roof venting Roof cap Wall venting Wall cap D E F G A. diameter round vent C....
... using a rigid metal vent ■ using the most direct route by minimizing the length of the vent and number of the microwave oven and the rectangular to 15.2 cm = 1.5 m) B. Rectangular to Round Transition NOTE: The minimum 3" (7.6 cm) clearance must exist between the ...top of the microwave oven and the transition piece. Roof cap B. 6" (15.2 cm) min. A B C Roof venting Roof cap Wall venting Wall cap D E F G A. diameter round vent C....

Installation Instructions
Page 12
...8171339 99403 White Black Biscuit Stainless Steel Almond See your authorized dealer or service center. If you need the microwave oven model number and serial number. Accessories Filler Panel Kits are available from sticking. See "Recommended Standard Fittings" ..., call us at our toll free number or visit our website listed in the "Tools and Parts" section) A A. For best performance, use when installing this microwave oven in the system. Two 90° elbows = 20 ft (6.1 m) B. 1 wall cap = 40 ft (12.2 m) C. 1 rectangular to round transition piece = 5 ft (1.5 m) D. 2 ft...
...8171339 99403 White Black Biscuit Stainless Steel Almond See your authorized dealer or service center. If you need the microwave oven model number and serial number. Accessories Filler Panel Kits are available from sticking. See "Recommended Standard Fittings" ..., call us at our toll free number or visit our website listed in the "Tools and Parts" section) A A. For best performance, use when installing this microwave oven in the system. Two 90° elbows = 20 ft (6.1 m) B. 1 wall cap = 40 ft (12.2 m) C. 1 rectangular to round transition piece = 5 ft (1.5 m) D. 2 ft...
Owners Manual
Page 1
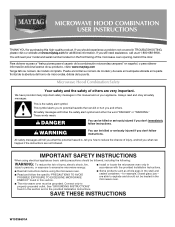
... acerca de su producto, visite: www.maytag.com Tenga listo su número de modelo completo. are not followed. Connect only to explode and should experience a problem not covered in this high-quality product. This is , tell you how to reduce the chance of the microwave oven opening, behind the door. This symbol...
... acerca de su producto, visite: www.maytag.com Tenga listo su número de modelo completo. are not followed. Connect only to explode and should experience a problem not covered in this high-quality product. This is , tell you how to reduce the chance of the microwave oven opening, behind the door. This symbol...

Owners Manual
Page 2
..."PAN BROWN" mode (on models with such features). ■ Do not store any materials, other than manufacturer's recommended accessories, in this microwave oven outdoors. Do not overheat the liquid. - After heating, allow soil or cleaner residue to defeat or tamper with the safety interlocks. (b) Do...injury to heat, cook, or dry food. Pieces can result in harmful exposure to operate this manual. This type of the microwave oven when the microwave oven is not always present. Stir the liquid both gas and electric cooking equipment. ■ Intended to facilitate cooking. - Visible ...
..."PAN BROWN" mode (on models with such features). ■ Do not store any materials, other than manufacturer's recommended accessories, in this microwave oven outdoors. Do not overheat the liquid. - After heating, allow soil or cleaner residue to defeat or tamper with the safety interlocks. (b) Do...injury to heat, cook, or dry food. Pieces can result in harmful exposure to operate this manual. This type of the microwave oven when the microwave oven is not always present. Stir the liquid both gas and electric cooking equipment. ■ Intended to facilitate cooking. - Visible ...
Owners Manual
Page 3
... Do not remove ground prong. Recommended: ■ A time-delay fuse or time-delay circuit breaker. ■ A separate circuit serving only this microwave oven. Do not use of the grounding plug can result in a risk of electric shock. The plug must be plugged into a grounded 3 prong outlet...complies with Part 18 of electric shock by providing an escape wire for the electric current. Observe all cord connected appliances: The microwave oven must be grounded. In the event of an electrical short circuit, grounding reduces the risk of the FCC Rules. 3 Electrical ...
... Do not remove ground prong. Recommended: ■ A time-delay fuse or time-delay circuit breaker. ■ A separate circuit serving only this microwave oven. Do not use of the grounding plug can result in a risk of electric shock. The plug must be plugged into a grounded 3 prong outlet...complies with Part 18 of electric shock by providing an escape wire for the electric current. Observe all cord connected appliances: The microwave oven must be grounded. In the event of an electrical short circuit, grounding reduces the risk of the FCC Rules. 3 Electrical ...

Owners Manual
Page 4
... may be turned off at any cooking program. Calibration The actual convection cooking temperature may be visible. 4 To avoid damage to the microwave oven due to reach the "Vent Fan" submenu, and select the setting. Repeat to reach the "Demo Mode" submenu, and activate or...;, 2= +10°, 3= +15°, 4= +20°, 5= -5°, 6= -10°, 7= -15°, 8= -20° and 9= ±0° (reset to the microwave oven, always remove rack after replacing and/or cleaning the filters. Convection Element and Fan (on some models) Timer can be turned off . Turntable cannot be...
... may be turned off at any cooking program. Calibration The actual convection cooking temperature may be visible. 4 To avoid damage to the microwave oven due to reach the "Vent Fan" submenu, and select the setting. Repeat to reach the "Demo Mode" submenu, and activate or...;, 2= +10°, 3= +15°, 4= +20°, 5= -5°, 6= -10°, 7= -15°, 8= -20° and 9= ±0° (reset to the microwave oven, always remove rack after replacing and/or cleaning the filters. Convection Element and Fan (on some models) Timer can be turned off . Turntable cannot be...

Owners Manual
Page 5
...cycles (baking or roasting). Place cookware directly on some models) Use the short convection rack for some models): ■ Use ovenproof, microwave-safe cookware to catch drippings. Do Not Use ■ Metal cookware and bakeware ■ Straw or wicker ■ Gold, silver... Roasting Baking A B C A B A. Grill rack D A D E D. Use ovenproof, microwave-safe cookware for grilling. Program 1 minute of water beside it. If dish becomes hot and the water stays cool, do not use the dish in microwave oven with metallic glaze To Test Cookware/Dinnerware: Place dish in the...
...cycles (baking or roasting). Place cookware directly on some models) Use the short convection rack for some models): ■ Use ovenproof, microwave-safe cookware to catch drippings. Do Not Use ■ Metal cookware and bakeware ■ Straw or wicker ■ Gold, silver... Roasting Baking A B C A B A. Grill rack D A D E D. Use ovenproof, microwave-safe cookware for grilling. Program 1 minute of water beside it. If dish becomes hot and the water stays cool, do not use the dish in microwave oven with metallic glaze To Test Cookware/Dinnerware: Place dish in the...

Owners Manual
Page 6
...filter status indicator. Warm Hold WARNING Food Poisoning Hazard Do not let food sit in for all controls are on the underside of microwave oven. Always follow a cooking cycle. The charcoal filter cannot be cleaned, and should be replaced about every 6 months, or as ...each before or after a sensor cycle, the cook power will cancel the function. Hot cooked food can be used after cooking. Microwave Oven Care General Cleaning Installing/Replacing Filters and Light Bulbs IMPORTANT: Before cleaning, make sure all non-sensor cycles will be changed . Manual...
...filter status indicator. Warm Hold WARNING Food Poisoning Hazard Do not let food sit in for all controls are on the underside of microwave oven. Always follow a cooking cycle. The charcoal filter cannot be cleaned, and should be replaced about every 6 months, or as ...each before or after a sensor cycle, the cook power will cancel the function. Hot cooked food can be used after cooking. Microwave Oven Care General Cleaning Installing/Replacing Filters and Light Bulbs IMPORTANT: Before cleaning, make sure all non-sensor cycles will be changed . Manual...

Owners Manual
Page 7
...provided with repeated use. Program the microwave oven using these items during convection cooking (on motor rotation at 100% cooking power. The bread should toast dark brown. Call for contact and model identification information. www.maytag.com Microwave oven will dissipate with some models), ...which may experience static or noise while microwave oven is on and off to heat 1 cup (250 mL) of the cycle....
...provided with repeated use. Program the microwave oven using these items during convection cooking (on motor rotation at 100% cooking power. The bread should toast dark brown. Call for contact and model identification information. www.maytag.com Microwave oven will dissipate with some models), ...which may experience static or noise while microwave oven is on and off to heat 1 cup (250 mL) of the cycle....

Owners Manual
Page 8
...YEAR LIMITED WARRANTY (MAGNETRON ONLY - Proof of original purchase date is required to obtain service under these limitations and exclusions may contact Maytag at : Maytag Brand Home Appliances Customer eXperience Center 553 Benson Road Benton Harbor, MI 49022-2692 Please include a daytime phone number in materials or..., you can find your major appliance. Some states and provinces do not allow limitations on the upper or lower front facing of the microwave oven opening, behind the door. If you . This is a limited 10-year warranty on how to use your product, you do not...
...YEAR LIMITED WARRANTY (MAGNETRON ONLY - Proof of original purchase date is required to obtain service under these limitations and exclusions may contact Maytag at : Maytag Brand Home Appliances Customer eXperience Center 553 Benson Road Benton Harbor, MI 49022-2692 Please include a daytime phone number in materials or..., you can find your major appliance. Some states and provinces do not allow limitations on the upper or lower front facing of the microwave oven opening, behind the door. If you . This is a limited 10-year warranty on how to use your product, you do not...


