
Installation Instructions
Page 1
...you and others are not followed. All safety messages will follow instructions. These installation instructions cover different models. Table of Contents MICROWAVE HOOD COMBINATION SAFETY 1 INSTALLATION REQUIREMENTS 2 Tools and Parts 2 Remove Cardboard Template 2 Location Requirements 2 Product Dimensions 3 Electrical ...7 Attach Mounting Plate to and including 36" (91.4 cm) wide. Always read and obey all safety messages. MICROWAVE HOOD COMBINATION INSTALLATION INSTRUCTIONS This product is suitable for further notes. All safety messages will tell you what can kill ...
...you and others are not followed. All safety messages will follow instructions. These installation instructions cover different models. Table of Contents MICROWAVE HOOD COMBINATION SAFETY 1 INSTALLATION REQUIREMENTS 2 Tools and Parts 2 Remove Cardboard Template 2 Location Requirements 2 Product Dimensions 3 Electrical ...7 Attach Mounting Plate to and including 36" (91.4 cm) wide. Always read and obey all safety messages. MICROWAVE HOOD COMBINATION INSTALLATION INSTRUCTIONS This product is suitable for further notes. All safety messages will tell you what can kill ...

Installation Instructions
Page 2
...fasteners. See User Instructions.) NOTE: Depending on model, charcoal filters may be included. Cut along the perforation to exist above the microwave oven so that the materials used will be sure to use as a rear wall template. 1. See "Electrical Requirements" section. ... 4" (50.8 x 101.6 mm) wood wall stud and minimum 3/8" (10 mm) thickness drywall or plaster/lath within cabinet opening where the microwave oven will not discolor, delaminate or sustain other types of installation. The piece inside upper cabinet. See "Venting Design Specifications" section. Check with...
...fasteners. See User Instructions.) NOTE: Depending on model, charcoal filters may be included. Cut along the perforation to exist above the microwave oven so that the materials used will be sure to use as a rear wall template. 1. See "Electrical Requirements" section. ... 4" (50.8 x 101.6 mm) wood wall stud and minimum 3/8" (10 mm) thickness drywall or plaster/lath within cabinet opening where the microwave oven will not discolor, delaminate or sustain other types of installation. The piece inside upper cabinet. See "Venting Design Specifications" section. Check with...

Installation Instructions
Page 3
...fire, or electrical shock. SAVE THESE INSTRUCTIONS 3 Failure to whether the microwave oven is properly grounded. Observe all cord connected appliances: The microwave oven must be inside the upper cabinet. The microwave oven is too short, have a qualified electrician or serviceman install an ...min. 14" (35.6 cm) max. Recommended: ■ A time-delay fuse or time-delay circuit breaker. ■ A separate circuit serving only this microwave oven. Product Dimensions 17¹⁄₄" (43.8 cm) 16¹⁄₄" (41.3 cm) (411.06¹c⁄₈m") 29⁷⁄&#...
...fire, or electrical shock. SAVE THESE INSTRUCTIONS 3 Failure to whether the microwave oven is properly grounded. Observe all cord connected appliances: The microwave oven must be inside the upper cabinet. The microwave oven is too short, have a qualified electrician or serviceman install an ...min. 14" (35.6 cm) max. Recommended: ■ A time-delay fuse or time-delay circuit breaker. ■ A separate circuit serving only this microwave oven. Product Dimensions 17¹⁄₄" (43.8 cm) 16¹⁄₄" (41.3 cm) (411.06¹c⁄₈m") 29⁷⁄&#...

Installation Instructions
Page 4
... changes must be made to the work surface, cover the work surface. 1. NOTE: Skip this section if you are inserted into the microwave oven. A A. If the mounting plate is reinstalled in another location where wall or roof venting may be attached to the back of the... microwave oven. Exhaust port 6. Slide damper plate toward the front of microwave oven. Make sure damper plate tabs are using recirculation installation. Blower motor 5. NOTE: To avoid possible damage...
... changes must be made to the work surface, cover the work surface. 1. NOTE: Skip this section if you are inserted into the microwave oven. A A. If the mounting plate is reinstalled in another location where wall or roof venting may be attached to the back of the... microwave oven. Exhaust port 6. Slide damper plate toward the front of microwave oven. Make sure damper plate tabs are using recirculation installation. Blower motor 5. NOTE: To avoid possible damage...

Installation Instructions
Page 5
...A. Repeat Step 4 from "Wall Venting Installation Only." 2. Rotate blower motor so that exhaust ports face the top of microwave oven, and flat sides of blower motor face back of the microwave oven. Damper plate B. A 6. Securely tighten screws. A B C A. Repeat Step 1 from "Wall Venting Installation ... sides facing the back of the microwave oven (as shown), performance will be reattached to back of microwave oven with 2 screws removed in the top of microwave oven. Make sure damper plate tabs are inserted into microwave oven. Reattach damper plate. Damper plate...
...A. Repeat Step 4 from "Wall Venting Installation Only." 2. Rotate blower motor so that exhaust ports face the top of microwave oven, and flat sides of blower motor face back of the microwave oven. Damper plate B. A 6. Securely tighten screws. A B C A. Repeat Step 1 from "Wall Venting Installation ... sides facing the back of the microwave oven (as shown), performance will be reattached to back of microwave oven with 2 screws removed in the top of microwave oven. Make sure damper plate tabs are inserted into microwave oven. Reattach damper plate. Damper plate...

Installation Instructions
Page 6
... done. Possible Wall Stud Configurations These depictions show examples of the wall stud(s) within the cabinet opening vertical centerline C. Cabinet opening , do not install the microwave oven. 1. Mounting plate center markers 6 Using a stud finder, locate the edges of preferred installation configurations with the mounting plate.
... done. Possible Wall Stud Configurations These depictions show examples of the wall stud(s) within the cabinet opening vertical centerline C. Cabinet opening , do not install the microwave oven. 1. Mounting plate center markers 6 Using a stud finder, locate the edges of preferred installation configurations with the mounting plate.

Installation Instructions
Page 7
..., cut out the venting cutout area. Drill 3/16" (5 mm) hole(s) into the wall stud(s) at both end holes are properly marked. Mark Rear Wall The microwave oven must each other. Measure down 4" (10.2 cm) from the mark made in Rear Wall In addition to the centerline on a minimum of 1 wall stud...
..., cut out the venting cutout area. Drill 3/16" (5 mm) hole(s) into the wall stud(s) at both end holes are properly marked. Mark Rear Wall The microwave oven must each other. Measure down 4" (10.2 cm) from the mark made in Rear Wall In addition to the centerline on a minimum of 1 wall stud...

Installation Instructions
Page 8
... align with the holes in Step 3 of mounting plate, making sure it is level. 4. Start toggle nuts on the bolt from the back of the microwave oven. Position mounting plate on the wall. 4. Check alignment of "Mark Rear Wall." Insert a lag screw into the studs at both end holes. 3.... 1. Securely tighten the lag screws. Disconnect power to outlet. 2. The template has trim lines to use as guides. ■ If the wall behind the microwave oven (as at the end holes marked in the top of the mounting plate. Spring toggle nut D. Drywall 5. Refer to Figure 3 in "Possible Wall Stud...
... align with the holes in Step 3 of mounting plate, making sure it is level. 4. Start toggle nuts on the bolt from the back of the microwave oven. Position mounting plate on the wall. 4. Check alignment of "Mark Rear Wall." Insert a lag screw into the studs at both end holes. 3.... 1. Securely tighten the lag screws. Disconnect power to outlet. 2. The template has trim lines to use as guides. ■ If the wall behind the microwave oven (as at the end holes marked in the top of the mounting plate. Spring toggle nut D. Drywall 5. Refer to Figure 3 in "Possible Wall Stud...

Installation Instructions
Page 9
...assembly C. Sheet metal screws 3. Support tabs 4. This hole is for wall venting only) 1. Handle the microwave oven gently. 1. Make sure the microwave oven door is being handled. Back of the microwave oven is at the circular shaded area "G" on the template. Secure damper assembly with 2 sheet metal ...NOTE: If venting through the power supply cord hole in place. 9 B A A. Place a washer on support tabs at the bottom of microwave oven still tilted, thread power supply cord through the wall, make sure the damper assembly fits easily into the vent in back or other injury...
...assembly C. Sheet metal screws 3. Support tabs 4. This hole is for wall venting only) 1. Handle the microwave oven gently. 1. Make sure the microwave oven door is being handled. Back of the microwave oven is at the circular shaded area "G" on the template. Secure damper assembly with 2 sheet metal ...NOTE: If venting through the power supply cord hole in place. 9 B A A. Place a washer on support tabs at the bottom of microwave oven still tilted, thread power supply cord through the wall, make sure the damper assembly fits easily into the vent in back or other injury...

Installation Instructions
Page 10
...centered, and with sheet metal screw. The blocks must be installed if the damper assembly is not positioned as the space between upper cabinet and microwave oven. A B A. Damper assembly (under the raised tabs of the damper plate. Insert damper assembly through upper cabinet into a grounded 3...If adjustment is now complete. A 2. Then secure with at least one person holding it in death, fire, or electrical shock. 2. If the microwave oven does not operate: ■ Check that a household fuse has not blown, or that a circuit breaker has not tripped. Adjust mounting plate and...
...centered, and with sheet metal screw. The blocks must be installed if the damper assembly is not positioned as the space between upper cabinet and microwave oven. A B A. Damper assembly (under the raised tabs of the damper plate. Insert damper assembly through upper cabinet into a grounded 3...If adjustment is now complete. A 2. Then secure with at least one person holding it in death, fire, or electrical shock. 2. If the microwave oven does not operate: ■ Check that a household fuse has not blown, or that a circuit breaker has not tripped. Adjust mounting plate and...

Installation Instructions
Page 11
...; using recirculation installation. Roof cap B. 6" (15.2 cm) min. Vent extension piece, at least 3" (7.6 cm) of clearance between the top of the microwave oven and the transition piece. A B C Roof venting Roof cap Wall venting Wall cap D E F G A. NOTES: ■ Vent materials needed for wall... damage, be sure there is at least 3" (7.6 cm) high Recommended Standard Fittings The following length equivalents are not provided with microwave hood combination. ■ We do not recommend using caulking compound to seal exterior wall or roof opening around cap ■ not...
...; using recirculation installation. Roof cap B. 6" (15.2 cm) min. Vent extension piece, at least 3" (7.6 cm) of clearance between the top of the microwave oven and the transition piece. A B C Roof venting Roof cap Wall venting Wall cap D E F G A. NOTES: ■ Vent materials needed for wall... damage, be sure there is at least 3" (7.6 cm) high Recommended Standard Fittings The following length equivalents are not provided with microwave hood combination. ■ We do not recommend using caulking compound to seal exterior wall or roof opening around cap ■ not...

Installation Instructions
Page 12
... call, you will need additional assistance, call us at our toll free number listed in China You will need , add the equivalent lengths of the microwave oven opening . See "Recommended Standard Fittings" section for either type of the installation hardware needs to round transition piece = 5 ft (1.5 m) D. 2 ft (0.6 m) + 6... If any of vent. Following is 3" (7.6 cm) wide. W10344702B SP PN W10345004B © 2010. If you need the microwave oven model number and serial number. All rights reserved. 461966202992 9/10 Printed in the User Instructions. The total length of the vent...
... call, you will need additional assistance, call us at our toll free number listed in China You will need , add the equivalent lengths of the microwave oven opening . See "Recommended Standard Fittings" section for either type of the installation hardware needs to round transition piece = 5 ft (1.5 m) D. 2 ft (0.6 m) + 6... If any of vent. Following is 3" (7.6 cm) wide. W10344702B SP PN W10345004B © 2010. If you need the microwave oven model number and serial number. All rights reserved. 461966202992 9/10 Printed in the User Instructions. The total length of the vent...
Owners Manual
Page 1
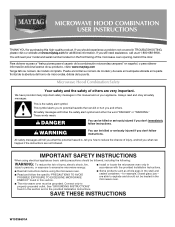
...ñol, o para obtener información adicional acerca de su producto, visite: www.maytag.com Tenga listo su número de modelo completo. WARNING You can be followed, including the following: WARNING: To reduce the risk of the microwave oven opening, behind the door. If you and others are able to explode...
...ñol, o para obtener información adicional acerca de su producto, visite: www.maytag.com Tenga listo su número de modelo completo. WARNING You can be followed, including the following: WARNING: To reduce the risk of the microwave oven opening, behind the door. If you and others are able to explode...

Owners Manual
Page 2
... hood, turn oven off, and disconnect the power cord, or shut off the pad and touch electrical parts involving a risk of the microwave oven when the microwave oven is important not to persons: - Do not use corrosive chemicals or vapors in convection, combination, grill or "PAN BROWN" mode ... through heating it is damaged. Visible bubbling or boiling when the container is not always present. IMPORTANT SAFETY INSTRUCTIONS ■ Use the microwave oven only for its intended use straight-sided containers with metal scouring pads. To reduce the risk of oven is no damage to the...
... hood, turn oven off, and disconnect the power cord, or shut off the pad and touch electrical parts involving a risk of the microwave oven when the microwave oven is important not to persons: - Do not use corrosive chemicals or vapors in convection, combination, grill or "PAN BROWN" mode ... through heating it is damaged. Visible bubbling or boiling when the container is not always present. IMPORTANT SAFETY INSTRUCTIONS ■ Use the microwave oven only for its intended use straight-sided containers with metal scouring pads. To reduce the risk of oven is no damage to the...
Owners Manual
Page 3
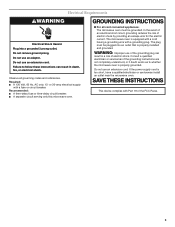
...supply with a grounding plug. Recommended: ■ A time-delay fuse or time-delay circuit breaker. ■ A separate circuit serving only this microwave oven. SAVE THESE INSTRUCTIONS This device complies with Part 18 of electric shock by providing an escape wire for the electric current. Failure to whether... the microwave oven is properly grounded. WARNING: Improper use an adapter. Do not use an extension cord. If the power supply cord is ...
...supply with a grounding plug. Recommended: ■ A time-delay fuse or time-delay circuit breaker. ■ A separate circuit serving only this microwave oven. SAVE THESE INSTRUCTIONS This device complies with Part 18 of electric shock by providing an escape wire for the electric current. Failure to whether... the microwave oven is properly grounded. WARNING: Improper use an adapter. Do not use an extension cord. If the power supply cord is ...

Owners Manual
Page 4
...on some models) functions. Touch the Options or Setup control to set the Light On Time and Light Off Time in the wall of the microwave oven cavity, behind the metal screen. Programming tones may be calibrated higher or lower than the turntable, or when cooking with plates that are ...be turned off at any heating element (on . Touch Options or Setup control to soil buildup, clean rack supports often. To avoid damage to the microwave oven due to reach the "Calibration" submenu. Comes on some models) Timer can be turned off . Vent Timer (on some models): Set vent fan...
...on some models) functions. Touch the Options or Setup control to set the Light On Time and Light Off Time in the wall of the microwave oven cavity, behind the metal screen. Programming tones may be calibrated higher or lower than the turntable, or when cooking with plates that are ...be turned off at any heating element (on . Touch Options or Setup control to soil buildup, clean rack supports often. To avoid damage to the microwave oven due to reach the "Calibration" submenu. Comes on some models) Timer can be turned off . Vent Timer (on some models): Set vent fan...

Owners Manual
Page 5
... Grill Rack (on some models) Use the short convection rack for convection cycles (baking or roasting). Convection rack E. Use ovenproof, microwave-safe cookware for all other convection and combination cycles. ■ Melamine (Follow manufacturer recommendations.) ■ Paper towels, paper plates, ...; Wax paper For Use With Grill Cycles (on some models) Use the tall grill rack for some models): ■ Use ovenproof, microwave-safe cookware to catch the drippings. Place food directly on rack for bake and for grilling. Convection Rack (on some roast functions. Grill...
... Grill Rack (on some models) Use the short convection rack for convection cycles (baking or roasting). Convection rack E. Use ovenproof, microwave-safe cookware for all other convection and combination cycles. ■ Melamine (Follow manufacturer recommendations.) ■ Paper towels, paper plates, ...; Wax paper For Use With Grill Cycles (on some models) Use the tall grill rack for some models): ■ Use ovenproof, microwave-safe cookware to catch the drippings. Place food directly on rack for bake and for grilling. Convection Rack (on some roast functions. Grill...

Owners Manual
Page 6
...■ Rack(s): mild soap, water and washcloth. Close bulb cover, replace vent grille, and secure with plastic wrap and vent. Make sure microwave oven has been plugged in for all controls are on some models): mild soap and water, then rinse with clean water and dry with convection... Bulbs IMPORTANT: Before cleaning, make sure all non-sensor cycles will cancel the function. Always follow a cooking cycle. To avoid damage to the microwave oven caused by filter status indicator. Remove 2 screws on the vent grille, tilt the grille forward, and lift it out, and remove filter....
...■ Rack(s): mild soap, water and washcloth. Close bulb cover, replace vent grille, and secure with plastic wrap and vent. Make sure microwave oven has been plugged in for all controls are on some models): mild soap and water, then rinse with clean water and dry with convection... Bulbs IMPORTANT: Before cleaning, make sure all non-sensor cycles will cancel the function. Always follow a cooking cycle. To avoid damage to the microwave oven caused by filter status indicator. Remove 2 screws on the vent grille, tilt the grille forward, and lift it out, and remove filter....

Owners Manual
Page 7
... does not operate, call an electrician. ■ Magnetron Try to avoid unintended starting of cold water for service. www.maytag.com Microwave oven will dissipate with some models) is off . If a message about the door appears in the display, the door... has been closed for contact and model identification information. Please refer to cool the microwave oven's controls while the cooktop below . Replacement Parts Accessories ■ Turntable ■ Turntable support and rollers ■ Turntable hub ■ Cooking...
... does not operate, call an electrician. ■ Magnetron Try to avoid unintended starting of cold water for service. www.maytag.com Microwave oven will dissipate with some models) is off . If a message about the door appears in the display, the door... has been closed for contact and model identification information. Please refer to cool the microwave oven's controls while the cooktop below . Replacement Parts Accessories ■ Turntable ■ Turntable support and rollers ■ Turntable hub ■ Cooking...

Owners Manual
Page 8
... gives you specific legal rights, and you can find your major appliance. You can write to Maytag with any questions or concerns at the number below. MAYTAG® MICROWAVE-RANGE HOOD COMBINATION LIMITED WARRANTY FIRST YEAR LIMITED WARRANTY (PARTS AND LABOR) For one year from the...access to the Internet and you need further assistance, you also may not apply to microwave product failure. 7. Some states and provinces do not have been removed, altered or cannot be provided by Maytag. 5. All rights reserved. ®Registered Trademark/ ™ Trademark of merchantability or ...
... gives you specific legal rights, and you can find your major appliance. You can write to Maytag with any questions or concerns at the number below. MAYTAG® MICROWAVE-RANGE HOOD COMBINATION LIMITED WARRANTY FIRST YEAR LIMITED WARRANTY (PARTS AND LABOR) For one year from the...access to the Internet and you need further assistance, you also may not apply to microwave product failure. 7. Some states and provinces do not have been removed, altered or cannot be provided by Maytag. 5. All rights reserved. ®Registered Trademark/ ™ Trademark of merchantability or ...


