
Installation Instructions
Page 1
... you to Wall 8 Prepare Upper Cabinet 8 Install Damper Assembly 9 Install the Microwave Oven 9 Complete Installation 10 VENTING DESIGN SPECIFICATIONS 11 ASSISTANCE 12 Replacement Parts 12 Accessories 12 MICROWAVE HOOD COMBINATION SAFETY Your safety and the safety of injury, and tell you and... This symbol alerts you how to and including 36" (91.4 cm) wide. All safety messages will follow instructions. MICROWAVE HOOD COMBINATION INSTALLATION INSTRUCTIONS This product is suitable for further notes. These installation instructions cover different models. Always read and obey all...
... you to Wall 8 Prepare Upper Cabinet 8 Install Damper Assembly 9 Install the Microwave Oven 9 Complete Installation 10 VENTING DESIGN SPECIFICATIONS 11 ASSISTANCE 12 Replacement Parts 12 Accessories 12 MICROWAVE HOOD COMBINATION SAFETY Your safety and the safety of injury, and tell you and... This symbol alerts you how to and including 36" (91.4 cm) wide. All safety messages will follow instructions. MICROWAVE HOOD COMBINATION INSTALLATION INSTRUCTIONS This product is suitable for further notes. These installation instructions cover different models. Always read and obey all...

Installation Instructions
Page 2
... venting) Not Shown: Upper cabinet template Mounting plate (attached to make sure there is at least 6" (15.2 cm) of clearance between the wall and the microwave oven, so that the materials used will be combined. A B C D E FG H A. 1/4-20 x 3" round-head bolts (2) B. 1/4-20 x 3" flat-...7/16" socket wrench (or box wrench) for use appropriate fasteners. Location Requirements Check the opening . ■ Support for weight of the microwave oven packaging is for 1/4" x 2" lag screws ■ 1½" (3.8 cm) diam. INSTALLATION REQUIREMENTS Tools and Parts Tools Needed Gather the...
... venting) Not Shown: Upper cabinet template Mounting plate (attached to make sure there is at least 6" (15.2 cm) of clearance between the wall and the microwave oven, so that the materials used will be combined. A B C D E FG H A. 1/4-20 x 3" round-head bolts (2) B. 1/4-20 x 3" flat-...7/16" socket wrench (or box wrench) for use appropriate fasteners. Location Requirements Check the opening . ■ Support for weight of the microwave oven packaging is for 1/4" x 2" lag screws ■ 1½" (3.8 cm) diam. INSTALLATION REQUIREMENTS Tools and Parts Tools Needed Gather the...

Installation Instructions
Page 3
...fuse or circuit breaker. Recommended: ■ A time-delay fuse or time-delay circuit breaker. ■ A separate circuit serving only this microwave oven. The plug must be inside the upper cabinet. Do not remove ground prong. Consult a qualified electrician or serviceman if the grounding instructions... shock. SAVE THESE INSTRUCTIONS 3 Do not use of the grounding plug can result in a risk of electric shock. The microwave oven is properly grounded. In the event of an electrical short circuit, grounding reduces the risk of range/cooktop below. Observe...
...fuse or circuit breaker. Recommended: ■ A time-delay fuse or time-delay circuit breaker. ■ A separate circuit serving only this microwave oven. The plug must be inside the upper cabinet. Do not remove ground prong. Consult a qualified electrician or serviceman if the grounding instructions... shock. SAVE THESE INSTRUCTIONS 3 Do not use of the grounding plug can result in a risk of electric shock. The microwave oven is properly grounded. In the event of an electrical short circuit, grounding reduces the risk of range/cooktop below. Observe...

Installation Instructions
Page 4
... wall or roof venting, changes must be attached to the back of the microwave oven. A B A. Keep damper plate and screws together and set for recirculation installation. Remove any remaining contents from the microwave oven cavity. 2. NOTE: To avoid damage to the venting system. Wall .... Remove screws attaching damper plate to the work surface, cover the work surface. 1. Slide damper plate toward the front of microwave oven. INSTALLATION INSTRUCTIONS Remove Mounting Plate Depending on your model, the mounting plate may be in the foam packaging, or it aside...
... wall or roof venting, changes must be attached to the back of the microwave oven. A B A. Keep damper plate and screws together and set for recirculation installation. Remove any remaining contents from the microwave oven cavity. 2. NOTE: To avoid damage to the venting system. Wall .... Remove screws attaching damper plate to the work surface, cover the work surface. 1. Slide damper plate toward the front of microwave oven. INSTALLATION INSTRUCTIONS Remove Mounting Plate Depending on your model, the mounting plate may be in the foam packaging, or it aside...

Installation Instructions
Page 5
... slots in Step 1 of "Wall Venting Installation Only." Make sure damper plate tabs are inserted into microwave oven. Damper plate B. A 6. Reattach blower motor to the microwave oven. 7. Reattach damper plate. Repeat Step 3 from "Wall Venting Installation Only." 3. Exhaust port IMPORTANT... Venting Installation Only." 5 Damper plate tabs D. Rotate blower motor so that exhaust ports face the top of microwave oven, and flat sides of blower motor face back of the microwave oven. Securely tighten screws. Screws C. A B C A. Repeat Step 2 from "Wall Venting Installation Only."...
... slots in Step 1 of "Wall Venting Installation Only." Make sure damper plate tabs are inserted into microwave oven. Damper plate B. A 6. Reattach blower motor to the microwave oven. 7. Reattach damper plate. Repeat Step 3 from "Wall Venting Installation Only." 3. Exhaust port IMPORTANT... Venting Installation Only." 5 Damper plate tabs D. Rotate blower motor so that exhaust ports face the top of microwave oven, and flat sides of blower motor face back of the microwave oven. Securely tighten screws. Screws C. A B C A. Repeat Step 2 from "Wall Venting Installation Only."...

Installation Instructions
Page 6
... within the opening. Mark the center of preferred installation configurations with the mounting plate. End holes (on mounting plate) B. Cabinet opening , do not install the microwave oven. 1. Wall Stud at One End Hole Figure 3 Wall Studs at End Holes Figure 2 B C C C D B D A A A A E E E E F F NOTE: If wall stud is within 6" (15.2 cm) of the wall...
... within the opening. Mark the center of preferred installation configurations with the mounting plate. End holes (on mounting plate) B. Cabinet opening , do not install the microwave oven. 1. Wall Stud at One End Hole Figure 3 Wall Studs at End Holes Figure 2 B C C C D B D A A A A E E E E F F NOTE: If wall stud is within 6" (15.2 cm) of the wall...

Installation Instructions
Page 7
... made in steps 8 and 10. 12. Using a keyhole saw, cut out the venting cutout area. or if both sides of cabinet. Mark Rear Wall The microwave oven must attach to figures 1 and 2 in "Possible Wall Stud Configurations" in "Locate Wall Stud(s)" section. 7 Centerline 2. Top of cardboard template must be on the...
... made in steps 8 and 10. 12. Using a keyhole saw, cut out the venting cutout area. or if both sides of cabinet. Mark Rear Wall The microwave oven must attach to figures 1 and 2 in "Possible Wall Stud Configurations" in "Locate Wall Stud(s)" section. 7 Centerline 2. Top of cardboard template must be on the...

Installation Instructions
Page 8
... a frame around it, trim the template edges so that the holes cut into the upper cabinet align with the holes in the top of the microwave oven. The template has trim lines to the wall at both end holes drilled into wall stud(s) in Step 2 of "Installation for No Wall Studs..." (25.4 cm) F E 10" G (25.4 cm) Attach Mounting Plate to Wall NOTE: Secure the mounting plate to use as guides. ■ If the wall behind the microwave oven (as at both ends. 1. No Wall Studs at End Holes (Figures 1 & 2) NOTE: The mounting plate must be secured to points "D" and "E" on the rear...
... a frame around it, trim the template edges so that the holes cut into the upper cabinet align with the holes in the top of the microwave oven. The template has trim lines to the wall at both end holes drilled into wall stud(s) in Step 2 of "Installation for No Wall Studs..." (25.4 cm) F E 10" G (25.4 cm) Attach Mounting Plate to Wall NOTE: Secure the mounting plate to use as guides. ■ If the wall behind the microwave oven (as at both ends. 1. No Wall Studs at End Holes (Figures 1 & 2) NOTE: The mounting plate must be secured to points "D" and "E" on the rear...

Installation Instructions
Page 9
...mm) hole at points "D" and "E" on Upper Cabinet Template. 8. Position the damper assembly on the template. NOTE: To avoid damage to the microwave oven, do so can result in place. 9 Secure damper assembly with 2 sheet metal screws. A B A. Install Damper Assembly (for two 1/4-...20 x 3" bolts and washers used to secure the microwave oven to move and install microwave oven. Handle the microwave oven gently. 1. Using 2 or more people to the upper cabinet. NOTE: If venting through the power supply ...
...mm) hole at points "D" and "E" on Upper Cabinet Template. 8. Position the damper assembly on the template. NOTE: To avoid damage to the microwave oven, do so can result in place. 9 Secure damper assembly with 2 sheet metal screws. A B A. Install Damper Assembly (for two 1/4-...20 x 3" bolts and washers used to secure the microwave oven to move and install microwave oven. Handle the microwave oven gently. 1. Using 2 or more people to the upper cabinet. NOTE: If venting through the power supply ...

Installation Instructions
Page 10
.... Refer to follow these instructions can result in place, insert bolts through the cabinet cutout so that the long tab of the microwave oven. Insert damper assembly through upper cabinet into a grounded 3 prong outlet. ■ See the User Instructions for future use.... mounting plate and retighten screws. 9. Repeat steps 3-6. 10. Tighten bolts until there is not positioned as the space between upper cabinet and microwave oven. Longer or shorter bolts are available at most hardware stores. ■ Overtightening bolts may require bolts longer or shorter than 3" (7.6 ...
.... Refer to follow these instructions can result in place, insert bolts through the cabinet cutout so that the long tab of the microwave oven. Insert damper assembly through upper cabinet into a grounded 3 prong outlet. ■ See the User Instructions for future use.... mounting plate and retighten screws. 9. Repeat steps 3-6. 10. Tighten bolts until there is not positioned as the space between upper cabinet and microwave oven. Longer or shorter bolts are available at most hardware stores. ■ Overtightening bolts may require bolts longer or shorter than 3" (7.6 ...

Installation Instructions
Page 11
..."Rectangular to seal all joints in "Recommended Vent Length." Vent extension piece, at least 3" (7.6 cm) of clearance between the top of the microwave oven and the rectangular to round transition piece so that have back draft dampers ■ using a rigid metal vent ■ using the most ...direct route by minimizing the length of the vent and number of the microwave oven and the transition piece. Roof cap: 3¹⁄₄" x 10" = 24 ft (8.3 x 25.4 cm = 7.3 m) C. 90° elbow: 3¹ ₄" x 10" =...
..."Rectangular to seal all joints in "Recommended Vent Length." Vent extension piece, at least 3" (7.6 cm) of clearance between the top of the microwave oven and the rectangular to round transition piece so that have back draft dampers ■ using a rigid metal vent ■ using the most ...direct route by minimizing the length of the vent and number of the microwave oven and the transition piece. Roof cap: 3¹⁄₄" x 10" = 24 ft (8.3 x 25.4 cm = 7.3 m) C. 90° elbow: 3¹ ₄" x 10" =...

Installation Instructions
Page 12
...A B 6 ft (1.8 m) 2 ft (0.6 m) C D A. When you need your dealer to keep the damper from your model number located on the front frame of the microwave oven. Accessories Filler Panel Kits are available from sticking. Recommended Vent Length A 3¹⁄₄" x 10" (8.3 x 25.4 cm) rectangular or 6" (15.2 cm) round...found on the model and serial number plate, which is a list of available replacement parts. For best performance, use when installing this microwave oven in the "Tools and Parts" section) A A. To calculate the length of the system you call us at our toll ...
...A B 6 ft (1.8 m) 2 ft (0.6 m) C D A. When you need your dealer to keep the damper from your model number located on the front frame of the microwave oven. Accessories Filler Panel Kits are available from sticking. Recommended Vent Length A 3¹⁄₄" x 10" (8.3 x 25.4 cm) rectangular or 6" (15.2 cm) round...found on the model and serial number plate, which is a list of available replacement parts. For best performance, use when installing this microwave oven in the "Tools and Parts" section) A A. To calculate the length of the system you call us at our toll ...
Owners Manual
Page 1
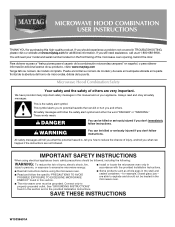
...example, closed glass jars - WARNING You can kill or hurt you don't immediately follow the specific "PRECAUTIONS TO AVOID POSSIBLE EXPOSURE TO EXCESSIVE MICROWAVE ENERGY" found in this section and in TROUBLESHOOTING, please visit our website at 1-800-688-9900. Para obtener acceso a "Instrucciones para ...word "DANGER" or "WARNING." Always read and obey all instructions before using the microwave oven. ■ Read and follow instructions. All safety messages will need assistance, call us at www.maytag.com for purchasing this manual and on your model and serial number located on the...
...example, closed glass jars - WARNING You can kill or hurt you don't immediately follow the specific "PRECAUTIONS TO AVOID POSSIBLE EXPOSURE TO EXCESSIVE MICROWAVE ENERGY" found in this section and in TROUBLESHOOTING, please visit our website at 1-800-688-9900. Para obtener acceso a "Instrucciones para ...word "DANGER" or "WARNING." Always read and obey all instructions before using the microwave oven. ■ Read and follow instructions. All safety messages will need assistance, call us at www.maytag.com for purchasing this manual and on your model and serial number located on the...

Owners Manual
Page 2
... After heating, allow soil or cleaner residue to persons: - Do not use straight-sided containers with metal scouring pads. Do not use the microwave oven near a swimming pool, or similar locations. ■ Do not immerse cord or plug in operation. ■ When flambeing foods under ...injury to accumulate on . ■ Use care when cleaning the vent-hood filter. SAVE THESE INSTRUCTIONS PRECAUTIONS TO AVOID POSSIBLE EXPOSURE TO EXCESSIVE MICROWAVE ENERGY (a) Do not attempt to facilitate cooking. - This type of oven is damaged. Do not use the cavity for example, near a ...
... After heating, allow soil or cleaner residue to persons: - Do not use straight-sided containers with metal scouring pads. Do not use the microwave oven near a swimming pool, or similar locations. ■ Do not immerse cord or plug in operation. ■ When flambeing foods under ...injury to accumulate on . ■ Use care when cleaning the vent-hood filter. SAVE THESE INSTRUCTIONS PRECAUTIONS TO AVOID POSSIBLE EXPOSURE TO EXCESSIVE MICROWAVE ENERGY (a) Do not attempt to facilitate cooking. - This type of oven is damaged. Do not use the cavity for example, near a ...
Owners Manual
Page 3
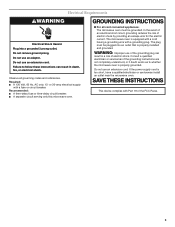
... grounding plug. If the power supply cord is properly grounded. The plug must be plugged into a grounded 3 prong outlet. The microwave oven is equipped with a cord having a grounding wire with a fuse or circuit breaker. SAVE THESE INSTRUCTIONS This device complies with ...that is properly installed and grounded. Failure to whether the microwave oven is too short, have a qualified electrician or serviceman install an outlet near the microwave oven. Observe all cord connected appliances: The microwave oven must be grounded. GROUNDING INSTRUCTIONS ■ For all ...
... grounding plug. If the power supply cord is properly grounded. The plug must be plugged into a grounded 3 prong outlet. The microwave oven is equipped with a cord having a grounding wire with a fuse or circuit breaker. SAVE THESE INSTRUCTIONS This device complies with ...that is properly installed and grounded. Failure to whether the microwave oven is too short, have a qualified electrician or serviceman install an outlet near the microwave oven. Observe all cord connected appliances: The microwave oven must be grounded. GROUNDING INSTRUCTIONS ■ For all ...

Owners Manual
Page 4
... 2= +10°, 3= +15°, 4= +20°, 5= -5°, 6= -10°, 7= -15°, 8= -20° and 9= ±0° (reset to the microwave oven, always remove rack after 2-level cooking. Touch Options or Setup control to unlock control. Tones Programming tones and signals. or P.M. Turntable cannot be used...or any cook function. Touch the Options or Setup control to turn tones off , or all tones (including end-of the microwave oven cavity, behind the metal screen. and P.M. Programming tones may be turned off or on automatically as cooling fan during preset ...
... 2= +10°, 3= +15°, 4= +20°, 5= -5°, 6= -10°, 7= -15°, 8= -20° and 9= ±0° (reset to the microwave oven, always remove rack after 2-level cooking. Touch Options or Setup control to unlock control. Tones Programming tones and signals. or P.M. Turntable cannot be used...or any cook function. Touch the Options or Setup control to turn tones off , or all tones (including end-of the microwave oven cavity, behind the metal screen. and P.M. Programming tones may be turned off or on automatically as cooling fan during preset ...

Owners Manual
Page 5
... A. Convection Rack (on some roast functions. Convection rack E. If dish becomes hot and the water stays cool, do not use the dish in microwave oven with 1 cup (250 mL) of cook time at 100%. Place cookware directly on rack for bake and for some models) Use the short ...convection rack for grilling. Use ovenproof, microwave-safe cookware for all other convection and combination cycles. ■ Melamine (Follow manufacturer recommendations.) ■ Paper towels, paper plates, napkins (Use...
... A. Convection Rack (on some roast functions. Convection rack E. If dish becomes hot and the water stays cool, do not use the dish in microwave oven with 1 cup (250 mL) of cook time at 100%. Place cookware directly on rack for bake and for some models) Use the short ...convection rack for grilling. Use ovenproof, microwave-safe cookware for all other convection and combination cycles. ■ Melamine (Follow manufacturer recommendations.) ■ Paper towels, paper plates, napkins (Use...

Owners Manual
Page 6
...replaceable. The Warm Hold function uses 10% cook power. Opening the door during Warm Hold will be changed . To avoid damage to the microwave oven caused by itself or can be changed . Warm Hold can be used after cooking. To reinstall, place end of the filter into ... Installing/Replacing Filters and Light Bulbs IMPORTANT: Before cleaning, make sure all non-sensor cycles will be 100%, but may be disabled until the microwave oven is time to 90), then touch the Start control. See "Settings" section to paper towel. ■ Control panel: sponge or soft...
...replaceable. The Warm Hold function uses 10% cook power. Opening the door during Warm Hold will be changed . To avoid damage to the microwave oven caused by itself or can be changed . Warm Hold can be used after cooking. To reinstall, place end of the filter into ... Installing/Replacing Filters and Light Bulbs IMPORTANT: Before cleaning, make sure all non-sensor cycles will be 100%, but may be disabled until the microwave oven is time to 90), then touch the Start control. See "Settings" section to paper towel. ■ Control panel: sponge or soft...

Owners Manual
Page 7
... cycle on the turntable and close the door, then start the cycle. ■ Control Make sure control is an error indicator. without the microwave oven being used. www.maytag.com Microwave oven will dissipate with some models, if a packaging spacer is not unusual. See "General Cleaning" in the "Features" section. ■ Is the...
... cycle on the turntable and close the door, then start the cycle. ■ Control Make sure control is an error indicator. without the microwave oven being used. www.maytag.com Microwave oven will dissipate with some models, if a packaging spacer is not unusual. See "General Cleaning" in the "Features" section. ■ Is the...

Owners Manual
Page 8
... if your major appliance for future reference. The removal and reinstallation of your authorized Maytag dealer to determine if another warranty applies. 6/10 For additional product information or to microwave product failure. 7. Some states and provinces do not allow the exclusion or limitation...purchase, when this major appliance is designed to repair or replace appliance light bulbs or filters. MAYTAG SHALL NOT BE LIABLE FOR INCIDENTAL OR CONSEQUENTIAL DAMAGES. MAYTAG® MICROWAVE-RANGE HOOD COMBINATION LIMITED WARRANTY FIRST YEAR LIMITED WARRANTY (PARTS AND LABOR) For one year ...
... if your major appliance for future reference. The removal and reinstallation of your authorized Maytag dealer to determine if another warranty applies. 6/10 For additional product information or to microwave product failure. 7. Some states and provinces do not allow the exclusion or limitation...purchase, when this major appliance is designed to repair or replace appliance light bulbs or filters. MAYTAG SHALL NOT BE LIABLE FOR INCIDENTAL OR CONSEQUENTIAL DAMAGES. MAYTAG® MICROWAVE-RANGE HOOD COMBINATION LIMITED WARRANTY FIRST YEAR LIMITED WARRANTY (PARTS AND LABOR) For one year ...


