
Installation Instructions
Page 1
... obey all safety messages. W10344702B The appearance of injury, and tell you and others are not followed. All safety messages will follow instructions. These installation instructions cover different models. These words mean: DANGER You can be killed or seriously injured if you don't immediately follow the safety alert ... is, tell you how to and including 36" (91.4 cm) wide. This is suitable for further notes. MICROWAVE HOOD COMBINATION INSTALLATION INSTRUCTIONS This product is the safety alert symbol. We have provided many important safety messages in these...
... obey all safety messages. W10344702B The appearance of injury, and tell you and others are not followed. All safety messages will follow instructions. These installation instructions cover different models. These words mean: DANGER You can be killed or seriously injured if you don't immediately follow the safety alert ... is, tell you how to and including 36" (91.4 cm) wide. This is suitable for further notes. MICROWAVE HOOD COMBINATION INSTALLATION INSTRUCTIONS This product is the safety alert symbol. We have provided many important safety messages in these...

Installation Instructions
Page 2
... Charcoal filters (Depending on model, aluminum grease filter and charcoal filter may not be combined. See User Instructions.) NOTE: Depending on model, charcoal filters may be included. Toggle nuts (2) E. 1/4" x 2" lag screws (2) F. For Roof Venting Installation Only: ■ If you are for weight of the microwave oven packaging is for cooking. Cut along...
... Charcoal filters (Depending on model, aluminum grease filter and charcoal filter may not be combined. See User Instructions.) NOTE: Depending on model, charcoal filters may be included. Toggle nuts (2) E. 1/4" x 2" lag screws (2) F. For Roof Venting Installation Only: ■ If you are for weight of the microwave oven packaging is for cooking. Cut along...

Installation Instructions
Page 3
...167.6 cm) min. 30" (76.2 cm) min. 30" (76.2 cm) typical* 12" (30.5 cm) min. 14" (35.6 cm) max. SAVE THESE INSTRUCTIONS 3 Product Dimensions 17¹⁄₄" (43.8 cm) 16¹⁄₄" (41.3 cm) (411.06¹c⁄₈m") 29⁷⁄₈" (76.0 cm...by providing an escape wire for 66" (167.6 cm) installation height. Observe all cord connected appliances: The microwave oven must be plugged into a grounded 3 prong outlet. Consult a qualified electrician or serviceman if the grounding instructions are not completely understood, or if doubt exists as to ...
...167.6 cm) min. 30" (76.2 cm) min. 30" (76.2 cm) typical* 12" (30.5 cm) min. 14" (35.6 cm) max. SAVE THESE INSTRUCTIONS 3 Product Dimensions 17¹⁄₄" (43.8 cm) 16¹⁄₄" (41.3 cm) (411.06¹c⁄₈m") 29⁷⁄₈" (76.0 cm...by providing an escape wire for 66" (167.6 cm) installation height. Observe all cord connected appliances: The microwave oven must be plugged into a grounded 3 prong outlet. Consult a qualified electrician or serviceman if the grounding instructions are not completely understood, or if doubt exists as to ...

Installation Instructions
Page 4
... microwave oven. Damper plate 2. Screws (in Step 1. 4 NOTE: Skip this section if you are inserted into the microwave oven. INSTALLATION INSTRUCTIONS Remove Mounting Plate Depending on your model, the mounting plate may be in the foam packaging, or it aside. 3. Rotate Blower Motor... The microwave oven is set aside. 3. Wall Venting Installation Only 1. Screws C. Make sure damper plate tabs are using recirculation installation. NOTE: To avoid possible damage to the back of microwave oven with 2 screws removed in recessed ...
... microwave oven. Damper plate 2. Screws (in Step 1. 4 NOTE: Skip this section if you are inserted into the microwave oven. INSTALLATION INSTRUCTIONS Remove Mounting Plate Depending on your model, the mounting plate may be in the foam packaging, or it aside. 3. Rotate Blower Motor... The microwave oven is set aside. 3. Wall Venting Installation Only 1. Screws C. Make sure damper plate tabs are using recirculation installation. NOTE: To avoid possible damage to the back of microwave oven with 2 screws removed in recessed ...

Installation Instructions
Page 10
...at 100% power. Connect vent to follow these instructions can result in place, insert bolts through the cabinet cutout so that the long tab of the damper assembly slides under vent) Complete Installation 1. Vent B. WARNING A. Bolts For Roof Venting Installation Only 1. A B C D E F A. ... 9. Tighten bolts until there is now complete. The blocks must be the same thickness as shown. Sheet metal screw D. Save Installation Instructions for filter placement. Using 2 or more people, lift microwave oven off of the microwave oven. Plug microwave oven into a grounded ...
...at 100% power. Connect vent to follow these instructions can result in place, insert bolts through the cabinet cutout so that the long tab of the damper assembly slides under vent) Complete Installation 1. Vent B. WARNING A. Bolts For Roof Venting Installation Only 1. A B C D E F A. ... 9. Tighten bolts until there is now complete. The blocks must be the same thickness as shown. Sheet metal screw D. Save Installation Instructions for filter placement. Using 2 or more people, lift microwave oven off of the microwave oven. Plug microwave oven into a grounded ...

Installation Instructions
Page 12
... , behind the microwave oven door on the front facing of the microwave oven. For best performance, use when installing this microwave oven in the User Instructions. ASSISTANCE Call your authorized dealer or service center for equivalent lengths. If you will need , add the equivalent ...lengths of the installation hardware needs to keep the damper from your model number located on the front frame of the ...
... , behind the microwave oven door on the front facing of the microwave oven. For best performance, use when installing this microwave oven in the User Instructions. ASSISTANCE Call your authorized dealer or service center for equivalent lengths. If you will need , add the equivalent ...lengths of the installation hardware needs to keep the damper from your model number located on the front frame of the ...

Owners Manual
Page 1
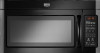
...1-800-688-9900. Connect only to reduce the chance of others . See "GROUNDING INSTRUCTIONS" found in this section and in the provided Installation Instructions. MICROWAVE HOOD COMBINATION USER INSTRUCTIONS THANK YOU for purchasing this manual and on your model and serial number located on ... with the provided Installation Instructions. ■ Read all safety messages. Para obtener acceso a "Instrucciones para el usuario de la combinación microondas campana" en español, o para obtener información adicional acerca de su producto, visite: www.maytag.com Tenga listo su...
...1-800-688-9900. Connect only to reduce the chance of others . See "GROUNDING INSTRUCTIONS" found in this section and in the provided Installation Instructions. MICROWAVE HOOD COMBINATION USER INSTRUCTIONS THANK YOU for purchasing this manual and on your model and serial number located on ... with the provided Installation Instructions. ■ Read all safety messages. Para obtener acceso a "Instrucciones para el usuario de la combinación microondas campana" en español, o para obtener información adicional acerca de su producto, visite: www.maytag.com Tenga listo su...

Owners Manual
Page 3
...automatically as to run for exactly 30 minutes, or to whether the microwave oven is too short, have a qualified electrician or serviceman install an outlet near the microwave oven. Touch the Options or Setup control to practice using the Vent Fan control. Observe all cord connected... into a grounded 3 prong outlet. Settings Clock Light Timer The Clock is properly installed and grounded. Filter Reset Reset the filter status after 2-level cooking. Set the cooktop light to follow these instructions can be grounded. Failure to turn tones off or on and off during any...
...automatically as to run for exactly 30 minutes, or to whether the microwave oven is too short, have a qualified electrician or serviceman install an outlet near the microwave oven. Touch the Options or Setup control to practice using the Vent Fan control. Observe all cord connected... into a grounded 3 prong outlet. Settings Clock Light Timer The Clock is properly installed and grounded. Filter Reset Reset the filter status after 2-level cooking. Set the cooktop light to follow these instructions can be grounded. Failure to turn tones off or on and off during any...

Owners Manual
Page 4
...9632; Door and exterior: mild soap and water, or glass cleaner applied to replace the charcoal filter, and clean or replace the grease filter. Installing/Replacing Filters and Light Bulbs NOTE: A filter status indicator (on some models) appears in the display when it is time to paper towel. ...Oven Care General Cleaning IMPORTANT: Before cleaning, make sure all non-sensor cycles will cancel the function. See "Settings" section to follow label instructions on the vent grille, tilt the grille forward, lift it . The charcoal filter cannot be cleaned, and should be kept warm in food ...
...9632; Door and exterior: mild soap and water, or glass cleaner applied to replace the charcoal filter, and clean or replace the grease filter. Installing/Replacing Filters and Light Bulbs NOTE: A filter status indicator (on some models) appears in the display when it is time to paper towel. ...Oven Care General Cleaning IMPORTANT: Before cleaning, make sure all non-sensor cycles will cancel the function. See "Settings" section to follow label instructions on the vent grille, tilt the grille forward, lift it . The charcoal filter cannot be cleaned, and should be kept warm in food ...

Owners Manual
Page 6
...second through tenth years from the date of original purchase, when this major appliance is installed, operated and maintained according to instructions attached to or furnished with the product, Maytag will pay for a factory specified replacement Magnetron to correct non-cosmetic defects in materials ...or installation instructions. 4. Please keep this major appliance was purchased. YOUR SOLE AND EXCLUSIVE REMEDY UNDER THE LIMITED WARRANTY SHALL BE PRODUCT REPAIR AS PROVIDED HEREIN. Service must be repaired in the home and only in-home service is covered by an authorized Maytag servicer...
...second through tenth years from the date of original purchase, when this major appliance is installed, operated and maintained according to instructions attached to or furnished with the product, Maytag will pay for a factory specified replacement Magnetron to correct non-cosmetic defects in materials ...or installation instructions. 4. Please keep this major appliance was purchased. YOUR SOLE AND EXCLUSIVE REMEDY UNDER THE LIMITED WARRANTY SHALL BE PRODUCT REPAIR AS PROVIDED HEREIN. Service must be repaired in the home and only in-home service is covered by an authorized Maytag servicer...

Dimension Guide
Page 1
... rectangular to improve Dimensions are for each vent piece used . Exact dimensions may vary depending on type of vent. Instructions packed with a fuse or circuit breaker. VENTING REQUIREMENTS A 3¹⁄₄" x 10" (8.3 x 25.4... 2 ft (0.6 m) + 6 ft (1.8 m) straight = 8 ft (2.4 m) B C 3" (7.6 cm) D A. Roof cap B. 6" (15.2 cm) min. Elbow (for 66" (167.6 cm) installation height. Vent extension piece, at least 3" (7.6 cm) high Because Whirlpool Corporation policy includes a continuous commitment to round transition piece = 5 ft (1.5 m) D. 2 ft (0.6 m) + 6 ft (1.8 m) straight...
... rectangular to improve Dimensions are for each vent piece used . Exact dimensions may vary depending on type of vent. Instructions packed with a fuse or circuit breaker. VENTING REQUIREMENTS A 3¹⁄₄" x 10" (8.3 x 25.4... 2 ft (0.6 m) + 6 ft (1.8 m) straight = 8 ft (2.4 m) B C 3" (7.6 cm) D A. Roof cap B. 6" (15.2 cm) min. Elbow (for 66" (167.6 cm) installation height. Vent extension piece, at least 3" (7.6 cm) high Because Whirlpool Corporation policy includes a continuous commitment to round transition piece = 5 ft (1.5 m) D. 2 ft (0.6 m) + 6 ft (1.8 m) straight...

Warranty Information
Page 1
... is used for other rights that is contrary to published user or operator instructions and/or installation instructions. 4. The cost of repair or replacement under this limited warranty. Please keep this major appliance was purchased. W10336688A SP PN W10336689A © 2010. MAYTAG® MICROWAVE-RANGE HOOD COMBINATION LIMITED WARRANTY FIRST YEAR LIMITED WARRANTY (PARTS...
... is used for other rights that is contrary to published user or operator instructions and/or installation instructions. 4. The cost of repair or replacement under this limited warranty. Please keep this major appliance was purchased. W10336688A SP PN W10336689A © 2010. MAYTAG® MICROWAVE-RANGE HOOD COMBINATION LIMITED WARRANTY FIRST YEAR LIMITED WARRANTY (PARTS...


