Maytag MMV4205DS Support and Manuals
Get Help and Manuals for this Maytag item
View All Support Options Below
Free Maytag MMV4205DS manuals!
Problems with Maytag MMV4205DS?
Ask a Question
Free Maytag MMV4205DS manuals!
Problems with Maytag MMV4205DS?
Ask a Question
Most Recent Maytag MMV4205DS Questions

Won't Start Says Open Close Door. Did Factory Reset. No Help
Won't start says open close door. Did factory reset. No help
Won't start says open close door. Did factory reset. No help
(Posted by Tom19689 8 years ago)

Open/close Door Message Continuously Appears And No Other Cooking Function
(Posted by Sharkz77 9 years ago)
Popular Maytag MMV4205DS Manual Pages
Installation Guide - Page 1
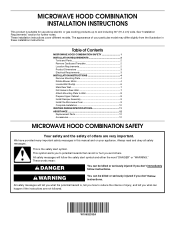
...8 Prepare Upper Cabinet 8 Install Damper Assembly 9 Install the Microwave Oven 9 Complete Installation 10 VENTING DESIGN SPECIFICATIONS 11 ASSISTANCE 12 Replacement Parts 12 Accessories 12
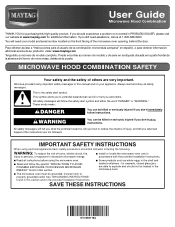
MICROWAVE HOOD COMBINATION SAFETY
Your safety and the safety of injury, and tell you don't immediately follow instructions.
These installation instructions cover different models. These words mean...
Installation Guide - Page 2
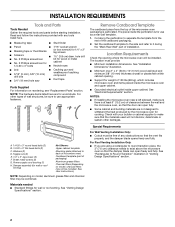
... Only: ■ Cutout must provide: ■ Minimum installation dimensions. Read and follow the instructions provided with your builder or cabinet supplier to make sure
there is at least 6" (15.2 cm) of the microwave oven packaging is for cooking. For other damages. See "Venting Design Specifications" section. See "Electrical Requirements" section.
hole drill
■ No. 2 Phillips...
Installation Guide - Page 4
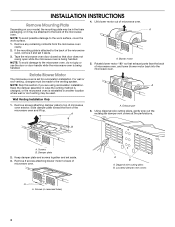
... handled. Rotate blower motor 180° so that door does not swing open while the microwave oven is reinstalled in recessed holes)
A B
A. Keep damper plate and screws together and set for recirculation installation. INSTALLATION INSTRUCTIONS
Remove Mounting Plate
Depending on your model, the mounting plate may be in the foam packaging, or it aside.
3. A
Keep the damper...
Installation Guide - Page 6

... down each stud center. Cabinet opening . Support tabs F.
See illustrations in "Possible Wall Stud Configurations." End holes (on mounting plate) B. Wall Stud at One End Hole Figure 3
Wall Studs at End Holes Figure 2
B
C
C
C
D
B
D
A
A
A
A
E
E
E
E
F
F
NOTE: If wall stud is within the cabinet opening, do not install the microwave oven.
1. Holes for lag screws E. No...
Installation Guide - Page 7
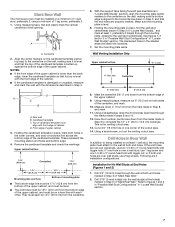
...Set the mounting plate aside. Draw the 2 vertical, plumb lines down from the bottom edge of cardboard template must
align with each be installed... the support tabs...microwave oven must be 14¹⁄₈" (35.9 cm) from the centerline.
5. Using measuring tape, find the wall stud centerline(s) drawn in Step 3 of upper cabinet
3. Rear wall B. Wall Venting Installation... dimensions ...
Installation Guide - Page 9
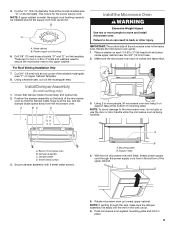
... avoid damage to move and install microwave oven. Sheet metal screws
3. Mounting plate B. Rotate microwave oven up toward upper cabinet. Cut 3/4" (19 mm) hole at the bottom of the shaded rectangular area "F" on support tabs at one corner of mounting plate. IMPORTANT: The control side of microwave oven B. Using 2 or more people to the microwave oven, do so can result...
Installation Guide - Page 10
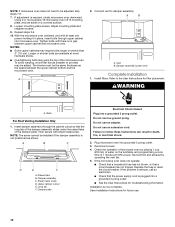
... into a grounded 3 prong outlet. ■ See the User Instructions for troubleshooting information. Installation is required, rotate microwave oven downward. Install filters. NOTE: The screw cannot be added.
Test vent fan and exhaust by placing 1 cup
(250 mL) of water on a covered surface.
8. If the problem continues, call an electrician. ■ Check that a
circuit breaker...
Installation Guide - Page 12
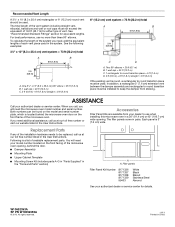
...(0.6 m)
C
D
A.
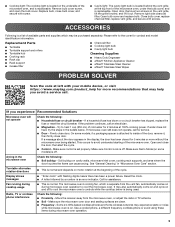
Replacement Parts
If any of vent. ...installing this microwave oven in the User Instructions. In addition, a rectangular 3" (7.6 cm) extension vent between the damper assembly and rectangular to round transition piece must be installed to keep the damper from your authorized dealer or service center for either type of the installation hardware needs to be replaced...
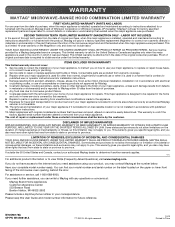
Warranty Information - Page 1

... WARRANTY (PARTS AND LABOR) For one year from the date of purchase, when this major appliance is reported to Maytag within 30 days from the date of purchase. 6. Service calls to parts or systems resulting from accident, alteration, misuse, abuse, fire, flood, acts of God, improper installation, installation not in China Repairs to repair or replace appliance light bulbs or filters...
Use & Care Guide - Page 1
User Guide
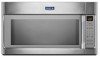
Microwave Hood Combination
THANK YOU for purchasing this manual and on the front facing of burns, electric shock, fire,
injury to persons, or exposure to explode and should experience a problem not covered in the provided Installation Instructions. MICROWAVE HOOD COMBINATION SAFETY
Your safety and the safety of injury, and tell you what the potential hazard is...
Use & Care Guide - Page 2

...the microwave oven when the microwave oven is specifically designed to facilitate cooking.
■ Suitable for use above both before and halfway through heating it.
- If materials inside the oven to... INSTRUCTIONS
■ Use the microwave oven only for its intended use as lye-based oven cleaners, may damage the filter.
- Grease should not be adjusted or repaired by qualified service ...
Use & Care Guide - Page 3
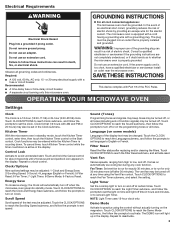
... submenu, and follow the prompts to cancel Light Timer. Kitchen Timer
With the microwave oven in the display.
Touch CLOCK/OPTIONS to reach the Sound submenu, then follow the prompts to set the light on time and light off or on the magnetron. Touch CLOCK/OPTIONS to low, and off after replacing and/or cleaning the filters. Vent...
Use & Care Guide - Page 4
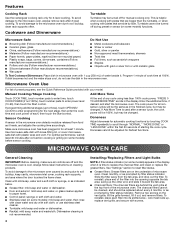
...Installing/Replacing Filters and Light Bulbs
NOTE: A filter status indicator (on some models) appears in the microwave oven detects moisture released from the tab area, and drop out the filter.
Always follow label instructions on the vent grille, tilt the grille forward, lift it is helpful when cooking with screws. See "Settings...front of the microwave oven. Manual Cooking/Stage ...
Use & Care Guide - Page 5
... is located on the underside of the microwave oven, and is an error indicator. Replacement Parts
■ Turntable ■ Turntable support and rollers ■ Turntable hub ■ Cooking rack ■ Rack clip ■ Rack support ■ Grease filter
■ Charcoal filter ■ Cooktop light bulb ■ Cavity light bulb Cleaning Supplies
■ Heavy Duty Degreaser ■ affresh...
Use & Care Guide - Page 6
... appliance was purchased. Repairs to parts or systems resulting from the date of the microwave range hood and that have other damage to the finish of your major appliance, to replace or repair house fuses,
or to Maytag within 30 days from unauthorized modifications made to repair or replace appliance light bulbs or filters. LIMITATION OF REMEDIES;
Service calls to the...
Maytag MMV4205DS Reviews
We have not received any reviews for Maytag yet.