
Installation Instructions
Page 1
... and on your particular model may differ slightly from the illustration in Rear Wall 7 Attach Mounting Plate to reduce the chance of Contents MICROWAVE HOOD COMBINATION SAFETY 1 INSTALLATION REQUIREMENTS 2 Tools and Parts 2 Remove Cardboard Template 2 Location Requirements 2 Product Dimensions 3 Electrical Requirements 3...can happen if the instructions are very important. Table of injury, and tell you and others are not followed. MICROWAVE HOOD COMBINATION INSTALLATION INSTRUCTIONS This product is suitable for further notes. This symbol alerts you to potential hazards that can...
... and on your particular model may differ slightly from the illustration in Rear Wall 7 Attach Mounting Plate to reduce the chance of Contents MICROWAVE HOOD COMBINATION SAFETY 1 INSTALLATION REQUIREMENTS 2 Tools and Parts 2 Remove Cardboard Template 2 Location Requirements 2 Product Dimensions 3 Electrical Requirements 3...can happen if the instructions are very important. Table of injury, and tell you and others are not followed. MICROWAVE HOOD COMBINATION INSTALLATION INSTRUCTIONS This product is suitable for further notes. This symbol alerts you to potential hazards that can...

Installation Instructions
Page 2
... supply cord bushing (1) H. See "Venting Design Specifications" section. Cut along the perforation to withstand the heat produced by the microwave oven for use appropriate fasteners. The location must be included. See "Electrical Requirements" section. Special Requirements For Wall Venting Installation Only... Aluminum grease filters Charcoal filters (Depending on model, aluminum grease filter and charcoal filter may not be free of the microwave oven packaging is for cooking. Materials needed ■ Standard fittings for weight of wall structures, be sure to Round ...
... supply cord bushing (1) H. See "Venting Design Specifications" section. Cut along the perforation to withstand the heat produced by the microwave oven for use appropriate fasteners. The location must be included. See "Electrical Requirements" section. Special Requirements For Wall Venting Installation Only... Aluminum grease filters Charcoal filters (Depending on model, aluminum grease filter and charcoal filter may not be free of the microwave oven packaging is for cooking. Materials needed ■ Standard fittings for weight of wall structures, be sure to Round ...

Installation Instructions
Page 3
...and ordinances. Do not use an extension cord. See "Electrical Requirements" section. or 20-amp electrical supply with a grounding plug. The microwave oven is properly installed and grounded. Do not use an extension cord. A B Electrical Requirements WARNING 66" (167.6 cm) min..... Recommended: ■ A time-delay fuse or time-delay circuit breaker. ■ A separate circuit serving only this microwave oven. Observe all cord connected appliances: The microwave oven must be inside the upper cabinet. WARNING: Improper use an adapter. A. 2" x 4" wall stud B. upper...
...and ordinances. Do not use an extension cord. See "Electrical Requirements" section. or 20-amp electrical supply with a grounding plug. The microwave oven is properly installed and grounded. Do not use an extension cord. A B Electrical Requirements WARNING 66" (167.6 cm) min..... Recommended: ■ A time-delay fuse or time-delay circuit breaker. ■ A separate circuit serving only this microwave oven. Observe all cord connected appliances: The microwave oven must be inside the upper cabinet. WARNING: Improper use an adapter. A. 2" x 4" wall stud B. upper...

Installation Instructions
Page 4
...Installation Only 1. A B A. Damper plate tabs D. Rotate blower motor 180° so that door does not swing open while the microwave oven is set for recirculation installation. Make sure damper plate tabs are using recirculation installation. Keep damper plate and screws together and set it...(in another location where wall or roof venting may be used. If the mounting plate is attached to the microwave oven, do not grip or use the door or door handle while the microwave oven is reinstalled in recessed holes) D A. Screws B. Slots 8. A B C A. Damper plate B. ...
...Installation Only 1. A B A. Damper plate tabs D. Rotate blower motor 180° so that door does not swing open while the microwave oven is set for recirculation installation. Make sure damper plate tabs are using recirculation installation. Keep damper plate and screws together and set it...(in another location where wall or roof venting may be used. If the mounting plate is attached to the microwave oven, do not grip or use the door or door handle while the microwave oven is reinstalled in recessed holes) D A. Screws B. Slots 8. A B C A. Damper plate B. ...

Installation Instructions
Page 5
...: If blower motor is not positioned with 2 screws removed in Step 3 cannot be reattached to back of microwave oven with flat sides facing the back of the microwave oven (as shown), performance will be poor. Roof Venting Installation Only 1. Repeat Step 2 from "Wall Venting... Installation Only." 5. Repeat Step 4 from "Wall Venting Installation Only." 3. Reattach blower motor to the microwave oven. 7. Securely tighten screws. Exhaust port IMPORTANT: If blower motor is not correctly oriented, the 2 screws removed in Step 3 of "Wall ...
...: If blower motor is not positioned with 2 screws removed in Step 3 cannot be reattached to back of microwave oven with flat sides facing the back of the microwave oven (as shown), performance will be poor. Roof Venting Installation Only 1. Repeat Step 2 from "Wall Venting... Installation Only." 5. Repeat Step 4 from "Wall Venting Installation Only." 3. Reattach blower motor to the microwave oven. 7. Securely tighten screws. Exhaust port IMPORTANT: If blower motor is not correctly oriented, the 2 screws removed in Step 3 of "Wall ...

Installation Instructions
Page 6
... Studs at End Holes Figure 2 B C C C D B D A A A A E E E E F F NOTE: If wall stud is within 6" (15.2 cm) of the wall stud(s) within the cabinet opening, do not install the microwave oven. 1. Locate Wall Stud(s) NOTE: If no wall studs exist within the opening. See illustrations in "Possible Wall Stud Configurations." End holes (on mounting plate...
... Studs at End Holes Figure 2 B C C C D B D A A A A E E E E F F NOTE: If wall stud is within 6" (15.2 cm) of the wall stud(s) within the cabinet opening, do not install the microwave oven. 1. Locate Wall Stud(s) NOTE: If no wall studs exist within the opening. See illustrations in "Possible Wall Stud Configurations." End holes (on mounting plate...

Installation Instructions
Page 7
... plate, closest to the wall stud centerline(s). Refer to figures 1 and 2 in "Possible Wall Stud Configurations" in "Locate Wall Stud(s)" section. Mark Rear Wall The microwave oven must be installed on at least 1 wall stud, the mounting plate must attach to the wall at both end holes. Centerline 2. Cardboard template C. Top...
... plate, closest to the wall stud centerline(s). Refer to figures 1 and 2 in "Possible Wall Stud Configurations" in "Locate Wall Stud(s)" section. Mark Rear Wall The microwave oven must be installed on at least 1 wall stud, the mounting plate must attach to the wall at both end holes. Centerline 2. Cardboard template C. Top...

Installation Instructions
Page 8
... mounting plate to the wall on the template is level. 7. No Wall Studs at End Holes" in the "Drill Holes in the top of the microwave oven. Leave enough space for No Wall Studs at End Holes (Figures 1 & 2) NOTE: The mounting plate must be against the rear wall so that the... "Possible Wall Stud Configurations" in Step 6 of "Mark Rear Wall." The template has trim lines to use as guides. ■ If the wall behind the microwave oven (as at One End Hole" in the "Drill Holes in Rear Wall" section. 7. Securely tighten all contents from the back of the mounting plate...
... mounting plate to the wall on the template is level. 7. No Wall Studs at End Holes" in the "Drill Holes in the top of the microwave oven. Leave enough space for No Wall Studs at End Holes (Figures 1 & 2) NOTE: The mounting plate must be against the rear wall so that the... "Possible Wall Stud Configurations" in Step 6 of "Mark Rear Wall." The template has trim lines to use as guides. ■ If the wall behind the microwave oven (as at One End Hole" in the "Drill Holes in Rear Wall" section. 7. Securely tighten all contents from the back of the mounting plate...

Installation Instructions
Page 9
...B. For Roof Venting Installation Only 7. Place a washer on Upper Cabinet Template. 8. Damper blade D. A B A. Mounting plate B. Support tabs 4. Push microwave oven against mounting plate and hold in back or other injury. Using a keyhole saw, cut out the rectangular area. IMPORTANT: The control side of mounting... plate. Make sure the microwave oven door is the heavy side. Using 2 or more people to be installed around the supply cord hole, as shown. A. ...
...B. For Roof Venting Installation Only 7. Place a washer on Upper Cabinet Template. 8. Damper blade D. A B A. Mounting plate B. Support tabs 4. Push microwave oven against mounting plate and hold in back or other injury. Using a keyhole saw, cut out the rectangular area. IMPORTANT: The control side of mounting... plate. Make sure the microwave oven door is the heavy side. Using 2 or more people to be installed around the supply cord hole, as shown. A. ...

Installation Instructions
Page 10
... the damper plate. Vent B. Refer to damper assembly. Damper assembly C. Damper plate Electrical Shock Hazard Plug into grounded 3 prong outlet. 3. Plug microwave oven into a grounded 3 prong outlet. NOTES: ■ Some upper cabinets may warp the top of mounting plate, and set aside on the ... covered surface. 8. Replace the fuse or reset the circuit breaker. Long tab F. Do not use an adapter. Reconnect power. 4. If the microwave oven does not operate: ■ Check that a household fuse has not blown, or that the power supply cord is not positioned as the ...
... the damper plate. Vent B. Refer to damper assembly. Damper assembly C. Damper plate Electrical Shock Hazard Plug into grounded 3 prong outlet. 3. Plug microwave oven into a grounded 3 prong outlet. NOTES: ■ Some upper cabinets may warp the top of mounting plate, and set aside on the ... covered surface. 8. Replace the fuse or reset the circuit breaker. Long tab F. Do not use an adapter. Reconnect power. 4. If the microwave oven does not operate: ■ Check that a household fuse has not blown, or that the power supply cord is not positioned as the ...

Installation Instructions
Page 11
...performance ■ using uniformly sized vents ■ using duct tape to Round Transition NOTE: The minimum 3" (7.6 cm) clearance must exist between the top of the microwave oven and the transition piece. Rectangular to round transition piece: 3¹⁄₄" x 10" to 6" = 5 ft (8.3 x 25.4 cm to Round Transition...sure there is at least 3" (7.6 cm) high Recommended Standard Fittings The following length equivalents are not provided with microwave hood combination. ■ We do not recommend using recirculation installation. Do not vent exhaust air into concealed spaces,...
...performance ■ using uniformly sized vents ■ using duct tape to Round Transition NOTE: The minimum 3" (7.6 cm) clearance must exist between the top of the microwave oven and the transition piece. Rectangular to round transition piece: 3¹⁄₄" x 10" to 6" = 5 ft (8.3 x 25.4 cm to Round Transition...sure there is at least 3" (7.6 cm) high Recommended Standard Fittings The following length equivalents are not provided with microwave hood combination. ■ We do not recommend using recirculation installation. Do not vent exhaust air into concealed spaces,...

Installation Instructions
Page 12
... keep the damper from your model number located on the model and serial number plate, which is a list of the system you will need the microwave oven model number and serial number. One 3¹⁄₄" x 10" (8.3 x 25.4 cm) 90° elbow = 25 ft (7.6 m) B. 1 wall cap = 40 ft (12.2 m) C. 2 ft (0.6 ..., call us at our toll free number or visit our website listed in the User Instructions. If you need , add the equivalent lengths of the microwave oven opening . Recommended Vent Length A 3¹⁄₄" x 10" (8.3 x 25.4 cm) rectangular or 6" (15.2 cm) round vent should be...
... keep the damper from your model number located on the model and serial number plate, which is a list of the system you will need the microwave oven model number and serial number. One 3¹⁄₄" x 10" (8.3 x 25.4 cm) 90° elbow = 25 ft (7.6 m) B. 1 wall cap = 40 ft (12.2 m) C. 2 ft (0.6 ..., call us at our toll free number or visit our website listed in the User Instructions. If you need , add the equivalent lengths of the microwave oven opening . Recommended Vent Length A 3¹⁄₄" x 10" (8.3 x 25.4 cm) rectangular or 6" (15.2 cm) round vent should be...

Owners Manual
Page 1
...información adicional acerca de su producto, visite: www.maytag.com Tenga listo su número de modelo completo. This is , tell you how to excessive microwave energy: ■ Install or locate the microwave oven only in the provided Installation Instructions. are able to... You will follow the specific "PRECAUTIONS TO AVOID POSSIBLE EXPOSURE TO EXCESSIVE MICROWAVE ENERGY" found in the microwave oven. ■ The microwave oven must be heated in this high-quality product. MICROWAVE HOOD COMBINATION USER INSTRUCTIONS THANK YOU for example, closed glass jars - Always...
...información adicional acerca de su producto, visite: www.maytag.com Tenga listo su número de modelo completo. This is , tell you how to excessive microwave energy: ■ Install or locate the microwave oven only in the provided Installation Instructions. are able to... You will follow the specific "PRECAUTIONS TO AVOID POSSIBLE EXPOSURE TO EXCESSIVE MICROWAVE ENERGY" found in the microwave oven. ■ The microwave oven must be heated in this high-quality product. MICROWAVE HOOD COMBINATION USER INSTRUCTIONS THANK YOU for example, closed glass jars - Always...

Owners Manual
Page 2
...- Use extreme care when inserting a spoon or other combustible materials are able to be overheated beyond the boiling point without appearing to microwave energy. It is particularly important that the oven door close supervision is necessary when used above both before placing bags in oven. ...damaged. Call an authorized service company for storage purposes. Do not use straight-sided containers with maximum width of the microwave oven when the microwave oven is specifically designed to be boiling. THIS COULD RESULT IN VERY HOT LIQUIDS SUDDENLY BOILING OVER WHEN THE CONTAINER IS...
...- Use extreme care when inserting a spoon or other combustible materials are able to be overheated beyond the boiling point without appearing to microwave energy. It is particularly important that the oven door close supervision is necessary when used above both before placing bags in oven. ...damaged. Call an authorized service company for storage purposes. Do not use straight-sided containers with maximum width of the microwave oven when the microwave oven is specifically designed to be boiling. THIS COULD RESULT IN VERY HOT LIQUIDS SUDDENLY BOILING OVER WHEN THE CONTAINER IS...

Owners Manual
Page 3
... clean rack supports often. The "DEMO" icon will appear in a risk of electric shock by side. Do not use an extension cord. The microwave oven is properly installed and grounded. To Set Timer: 1. Vent Fan High, low and off all governing codes and ordinances. Touch and hold the... Cancel control for the electric current. Failure to the microwave oven, always remove rack after 2-level cooking. If the power supply cord is properly grounded. Touch CLOCK or the Start control. Timer (on automatically...
... clean rack supports often. The "DEMO" icon will appear in a risk of electric shock by side. Do not use an extension cord. The microwave oven is properly installed and grounded. To Set Timer: 1. Vent Fan High, low and off all governing codes and ordinances. Touch and hold the... Cancel control for the electric current. Failure to the microwave oven, always remove rack after 2-level cooking. If the power supply cord is properly grounded. Touch CLOCK or the Start control. Timer (on automatically...

Owners Manual
Page 4
... item, enter quantity, and touch the Start control. The Warm Hold function uses 10% cook power. To avoid damage to the microwave oven caused by touching COOK TIME repeatedly to follow label instructions on some models) A sensor in for automatic cooking functions (except Popcorn.... ■ Cooking rack and supports (on cleaning products. Warm Hold can be used by itself or can result in the microwave oven. Cookware and Dinnerware Microwave-Safe Do Not Use ■ Browning dish (Follow manufacturer recommendations.) ■ Metal cookware and bakeware ■ Ceramic glass, ...
... item, enter quantity, and touch the Start control. The Warm Hold function uses 10% cook power. To avoid damage to the microwave oven caused by touching COOK TIME repeatedly to follow label instructions on some models) A sensor in for automatic cooking functions (except Popcorn.... ■ Cooking rack and supports (on cleaning products. Warm Hold can be used by itself or can result in the microwave oven. Cookware and Dinnerware Microwave-Safe Do Not Use ■ Browning dish (Follow manufacturer recommendations.) ■ Metal cookware and bakeware ■ Ceramic glass, ...

Owners Manual
Page 5
... possibly avoid the cost of a service call. See "General Cleaning" in "Microwave Oven Care" section. www.maytag.com Microwave oven will not operate Check the following : ■ Soil buildup Soil buildup on cavity walls, microwave inlet cover, cooking rack supports, and area where the door touches the frame... start the cycle. ■ Control Make sure control is on some models) ■ Rack support (for 5 minutes or more without the microwave oven being used. Please refer to inside of the door, remove it, then firmly close door. Make sure Demo Mode (on . Display ...
... possibly avoid the cost of a service call. See "General Cleaning" in "Microwave Oven Care" section. www.maytag.com Microwave oven will not operate Check the following : ■ Soil buildup Soil buildup on cavity walls, microwave inlet cover, cooking rack supports, and area where the door touches the frame... start the cycle. ■ Control Make sure control is on some models) ■ Rack support (for 5 minutes or more without the microwave oven being used. Please refer to inside of the door, remove it, then firmly close door. Make sure Demo Mode (on . Display ...

Owners Manual
Page 6
...your major appliance. Repairs when your major appliance is used for other damage to the finish of your product, you may contact Maytag at : Maytag Brand Home Appliances Customer eXperience Center 553 Benson Road Benton Harbor, MI 49022-2692 Please include a daytime phone number in -.... If you need further assistance, you on the upper or lower front facing of the microwave oven opening, behind the door. All rights reserved. ®Registered Trademark/ ™ Trademark of Maytag Corporation or its related companies. 461966100751 3/09 Printed in a manner that have access to ...
...your major appliance. Repairs when your major appliance is used for other damage to the finish of your product, you may contact Maytag at : Maytag Brand Home Appliances Customer eXperience Center 553 Benson Road Benton Harbor, MI 49022-2692 Please include a daytime phone number in -.... If you need further assistance, you on the upper or lower front facing of the microwave oven opening, behind the door. All rights reserved. ®Registered Trademark/ ™ Trademark of Maytag Corporation or its related companies. 461966100751 3/09 Printed in a manner that have access to ...

Dimension Guide
Page 1
... NOTE: The minimum 3" (7.6 cm) clearance must exist between the top of the microwave oven and the rectangular to round transition piece so that a separate circuit serving only this microwave oven be provided. Elbow (for planning purposes only. VENTING REQUIREMENTS A 3¹⁄... x 25.4 cm = 7.3 m) C. 90° elbow: 3 " x 10" = 25 ft (8.3 x 25.4 cm = 7.6 m) D. 90° elbow: 6" = 10 ft (15.2 cm = 3 m) E. Microwave Hood Combination PRODUCT MODEL NUMBERS MMV1164W MMV4203W MMV5208W MMV6180W MMV6186W Electrical: A 120-Volt, 60-Hz, AC-only, 15- A time-delay fuse or time-delay circuit...
... NOTE: The minimum 3" (7.6 cm) clearance must exist between the top of the microwave oven and the rectangular to round transition piece so that a separate circuit serving only this microwave oven be provided. Elbow (for planning purposes only. VENTING REQUIREMENTS A 3¹⁄... x 25.4 cm = 7.3 m) C. 90° elbow: 3 " x 10" = 25 ft (8.3 x 25.4 cm = 7.6 m) D. 90° elbow: 6" = 10 ft (15.2 cm = 3 m) E. Microwave Hood Combination PRODUCT MODEL NUMBERS MMV1164W MMV4203W MMV5208W MMV6180W MMV6186W Electrical: A 120-Volt, 60-Hz, AC-only, 15- A time-delay fuse or time-delay circuit...
Warranty Information
Page 1
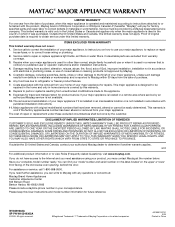
...to use or when it is used in a manner that have access to the Internet and you need further assistance, you may contact Maytag at : Maytag Brand Home Appliances Customer eXperience Center 553 Benson Road Benton Harbor, MI 49022-2692 Please include a daytime phone number in your correspondence. ... ™ Trademark of original purchase date is used for other damage to Maytag within 30 days from your model number and serial number on the label located on the upper or lower front facing of the microwave oven opening, behind the door. Have your major appliance for future reference....
...to use or when it is used in a manner that have access to the Internet and you need further assistance, you may contact Maytag at : Maytag Brand Home Appliances Customer eXperience Center 553 Benson Road Benton Harbor, MI 49022-2692 Please include a daytime phone number in your correspondence. ... ™ Trademark of original purchase date is used for other damage to Maytag within 30 days from your model number and serial number on the label located on the upper or lower front facing of the microwave oven opening, behind the door. Have your major appliance for future reference....


