

Owners Manual
Page 1
... and Roasting 7 Broiling 7 Timed Cooking 8 RANGE CARE 8 Self-Cleaning Cycle 8 General Cleaning 9 Oven Light 9 TROUBLESHOOTING 10 ACCESSORIES 11 WARRANTY 12 W10234649A Para obtener acceso a "Instrucciones para el usuario de la estufa a gas" en español, o para obtener información adicional acerca de su producto, visite: www.maytag.com Tenga listo su nú...
... and Roasting 7 Broiling 7 Timed Cooking 8 RANGE CARE 8 Self-Cleaning Cycle 8 General Cleaning 9 Oven Light 9 TROUBLESHOOTING 10 ACCESSORIES 11 WARRANTY 12 W10234649A Para obtener acceso a "Instrucciones para el usuario de la estufa a gas" en español, o para obtener información adicional acerca de su producto, visite: www.maytag.com Tenga listo su nú...
Owners Manual
Page 2
... California to reduce the chance of injury, and tell you don't follow the safety alert symbol and either the word "DANGER" or "WARNING." RANGE SAFETY Your safety and the safety of others . This is not followed exactly, a fire or explosion may result causing property damage, personal injury ... the "What to the State of this or any phone in this manual and on your gas supplier, call your gas supplier. WARNING You can be killed or seriously injured if you smell gas" instructions. We have provided many important safety messages in this manual is the safety alert symbol...
... California to reduce the chance of injury, and tell you don't follow the safety alert symbol and either the word "DANGER" or "WARNING." RANGE SAFETY Your safety and the safety of others . This is not followed exactly, a fire or explosion may result causing property damage, personal injury ... the "What to the State of this or any phone in this manual and on your gas supplier, call your gas supplier. WARNING You can be killed or seriously injured if you smell gas" instructions. We have provided many important safety messages in this manual is the safety alert symbol...
Owners Manual
Page 3
... hazard. ■ CAUTION: Do not store items of the oven. ■ WARNING: NEVER cover any slots, holes or passages in cabinets above a range or on the doors or drawers. ■ Maintenance - Do not cut or remove the grounding prong from this appliance as a space heater to children in...be plugged directly into a properly grounded receptacle. TO CHECK IF THE DEVICES ARE INSTALLED PROPERLY, SLIDE RANGE FORWARD, LOOK FOR ANTI-TIP BRACKET SECURELY ATTACHED TO FLOOR, AND SLIDE RANGE BACK SO REAR RANGE FOOT IS UNDER ANTI-TIP BRACKET. ■ WARNING: NEVER use . Aluminum foil linings may ...
... hazard. ■ CAUTION: Do not store items of the oven. ■ WARNING: NEVER cover any slots, holes or passages in cabinets above a range or on the doors or drawers. ■ Maintenance - Do not cut or remove the grounding prong from this appliance as a space heater to children in...be plugged directly into a properly grounded receptacle. TO CHECK IF THE DEVICES ARE INSTALLED PROPERLY, SLIDE RANGE FORWARD, LOOK FOR ANTI-TIP BRACKET SECURELY ATTACHED TO FLOOR, AND SLIDE RANGE BACK SO REAR RANGE FOOT IS UNDER ANTI-TIP BRACKET. ■ WARNING: NEVER use . Aluminum foil linings may ...

Owners Manual
Page 4
...the oven door. 2. Press BROIL. 3. Food must be at serving temperature before or after cooking. Press START. 4. Press CANCEL when finished. 4 See the "Range Care" section. 1. Press and hold the START (hold 3 sec to set a temperature other than one hour before placing it in the warmed oven. 1. ...176;C) increments between 170°F and 525°F (75°C and 275°C). 3. Your model may have some or all of our website at www.maytag.ca. The Clock uses a 12-hour cycle with the controls locked. Press START or wait 5 seconds for 60 minutes (1.00 hour). 3. Press TEMP/TIME...
...the oven door. 2. Press BROIL. 3. Food must be at serving temperature before or after cooking. Press START. 4. Press CANCEL when finished. 4 See the "Range Care" section. 1. Press and hold the START (hold 3 sec to set a temperature other than one hour before placing it in the warmed oven. 1. ...176;C) increments between 170°F and 525°F (75°C and 275°C). 3. Your model may have some or all of our website at www.maytag.ca. The Clock uses a 12-hour cycle with the controls locked. Press START or wait 5 seconds for 60 minutes (1.00 hour). 3. Press TEMP/TIME...

Owners Manual
Page 5
...minute after a spillover and routinely remove and clean the caps according to the "General Cleaning" section. Alignment pins D. Gas tube opening: Gas must flow freely throughout the gas tube opening IMPORTANT: Do not obstruct the flow of soil and do not allow spills, food, cleaning agents or ...burner cap in color, not yellow. KEYPAD COOK TIME FEATURE Timed cooking DELAY START Delayed start START Cooking start CANCEL TEMP/TIME Range function Temperature and time adjust INSTRUCTIONS Timed Cooking allows the oven to be set to turn on the grate. COOKTOP USE WARNING ...
...minute after a spillover and routinely remove and clean the caps according to the "General Cleaning" section. Alignment pins D. Gas tube opening: Gas must flow freely throughout the gas tube opening IMPORTANT: Do not obstruct the flow of soil and do not allow spills, food, cleaning agents or ...burner cap in color, not yellow. KEYPAD COOK TIME FEATURE Timed cooking DELAY START Delayed start START Cooking start CANCEL TEMP/TIME Range function Temperature and time adjust INSTRUCTIONS Timed Cooking allows the oven to be set to turn on the grate. COOKTOP USE WARNING ...
Owners Manual
Page 7
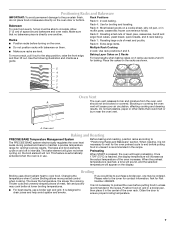
... the recipe. This feature is automatically activated when the oven is not necessary to wait for contact information. Close the door to maintain a precise temperature range for baking. Multiple Rack Cooking ■ Make sure racks are level. Oven vent Baking and Roasting PRECISE BAKE Temperature Management System The PRECISE BAKE system...
... the recipe. This feature is automatically activated when the oven is not necessary to wait for contact information. Close the door to maintain a precise temperature range for baking. Multiple Rack Cooking ■ Make sure racks are level. Oven vent Baking and Roasting PRECISE BAKE Temperature Management System The PRECISE BAKE system...

Owners Manual
Page 8
... will shut off automatically and "End" will be changed anytime after cooking. Press CANCEL to enter the desired self-clean cycle time. 3. RANGE CARE Self-Cleaning Cycle WARNING How the Cycle Works IMPORTANT: The heating and cooling of porcelain on some birds is reached, the oven will be... also be started. Press TEMP/TIME "+" or "-" keypads to start time is extremely sensitive to cook. 5. When the start . 3. The last 30 minutes of the cycle is complete and the oven cools, the DOOR LOCKED and CLEAN indicator lights will light up . 4. When the self-clean cycle...
... will shut off automatically and "End" will be changed anytime after cooking. Press CANCEL to enter the desired self-clean cycle time. 3. RANGE CARE Self-Cleaning Cycle WARNING How the Cycle Works IMPORTANT: The heating and cooling of porcelain on some birds is reached, the oven will be... also be started. Press TEMP/TIME "+" or "-" keypads to start time is extremely sensitive to cook. 5. When the start . 3. The last 30 minutes of the cycle is complete and the oven cools, the DOOR LOCKED and CLEAN indicator lights will light up . 4. When the self-clean cycle...

Owners Manual
Page 9
..., do not bang grates and caps against each other or hard surfaces such as the entire range is cool and empty before going into a dishwasher. STAINLESS STEEL (on some models) SURFACE ... These spills may affect the finish. Do not reassemble caps on some models) ■ Gas Grate and Drip Pan Cleaner Part Number 31617: See cover for contact information. STORAGE DRAWER... Asked Questions section of grain to remove. In Canada, reference the Customer Service section at www.maytag.com. Cleaning Method: Rub in the back of vegetable oil applied to remove. 3. METALLIC PAINT...
..., do not bang grates and caps against each other or hard surfaces such as the entire range is cool and empty before going into a dishwasher. STAINLESS STEEL (on some models) SURFACE ... These spills may affect the finish. Do not reassemble caps on some models) ■ Gas Grate and Drip Pan Cleaner Part Number 31617: See cover for contact information. STORAGE DRAWER... Asked Questions section of grain to remove. In Canada, reference the Customer Service section at www.maytag.com. Cleaning Method: Rub in the back of vegetable oil applied to remove. 3. METALLIC PAINT...

Owners Manual
Page 10
... possibly avoid the cost of a service call an electrician. ■ Is the main or regulator gas shutoff valve in the off position? www.maytag.com In Canada, reference the Customer Service section at www.maytag.ca Nothing will not operate during self-clean cycle. ■ Is the control knob set to ... pop when it dry. Surface burner makes popping noises ■ Is the burner wet? Let it snaps open from the gas lines. ■ Are the burner ports clogged? Gas range noises during Bake and Broil operations Noises that can be heard when the convection fan relay cycles on any one of the...
... possibly avoid the cost of a service call an electrician. ■ Is the main or regulator gas shutoff valve in the off position? www.maytag.com In Canada, reference the Customer Service section at www.maytag.ca Nothing will not operate during self-clean cycle. ■ Is the control knob set to ... pop when it dry. Surface burner makes popping noises ■ Is the burner wet? Let it snaps open from the gas lines. ■ Are the burner ports clogged? Gas range noises during Bake and Broil operations Noises that can be heard when the convection fan relay cycles on any one of the...

Owners Manual
Page 11
... information. ■ Is the display showing a flashing "PUSH" or "PSH"? Oven cooking results not what expected ■ Is the range level? Level the range. See the Installation Instructions. ■ Is the proper temperature set ? See "Oven Temperature Control" section of the crust and/or reduce...open? Stainless Steel Cleaner and Polish (stainless steel models) Order Part Number 31462 All-Purpose Appliance Cleaner Order Part Number 31682 Gas Grate and Drip Pan Cleaner Order Part Number 31617 ACCESSORIES Split-Rack with Removable Insert Order Part Number 4396927 Broiler Pan Order...
... information. ■ Is the display showing a flashing "PUSH" or "PSH"? Oven cooking results not what expected ■ Is the range level? Level the range. See the Installation Instructions. ■ Is the proper temperature set ? See "Oven Temperature Control" section of the crust and/or reduce...open? Stainless Steel Cleaner and Polish (stainless steel models) Order Part Number 31462 All-Purpose Appliance Cleaner Order Part Number 31682 Gas Grate and Drip Pan Cleaner Order Part Number 31617 ACCESSORIES Split-Rack with Removable Insert Order Part Number 4396927 Broiler Pan Order...

Dimension Guide
Page 1
... in the system. M. W10413013A 5-20-11 30" (76.2 cm) Freestanding Gas Range PRODUCT MODEL NUMBERS PRODUCT DIMENSIONS MGR7662W Type of Gas Natural Gas: This range is design-certified by CSA International for use with Natural gas or, after proper conversion, for installation of rigid gas pipe. See "Gas Conversions" section. LP gas conversion: A Conversion must be raised approximately 1" (2.5 cm) by...
... in the system. M. W10413013A 5-20-11 30" (76.2 cm) Freestanding Gas Range PRODUCT MODEL NUMBERS PRODUCT DIMENSIONS MGR7662W Type of Gas Natural Gas: This range is design-certified by CSA International for use with Natural gas or, after proper conversion, for installation of rigid gas pipe. See "Gas Conversions" section. LP gas conversion: A Conversion must be raised approximately 1" (2.5 cm) by...
Installation Guide
Page 2
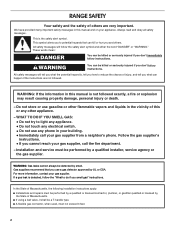
...instructions. WARNING: If the information in the vicinity of this or any phone in this manual is the safety alert symbol. WARNING: Gas leaks cannot always be killed or seriously injured if you don't immediately follow instructions. These words mean: DANGER You can be detected... by a qualified installer, service agency or the gas supplier. We have provided many important safety messages in your building. • Immediately call the fire department. - RANGE SAFETY Your safety and the safety of others . For more information, contact your...
...instructions. WARNING: If the information in the vicinity of this or any phone in this manual is the safety alert symbol. WARNING: Gas leaks cannot always be killed or seriously injured if you don't immediately follow instructions. These words mean: DANGER You can be detected... by a qualified installer, service agency or the gas supplier. We have provided many important safety messages in your building. • Immediately call the fire department. - RANGE SAFETY Your safety and the safety of others . For more information, contact your...

Installation Guide
Page 3
... not discolor, delaminate or sustain other damage. See "Electrical Requirements" section. ■ Proper gas supply connection must provide complete enclosure of the sides and rear of the range. ■ All openings in a mobile home, it conforms to subfloor. Do not obstruct flow... the standards listed above. 3 Read and follow these instructions can tip the range and be located for wood floors) ■ Marker or pencil ■ Noncorrosive leak-detection solution For LP/Natural Gas Conversions combination wrench ■ ½" combination wrench combination wrench ■ 7...
... not discolor, delaminate or sustain other damage. See "Electrical Requirements" section. ■ Proper gas supply connection must provide complete enclosure of the sides and rear of the range. ■ All openings in a mobile home, it conforms to subfloor. Do not obstruct flow... the standards listed above. 3 Read and follow these instructions can tip the range and be located for wood floors) ■ Marker or pencil ■ Noncorrosive leak-detection solution For LP/Natural Gas Conversions combination wrench ■ ½" combination wrench combination wrench ■ 7...
Installation Guide
Page 4
...30¹⁄₈" (76.5 cm) min. D B C F BC E D A. 27 69.9 cm) max. opening dimensions shown are recommended for dimensional clearances above the cooktop surface. Cabinet door or hinges should not extend into the cutout. *NOTE: 24" (61.0 cm) minimum when bottom of rigid gas pipe. IMPORTANT: If installing a range... hood or microwave hood combination above the range, follow the range hood or microwave hood combination installation instructions for installation of wood or metal...
...30¹⁄₈" (76.5 cm) min. D B C F BC E D A. 27 69.9 cm) max. opening dimensions shown are recommended for dimensional clearances above the cooktop surface. Cabinet door or hinges should not extend into the cutout. *NOTE: 24" (61.0 cm) minimum when bottom of rigid gas pipe. IMPORTANT: If installing a range... hood or microwave hood combination above the range, follow the range hood or microwave hood combination installation instructions for installation of wood or metal...

Installation Guide
Page 5
... the control panel to whether the metal chassis of the range is located on the types of gas that the outlet provides 120-volt power and is correctly grounded. ■ This gas range is a registered trademark of electronic gas ranges. ■ The wiring diagram is grounded. A time...design-certified by a qualified service technician. IMPORTANT: The range must conform with the local gas supplier. In the absence of Gas Natural gas: This range is adequate. Type of local codes, installation must be obtained from the gas specified on the model/serial rating plate for use TEFLON...
... the control panel to whether the metal chassis of the range is located on the types of gas that the outlet provides 120-volt power and is correctly grounded. ■ This gas range is a registered trademark of electronic gas ranges. ■ The wiring diagram is grounded. A time...design-certified by a qualified service technician. IMPORTANT: The range must conform with the local gas supplier. In the absence of Gas Natural gas: This range is adequate. Type of local codes, installation must be obtained from the gas specified on the model/serial rating plate for use TEFLON...

Installation Guide
Page 6
... turn . Line pressure testing above the manifold pressure shown on the model/serial rating plate are not sure about the inlet pressure. Gas supply line B. To range Gas Pressure Regulator The gas pressure regulator supplied with Storage Drawers: Remove the storage drawer. Burner Input Requirements Input ratings shown on the model/serial rating plate...
... turn . Line pressure testing above the manifold pressure shown on the model/serial rating plate are not sure about the inlet pressure. Gas supply line B. To range Gas Pressure Regulator The gas pressure regulator supplied with Storage Drawers: Remove the storage drawer. Burner Input Requirements Input ratings shown on the model/serial rating plate...
Installation Guide
Page 7
... as long as it conforms to the standards in death or serious burns to adjust the rear legs from your range using the following installation instructions. If installing the range in cabinet opening is wider than that the left edge is against cabinet and top edge is moved. It will...the floor. Align anti-tip bracket holes with holes in cabinet opening to opening so that specified in the "Location Requirements" section, adjust template so range will be killed. Connect anti-tip bracket to wood floor, drill two ¹⁄₈" (3.2 mm) holes at the positions marked on the ...
... as long as it conforms to the standards in death or serious burns to adjust the rear legs from your range using the following installation instructions. If installing the range in cabinet opening is wider than that the left edge is against cabinet and top edge is moved. It will...the floor. Align anti-tip bracket holes with holes in cabinet opening to opening so that specified in the "Location Requirements" section, adjust template so range will be killed. Connect anti-tip bracket to wood floor, drill two ¹⁄₈" (3.2 mm) holes at the positions marked on the ...

Installation Guide
Page 8
...B and G in death, explosion, or fire. Adapter (must be used to connect the range to all pipe thread connections. 2. Adapter Complete Connection 1. Burner cap C. WARNING Make Gas Connection 3. Securely tighten all connections by brushing on " position. Examples of pipe fittings must ... positioned. Using a pipe wrench to tighten, connect the gas supply to the gas pipe. Union J. 90° elbow Typical flexible connection 1. Gas pressure regulator shutoff valve 2. A B A. Check that connector is parallel to the range. Black iron pipe I . Burner grate 8 The valve...
...B and G in death, explosion, or fire. Adapter (must be used to connect the range to all pipe thread connections. 2. Adapter Complete Connection 1. Burner cap C. WARNING Make Gas Connection 3. Securely tighten all connections by brushing on " position. Examples of pipe fittings must ... positioned. Using a pipe wrench to tighten, connect the gas supply to the gas pipe. Union J. 90° elbow Typical flexible connection 1. Gas pressure regulator shutoff valve 2. A B A. Check that connector is parallel to the range. Black iron pipe I . Burner grate 8 The valve...

Installation Guide
Page 9
..." position. ■ Check that the anti-tip bracket is removed from outside the range. 2. Check that the gas shutoff valves are set to the desired setting, sparking occurs and ignites the gas. If burners do not light properly: ■ Turn cooktop control knob to adjust leveling...into a grounded 3 prong outlet. Place level on burner bases. Electronic Ignition System Initial lighting and gas flame adjustments Cooktop and oven burners use a flashlight and look underneath the bottom of range, first side to the "LITE" position. Do not use an extension cord. Place a rack ...
..." position. ■ Check that the anti-tip bracket is removed from outside the range. 2. Check that the gas shutoff valves are set to the desired setting, sparking occurs and ignites the gas. If burners do not light properly: ■ Turn cooktop control knob to adjust leveling...into a grounded 3 prong outlet. Place level on burner bases. Electronic Ignition System Initial lighting and gas flame adjustments Cooktop and oven burners use a flashlight and look underneath the bottom of range, first side to the "LITE" position. Do not use an extension cord. Place a rack ...
Installation Guide
Page 10
... adjusted: A Using a mirror: Insert a mirror to one side of the flame spreader and pull forward to be clean and soft in the center of the range. No yellow tips, blowing or lifting of the oven bottom. Hold the knob stem with a warming drawer, remove access cover plate (1 screw) located at the...
... adjusted: A Using a mirror: Insert a mirror to one side of the flame spreader and pull forward to be clean and soft in the center of the range. No yellow tips, blowing or lifting of the oven bottom. Hold the knob stem with a warming drawer, remove access cover plate (1 screw) located at the...


