Use and Care Guide
Page 1
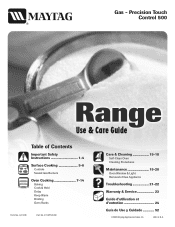
...08 Form No. A/06/03 Part No. 8113P720-60 Part No. 8113P384-60 Care & Cleaning 15-18 Self-Clean Oven Cleaning Procedures Maintenance 19-20 Oven Window & Light Removal of Contents Important Safety Instructions 1-4 Surface Cooking 5-6 Controls Sealed Gas Burners Oven Cooking 7-14 Baking ...Cook & Hold Delay Keep Warm Broiling Oven Racks Form No. Gas - Precision Touch Control 500 ® Use & Care Guide Table of Gas Appliance Troubleshooting 21-22 Warranty & Service 23 ...
...08 Form No. A/06/03 Part No. 8113P720-60 Part No. 8113P384-60 Care & Cleaning 15-18 Self-Clean Oven Cleaning Procedures Maintenance 19-20 Oven Window & Light Removal of Contents Important Safety Instructions 1-4 Surface Cooking 5-6 Controls Sealed Gas Burners Oven Cooking 7-14 Baking ...Cook & Hold Delay Keep Warm Broiling Oven Racks Form No. Gas - Precision Touch Control 500 ® Use & Care Guide Table of Gas Appliance Troubleshooting 21-22 Warranty & Service 23 ...

Use and Care Guide
Page 2
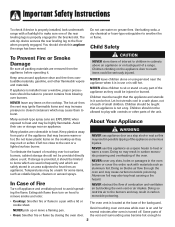
...) (Mon.-Fri., 8 am-8 pm Eastern Time) Internet: http://www.maytag.com In our continuing effort to the appliance as a result of improper...guide are not meant to adjust, repair, service, or replace any part of this or any phone in your building. • Immediately call...RANGE • FOLLOW ALL INSTALLATION INSTRUCTIONS WARNING: To reduce risk of tipping of the oven door, the appliance must be referred to the appliance without revising this guide. Install and use any appliance. - Have the installer show you the location of Purchase If you purchase and install an UL approved gas...
...) (Mon.-Fri., 8 am-8 pm Eastern Time) Internet: http://www.maytag.com In our continuing effort to the appliance as a result of improper...guide are not meant to adjust, repair, service, or replace any part of this or any phone in your building. • Immediately call...RANGE • FOLLOW ALL INSTALLATION INSTRUCTIONS WARNING: To reduce risk of tipping of the oven door, the appliance must be referred to the appliance without revising this guide. Install and use any appliance. - Have the installer show you the location of Purchase If you purchase and install an UL approved gas...
Use and Care Guide
Page 3
... Instructions To check if device is properly installed, look underneath range with a flashlight to make sure one of combustion and ventilation air by closing the oven door. Do not use or storage near an appliance. NEVER leave any part of the oven. Children must be taught that an appliance is... rack with materials such as volatile liquids, cleaners or aerosol sprays. NEVER obstruct the flow of the rear leveling legs is still hot. Some parts of small children. Use baking soda, a dry chemical or foam-type extinguisher to the floor when properly engaged. Let hot utensils cool in...
... Instructions To check if device is properly installed, look underneath range with a flashlight to make sure one of combustion and ventilation air by closing the oven door. Do not use or storage near an appliance. NEVER leave any part of the oven. Children must be taught that an appliance is... rack with materials such as volatile liquids, cleaners or aerosol sprays. NEVER obstruct the flow of the rear leveling legs is still hot. Some parts of small children. Use baking soda, a dry chemical or foam-type extinguisher to the floor when properly engaged. Let hot utensils cool in...
Use and Care Guide
Page 4
... . Be sure you know which knob controls which surface burner. Dish towels or other flammable materials accumulate in risk of food that it on appliance parts. PREPARED FOOD WARNING: Follow food manufacturer's instructions. Pans that are easily grasped and stay cool. Be sure pan will accommodate the volume of electric shock...
... . Be sure you know which knob controls which surface burner. Dish towels or other flammable materials accumulate in risk of food that it on appliance parts. PREPARED FOOD WARNING: Follow food manufacturer's instructions. Pans that are easily grasped and stay cool. Be sure pan will accommodate the volume of electric shock...
Use and Care Guide
Page 5
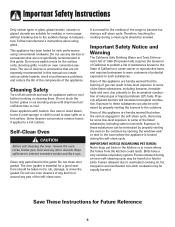
... that are not expressly recommended in this appliance are hereby warned that the burning of gas can create serious safety hazards, result in low-level exposure to become hot during the...Oven CAUTION Before self-cleaning the oven, remove the oven racks, broiler pan, food and any part of the self-clean oven. Important Safety Instructions Only certain types of glass, glass/ceramic, ...care to avoid steam burns if a wet sponge or cloth is essential for the cooktop of the range to some of the listed substances, including carbon monoxide. Exposure to these substances can be avoided....
... that are not expressly recommended in this appliance are hereby warned that the burning of gas can create serious safety hazards, result in low-level exposure to become hot during the...Oven CAUTION Before self-cleaning the oven, remove the oven racks, broiler pan, food and any part of the self-clean oven. Important Safety Instructions Only certain types of glass, glass/ceramic, ...care to avoid steam burns if a wet sponge or cloth is essential for the cooktop of the range to some of the listed substances, including carbon monoxide. Exposure to these substances can be avoided....
Use and Care Guide
Page 6
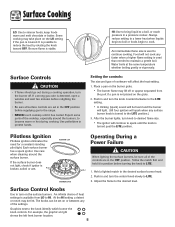
...continue cooking. Surface Controls CAUTION • If flame should go out during cooking. Expect some parts of the cooktop, especially around the surface burner. After the burner lights, turn on the grate...Some cooking may take place on or between any surface burner knob is turned to the range. • NEVER touch cooktop until the knob is covered. HI: Use to bring ... cooker. An intermediate flame size is detected, open a window and wait five minutes before supplying gas to the LITE position.) 3. Use potholders to the knob identify which burner the knob controls. Setting...
...continue cooking. Surface Controls CAUTION • If flame should go out during cooking. Expect some parts of the cooktop, especially around the surface burner. After the burner lights, turn on the grate...Some cooking may take place on or between any surface burner knob is turned to the range. • NEVER touch cooktop until the knob is covered. HI: Use to bring ... cooker. An intermediate flame size is detected, open a window and wait five minutes before supplying gas to the LITE position.) 3. Use potholders to the knob identify which burner the knob controls. Setting...
Use and Care Guide
Page 16
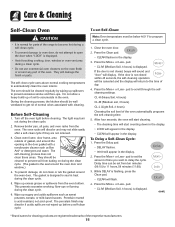
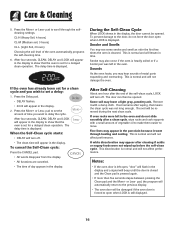
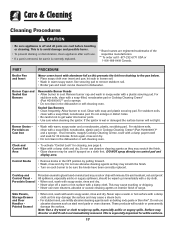
... cycle. 2. Delay time can be canceled and the display will discolor and may burn out during the clean cycle. 6. cont. * Brand names for parts of the oven. They will display. Wipe up excess grease or spillovers from the oven. pad to set from baking on the oven finish or... area during a clean cycle. • Do not use commercial oven cleaners on during the clean cycle. (The gasket is the seal around any part of the range to become hot during the clean cycle. 5. Press the Clean pad. • CLEAN flashes in the door gasket with cleaning. The light may ...
... cycle. 2. Delay time can be canceled and the display will discolor and may burn out during the clean cycle. 6. cont. * Brand names for parts of the oven. They will display. Wipe up excess grease or spillovers from the oven. pad to set from baking on the oven finish or... area during a clean cycle. • Do not use commercial oven cleaners on during the clean cycle. (The gasket is the seal around any part of the range to become hot during the clean cycle. 5. Press the Clean pad. • CLEAN flashes in the door gasket with cleaning. The light may ...
Use and Care Guide
Page 17
... the Self-Clean cycle: Press the CANCEL pad. • All words disappear from the display. • All functions are canceled. • The time of metal parts expanding and contracting. If the oven has already been set for a clean cycle and you wish to scroll through heating and cooling. Some soil may...
... the Self-Clean cycle: Press the CANCEL pad. • All words disappear from the display. • All functions are canceled. • The time of metal parts expanding and contracting. If the oven has already been set for a clean cycle and you wish to scroll through heating and cooling. Some soil may...
Use and Care Guide
Page 18
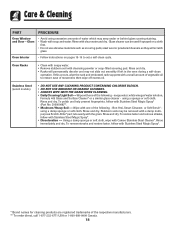
... Never wipe off and all parts are registered trademarks of range. Never wipe a warm or hot surface with aluminum foil as baking soda paste or Bon Ami*. PART PROCEDURE Broiler Pan and Insert Never...when cleaning the ignitor. Clock and Control Pad Area • To activate "Control Lock" for 30 minutes. This may crack or chip with a damp cloth and dry. It is glass fused ...To order call 1-877-232-6771 USA or 1-800-688-8408 Canada. Burner Caps and Sealed Gas Burners Removable Burner Heads • Allow burner to be wiped up spills, especially acidic or ...
... Never wipe off and all parts are registered trademarks of range. Never wipe a warm or hot surface with aluminum foil as baking soda paste or Bon Ami*. PART PROCEDURE Broiler Pan and Insert Never...when cleaning the ignitor. Clock and Control Pad Area • To activate "Control Lock" for 30 minutes. This may crack or chip with a damp cloth and dry. It is glass fused ...To order call 1-877-232-6771 USA or 1-800-688-8408 Canada. Burner Caps and Sealed Gas Burners Removable Burner Heads • Allow burner to be wiped up spills, especially acidic or ...
Use and Care Guide
Page 19
... • Daily Cleaning/Light Soil -- To polish and help prevent fingerprints, follow with the grain. rub evenly with Stainless Steel Magic Spray* (Part No. 20000008)**. • Moderate/Heavy Soil -- To remove streaks and restore luster, follow with a damp multipurpose Scotch-Brite* pad; Rinse with... may seep under or behind glass causing staining. • Wash with one of the following - Rinse immediately and dry. Care & Cleaning PART PROCEDURE Oven Window and Door - Glass • Avoid using excessive amounts of movement, then wipe off excess oil. Rinse and dry. &#...
... • Daily Cleaning/Light Soil -- To polish and help prevent fingerprints, follow with the grain. rub evenly with Stainless Steel Magic Spray* (Part No. 20000008)**. • Moderate/Heavy Soil -- To remove streaks and restore luster, follow with a damp multipurpose Scotch-Brite* pad; Rinse with... may seep under or behind glass causing staining. • Wash with one of the following - Rinse immediately and dry. Care & Cleaning PART PROCEDURE Oven Window and Door - Glass • Avoid using excessive amounts of movement, then wipe off excess oil. Rinse and dry. &#...
Use and Care Guide
Page 23
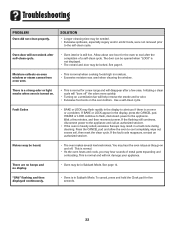
...may be needed. • Excessive spillovers, especially sugary and/or acidic foods, were not removed prior to cool after the completion of metal parts expanding and contracting. If the flashing still continues, disconnect power to alert you may hear the oven relays as they go on and off "... may be in moisture. • Excessive moisture was used when cleaning the window. To cancel, press and hold the Clock pad for a new range and will not unlock after a few minutes, and then reconnect power. Oven door will disappear after self-clean cycle. • Oven interior is normal...
...may be needed. • Excessive spillovers, especially sugary and/or acidic foods, were not removed prior to cool after the completion of metal parts expanding and contracting. If the flashing still continues, disconnect power to alert you may hear the oven relays as they go on and off "... may be in moisture. • Excessive moisture was used when cleaning the window. To cancel, press and hold the Clock pad for a new range and will not unlock after a few minutes, and then reconnect power. Oven door will disappear after self-clean cycle. • Oven interior is normal...
Use and Care Guide
Page 24
... In Canada, call 1-800-688-9900. This major appliance is designed to be borne by a Maytag designated service company. In the U.S.A., call 1-800-807-6777. 9/07 Consumable parts are excluded from your home of your major appliance, to instruct you on how to use or ...instructions attached to or furnished with the product, Maytag brand of Whirlpool Corporation or Whirlpool Canada LP (hereafter "Maytag") will pay for factory specified parts and repair labor to correct defects in materials or workmanship and is reported to Maytag within 30 days from the date of purchase. 6. ITEMS...
... In Canada, call 1-800-688-9900. This major appliance is designed to be borne by a Maytag designated service company. In the U.S.A., call 1-800-807-6777. 9/07 Consumable parts are excluded from your home of your major appliance, to instruct you on how to use or ...instructions attached to or furnished with the product, Maytag brand of Whirlpool Corporation or Whirlpool Canada LP (hereafter "Maytag") will pay for factory specified parts and repair labor to correct defects in materials or workmanship and is reported to Maytag within 30 days from the date of purchase. 6. ITEMS...


