Use and Care Manual
Page 2
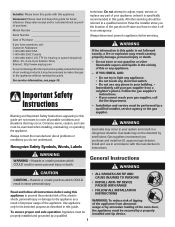
... 8 am-8 pm Eastern Time) Internet: http://www.maytag.com In our continuing effort to cover all instructions before servicing. IF YOU SMELL GAS: • Do not try to shut it is ...installed and grounded by a qualified 1 • ALL RANGES CAN TIP AND CAUSE INJURIES TO PERSONS • INSTALL ANTI-TIP DEVICE PACKED WITH RANGE • FOLLOW ALL INSTALLATION INSTRUCTIONS WARNING: To reduce ...attempt to a qualified servicer. WARNING Gas leaks may not be performed by excessive loading of the appliance. For service information, see page 19. Model Number Serial Number Date of your ...
... 8 am-8 pm Eastern Time) Internet: http://www.maytag.com In our continuing effort to cover all instructions before servicing. IF YOU SMELL GAS: • Do not try to shut it is ...installed and grounded by a qualified 1 • ALL RANGES CAN TIP AND CAUSE INJURIES TO PERSONS • INSTALL ANTI-TIP DEVICE PACKED WITH RANGE • FOLLOW ALL INSTALLATION INSTRUCTIONS WARNING: To reduce ...attempt to a qualified servicer. WARNING Gas leaks may not be performed by excessive loading of the appliance. For service information, see page 19. Model Number Serial Number Date of your ...

Use and Care Manual
Page 5
Self-Clean Oven (select models) CAUTION Before self-cleaning the oven, remove the oven racks, broiler pan, food and any part of natural gas or liquid petroleum (LP) fuels. Do not use commercial oven cleaners on during the clean cycle. (The to open . Users of this appliance... oven. Save These Instructions for a good seal. Before Self-Cleaning CAUTION • It is engaged in low-level exposure to some of the range to become hot during a clean cycle should be avoided. The oven racks will discolor and may result in this appliance are not removed. Properly ...
Self-Clean Oven (select models) CAUTION Before self-cleaning the oven, remove the oven racks, broiler pan, food and any part of natural gas or liquid petroleum (LP) fuels. Do not use commercial oven cleaners on during the clean cycle. (The to open . Users of this appliance... oven. Save These Instructions for a good seal. Before Self-Cleaning CAUTION • It is engaged in low-level exposure to some of the range to become hot during a clean cycle should be avoided. The oven racks will discolor and may result in this appliance are not removed. Properly ...

Use and Care Manual
Page 7
... commercial oven cleaner. (Do not spray surrounding surfaces.) Place in warm soapy water. Sealed Gas Burners • Clean frequently. Allow burner to loosen soil. • Wash in plastic ... affect performance. Cooktop and Control Panel - Side Panels, Storage Drawer, Lower Broiler Door (select models) and Door Handles - Do not use oven cleaners, abrasive or caustic cleaning agents on control ... scratch or permanently damage the surface. For stubborn soils, clean with a small amount of range. Do not use abrasive cleaning agents as they may appear after wiping, that means the...
... commercial oven cleaner. (Do not spray surrounding surfaces.) Place in warm soapy water. Sealed Gas Burners • Clean frequently. Allow burner to loosen soil. • Wash in plastic ... affect performance. Cooktop and Control Panel - Side Panels, Storage Drawer, Lower Broiler Door (select models) and Door Handles - Do not use oven cleaners, abrasive or caustic cleaning agents on control ... scratch or permanently damage the surface. For stubborn soils, clean with a small amount of range. Do not use abrasive cleaning agents as they may appear after wiping, that means the...
Use and Care Manual
Page 8
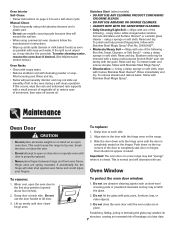
...down on the top corners of vegetable oil to the first stop position (opened about four inches). 2. Maintenance Oven Door CAUTION • Do not place excessive weight on or stand on a new range may feel "spongy" when it may weaken its structure, causing an increased risk of the... following Bon Ami, Smart Cleanser, or Soft Scrub* - Stainless Steel (select models) • DO NOT USE ANY CLEANING PRODUCT CONTAINING CHLORINE BLEACH. ...
...down on the top corners of vegetable oil to the first stop position (opened about four inches). 2. Maintenance Oven Door CAUTION • Do not place excessive weight on or stand on a new range may feel "spongy" when it may weaken its structure, causing an increased risk of the... following Bon Ami, Smart Cleanser, or Soft Scrub* - Stainless Steel (select models) • DO NOT USE ANY CLEANING PRODUCT CONTAINING CHLORINE BLEACH. ...

Use and Care Manual
Page 9
...models) CAUTION Do not store plastic, paper products, food or flammable materials in the installation instructions. Lift up the front of the drawer. 3. Leveling Legs CAUTION Be sure the anti-tip bracket secures one of the rear leveling legs to range. If the range...offers protection against spillovers, especially acidic or sugary spills, as this gas appliance for servicing, follow the procedure described in this appliance to ... FROM THE POWER CORD PLUG. For information, contact Maytag Customer Assistance at each corner of the range) until drawer is cool before touching bulb. •...
...models) CAUTION Do not store plastic, paper products, food or flammable materials in the installation instructions. Lift up the front of the drawer. 3. Leveling Legs CAUTION Be sure the anti-tip bracket secures one of the rear leveling legs to range. If the range...offers protection against spillovers, especially acidic or sugary spills, as this gas appliance for servicing, follow the procedure described in this appliance to ... FROM THE POWER CORD PLUG. For information, contact Maytag Customer Assistance at each corner of the range) until drawer is cool before touching bulb. •...

Use and Care Manual
Page 10
...sugary and/or acidic foods, were not removed prior to the self-clean cycle. Oven door will not self-clean. (select models) • Check to make sure range is securely inserted into receptacle. • Check or reset circuit breaker. See pages 5 and 14 to cool completely, wipe ...ignitor doesn't click, turn control knob OFF. Make sure oven is not broiling properly or smokes excessively. • Check oven rack positions. Allow 1-2 inches between a new oven and an old one. Moisture collects on a ventilation fan will not light if ignitor is uneven. • Burner ports may ...
...sugary and/or acidic foods, were not removed prior to the self-clean cycle. Oven door will not self-clean. (select models) • Check to make sure range is securely inserted into receptacle. • Check or reset circuit breaker. See pages 5 and 14 to cool completely, wipe ...ignitor doesn't click, turn control knob OFF. Make sure oven is not broiling properly or smokes excessively. • Check oven rack positions. Allow 1-2 inches between a new oven and an old one. Moisture collects on a ventilation fan will not light if ignitor is uneven. • Burner ports may ...
Use and Care Manual
Page 12
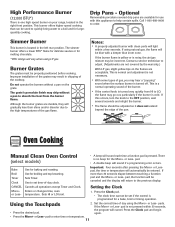
... the correct time of -day clock. pad is one high speed burner on your range, located in chipping of gas, you may go out, particularly if the burner is located in the left rear position...not necessary. • With some types of the cooktop. Oven Cooking Manual Clean Oven Control (select models) • A beep will gradually lose their shine and/or discolor due to set if the control... is programmed for broiling and top browning. If more than 30 seconds elapse between touching a function pad and the More+ or Less- Setting the Clock More+ ...
... the correct time of -day clock. pad is one high speed burner on your range, located in chipping of gas, you may go out, particularly if the burner is located in the left rear position...not necessary. • With some types of the cooktop. Oven Cooking Manual Clean Oven Control (select models) • A beep will gradually lose their shine and/or discolor due to set if the control... is programmed for broiling and top browning. If more than 30 seconds elapse between touching a function pad and the More+ or Less- Setting the Clock More+ ...

Use and Care Manual
Page 13
...is in the display during preheat, press the Bake pad twice, then press the More+ or Lesspad until the desired temperature is reached. select models) For best results, use pan designed for the oven to 15 minutes for broiling. 1. pad to 99 hours and 59 minutes (99:59)....). ** This chart is pressed once. • Press and tap the More+ or Less- Poultry Chicken Pieces Well Done Bottom (Lo Broil 450° F) 30-45 min. pad until preset temperature is displayed. 3. Setting the Controls For Broiling: (lower compartment - Place broiler pan on . • The temperature in ...
...is in the display during preheat, press the Bake pad twice, then press the More+ or Lesspad until the desired temperature is reached. select models) For best results, use pan designed for the oven to 15 minutes for broiling. 1. pad to 99 hours and 59 minutes (99:59)....). ** This chart is pressed once. • Press and tap the More+ or Less- Poultry Chicken Pieces Well Done Bottom (Lo Broil 450° F) 30-45 min. pad until preset temperature is displayed. 3. Setting the Controls For Broiling: (lower compartment - Place broiler pan on . • The temperature in ...

Use and Care Manual
Page 14
Manual Clean Oven Knob Control (select models) Oven Control (select models) Broil Bake More+ or LessTimer Cook & Hold Clean Delay Clock Keep ...Bakes for a preset time, then holds food warm for Broiling: Clock 1. Cook longer if necessary. If more than 30 seconds elapse between touching a function pad and the More+ or Less- Setting the Control for 1 hour. The clock...browning of longer cooking foods like poultry. • If you do not select HI or LO Broil within 30 seconds, the program will automatically cancel and the time of day will sound if a programming error occurs. ...
Manual Clean Oven Knob Control (select models) Oven Control (select models) Broil Bake More+ or LessTimer Cook & Hold Clean Delay Clock Keep ...Bakes for a preset time, then holds food warm for Broiling: Clock 1. Cook longer if necessary. If more than 30 seconds elapse between touching a function pad and the More+ or Less- Setting the Control for 1 hour. The clock...browning of longer cooking foods like poultry. • If you do not select HI or LO Broil within 30 seconds, the program will automatically cancel and the time of day will sound if a programming error occurs. ...

Use and Care Manual
Page 17
... start. • "BROIL" will light when either pad is active. Close oven door. 6. The lower temperature allows food to cook to set Broil: 1. Broiling (select models) To set LO broil. • HI or LO will reappear in the oven for 2-3 minutes before adding food. 5. Place food in the display. 2. Notes: •...
... start. • "BROIL" will light when either pad is active. Close oven door. 6. The lower temperature allows food to cook to set Broil: 1. Broiling (select models) To set LO broil. • HI or LO will reappear in the oven for 2-3 minutes before adding food. 5. Place food in the display. 2. Notes: •...
Use and Care Manual
Page 20
...PROVIDED HEREIN. Service calls to refrigerator or freezer product failures. 7. Repairs when your major appliance for repairs. Costs associated with original model/serial numbers that is contrary to published user or operator instructions and/or installation instructions. 4. This warranty is void if the ... wiring or plumbing. 2. Service must be repaired in the home and only in materials or workmanship and is reported to Maytag within 30 days from the date of repair or replacement under this limited warranty. Expenses for travel and transportation for factory specified parts and...
...PROVIDED HEREIN. Service calls to refrigerator or freezer product failures. 7. Repairs when your major appliance for repairs. Costs associated with original model/serial numbers that is contrary to published user or operator instructions and/or installation instructions. 4. This warranty is void if the ... wiring or plumbing. 2. Service must be repaired in the home and only in materials or workmanship and is reported to Maytag within 30 days from the date of repair or replacement under this limited warranty. Expenses for travel and transportation for factory specified parts and...


