

Use & Care Guide
Page 7
... of the rack and sliding shelf together. 4. Place the cakes on Rack 1 Center of rack 2 Side by side 3 or 4 Refer to the back wall of the oven so the front edge of the sliding shelf sits on the rack guides, located on the rack as a guide. Number of Pan(s) Position on... Position 6 6 Food Large roasts, roasted meats, or poultry Most baked goods, casseroles Baking Layer Cakes on 1 Rack Place the cakes on the sides of the oven. Pull out the rack and sliding shelf. 7 Rack Position 1 or 2 2 or 3 Multiple Rack Cooking 2-rack: Use rack positions 2 and 5 for regular baking. 2-rack (...
... of the rack and sliding shelf together. 4. Place the cakes on Rack 1 Center of rack 2 Side by side 3 or 4 Refer to the back wall of the oven so the front edge of the sliding shelf sits on the rack guides, located on the rack as a guide. Number of Pan(s) Position on... Position 6 6 Food Large roasts, roasted meats, or poultry Most baked goods, casseroles Baking Layer Cakes on 1 Rack Place the cakes on the sides of the oven. Pull out the rack and sliding shelf. 7 Rack Position 1 or 2 2 or 3 Multiple Rack Cooking 2-rack: Use rack positions 2 and 5 for regular baking. 2-rack (...
Use & Care Guide
Page 13
... for service. Darker browning of cooking time was incorrect: Double-check the recipe in the oven. Oven door was opened during cooking: Oven peeking releases oven heat and can visit our website at www.maytag.com or call us at 1-800-688-9000. In Canada, visit our website at www... for display models in the "Feature Guide" section. Self-Cleaning cycle did not Several cooking cycles between Self-Cleaning cycles or spills on oven walls and doors: Run work on all spills additional Self-Cleaning cycles. Not enough air circulation around bakeware: See the "Positioning Racks and Bakeware...
... for service. Darker browning of cooking time was incorrect: Double-check the recipe in the oven. Oven door was opened during cooking: Oven peeking releases oven heat and can visit our website at www.maytag.com or call us at 1-800-688-9000. In Canada, visit our website at www... for display models in the "Feature Guide" section. Self-Cleaning cycle did not Several cooking cycles between Self-Cleaning cycles or spills on oven walls and doors: Run work on all spills additional Self-Cleaning cycles. Not enough air circulation around bakeware: See the "Positioning Racks and Bakeware...
Installation Guide
Page 2
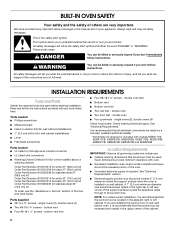
..." section. ■ Electrical supply junction box should have provided many important safety messages in this manual and on rear wall behind oven, it is installed in the right rear or left cabinet. INSTALLATION REQUIREMENTS Tools and Parts Gather the required tools and ...screwdriver ■ Four #8-18 x ³⁄₈" screws - double oven ■ Four grommets - single ovens (2), double ovens (4) ■ Two #8-18 x ³⁄₈" screws - We have been drilled in a wall cabinet. Always read and obey all electrical connections be located in the adjacent ...
..." section. ■ Electrical supply junction box should have provided many important safety messages in this manual and on rear wall behind oven, it is installed in the right rear or left cabinet. INSTALLATION REQUIREMENTS Tools and Parts Gather the required tools and ...screwdriver ■ Four #8-18 x ³⁄₈" screws - double oven ■ Four grommets - single ovens (2), double ovens (4) ■ Two #8-18 x ³⁄₈" screws - We have been drilled in a wall cabinet. Always read and obey all electrical connections be located in the adjacent ...

Installation Guide
Page 12
... supply where local codes permit a 3-wire connection. Do not push against seal area of the oven front frame when pushing the oven into the cabinet until the back surface of the front frame touches the front wall of the oven cable) using the # 8-14 x ¾" screws provided. Install junction box cover. A B C A. Insert the screws...
... supply where local codes permit a 3-wire connection. Do not push against seal area of the oven front frame when pushing the oven into the cabinet until the back surface of the front frame touches the front wall of the oven cable) using the # 8-14 x ¾" screws provided. Install junction box cover. A B C A. Insert the screws...


