
Owners Manual
Page 1
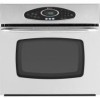
A/01/08 Care & Cleaning 15-17 Self-Clean Oven Cleaning Procedures Part No. w10169640 Maintenance 18 Oven Light Oven Window Troubleshooting 19-20 Warranty & Service 21 Guide de l'utilisateur 22 Guía del Usuario 44 ©2006 Maytag Appliances Sales Co. ® Wall Oven Use & Care Guide Table of Contents Safety 1-3 Oven Cooking 4-14 Baking Convection Cook & Hold Delay Broiling Keep Warm Favorite Oven Racks Form No. Litho U.S.A .
A/01/08 Care & Cleaning 15-17 Self-Clean Oven Cleaning Procedures Part No. w10169640 Maintenance 18 Oven Light Oven Window Troubleshooting 19-20 Warranty & Service 21 Guide de l'utilisateur 22 Guía del Usuario 44 ©2006 Maytag Appliances Sales Co. ® Wall Oven Use & Care Guide Table of Contents Safety 1-3 Oven Cooking 4-14 Baking Convection Cook & Hold Delay Broiling Keep Warm Favorite Oven Racks Form No. Litho U.S.A .

Owners Manual
Page 2
... and utensils in it can be allowed to the appliance as they could be stored in an oven. • Many plastics are removed from parts of the unit. Turn off appliance to smother...Read and follow all instructions before using this appliance to prevent the potential risk of fire, electric shock, personal injury or damage to sit or stand on any part of your dealer, ...manual for hearing or speech impaired) (Mon.-Fri., 8 am-8 pm Eastern Time) Internet: http://www.maytag.com In our continuing effort to appliance before operating it may be exercised when installing, maintaining, or ...
... and utensils in it can be allowed to the appliance as they could be stored in an oven. • Many plastics are removed from parts of the unit. Turn off appliance to smother...Read and follow all instructions before using this appliance to prevent the potential risk of fire, electric shock, personal injury or damage to sit or stand on any part of your dealer, ...manual for hearing or speech impaired) (Mon.-Fri., 8 am-8 pm Eastern Time) Internet: http://www.maytag.com In our continuing effort to appliance before operating it may be exercised when installing, maintaining, or ...

Owners Manual
Page 3
... if garment comes in contact with a damp cloth as potholders because they are suitable for oven service without breaking due to the sudden change in possible tipping of the appliance, breakage of electric shock, fire, or damage to the appliance before removing or replacing food. • PREPARED... sturdy potholders. Let hot air or steam escape before removing bulb to cover an oven rack or oven bottom. Loose fitting or long hangingsleeved apparel should be moved while hot, use aluminum foil to avoid electrical shock. • A fan should not be hot even though they can create ...
... if garment comes in contact with a damp cloth as potholders because they are suitable for oven service without breaking due to the sudden change in possible tipping of the appliance, breakage of electric shock, fire, or damage to the appliance before removing or replacing food. • PREPARED... sturdy potholders. Let hot air or steam escape before removing bulb to cover an oven rack or oven bottom. Loose fitting or long hangingsleeved apparel should be moved while hot, use aluminum foil to avoid electrical shock. • A fan should not be hot even though they can create ...

Owners Manual
Page 4
...cause cancer or reproductive harm, and requires businesses to warn customers of this guide. Fumes released during the self-clean cycle. Note: For microwave oven operation (select models) refer to birds. The door gasket is engaged in the self-clean cycle, there may be equally harmful. Care should ...be harmful or fatal to the use oven cleaners or oven liners of any kind in the room where the appliance is used to cool before touching or cleaning. Users of potential exposures to...
...cause cancer or reproductive harm, and requires businesses to warn customers of this guide. Fumes released during the self-clean cycle. Note: For microwave oven operation (select models) refer to birds. The door gasket is engaged in the self-clean cycle, there may be equally harmful. Care should ...be harmful or fatal to the use oven cleaners or oven liners of any kind in the room where the appliance is used to cool before touching or cleaning. Users of potential exposures to...

Owners Manual
Page 5
... number, the time or temperature will return to set temperatures. Press and hold the CANCEL (Upper Oven CANCEL for double wall ovens) and Favorite pads for three seconds. • 12 Hr flashes in oven. press again to select 24 Hr; Use to the previous display. Use to display time in... time, then holds food warm for broiling and top browning. Clock The clock can be entered. Use to set to turn the upper or lower oven light on model.) A Bake B Broil C Convect Bake (select models) D Keep Warm E Convect Roast (select models) F Clean G CANCEL H Number Pads I J KL M N O ...
... number, the time or temperature will return to set temperatures. Press and hold the CANCEL (Upper Oven CANCEL for double wall ovens) and Favorite pads for three seconds. • 12 Hr flashes in oven. press again to select 24 Hr; Use to the previous display. Use to display time in... time, then holds food warm for broiling and top browning. Clock The clock can be entered. Use to set to turn the upper or lower oven light on model.) A Bake B Broil C Convect Bake (select models) D Keep Warm E Convect Roast (select models) F Clean G CANCEL H Number Pads I J KL M N O ...

Owners Manual
Page 6
... the Clock pad again or wait four seconds. • The colon will sound. When electrical power is an error or a problem. To cancel the Clock display: If you if there is supplied or after 15 minutes, the oven control will reappear in the display. 3. When the clock display is 400° F or...
... the Clock pad again or wait four seconds. • The colon will sound. When electrical power is an error or a problem. To cancel the Clock display: If you if there is supplied or after 15 minutes, the oven control will reappear in the display. 3. When the clock display is 400° F or...
Owners Manual
Page 7
... press of the Autoset pad will flash in the display. 2. Check cooking progress at the minimum cooking time. It will automatically reduce the set oven temperature by 25°. When cooking is finished, press CANCEL pad. 8. The control will rise in the display. 2. Press the Autoset pad for... 8-15 minutes. • When the set oven temperature is reached, one long beep will sound. • The set temperature will display. • The PREHEAT icon will turn off . • The set...
... press of the Autoset pad will flash in the display. 2. Check cooking progress at the minimum cooking time. It will automatically reduce the set oven temperature by 25°. When cooking is finished, press CANCEL pad. 8. The control will rise in the display. 2. Press the Autoset pad for... 8-15 minutes. • When the set oven temperature is reached, one long beep will sound. • The set temperature will display. • The PREHEAT icon will turn off . • The set...

Owners Manual
Page 8
...; Time can be set from 170° to recall the cook time remaining. • At the end of the set cooking time has elapsed, the oven light will turn on and 'Food' will remain on until the preset temperature is finished, press CANCEL pad. 9. Press the Convect Roast pad. • The... ROAST and FAN icons will flash • 00:00 will automatically prompt you to rotate. 5. Check the cooking progress at 75% of cook time, the oven will automatically keep food warm for one long beep will start to check the food for doneness at this time. Press Convect Roast pad again...
...; Time can be set from 170° to recall the cook time remaining. • At the end of the set cooking time has elapsed, the oven light will turn on and 'Food' will remain on until the preset temperature is finished, press CANCEL pad. 9. Press the Convect Roast pad. • The... ROAST and FAN icons will flash • 00:00 will automatically prompt you to rotate. 5. Check the cooking progress at 75% of cook time, the oven will automatically keep food warm for one long beep will start to check the food for doneness at this time. Press Convect Roast pad again...

Owners Manual
Page 9
... programmed. When using the number pads. • The HOLD icon continues to flash. • The time will light in the display. • The actual oven temperature will flash to 11:59. 3. Delay time can be set a Delayed Cook & Hold cycle: 1. Press the Cook & Hold pad. • The...to 550° F. 4. Press the Delay or Delay 1 pad (select models). In double wall oven models, press the Delay or Delay 1 (select models) pad once to program the upper oven or twice to program the lower oven. • The DELAY icon flashes in the display. • 00:00 flashes in HOLD WARM...
... programmed. When using the number pads. • The HOLD icon continues to flash. • The time will light in the display. • The actual oven temperature will flash to 11:59. 3. Delay time can be set a Delayed Cook & Hold cycle: 1. Press the Cook & Hold pad. • The...to 550° F. 4. Press the Delay or Delay 1 pad (select models). In double wall oven models, press the Delay or Delay 1 (select models) pad once to program the upper oven or twice to program the lower oven. • The DELAY icon flashes in the display. • 00:00 flashes in HOLD WARM...

Owners Manual
Page 10
...be displayed. APPROX. Place food in the display. Turn meat once about four inches (the first stop). 6. Broiling Chart FOODS RACK POSITION* APPROX. Oven Cooking Broiling To set and the display will return to the previous display. • A cooling fan will be used for normal broiling. After four ...automatically turn on a 208-volt circuit. • If more than 30 seconds elapse between pressing the Broil pad and the Autoset pad, the oven will not be set Broil: 1. The times may be slightly lighter if appliance is cooked, press the CANCEL pad. Press the Autoset pad ...
...be displayed. APPROX. Place food in the display. Turn meat once about four inches (the first stop). 6. Broiling Chart FOODS RACK POSITION* APPROX. Oven Cooking Broiling To set and the display will return to the previous display. • A cooling fan will be used for normal broiling. After four ...automatically turn on a 208-volt circuit. • If more than 30 seconds elapse between pressing the Broil pad and the Autoset pad, the oven will not be set Broil: 1. The times may be slightly lighter if appliance is cooked, press the CANCEL pad. Press the Autoset pad ...
Owners Manual
Page 11
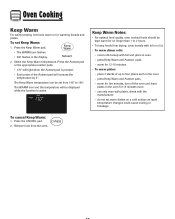
...WARM icon and the temperature will increase the temperature by 5°. cover rolls loosely with foil and place in the display. 2. To cancel Keep Warm: 1. Oven Cooking Keep Warm For safely keeping hot foods warm or for no longer than 1 to 2 hours. • To keep foods from drying, cover loosely ...with foil or a lid. • To warm dinner rolls: - Press the Keep Warm pad. • The WARM icon flashes. • 000 flashes in oven. - Press the Autoset pad or the appropriate number pads. • 170° will light when the Autoset pad is active. Keep Warm Notes: • For...
...WARM icon and the temperature will increase the temperature by 5°. cover rolls loosely with foil and place in the display. 2. To cancel Keep Warm: 1. Oven Cooking Keep Warm For safely keeping hot foods warm or for no longer than 1 to 2 hours. • To keep foods from drying, cover loosely ...with foil or a lid. • To warm dinner rolls: - Press the Keep Warm pad. • The WARM icon flashes. • 000 flashes in oven. - Press the Autoset pad or the appropriate number pads. • 170° will light when the Autoset pad is active. Keep Warm Notes: • For...

Owners Manual
Page 12
... (Timer, Keep Warm, Clean, etc.) are locked out during the Sabbath Mode. • A Cook & Hold can be displayed continuously until turned off and run the oven continuously for three seconds. Press the CLOCK pad for 72 hours: 1. To cancel the 12-hour shut-off or until the 72-hour time limit... will immediately show the set , the BAKE icon will also be no cycle active. There will power up in Sabbath Mode with or without the oven on. • Sabbath Mode cannot be turned on . Sabbath Mode Notes: • Sabbath Mode can be turned on at any time with 72 hours remaining...
... (Timer, Keep Warm, Clean, etc.) are locked out during the Sabbath Mode. • A Cook & Hold can be displayed continuously until turned off and run the oven continuously for three seconds. Press the CLOCK pad for 72 hours: 1. To cancel the 12-hour shut-off or until the 72-hour time limit... will immediately show the set , the BAKE icon will also be no cycle active. There will power up in Sabbath Mode with or without the oven on. • Sabbath Mode cannot be turned on . Sabbath Mode Notes: • Sabbath Mode can be turned on at any time with 72 hours remaining...
Owners Manual
Page 13
...the temperature. Press and hold the Favorite pad for several seconds or until 00° appears in progress: 1. For example, if the oven temperature was previously adjusted, the change the temperature, set a new Favorite cycle or to indicate that the control has accepted the Favorite setting..... • The stored Favorite cycle will be displayed. (If no Cook & Hold cycle has been programmed, "nonE" is displayed.) 2. If the oven temperature was reduced by 5°. Each time the Autoset pad is a power failure or interruption. To start a cycle programmed into Favorite: 1. To set...
...the temperature. Press and hold the Favorite pad for several seconds or until 00° appears in progress: 1. For example, if the oven temperature was previously adjusted, the change the temperature, set a new Favorite cycle or to indicate that the control has accepted the Favorite setting..... • The stored Favorite cycle will be displayed. (If no Cook & Hold cycle has been programmed, "nonE" is displayed.) 2. If the oven temperature was reduced by 5°. Each time the Autoset pad is a power failure or interruption. To start a cycle programmed into Favorite: 1. To set...

Owners Manual
Page 14
... is selected. It is normal. This is used to circulate hot air in the oven when the convection feature is located below the control panel on your wall oven. Single and Double Convect Ovens - Tilt the front end up on the front of the rack and pull out. Rack Position #4o (offset... rack on the rack support in use the oven for each oven. A beep will automatically stop whenever the oven door is canceled. Place rack...
... is selected. It is normal. This is used to circulate hot air in the oven when the convection feature is located below the control panel on your wall oven. Single and Double Convect Ovens - Tilt the front end up on the front of the rack and pull out. Rack Position #4o (offset... rack on the rack support in use the oven for each oven. A beep will automatically stop whenever the oven door is canceled. Place rack...

Owners Manual
Page 15
...section of the rack can be removed to hold a casserole dish. Rack Position #2o (offset on page 13.) Create-A-SpaceTM Half Rack (select models) Select wall oven models are equipped with aluminum foil or place foil on the lower rack. Multiple Rack Cooking: Two racks: Use #2o and #4. Notes: • The ...not use cookware that extends beyond edge of rack. • For best results, allow two inches between the pan placed on the rack and the oven side wall. • Use caution when removing items from the half rack to avoid burns. • Carefully remove items from the lower rack to avoid ...
...section of the rack can be removed to hold a casserole dish. Rack Position #2o (offset on page 13.) Create-A-SpaceTM Half Rack (select models) Select wall oven models are equipped with aluminum foil or place foil on the lower rack. Multiple Rack Cooking: Two racks: Use #2o and #4. Notes: • The ...not use cookware that extends beyond edge of rack. • For best results, allow two inches between the pan placed on the rack and the oven side wall. • Use caution when removing items from the half rack to avoid burns. • Carefully remove items from the lower rack to avoid ...

Owners Manual
Page 16
...-Clean Cycle: 1. Press the Autoset pad. • "LITE" (Light soil level) is the seal around the oven door. Remove broiler pan, all pans, and oven racks from the oven bottom. The selfcleaning process does not clean these areas. They should be canceled and the display will return to the... the door when the LOCK icon is displayed. 4. To set Self-Clean: Notes: • Oven temperature must be below 400° F to program a clean cycle. • In double wall oven models, only one oven can be cleaned at a time. 1. To make cleaning easier, the heating element can be lifted...
...-Clean Cycle: 1. Press the Autoset pad. • "LITE" (Light soil level) is the seal around the oven door. Remove broiler pan, all pans, and oven racks from the oven bottom. The selfcleaning process does not clean these areas. They should be canceled and the display will return to the... the door when the LOCK icon is displayed. 4. To set Self-Clean: Notes: • Oven temperature must be below 400° F to program a clean cycle. • In double wall oven models, only one oven can be cleaned at a time. 1. To make cleaning easier, the heating element can be lifted...

Owners Manual
Page 17
... door cannot be removed during the self-clean cycle and will flash in time. The delay time will not affect performance. Notes: • If the oven door is forced to show that means the clean cycle was left open, "door" will automatically turn off . The soil will be opened . This ... will lessen in the display and a signal will beep until the door is closed and the Clean pad is normal and will not damage the oven. Care & Cleaning 5. This discoloration is pressed again. • If more than five seconds elapse between pressing the Clean pad and the Autoset pad, the ...
... door cannot be removed during the self-clean cycle and will flash in time. The delay time will not affect performance. Notes: • If the oven door is forced to show that means the clean cycle was left open, "door" will automatically turn off . The soil will be opened . This ... will lessen in the display and a signal will beep until the door is closed and the Clean pad is normal and will not damage the oven. Care & Cleaning 5. This discoloration is pressed again. • If more than five seconds elapse between pressing the Clean pad and the Autoset pad, the ...

Owners Manual
Page 18
...respective manufacturers. ** To order call 1-800-688-9900 USA or 1-800-688-2002 Canada PART Broiler Pan and Insert Control Panel Door Handle, Oven Exterior (select models) Stainless Steel Oven Window & Door - Rinse and dry. • For hard to a self-clean cycle. • Rub with a sponge or cloth ...8226; Be sure appliance is acid resistant, not acid proof. This is to loosen soil. • Wash in the oven during a self-clean operation. DO NOT spray directly on the self-clean oven. • To remove occasional spillovers between cleanings, use . • If a part is removed, be used if...
...respective manufacturers. ** To order call 1-800-688-9900 USA or 1-800-688-2002 Canada PART Broiler Pan and Insert Control Panel Door Handle, Oven Exterior (select models) Stainless Steel Oven Window & Door - Rinse and dry. • For hard to a self-clean cycle. • Rub with a sponge or cloth ...8226; Be sure appliance is acid resistant, not acid proof. This is to loosen soil. • Wash in the oven during a self-clean operation. DO NOT spray directly on the self-clean oven. • To remove occasional spillovers between cleanings, use . • If a part is removed, be used if...
Owners Manual
Page 19
...a brass base is cool. • Do not touch a hot bulb with a damp cloth as they may scratch the glass. 2. Do not close the oven door until the oven racks are in place. Replace with pots, pans, furniture, toys, or other objects. 3. Reset clock. Do not hit the glass with a 40 watt... and reconnect power to prevent fusing of breakage at a later date. Use a dry potholder and very carefully unscrew bulb cover and bulb. 2. Oven Window To protect the oven door window: 1. Do not use abrasive cleaning agents such as steel wool scouring pads or powdered cleansers as the bulb may weaken its...
...a brass base is cool. • Do not touch a hot bulb with a damp cloth as they may scratch the glass. 2. Do not close the oven door until the oven racks are in place. Replace with pots, pans, furniture, toys, or other objects. 3. Reset clock. Do not hit the glass with a 40 watt... and reconnect power to prevent fusing of breakage at a later date. Use a dry potholder and very carefully unscrew bulb cover and bulb. 2. Oven Window To protect the oven door window: 1. Do not use abrasive cleaning agents such as steel wool scouring pads or powdered cleansers as the bulb may weaken its...

Owners Manual
Page 20
... (See page 9.) • Voltage into house may not have been properly set. • Check if oven is burned or too brown on oven rack. Baked food is properly connected to electrical outlet. • Check or re-set for suggested placement of pans on top. • Food may ...be below 400° F to touch each other or oven wall. • Check instructions for a delay clean. • Oven may be in oven. • Oven not preheated properly. Oven door will "burn...
... (See page 9.) • Voltage into house may not have been properly set. • Check if oven is burned or too brown on oven rack. Baked food is properly connected to electrical outlet. • Check or re-set for suggested placement of pans on top. • Food may ...be below 400° F to touch each other or oven wall. • Check instructions for a delay clean. • Oven may be in oven. • Oven not preheated properly. Oven door will "burn...


