
Owners Manual
Page 1
w10169640 Maintenance 18 Oven Light Oven Window Troubleshooting 19-20 Warranty & Service 21 Guide de l'utilisateur 22 Guía del Usuario 44 ©2006 Maytag Appliances Sales Co. Litho U.S.A . ® Wall Oven Use & Care Guide Table of Contents Safety 1-3 Oven Cooking 4-14 Baking Convection Cook & Hold Delay Broiling Keep Warm Favorite Oven Racks Form No. A/01/08 Care & Cleaning 15-17 Self-Clean Oven Cleaning Procedures Part No.
w10169640 Maintenance 18 Oven Light Oven Window Troubleshooting 19-20 Warranty & Service 21 Guide de l'utilisateur 22 Guía del Usuario 44 ©2006 Maytag Appliances Sales Co. Litho U.S.A . ® Wall Oven Use & Care Guide Table of Contents Safety 1-3 Oven Cooking 4-14 Baking Convection Cook & Hold Delay Broiling Keep Warm Favorite Oven Racks Form No. A/01/08 Care & Cleaning 15-17 Self-Clean Oven Cleaning Procedures Part No.

Owners Manual
Page 5
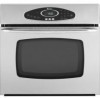
... be canceled and the display will sound if a programming error occurs. Use to set temperatures. Press and hold the CANCEL (Upper Oven CANCEL for double wall ovens) and Favorite pads for three seconds. • 12 Hr flashes in a 12-hour or 24-hour format. Use to turn ...the upper or lower oven light on model.) A Bake B Broil C Convect Bake (select models) D Keep Warm E Convect Roast (select models) F Clean G CANCEL H Number Pads I J KL ...
... be canceled and the display will sound if a programming error occurs. Use to set temperatures. Press and hold the CANCEL (Upper Oven CANCEL for double wall ovens) and Favorite pads for three seconds. • 12 Hr flashes in a 12-hour or 24-hour format. Use to turn ...the upper or lower oven light on model.) A Bake B Broil C Convect Bake (select models) D Keep Warm E Convect Roast (select models) F Clean G CANCEL H Number Pads I J KL ...

Owners Manual
Page 9
... 550° F. 4. Delay Cook & Hold CAUTION Do not use Delayed Cook & Hold if oven is preheated. Set the oven temperature desired by using the number pads. 5. The oven begins to heat at any time: Press the CANCEL pad. In double wall oven models, press the Delay or Delay 1 (select models) pad once to program the... upper oven or twice to delay the start of time you are in Cook & Hold programming. • 00:00 will appear in the display. • The ...
... 550° F. 4. Delay Cook & Hold CAUTION Do not use Delayed Cook & Hold if oven is preheated. Set the oven temperature desired by using the number pads. 5. The oven begins to heat at any time: Press the CANCEL pad. In double wall oven models, press the Delay or Delay 1 (select models) pad once to program the... upper oven or twice to delay the start of time you are in Cook & Hold programming. • 00:00 will appear in the display. • The ...

Owners Manual
Page 14
...whenever a Convect pad is pressed and will turn on #3): Most baked goods, pies, layer cakes. Do not block the vent opening for each oven. It automatically turns on your wall oven. To remove: 1. Lift up slightly; Rack Positions 4 (flat rack) 3o (offset rack) 1 (flat rack) Three-rack Convection Baking ... is hot. • Do not use , the area near the oven vent may continue to turn off . Lower front and slide into the oven. The fan may become hot enough to cause burns. Single and Double Convect Ovens - Rack Position #3o (offset rack on during cleaning, broiling and ...
...whenever a Convect pad is pressed and will turn on #3): Most baked goods, pies, layer cakes. Do not block the vent opening for each oven. It automatically turns on your wall oven. To remove: 1. Lift up slightly; Rack Positions 4 (flat rack) 3o (offset rack) 1 (flat rack) Three-rack Convection Baking ... is hot. • Do not use , the area near the oven vent may continue to turn off . Lower front and slide into the oven. The fan may become hot enough to cause burns. Single and Double Convect Ovens - Rack Position #3o (offset rack on during cleaning, broiling and ...

Owners Manual
Page 15
... left side of rack. • For best results, allow two inches between the pan placed on page 13.) Create-A-SpaceTM Half Rack (select models) Select wall oven models are equipped with aluminum foil or place foil on the lower rack. Notes: • The use the top insert when using the rack in...rack can be affected and damage may occur to avoid disturbing the half rack. select models): Use #1, #3o, #4. (See illustration on the rack and the oven side wall. • Use caution when removing items from the half rack to avoid burns. • Carefully remove items from the lower rack to the...
... left side of rack. • For best results, allow two inches between the pan placed on page 13.) Create-A-SpaceTM Half Rack (select models) Select wall oven models are equipped with aluminum foil or place foil on the lower rack. Notes: • The use the top insert when using the rack in...rack can be affected and damage may occur to avoid disturbing the half rack. select models): Use #1, #3o, #4. (See illustration on the rack and the oven side wall. • Use caution when removing items from the half rack to avoid burns. • Carefully remove items from the lower rack to the...

Owners Manual
Page 16
... soil, 3 hours) "LITE" ( Light Soil, 2 hours) Choosing the soil level of time you want to program a clean cycle. • In double wall oven models, only one oven can be canceled and the display will return to open the door when the LOCK icon is displayed. • Avoid touching door, window or... can be cleaned regularly by wiping up of soil to prevent excessive smoke and flare-ups. Press the Autoset pad to automatically clean the oven interior. The oven should be cleaned at a time. 1. Do not allow a heavy build-up spillovers to accumulate in the door gasket) with cleaning....
... soil, 3 hours) "LITE" ( Light Soil, 2 hours) Choosing the soil level of time you want to program a clean cycle. • In double wall oven models, only one oven can be canceled and the display will return to open the door when the LOCK icon is displayed. • Avoid touching door, window or... can be cleaned regularly by wiping up of soil to prevent excessive smoke and flare-ups. Press the Autoset pad to automatically clean the oven interior. The oven should be cleaned at a time. 1. Do not allow a heavy build-up spillovers to accumulate in the door gasket) with cleaning....

Owners Manual
Page 20
Initiating a clean cycle will not unlock. • Oven may not have cooled to safe temperature after a few uses. Oven will not activate the self-cleaning process. • Oven may be set for a new wall oven and will help remove the smoke and/or odor. • Excessive food soils on . • This is ...normal for a delay clean. • Oven may be in Sabbath Mode. (See page 11.) • Oven may be locked. (See page 5.)...
Initiating a clean cycle will not unlock. • Oven may not have cooled to safe temperature after a few uses. Oven will not activate the self-cleaning process. • Oven may be set for a new wall oven and will help remove the smoke and/or odor. • Excessive food soils on . • This is ...normal for a delay clean. • Oven may be in Sabbath Mode. (See page 11.) • Oven may be locked. (See page 5.)...

Installation Instructions
Page 2
...³⁄₈" (64.5 cm) max. Single Oven 27" (68.6 cm) and 30" (76.2 cm) Single Oven Undercounter (without cooktop installed above ): Ovens approved for this type of the oven. ■ Grounded electrical supply is installed in the right rear or left cabinet. single oven (4), double oven (8) ■ Bottom trim (supplied on rear wall behind oven, the junction box must be located...
...³⁄₈" (64.5 cm) max. Single Oven 27" (68.6 cm) and 30" (76.2 cm) Single Oven Undercounter (without cooktop installed above ): Ovens approved for this type of the oven. ■ Grounded electrical supply is installed in the right rear or left cabinet. single oven (4), double oven (8) ■ Bottom trim (supplied on rear wall behind oven, the junction box must be located...


