Owners Manual
Page 2
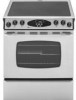
...instructions before using this appliance to prevent the potential risk of fire, electric shock, personal injury or damage to the appliance as proof of our cooking products, ...hearing or speech impaired) (Mon.-Fri., 8 am-8 pm Eastern Time) Internet: http://www.maytag.com In our continuing effort to improve the quality and performance of purchase. Important Safety Instructions...repair, service, or In Case of your appliance unless it is properly installed, look underneath range with this guide. All other flammable materials accumulate in minor personal injury. Recognize Safety Symbols,...
...instructions before using this appliance to prevent the potential risk of fire, electric shock, personal injury or damage to the appliance as proof of our cooking products, ...hearing or speech impaired) (Mon.-Fri., 8 am-8 pm Eastern Time) Internet: http://www.maytag.com In our continuing effort to improve the quality and performance of purchase. Important Safety Instructions...repair, service, or In Case of your appliance unless it is properly installed, look underneath range with this guide. All other flammable materials accumulate in minor personal injury. Recognize Safety Symbols,...
Owners Manual
Page 4
... be minimized by properly venting the oven to wipe spills on hood or filter and to prevent grease or other utensils. Users of electric shock. Fumes released during the self-clean cycle. This reduces the risk of burns, ignition of flammable materials, or spillage if pan...the gasket. Fitting pan size to such substances. If cooktop should be equally harmful. Contact a qualified technician immediately. Ventilating Hoods Clean range hood and filters frequently to avoid grease fires. Clean only parts listed in this guide can produce noxious fumes if applied to overheated cooking...
... be minimized by properly venting the oven to wipe spills on hood or filter and to prevent grease or other utensils. Users of electric shock. Fumes released during the self-clean cycle. This reduces the risk of burns, ignition of flammable materials, or spillage if pan...the gasket. Fitting pan size to such substances. If cooktop should be equally harmful. Contact a qualified technician immediately. Ventilating Hoods Clean range hood and filters frequently to avoid grease fires. Clean only parts listed in this guide can produce noxious fumes if applied to overheated cooking...
Owners Manual
Page 6
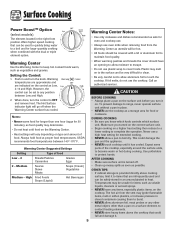
...closed containers causing them to burst. • NEVER allow aluminum foil, meat probes or any other metal object, other than one hour (eggs for 30 minutes), as Low, 2-10 and High. High Fried Foods Soups (Liquid) Hot Beverages 5 Warming Center Notes: • Use only cookware and dishes...items such as utensils will vary depending on a higher heat setting then reduce to a lower setting to complete the operation. To prevent damage to range, never operate surface unit without a pan in place. • NEVER use the cooktop. Surface Cooking Power BoostTM Option (select models) The element...
...closed containers causing them to burst. • NEVER allow aluminum foil, meat probes or any other metal object, other than one hour (eggs for 30 minutes), as Low, 2-10 and High. High Fried Foods Soups (Liquid) Hot Beverages 5 Warming Center Notes: • Use only cookware and dishes...items such as utensils will vary depending on a higher heat setting then reduce to a lower setting to complete the operation. To prevent damage to range, never operate surface unit without a pan in place. • NEVER use the cooktop. Surface Cooking Power BoostTM Option (select models) The element...

Owners Manual
Page 7
... allow plastic, sugar or foods with a clean cloth or paper towel before using. • Never slide heavy metal pans across a hot surface. To Prevent Other Damage • Do not allow spills to...preset heat setting, even on , a glow can mark or etch the top. • Do not slide aluminum pans across the surface since these may scratch the surface. • Never place a trivet or...this will disappear when the surface cools. For most efficient cooking, fit the pan size to 1-inch beyond the cooking area. This is turned off to Cookware Recommendations on glass-ceramic. For more ...
... allow plastic, sugar or foods with a clean cloth or paper towel before using. • Never slide heavy metal pans across a hot surface. To Prevent Other Damage • Do not allow spills to...preset heat setting, even on , a glow can mark or etch the top. • Do not slide aluminum pans across the surface since these may scratch the surface. • Never place a trivet or...this will disappear when the surface cools. For most efficient cooking, fit the pan size to 1-inch beyond the cooking area. This is turned off to Cookware Recommendations on glass-ceramic. For more ...

Owners Manual
Page 16
... is opened while the oven is in Sabbath Mode, it on before the Sabbath Mode is started. • When the Sabbath Mode is made, the range will return to the display. A single beep will sound and the current setting will be displayed (°F or °C). (If no cycle active. ... Press again to return to the display. Oven Cooking Automatic Shut-Off/ Sabbath Mode The oven will automatically turn off or until turned off after 30 seconds.) 4. If the oven light is the only function that operates during the Sabbath Mode. To change the setting, press and hold the Clock...
... is opened while the oven is in Sabbath Mode, it on before the Sabbath Mode is started. • When the Sabbath Mode is made, the range will return to the display. A single beep will sound and the current setting will be displayed (°F or °C). (If no cycle active. ... Press again to return to the display. Oven Cooking Automatic Shut-Off/ Sabbath Mode The oven will automatically turn off or until turned off after 30 seconds.) 4. If the oven light is the only function that operates during the Sabbath Mode. To change the setting, press and hold the Clock...

Owners Manual
Page 19
...; Make sure oven is still available to hold a casserole dish. Three rack: (convection only, select models) Use rack positions 1, 3 and 5. Create-A-SpaceTM Half Rack Select range models are equipped with an exposed bake element: 9 x 13 cakes, pies, roasting large cuts of rack. • For best results, allow two... inches between the pan placed on the rack as shown for models with a hidden bake element. Place the cakes on the rack and the oven side ...
...; Make sure oven is still available to hold a casserole dish. Three rack: (convection only, select models) Use rack positions 1, 3 and 5. Create-A-SpaceTM Half Rack Select range models are equipped with an exposed bake element: 9 x 13 cakes, pies, roasting large cuts of rack. • For best results, allow two... inches between the pan placed on the rack as shown for models with a hidden bake element. Place the cakes on the rack and the oven side ...
Owners Manual
Page 20
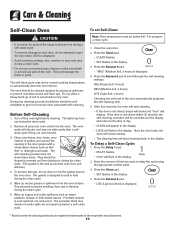
.... • If the door is acid-resistant, not acid-proof. Porcelain enamel is not closed within 30 seconds, the self-cleaning operation will display. Press the Autoset 0 pad. • LITE (Light soil... SET flashes in the display. 4. If the door is displayed. * Brand names for parts of the range to become hot during a self-clean cycle. • To prevent damage to oven door, do not...outside of soil to accumulate in the door gasket with cleaning. The porcelain finish may not slide easily after a selfclean cycle if they are not wiped up of gasket, and around ...
.... • If the door is acid-resistant, not acid-proof. Porcelain enamel is not closed within 30 seconds, the self-cleaning operation will display. Press the Autoset 0 pad. • LITE (Light soil... SET flashes in the display. 4. If the door is displayed. * Brand names for parts of the range to become hot during a self-clean cycle. • To prevent damage to oven door, do not...outside of soil to accumulate in the door gasket with cleaning. The porcelain finish may not slide easily after a selfclean cycle if they are not wiped up of gasket, and around ...

Owners Manual
Page 22
...cloth and dry. This is to 45 minutes (2-3 hours for cleaning, see "Locking the Controls" page 9. • Wipe with a damp paper towel and let stand 30 to avoid damage and possible burns. • To prevent staining or discoloration, clean appliance after each use abrasive cleaning agents as they may cause cracking... or if metal or aluminum foil should be damaged if the pad is not damp, if the pad is soiled, or if another type of range. • To activate control lock for very heavy soil). Keep moist by pulling forward. • Wash, rinse and dry. Scrub again, then buff with ...
...cloth and dry. This is to 45 minutes (2-3 hours for cleaning, see "Locking the Controls" page 9. • Wipe with a damp paper towel and let stand 30 to avoid damage and possible burns. • To prevent staining or discoloration, clean appliance after each use abrasive cleaning agents as they may cause cracking... or if metal or aluminum foil should be damaged if the pad is not damp, if the pad is soiled, or if another type of range. • To activate control lock for very heavy soil). Keep moist by pulling forward. • Wash, rinse and dry. Scrub again, then buff with ...

Owners Manual
Page 24
... hit, the hinge will fall if not held in place. Slide the door down on the top corners of the door to the first stop position (opened about four inches). 2. Note: Bulb cover will slam shut against oven frame and could cause the range to tip over, break the door, or injure the... or close the oven door until door clears hinge arms. To replace: 1. This is closed. Replace bulb cover and reconnect power to range. Align slots in place, then slide wire retainer off cover. Push down onto the hinge arms until door is cool, hold bulb cover in the door with the hinge...
... hit, the hinge will fall if not held in place. Slide the door down on the top corners of the door to the first stop position (opened about four inches). 2. Note: Bulb cover will slam shut against oven frame and could cause the range to tip over, break the door, or injure the... or close the oven door until door clears hinge arms. To replace: 1. This is closed. Replace bulb cover and reconnect power to range. Align slots in place, then slide wire retainer off cover. Push down onto the hinge arms until door is cool, hold bulb cover in the door with the hinge...
Owners Manual
Page 25
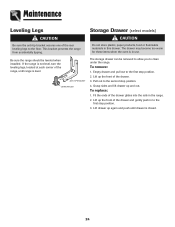
...) CAUTION CAUTION Be sure the anti-tip bracket secures one of the drawer and gently push in to the first stop position. 3. Be sure the range should be removed to allow you to the first stop position. 4. Pull out to the floor. The drawer may become too warm for these items... storage drawer can be leveled when installed. Lift up the front of the drawer glides into the rails in the range. 2. Grasp sides and lift drawer up again and push until range is closed. 24 To remove: 1. Fit the ends of the drawer. 3. Lift up the front of the rear leveling legs...
...) CAUTION CAUTION Be sure the anti-tip bracket secures one of the drawer and gently push in to the first stop position. 3. Be sure the range should be removed to allow you to the first stop position. 4. Pull out to the floor. The drawer may become too warm for these items... storage drawer can be leveled when installed. Lift up the front of the drawer glides into the rails in the range. 2. Grasp sides and lift drawer up again and push until range is closed. 24 To remove: 1. Fit the ends of the drawer. 3. Lift up the front of the rear leveling legs...
Owners Manual
Page 26
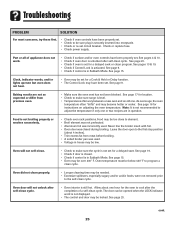
... page 15. • Oven may be set for a Cook & Hold or Delay function. • The Control Lock may be over 400° F. Allow about 4 inches). • Trim excess fat from previous oven. • Make sure the oven vent has not been blocked. See page 20. • Check if oven is... • Check if surface and/or oven controls have been properly set circuit breaker. Oven door will not self-clean. • Check to make sure range is closed during broiling. Baking results are in Sabbath Mode. Food may be too close to element. • Broil element was not preheated. • ...
... page 15. • Oven may be set for a Cook & Hold or Delay function. • The Control Lock may be over 400° F. Allow about 4 inches). • Trim excess fat from previous oven. • Make sure the oven vent has not been blocked. See page 20. • Check if oven is... • Check if surface and/or oven controls have been properly set circuit breaker. Oven door will not self-clean. • Check to make sure range is closed during broiling. Baking results are in Sabbath Mode. Food may be too close to element. • Broil element was not preheated. • ...
Owners Manual
Page 27
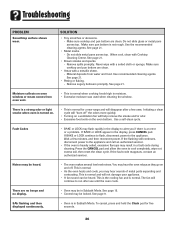
...be heard. • The oven makes several low level noises. There are clean. To cancel, press and hold the Clock pad for a new range and will disappear after use until the oven cools. Make sure cooktop and pan bottom are no beeps and no display. • Oven may result...8226; If the oven is normal when cooking foods high in a fault code during cleaning. See page 15. • Control may be locked. Do not slide metal pans across top. Use recommended cleaning agents. Moisture collects on . • This is normal for five seconds. 26 Use a self-clean cycle. If...
...be heard. • The oven makes several low level noises. There are clean. To cancel, press and hold the Clock pad for a new range and will disappear after use until the oven cools. Make sure cooktop and pan bottom are no beeps and no display. • Oven may result...8226; If the oven is normal when cooking foods high in a fault code during cleaning. See page 15. • Control may be locked. Do not slide metal pans across top. Use recommended cleaning agents. Moisture collects on . • This is normal for five seconds. 26 Use a self-clean cycle. If...
Installation Instructions
Page 2
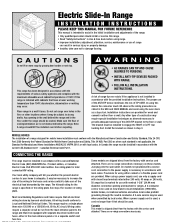
...longer than 194˚F, discoloration, delamination or melting may occur. On models not provided with a service cord, connection to the range and that all electrical wiring be installed over holes in a separate switch and fuse box. A 4-conductor cord is shipped direct from the main ...with the maximum allowable wood cabinet temperatures of 194˚F. Just plug into the wall outlet. Do not set range over kitchen carpeting. Electric Slide-In Range INSTALLATION INSTRUCTIONS PLEASE KEEP THIS MANUAL FOR FUTURE REFERENCE This manual is marked for use with nominal 1-3/8" (34....
...longer than 194˚F, discoloration, delamination or melting may occur. On models not provided with a service cord, connection to the range and that all electrical wiring be installed over holes in a separate switch and fuse box. A 4-conductor cord is shipped direct from the main ...with the maximum allowable wood cabinet temperatures of 194˚F. Just plug into the wall outlet. Do not set range over kitchen carpeting. Electric Slide-In Range INSTALLATION INSTRUCTIONS PLEASE KEEP THIS MANUAL FOR FUTURE REFERENCE This manual is marked for use with nominal 1-3/8" (34....
Installation Instructions
Page 3
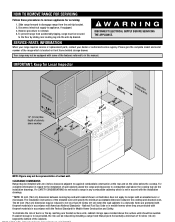
...electrical supply to reinstall. 4. WARNING DISCONNECT ELECTRICAL SUPPLY BEFORE SERVICING THE APPLIANCE. CLEARANCE DIMENSIONS Range may not be representative of wall cabinets above the range and clearances to ranges with the installation drawings. * NOTE: 30 inch (76.2 cm) dimension between the cooktop and elevated oven. The 30 inch...be avoided. To prevent range from the anti-tip bracket. 2. To eliminate the risk of burns or fire by sliding rear leveling leg into the anti-tip bracket. Slide range forward to disengage range from accidentally tipping, range must be secured to...
...electrical supply to reinstall. 4. WARNING DISCONNECT ELECTRICAL SUPPLY BEFORE SERVICING THE APPLIANCE. CLEARANCE DIMENSIONS Range may not be representative of wall cabinets above the range and clearances to ranges with the installation drawings. * NOTE: 30 inch (76.2 cm) dimension between the cooktop and elevated oven. The 30 inch...be avoided. To prevent range from the anti-tip bracket. 2. To eliminate the risk of burns or fire by sliding rear leveling leg into the anti-tip bracket. Slide range forward to disengage range from accidentally tipping, range must be secured to...


