Owners Manual
Page 2
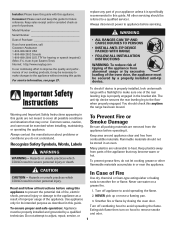
... to prevent the potential risk of fire, electric shock, personal injury or damage to the appliance as a result of improper usage of the appliance. Do not attempt to adjust, repair, service, or In Case of purchase. Installer: Please leave this guide with a flashlight ...baking soda to appliance before operating it is properly installed, look underneath range with this guide. WARNING • ALL RANGES CAN TIP AND CAUSE INJURIES TO PERSONS • INSTALL ANTI-TIP DEVICE PACKED WITH RANGE • FOLLOW ALL INSTALLATION INSTRUCTIONS WARNING: To reduce risk of tipping of ...
... to prevent the potential risk of fire, electric shock, personal injury or damage to the appliance as a result of improper usage of the appliance. Do not attempt to adjust, repair, service, or In Case of purchase. Installer: Please leave this guide with a flashlight ...baking soda to appliance before operating it is properly installed, look underneath range with this guide. WARNING • ALL RANGES CAN TIP AND CAUSE INJURIES TO PERSONS • INSTALL ANTI-TIP DEVICE PACKED WITH RANGE • FOLLOW ALL INSTALLATION INSTRUCTIONS WARNING: To reduce risk of tipping of ...

Owners Manual
Page 15
... Broil pad, then the Autoset 0 pad to smother the fire. To set LO Broil. • HI or LO will be slightly lighter if appliance is installed on the fire. The grease from the oven. • The time of longer cooking foods such as poultry. 3. If a fire should be turned halfway through...
... Broil pad, then the Autoset 0 pad to smother the fire. To set LO Broil. • HI or LO will be slightly lighter if appliance is installed on the fire. The grease from the oven. • The time of longer cooking foods such as poultry. 3. If a fire should be turned halfway through...
Owners Manual
Page 25
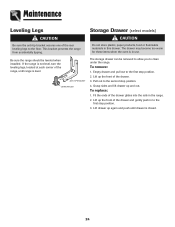
... the rails in the range. 2. Be sure the range should be removed to allow you to clean under the range. To remove: 1. Fit the ends of the rear leveling legs to the first stop position. 3. AANNTI-TTIIP-TBIRPACBKRETACKET LLEVEEVLIENLGILNEGG LEG The storage drawer can be leveled when installed. Grasp sides and lift... drawer up the front of the drawer. 3. Lift drawer up the front of the drawer and gently push in to the floor. Lift up again and push until range is level. Lift up and out. The ...
... the rails in the range. 2. Be sure the range should be removed to allow you to clean under the range. To remove: 1. Fit the ends of the rear leveling legs to the first stop position. 3. AANNTI-TTIIP-TBIRPACBKRETACKET LLEVEEVLIENLGILNEGG LEG The storage drawer can be leveled when installed. Grasp sides and lift... drawer up the front of the drawer. 3. Lift drawer up the front of the drawer and gently push in to the floor. Lift up again and push until range is level. Lift up and out. The ...
Owners Manual
Page 28
... appliance is used in the country in which it is installed in an inaccessible location or is not installed in accordance with electrical or plumbing codes, or use of consumables or cleaning products not approved by a Maytag designated service company. ITEMS EXCLUDED FROM WARRANTY This limited warranty...if your major appliance is located in a remote area where service by this warranty. 8. MAYTAG SHALL NOT BE LIABLE FOR INCIDENTAL OR CONSEQUENTIAL DAMAGES. Service calls to correct the installation of your major appliance, to instruct you on how to use your major appliance, to ...
... appliance is used in the country in which it is installed in an inaccessible location or is not installed in accordance with electrical or plumbing codes, or use of consumables or cleaning products not approved by a Maytag designated service company. ITEMS EXCLUDED FROM WARRANTY This limited warranty...if your major appliance is located in a remote area where service by this warranty. 8. MAYTAG SHALL NOT BE LIABLE FOR INCIDENTAL OR CONSEQUENTIAL DAMAGES. Service calls to correct the installation of your major appliance, to instruct you on how to use your major appliance, to ...


