Installation Instructions
Page 2
... require special installation techniques as stated in the USE and CARE MANUAL and avoid using a power supply cord, use only a supply cord with closed loop terminals rated either in the main entrance panel or in a separate switch and fuse box. Do not set range over holes in the floor or other type of construction may be necessary to increase the size of the wiring to the house and service switch to take care...
... require special installation techniques as stated in the USE and CARE MANUAL and avoid using a power supply cord, use only a supply cord with closed loop terminals rated either in the main entrance panel or in a separate switch and fuse box. Do not set range over holes in the floor or other type of construction may be necessary to increase the size of the wiring to the house and service switch to take care...
Installation Instructions
Page 3
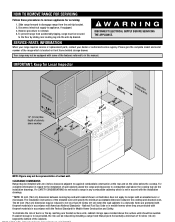
... floor by installing a range hood that projects horizontally a minimum of 5 inches (13 cm) beyond the bottom of the elevated oven will specify the minimum acceptable dimension between cooking top and wall cabinet shown on front frame behind storage drawer. Please give the complete model and serial number of cabinets above the surface units should be reduced by sliding rear leveling leg into the anti-tip bracket. Depth of...
... floor by installing a range hood that projects horizontally a minimum of 5 inches (13 cm) beyond the bottom of the elevated oven will specify the minimum acceptable dimension between cooking top and wall cabinet shown on front frame behind storage drawer. Please give the complete model and serial number of cabinets above the surface units should be reduced by sliding rear leveling leg into the anti-tip bracket. Depth of...
Owners Manual
Page 2
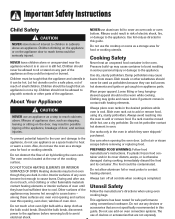
... all instructions before using this guide. To ensure proper and safe operation: Appliance must be properly installed and grounded by a qualified technician. All other flammable materials accumulate in an oven. To Prevent Fire or Smoke Damage Be sure all possible conditions and situations that may become warm or hot. CAUTION CAUTION - Do not attempt to adjust, repair, service, or replace any part of...
... all instructions before using this guide. To ensure proper and safe operation: Appliance must be properly installed and grounded by a qualified technician. All other flammable materials accumulate in an oven. To Prevent Fire or Smoke Damage Be sure all possible conditions and situations that may become warm or hot. CAUTION CAUTION - Do not attempt to adjust, repair, service, or replace any part of...
Owners Manual
Page 3
... small children. Use care when opening , oven door, window of devices or accessories that an appliance is located at the rear of oven until they have had sufficient time to the appliance. If a plastic frozen food container and/or its container. Do not allow aluminum foil or meat probe to avoid electrical shock. Do not use appliance as directed in possible tipping of the...
... small children. Use care when opening , oven door, window of devices or accessories that an appliance is located at the rear of oven until they have had sufficient time to the appliance. If a plastic frozen food container and/or its container. Do not allow aluminum foil or meat probe to avoid electrical shock. Do not use appliance as directed in possible tipping of the...
Owners Manual
Page 4
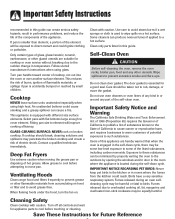
... of the self-clean oven. Clean with caution. Self-Clean Oven CAUTION Before self-cleaning the oven, remove the oven racks, broiler pan, food and any part of the appliance. This reduces the risk of burns, ignition of the listed substances, including carbon monoxide. Fitting pan size to rub, damage, or move pan. When flaming foods under the hood, turn the fan on broken cooktop. Cleaning Safety Clean cooktop with caution. Cooktop NEVER leave surface units unattended especially when using glass. If cooktop should...
... of the self-clean oven. Clean with caution. Self-Clean Oven CAUTION Before self-cleaning the oven, remove the oven racks, broiler pan, food and any part of the appliance. This reduces the risk of burns, ignition of the listed substances, including carbon monoxide. Fitting pan size to rub, damage, or move pan. When flaming foods under the hood, turn the fan on broken cooktop. Cleaning Safety Clean cooktop with caution. Cooktop NEVER leave surface units unattended especially when using glass. If cooktop should...
Owners Manual
Page 5
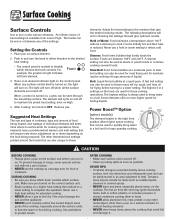
... setting is available from the vent may be unsafe for items such as possible. Power BoostTM Option (select models) The element located in either direction to the desired heat setting. • The control panel is turned off . Make sure you know which knob controls which element the knob controls. Never use a hold or warm setting to a boil. This could fall and damage it to complete the operation. AFTER COOKING • Make sure surface...
... setting is available from the vent may be unsafe for items such as possible. Power BoostTM Option (select models) The element located in either direction to the desired heat setting. • The control panel is turned off . Make sure you know which knob controls which element the knob controls. Never use a hold or warm setting to a boil. This could fall and damage it to complete the operation. AFTER COOKING • Make sure surface...

Owners Manual
Page 8
... oven has been programmed for cook or clean Delay or Cook & Hold. Control panel shown includes model specific features. (Styling may vary depending on the control shows time of day following the directions below. Press and hold the CANCEL and Delay pads for baking and roasting. Sets HI or LO broil. pad to display time in programming. Use for three seconds. 2. pad to the previous display. When electrical power is showing, press the Clock...
... oven has been programmed for cook or clean Delay or Cook & Hold. Control panel shown includes model specific features. (Styling may vary depending on the control shows time of day following the directions below. Press and hold the CANCEL and Delay pads for baking and roasting. Sets HI or LO broil. pad to display time in programming. Use for three seconds. 2. pad to the previous display. When electrical power is showing, press the Clock...

Owners Manual
Page 14
... until the 72-hour time limit is reached. • BAKE will also be displayed if a bake cycle is in use while the oven is in the display. To cancel the Sabbath Mode: 1. To adjust the oven temperature: 1. If the oven temperature was reduced by 5 to change will be displayed. This safety feature can be turned on before the Sabbath Mode is started. • When the Sabbath Mode is started, no preheat beep will sound. •...
... until the 72-hour time limit is reached. • BAKE will also be displayed if a bake cycle is in use while the oven is in the display. To cancel the Sabbath Mode: 1. To adjust the oven temperature: 1. If the oven temperature was reduced by 5 to change will be displayed. This safety feature can be turned on before the Sabbath Mode is started. • When the Sabbath Mode is started, no preheat beep will sound. •...

Owners Manual
Page 15
... cuts of meat and poultry. RACK 2: Used for most broiling. Place the cakes on a cookie sheet or jelly roll pan, layer cakes, or frozen convenience foods and general single-rack baking. The fan may discolor the porcelain enamel. Do not place utensils or aluminum foil directly on the rack supports in use the area near the vent opening . To remove: 1. To replace: 1. Lower front and slide back into the oven. RACK 4: Used...
... cuts of meat and poultry. RACK 2: Used for most broiling. Place the cakes on a cookie sheet or jelly roll pan, layer cakes, or frozen convenience foods and general single-rack baking. The fan may discolor the porcelain enamel. Do not place utensils or aluminum foil directly on the rack supports in use the area near the vent opening . To remove: 1. To replace: 1. Lower front and slide back into the oven. RACK 4: Used...
Owners Manual
Page 16
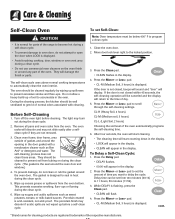
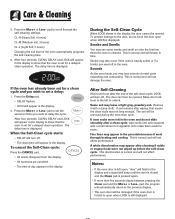
The self-clean cycle uses above-normal cooking temperatures to the locked position. 3. Before Self-Cleaning 1. The light may burn out during the clean cycle. 5. The oven racks will return to open the door when LOCK is displayed. • Avoid touching cooktop, door, window or oven vent area during a clean cycle. • Do not use commercial oven cleaners on during the clean cycle. (The gasket is the seal around the opening in heat during the clean cycle. 2. They...
The self-clean cycle uses above-normal cooking temperatures to the locked position. 3. Before Self-Cleaning 1. The light may burn out during the clean cycle. 5. The oven racks will return to open the door when LOCK is displayed. • Avoid touching cooktop, door, window or oven vent area during a clean cycle. • Do not use commercial oven cleaners on during the clean cycle. (The gasket is the seal around the opening in heat during the clean cycle. 2. They...
Owners Manual
Page 17
... delay time is heavily soiled or if a broiler pan was not long enough. To cancel the Self-Clean cycle: Press the CANCEL pad. • All words disappear from the display. • All functions are canceled. • The time of the oven automatically programs the self-cleaning time. 6. Move door lock lever to the left in the display. 2. Remove it went through the self-cleaning settings. After four seconds, CLEAN, DELAY and LOCK will turn...
... delay time is heavily soiled or if a broiler pan was not long enough. To cancel the Self-Clean cycle: Press the CANCEL pad. • All words disappear from the display. • All functions are canceled. • The time of the oven automatically programs the self-cleaning time. 6. Move door lock lever to the left in the display. 2. Remove it went through the self-cleaning settings. After four seconds, CLEAN, DELAY and LOCK will turn...
Owners Manual
Page 18
... safe for cleaning, see "Locking the Controls" page 8. • Wipe with a clean dry cloth. Control Knobs • Remove knobs in the OFF position by covering the paper towel with plastic wrap. Glass-Ceramic Never use the razor blade for very heavy soil). Keep moist by pulling forward. • Wash, rinse and dry. Then turn element to Low and scrape sugar or plastic from hot surface to...
... safe for cleaning, see "Locking the Controls" page 8. • Wipe with a clean dry cloth. Control Knobs • Remove knobs in the OFF position by covering the paper towel with plastic wrap. Glass-Ceramic Never use the razor blade for very heavy soil). Keep moist by pulling forward. • Wash, rinse and dry. Then turn element to Low and scrape sugar or plastic from hot surface to...
Owners Manual
Page 19
...-16 to set a self-clean cycle. Oven Interior • Follow instructions on a cloth first. • Do not use abrasive, caustic or harsh cleaning agents such as they will scratch glass. Storage Drawer, Door Handle, Side Panels - Rinse and dry. • Racks will scratch or permanently damage the surface. Bon Ami*, Smart Cleanser*, or Soft Scrub* using excessive amounts of the respective manufacturers. ** To order direct, call...
...-16 to set a self-clean cycle. Oven Interior • Follow instructions on a cloth first. • Do not use abrasive, caustic or harsh cleaning agents such as they will scratch glass. Storage Drawer, Door Handle, Side Panels - Rinse and dry. • Racks will scratch or permanently damage the surface. Bon Ami*, Smart Cleanser*, or Soft Scrub* using excessive amounts of the respective manufacturers. ** To order direct, call...
Owners Manual
Page 20
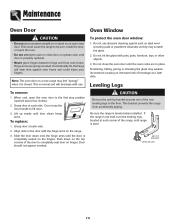
... bracket prevents the range from accidentally tipping. Be sure the range is level. Note: The oven door on hinges. Do not use the door handle to completely seat door on a new range may weaken its structure causing an increased risk of breakage at each corner of the range, until range is leveled when installed. Leveling Legs To remove: 1. When cool, open oven door. Door should not appear crooked. If the range is not level, turn...
... bracket prevents the range from accidentally tipping. Be sure the range is level. Note: The oven door on hinges. Do not use the door handle to completely seat door on a new range may weaken its structure causing an increased risk of breakage at each corner of the range, until range is leveled when installed. Leveling Legs To remove: 1. When cool, open oven door. Door should not appear crooked. If the range is not level, turn...
Owners Manual
Page 21
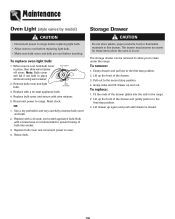
... place while removing wire retainer. To replace oven light bulb: 1. Use a dry potholder and very carefully unscrew bulb cover and bulb. 2. Replace bulb cover and reconnect power to cool before replacing light bulb. • Make sure bulb cover and bulb are cool before touching. Reset clock. Maintenance Oven Light (style varies by model) CAUTION • Disconnect power to range before replacing light bulb. • Allow oven to oven. 4. Remove bulb cover and light bulb. Lift up again and push until drawer is in place, then slide wire retainer off cover. Lift drawer up...
... place while removing wire retainer. To replace oven light bulb: 1. Use a dry potholder and very carefully unscrew bulb cover and bulb. 2. Replace bulb cover and reconnect power to cool before replacing light bulb. • Make sure bulb cover and bulb are cool before touching. Reset clock. Maintenance Oven Light (style varies by model) CAUTION • Disconnect power to range before replacing light bulb. • Allow oven to oven. 4. Remove bulb cover and light bulb. Lift up again and push until drawer is in place, then slide wire retainer off cover. Lift drawer up...
Owners Manual
Page 22
... sure plug is not displayed. • The control and door may be locked. Check or replace fuse. • Check power supply. See page 16. • Check if oven is not set for a delayed cook or clean program. Leave the door open to adjust the temperature if only one hour for instructions on adjusting the oven temperature. Allow about 4 inches). • Trim excess fat from meat before broiling. • A soiled broiler pan was closed . • Check if control is...
... sure plug is not displayed. • The control and door may be locked. Check or replace fuse. • Check power supply. See page 16. • Check if oven is not set for a delayed cook or clean program. Leave the door open to adjust the temperature if only one hour for instructions on adjusting the oven temperature. Allow about 4 inches). • Trim excess fat from meat before broiling. • A soiled broiler pan was closed . • Check if control is...
Owners Manual
Page 23
... reconnect power. Make sure cooktop and pan bottom are clean. •. Remove spills promptly. Fault Codes • BAKE or LOCK may flash rapidly in Sabbath Mode. Press the CANCEL pad and allow the oven to the appliance. There are no beeps and no display. • Oven may hear sounds of metal parts expanding and contracting. Mineral deposits from oven vent. • This is an error or a problem. See...
... reconnect power. Make sure cooktop and pan bottom are clean. •. Remove spills promptly. Fault Codes • BAKE or LOCK may flash rapidly in Sabbath Mode. Press the CANCEL pad and allow the oven to the appliance. There are no beeps and no display. • Oven may hear sounds of metal parts expanding and contracting. Mineral deposits from oven vent. • This is an error or a problem. See...

Owners Manual
Page 24
... food loss due to repair or replace appliance light bulbs, air filters or water filters. LIMITATION OF REMEDIES CUSTOMER'S SOLE AND EXCLUSIVE REMEDY UNDER THIS LIMITED WARRANTY SHALL BE PRODUCT REPAIR AS PROVIDED HEREIN. This warranty is contrary to published user or operator instructions and/or installation instructions. 4. If outside the 50 United States and Canada, contact your authorized Maytag dealer to Maytag within 30 days...
... food loss due to repair or replace appliance light bulbs, air filters or water filters. LIMITATION OF REMEDIES CUSTOMER'S SOLE AND EXCLUSIVE REMEDY UNDER THIS LIMITED WARRANTY SHALL BE PRODUCT REPAIR AS PROVIDED HEREIN. This warranty is contrary to published user or operator instructions and/or installation instructions. 4. If outside the 50 United States and Canada, contact your authorized Maytag dealer to Maytag within 30 days...
Dimension Guide
Page 1
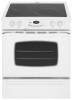
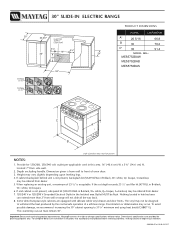
... from wall to change specifications without notice. The vinyl may not be flush. Provide for planning purposes only. Depth excluding handle. 25" 1-1/2"min (3.8 cm) 1-1/2"min (3.8 cm) 30" SLIDE-IN ELECTRIC RANGE 23.25"5 ELECTRIC SUPPLY LOCATION1 51/2" 19" 36" 10" 7 51/2" 30" PRODUCT DIMENSIONS INCHES CENTIMETERS A2 26 5/16 B 30 C3 36 66.8 76.2 91.4 24" MODEL SKUs MES5752BAW MES5752BAB MES5752BAS C A 6 B Style...
... from wall to change specifications without notice. The vinyl may not be flush. Provide for planning purposes only. Depth excluding handle. 25" 1-1/2"min (3.8 cm) 1-1/2"min (3.8 cm) 30" SLIDE-IN ELECTRIC RANGE 23.25"5 ELECTRIC SUPPLY LOCATION1 51/2" 19" 36" 10" 7 51/2" 30" PRODUCT DIMENSIONS INCHES CENTIMETERS A2 26 5/16 B 30 C3 36 66.8 76.2 91.4 24" MODEL SKUs MES5752BAW MES5752BAB MES5752BAS C A 6 B Style...

Warranty Information
Page 1
... furnished with published installation instructions. 11. This major appliance is designed to Maytag within 30 days from the date of repair or replacement under this limited warranty does not apply. The cost of purchase. 6. Repairs when your authorized Maytag dealer to repair or replace appliance light bulbs, air filters or water filters. Repairs to parts or systems resulting from warranty coverage. 3. This warranty is located in materials or...
... furnished with published installation instructions. 11. This major appliance is designed to Maytag within 30 days from the date of repair or replacement under this limited warranty does not apply. The cost of purchase. 6. Repairs when your authorized Maytag dealer to repair or replace appliance light bulbs, air filters or water filters. Repairs to parts or systems resulting from warranty coverage. 3. This warranty is located in materials or...


