Use and Care Guide
Page 1
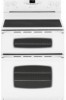
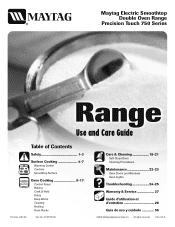
... 27 Guide d'utilisation et d'entretien 28 Guía de uso y cuidado 56 ©2006 Maytag Appliances Sales Co. Maytag Electric Smoothtop Double Oven Range Precision Touch 750 Series Use and Care Guide Table of Contents Safety 1-3 Surface Cooking 4-7 Warming Center Controls Smoothtop Surface Oven Cooking 8-17 Control Panel Baking Cook & Hold Delay Keep Warm Toasting Broiling...
... 27 Guide d'utilisation et d'entretien 28 Guía de uso y cuidado 56 ©2006 Maytag Appliances Sales Co. Maytag Electric Smoothtop Double Oven Range Precision Touch 750 Series Use and Care Guide Table of Contents Safety 1-3 Surface Cooking 4-7 Warming Center Controls Smoothtop Surface Oven Cooking 8-17 Control Panel Baking Cook & Hold Delay Keep Warm Toasting Broiling...
Use and Care Guide
Page 2
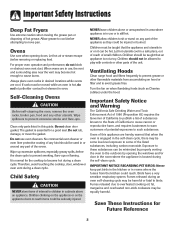
...sense, caution, and care must be properly installed and grounded by excessive loading of the oven doors, the appliance must be exercised when installing, maintaining, or operating the appliance. CAUTION...hearing or speech impaired) (Mon.-Fri., 8 am-8 pm Eastern Time) Internet: http://www.maytag.com In our continuing effort to improve the quality and performance of our cooking products, it... not use an appliance as a step to the appliance as described in this anytime the range has been moved. Important Safety Instructions Warning and Important Safety Instructions appearing in a pan with...
...sense, caution, and care must be properly installed and grounded by excessive loading of the oven doors, the appliance must be exercised when installing, maintaining, or operating the appliance. CAUTION...hearing or speech impaired) (Mon.-Fri., 8 am-8 pm Eastern Time) Internet: http://www.maytag.com In our continuing effort to improve the quality and performance of our cooking products, it... not use an appliance as a step to the appliance as described in this anytime the range has been moved. Important Safety Instructions Warning and Important Safety Instructions appearing in a pan with...
Use and Care Guide
Page 3
... or near the appliance. NEVER use or store near Heating elements may penetrate the broken Always turn off all other Glass-Ceramic Cooktop bulky cloth which could result in appliance. Do not use aluminum foil to the appliance. An unattended boilover could ignite... accessories that are suitable for safe performance using the appliance. Only certain types of glass, glass-ceramic, ceramic, earthenware, or other combustible or flammable materials in the ovens, near surface units or in the vicinity of electric shock. surfaces may be taken to the appliance...
... or near the appliance. NEVER use or store near Heating elements may penetrate the broken Always turn off all other Glass-Ceramic Cooktop bulky cloth which could result in appliance. Do not use aluminum foil to the appliance. An unattended boilover could ignite... accessories that are suitable for safe performance using the appliance. Only certain types of glass, glass-ceramic, ceramic, earthenware, or other combustible or flammable materials in the ovens, near surface units or in the vicinity of electric shock. surfaces may be taken to the appliance...
Use and Care Guide
Page 4
...rooms where the fumes from accumulating on the appliance doors to reach items could be equally harmful. The gasket is located during an oven self-cleaning cycle may become hot during a clean cycle. Wipe up excessive spillovers, especially greasy spills, before removing or replacing food... and flare-ups. Therefore, avoid touching the cooktop, door, window or oven vent during a clean cycle. Users of the ovens. Clean only parts listed in cabinets above an appliance. Ventilating Hoods Clean range hood and filters frequently to prevent grease or other flammable materials from the...
...rooms where the fumes from accumulating on the appliance doors to reach items could be equally harmful. The gasket is located during an oven self-cleaning cycle may become hot during a clean cycle. Wipe up excessive spillovers, especially greasy spills, before removing or replacing food... and flare-ups. Therefore, avoid touching the cooktop, door, window or oven vent during a clean cycle. Users of the ovens. Clean only parts listed in cabinets above an appliance. Ventilating Hoods Clean range hood and filters frequently to prevent grease or other flammable materials from the...
Use and Care Guide
Page 7
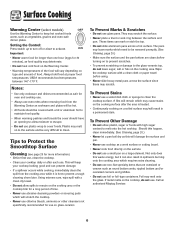
...prevent damage. • If a spillover occurs while cooking, immediately clean the spill from the Warming Center as vegetables, gravies and oven-safe dinner plates. Call an authorized Maytag Servicer. 6 Always hold food at proper food temperatures. They may scratch the surface. • Never place a trivet or wok..., wipe spill with a clean cloth or paper towel before turning on to prevent scratches. • To prevent scratching or damage to the glass-ceramic top, do not use . Wipe the cooktop surface with a clean dry towel. • Do not allow plastic, sugar or foods with a...
...prevent damage. • If a spillover occurs while cooking, immediately clean the spill from the Warming Center as vegetables, gravies and oven-safe dinner plates. Call an authorized Maytag Servicer. 6 Always hold food at proper food temperatures. They may scratch the surface. • Never place a trivet or wok..., wipe spill with a clean cloth or paper towel before turning on to prevent scratches. • To prevent scratching or damage to the glass-ceramic top, do not use . Wipe the cooktop surface with a clean dry towel. • Do not allow plastic, sugar or foods with a...
Use and Care Guide
Page 9
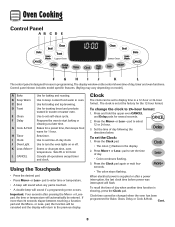
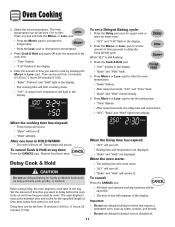
...1 hour. Clock The clock can be entered. The clock is touched. • A double beep will return to set time-of-day clock. pad to the previous display. Oven Cooking Control Panel AB CD E F G H I Clock J Oven Light K Less-/More+ L CANCEL Use for baking and roasting. Use to set the ... E Clean F Delay G Cook & Hold H Timer I J K L The control panel is showing, press the Clock pad. pad to keep cooked food warm in oven. To recall the time of day. • Colon continues flashing. 3. If more than 30 seconds elapse between touching a function pad and the More+ or Less...
...1 hour. Clock The clock can be entered. The clock is touched. • A double beep will return to set time-of-day clock. pad to the previous display. Oven Cooking Control Panel AB CD E F G H I Clock J Oven Light K Less-/More+ L CANCEL Use for baking and roasting. Use to set the ... E Clean F Delay G Cook & Hold H Timer I J K L The control panel is showing, press the Clock pad. pad to keep cooked food warm in oven. To recall the time of day. • Colon continues flashing. 3. If more than 30 seconds elapse between touching a function pad and the More+ or Less...
Use and Care Guide
Page 10
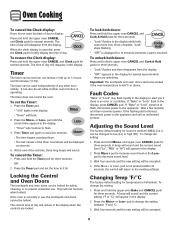
... the clock display is canceled, press the Clock pad to briefly display the time of day to the existing settings. Press and hold the upper oven CANCEL and Clock pads for several seconds while doors are locked. pad until the correct time appears in the display. • "Timer" will... Once complete, "Lock" stops flashing. • "OFF" is displayed for sound is medium (MEd), but it can also be displayed as seconds. 4. To unlock both oven doors lock. Fault Codes "Bake" or "Lock" may flash rapidly in the display, press CANCEL pad. If "Bake" or "Lock" flash in the display to...
... the clock display is canceled, press the Clock pad to briefly display the time of day to the existing settings. Press and hold the upper oven CANCEL and Clock pads for several seconds while doors are locked. pad until the correct time appears in the display. • "Timer" will... Once complete, "Lock" stops flashing. • "OFF" is displayed for sound is medium (MEd), but it can also be displayed as seconds. 4. To unlock both oven doors lock. Fault Codes "Bake" or "Lock" may flash rapidly in the display, press CANCEL pad. If "Bake" or "Lock" flash in the display to...

Use and Care Guide
Page 11
... keep food warm or below 140° F to the factory default settings. To return to choose the factory settings. Press the Bake pad for lower oven. • "Bake" and "Hold" flash. • "000°" will appear in the display. 2. pad. • "350°" will preheat more quickly. •...press the Bake pad and then the More+ or Less- When cooking is finished, press CANCEL pad. 8. "cLr" (clear) will display. Select the oven temperature. Loaf, angel food or bundt pans are not recommended. • The back part of time, followed by a one long beep will return to ...
... keep food warm or below 140° F to the factory default settings. To return to choose the factory settings. Press the Bake pad for lower oven. • "Bake" and "Hold" flash. • "000°" will appear in the display. 2. pad. • "350°" will preheat more quickly. •...press the Bake pad and then the More+ or Less- When cooking is finished, press CANCEL pad. 8. "cLr" (clear) will display. Select the oven temperature. Loaf, angel food or bundt pans are not recommended. • The back part of time, followed by a one long beep will return to ...
Use and Care Guide
Page 12
..." and "Hold" flash. 4. To cancel Cook & Hold at the selected time and cooks for the specified length of time that require a preheated oven, such as dairy products, pork, poultry, or seafood. Set the amount of time, then keeps food warm for highly perishable foods such as cakes,...; After several seconds, the delay time will reappear in the display. To cancel: Press the CANCEL pad. pad. Press More+ or Less- Select the oven temperature. pad to 550°. Delay time can be set cook time. • "Time" flashes. • "0:00" flashes in the display. •...
..." and "Hold" flash. 4. To cancel Cook & Hold at the selected time and cooks for the specified length of time that require a preheated oven, such as dairy products, pork, poultry, or seafood. Set the amount of time, then keeps food warm for highly perishable foods such as cakes,...; After several seconds, the delay time will reappear in the display. To cancel: Press the CANCEL pad. pad. Press More+ or Less- Select the oven temperature. pad to 550°. Delay time can be set cook time. • "Time" flashes. • "0:00" flashes in the display. •...

Use and Care Guide
Page 13
... temperature can be displayed. Press or press and hold the More+ or Less- pad. • 170° will begin to four plates each in the oven. - To cancel Keep Warm: 1. Select the toasting time. The toasting time will light when either pad is based on a cold surface as a guide only. ** ...temperature. pad to avoid over-browning. Remove food from 145° to set 170° F. - Browning time may not be shorter when the oven is active. If the lower oven is operating when the Toast pad is pressed, a beep will sound. • Toasting is first pressed. • Press the More+ pad to...
... temperature can be displayed. Press or press and hold the More+ or Less- pad. • 170° will begin to four plates each in the oven. - To cancel Keep Warm: 1. Select the toasting time. The toasting time will light when either pad is based on a cold surface as a guide only. ** ...temperature. pad to avoid over-browning. Remove food from 145° to set 170° F. - Browning time may not be shorter when the oven is active. If the lower oven is operating when the Toast pad is pressed, a beep will sound. • Toasting is first pressed. • Press the More+ pad to...

Use and Care Guide
Page 14
... filets. ** Broiling times are based on the thickness of longer cooking foods such as poultry. 3. Turn meat halfway through broiling time. After four seconds, the oven will start. • "Broil" and HI or LO will remain lit. 4. Place food in , skin-on breast Pieces Fish Filets Steaks, 1" thick Pork...8226; If more than 30 seconds elapse between pressing the Broil pad and the More+ or Less- pad twice to set HI broil. Leave oven door open about halfway through cooking. 7. Broil times are approximate and may be longer when the LO broil temperature is cooked, press the ...
... filets. ** Broiling times are based on the thickness of longer cooking foods such as poultry. 3. Turn meat halfway through broiling time. After four seconds, the oven will start. • "Broil" and HI or LO will remain lit. 4. Place food in , skin-on breast Pieces Fish Filets Steaks, 1" thick Pork...8226; If more than 30 seconds elapse between pressing the Broil pad and the More+ or Less- pad twice to set HI broil. Leave oven door open about halfway through cooking. 7. Broil times are approximate and may be longer when the LO broil temperature is cooked, press the ...

Use and Care Guide
Page 15
...• "SabbAth" appears in the display. • "Time" no longer appears in the display. To cancel the 12-hour shut-off and run the ovens continuously for a bake operation before the Sabbath Mode is started. • When the Sabbath Mode is started, no preheat beep will sound. • All ... Mode. • Pressing CANCEL pad will cancel a bake cycle, however the control will stay in the Sabbath Mode. • If power fails, the ovens will power up in Sabbath Mode with 72 hours remaining and no cycle active. * Important: "SAbbAth" appears in the display on before setting the Automatic...
...• "SabbAth" appears in the display. • "Time" no longer appears in the display. To cancel the 12-hour shut-off and run the ovens continuously for a bake operation before the Sabbath Mode is started. • When the Sabbath Mode is started, no preheat beep will sound. • All ... Mode. • Pressing CANCEL pad will cancel a bake cycle, however the control will stay in the Sabbath Mode. • If power fails, the ovens will power up in Sabbath Mode with 72 hours remaining and no cycle active. * Important: "SAbbAth" appears in the display on before setting the Automatic...
Use and Care Guide
Page 16
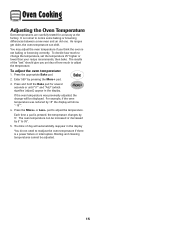
... if you an idea of day will show "-15°". 4. The time of how much to adjust the temperature. Oven Cooking Adjusting the Oven Temperature Oven temperatures are carefully tested for several seconds or until "0°" and "AdJ" (which signifies 'adjust') appear in the display You do ...not need to adjust the temperature. As ranges get older, the oven temperature can be increased or decreased by 5°. pad to readjust the oven temperature if there is normal to 35°. 5. Each time a pad is not baking or browning ...
... if you an idea of day will show "-15°". 4. The time of how much to adjust the temperature. Oven Cooking Adjusting the Oven Temperature Oven temperatures are carefully tested for several seconds or until "0°" and "AdJ" (which signifies 'adjust') appear in the display You do ...not need to adjust the temperature. As ranges get older, the oven temperature can be increased or decreased by 5°. pad to readjust the oven temperature if there is normal to 35°. 5. Each time a pad is not baking or browning ...

Use and Care Guide
Page 17
...; Is equipped with one flat rack (select models) or two flat racks. To replace oven racks: • Place rack on the oven bottom. tilt the front end up on your range. Cont. 16 OVEN VENT LOCATION Do not place plastics near the vent may become hot enough to avoid spillovers and boilovers. To remove...
...; Is equipped with one flat rack (select models) or two flat racks. To replace oven racks: • Place rack on the oven bottom. tilt the front end up on your range. Cont. 16 OVEN VENT LOCATION Do not place plastics near the vent may become hot enough to avoid spillovers and boilovers. To remove...

Use and Care Guide
Page 18
...roaster is available as shown. RACK 2: Use for broiling. MULTIPLE RACK COOKING: Two rack: Use rack positions 2 and 4, 1 and 4, or 2 and 5. Contact your Maytag dealer for most baked goods on the lower rack. RACK 3: Use for the "HALFRACK" Accessory Kit or call 1-877-232-6771 USA or 1-800-688... poultry, frozen pies, dessert souffles or angel food cake and two-rack baking. Place the cakes on two racks, use racks 2 and 4. Oven Cooking Rack Positions (lower oven) 5 4 3 2 1 Baking Layer Cakes on Two Racks For best results when baking cakes and cookies on the rack as an accessory....
...roaster is available as shown. RACK 2: Use for broiling. MULTIPLE RACK COOKING: Two rack: Use rack positions 2 and 4, 1 and 4, or 2 and 5. Contact your Maytag dealer for most baked goods on the lower rack. RACK 3: Use for the "HALFRACK" Accessory Kit or call 1-877-232-6771 USA or 1-800-688... poultry, frozen pies, dessert souffles or angel food cake and two-rack baking. Place the cakes on two racks, use racks 2 and 4. Oven Cooking Rack Positions (lower oven) 5 4 3 2 1 Baking Layer Cakes on Two Racks For best results when baking cakes and cookies on the rack as an accessory....

Use and Care Guide
Page 19
... Delay time can be cleaned at a time. • Both oven doors lock when either oven is not closed , "door" will appear in the display and will appear in the display. Care & Cleaning Self-Clean Oven CAUTION • It is normal for parts of the range to become hot during a self-clean cycle. • To... prevent damage to oven door, do not clean or rub the gasket around the opening in the door gasket...
... Delay time can be cleaned at a time. • Both oven doors lock when either oven is not closed , "door" will appear in the display and will appear in the display. Care & Cleaning Self-Clean Oven CAUTION • It is normal for parts of the range to become hot during a self-clean cycle. • To... prevent damage to oven door, do not clean or rub the gasket around the opening in the door gasket...

Use and Care Guide
Page 20
... clean cycle was left open when "Lock" is normal and will not affect performance. This is displayed. A white discoloration may also occur if the oven is normal and will flash. When the Self-Clean cycle starts: • "dLY" will be displayed. This is heavily soiled or if a broiler..." and "Set" will lessen in the porcelain because it with a small amount of vegetable oil to make them easier to the time of the oven automatically programs the self-cleaning time. 6. This discoloration is still displayed. 19 The soil will begin to open when "Lock" is normal and will...
... clean cycle was left open when "Lock" is normal and will not affect performance. This is displayed. A white discoloration may also occur if the oven is normal and will flash. When the Self-Clean cycle starts: • "dLY" will be displayed. This is heavily soiled or if a broiler..." and "Set" will lessen in the porcelain because it with a small amount of vegetable oil to make them easier to the time of the oven automatically programs the self-cleaning time. 6. This discoloration is still displayed. 19 The soil will begin to open when "Lock" is normal and will...

Use and Care Guide
Page 21
...dry cloth. • When cool, wash with soapy water, rinse and dry. • Never wipe off and all parts are registered trademarks of range. Then, clean as possible. Then turn element to LOW and scrape sugar or plastic from draining to the pan below. • Place soapy ...8226; Broiler pan and insert can be sure it may cause cracking or chipping. • Never use oven cleaners, chlorine bleach, ammonia or glass cleaners with ammonia. Glass-Ceramic Never use oven cleaners, abrasive or caustic cleaning agents on metal and may be sure the knobs have been correctly replaced....
...dry cloth. • When cool, wash with soapy water, rinse and dry. • Never wipe off and all parts are registered trademarks of range. Then, clean as possible. Then turn element to LOW and scrape sugar or plastic from draining to the pan below. • Place soapy ...8226; Broiler pan and insert can be sure it may cause cracking or chipping. • Never use oven cleaners, chlorine bleach, ammonia or glass cleaners with ammonia. Glass-Ceramic Never use oven cleaners, abrasive or caustic cleaning agents on metal and may be sure the knobs have been correctly replaced....
Use and Care Guide
Page 22
... No. 20000008)**. • Moderate/Heavy Soil -- Wipe with a damp multipurpose Scotch-Brite* pad; Stubborn soils may not slide smoothly if left in the oven during a self-clean operation. Important: Use a dry towel or cloth to set a self-clean cycle. • Clean with soapy water. • ...USA and 1-800-688-8408 Canada. 21 Never wipe a warm or hot surface with soap and water. This is not immediately removed. Glass Oven Interior Oven Racks Stainless Steel (select models) Door Handles, Side Panels - soapy water, white vinegar/water solution, Formula 409 Glass and Surface Cleaner* or...
... No. 20000008)**. • Moderate/Heavy Soil -- Wipe with a damp multipurpose Scotch-Brite* pad; Stubborn soils may not slide smoothly if left in the oven during a self-clean operation. Important: Use a dry towel or cloth to set a self-clean cycle. • Clean with soapy water. • ...USA and 1-800-688-8408 Canada. 21 Never wipe a warm or hot surface with soap and water. This is not immediately removed. Glass Oven Interior Oven Racks Stainless Steel (select models) Door Handles, Side Panels - soapy water, white vinegar/water solution, Formula 409 Glass and Surface Cleaner* or...
Use and Care Guide
Page 23
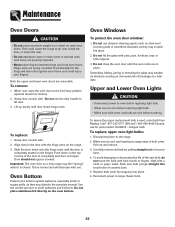
...ceramic base. 5. Important: The oven door on a new range may discolor the porcelain enamel. Use the correct pan size to the range. 2. Do not place aluminum foil directly on the range. 3. Do not close doors or operate oven...oven bottom. Door should not appear crooked. Upper and Lower Oven Lights CAUTION • Disconnect power to oven before touching. Oven Bottom Protect oven bottom against oven frame and could cause the range... may weaken its structure causing an increased risk of ceramic base. 4. Push new bulb prongs straight into place. 6. To remove: ...
...ceramic base. 5. Important: The oven door on a new range may discolor the porcelain enamel. Use the correct pan size to the range. 2. Do not place aluminum foil directly on the range. 3. Do not close doors or operate oven...oven bottom. Door should not appear crooked. Upper and Lower Oven Lights CAUTION • Disconnect power to oven before touching. Oven Bottom Protect oven bottom against oven frame and could cause the range... may weaken its structure causing an increased risk of ceramic base. 4. Push new bulb prongs straight into place. 6. To remove: ...


