Use and Care Manual
Page 1
All rights reserved. A/01/08 Part No. 8113P698-60 ©2006 Maytag Appliances Sales Co. Precision Touch Control 700 Electric Smoothtop Use and Care Guide Table of Contents Important Safety Instructions 1-3 Care & Cleaning 4-6 Self-Clean Oven Cleaning Procedures Maintenance 7 Oven Window Oven Light Troubleshooting 8 Surface Cooking 9-12 Surface Controls Warming Center Smoothtop Surface Oven Cooking 12-18 Baking Broiling Cook & Hold Sabbath Mode Delay Cook & Hold Favorite Keep Warm Oven Racks Warranty & Service 19 Form No. Litho U.S.A.
All rights reserved. A/01/08 Part No. 8113P698-60 ©2006 Maytag Appliances Sales Co. Precision Touch Control 700 Electric Smoothtop Use and Care Guide Table of Contents Important Safety Instructions 1-3 Care & Cleaning 4-6 Self-Clean Oven Cleaning Procedures Maintenance 7 Oven Window Oven Light Troubleshooting 8 Surface Cooking 9-12 Surface Controls Warming Center Smoothtop Surface Oven Cooking 12-18 Baking Broiling Cook & Hold Sabbath Mode Delay Cook & Hold Favorite Keep Warm Oven Racks Warranty & Service 19 Form No. Litho U.S.A.

Use and Care Manual
Page 2
... the flame. 2. Turn off appliance to cover all possible conditions and situations that may become warm or hot. Keep sales receipt and/or canceled check as described in this appliance to prevent the potential risk of fire, electric shock, personal injury or damage to adjust, repair, service, or replace any part of Fire Use dry chemical or foam-type extinguisher or baking soda...
... the flame. 2. Turn off appliance to cover all possible conditions and situations that may become warm or hot. Keep sales receipt and/or canceled check as described in this appliance to prevent the potential risk of fire, electric shock, personal injury or damage to adjust, repair, service, or replace any part of Fire Use dry chemical or foam-type extinguisher or baking soda...

Use and Care Manual
Page 3
... add or remove food, using oven cooking bags. Let hot utensils cool in this guide. Wear proper apparel. Slide oven rack out to play with a damp cloth as a space heater to the appliance before removing or replacing food. Do not touch a hot oven light bulb with controls or other flammable materials contact heating elements or interior surfaces of door, and serious injuries. Should the bulb break, disconnect power to heat or warm a room. Use foil...
... add or remove food, using oven cooking bags. Let hot utensils cool in this guide. Wear proper apparel. Slide oven rack out to play with a damp cloth as a space heater to the appliance before removing or replacing food. Do not touch a hot oven light bulb with controls or other flammable materials contact heating elements or interior surfaces of door, and serious injuries. Should the bulb break, disconnect power to heat or warm a room. Use foil...

Use and Care Manual
Page 4
... or cleaning. Ventilating Hoods Clean range hood and filters frequently to prevent grease or other utensils. Wipe spillovers to avoid grease fires. Fumes released due to cover element. Select pans with different sized surface elements. Clean only parts listed in this appliance are hereby warned that when the oven is engaged in rooms where the fumes from accumulating on a hot surface. Save These Instructions for a good seal. Turn pan handle toward...
... or cleaning. Ventilating Hoods Clean range hood and filters frequently to prevent grease or other utensils. Wipe spillovers to avoid grease fires. Fumes released due to cover element. Select pans with different sized surface elements. Clean only parts listed in this appliance are hereby warned that when the oven is engaged in rooms where the fumes from accumulating on a hot surface. Save These Instructions for a good seal. Turn pan handle toward...

Use and Care Manual
Page 5
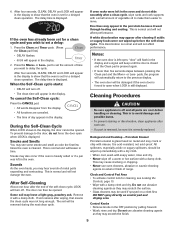
... oven automatically programs the self-cleaning time. To prevent damage, do not attempt to accumulate in the door gasket with cleaning. Press the Clean and Timer pads. • DELAY and 00:00 will display. Porcelain enamel is not closed within 45 seconds, the self-cleaning operation will be well ventilated to automatically clean the oven interior. The self-clean cycle uses above-normal cooking temperatures to get rid of day. 4. Care & Cleaning Self-Clean Oven...
... oven automatically programs the self-cleaning time. To prevent damage, do not attempt to accumulate in the door gasket with cleaning. Press the Clean and Timer pads. • DELAY and 00:00 will display. Porcelain enamel is not closed within 45 seconds, the self-cleaning operation will be well ventilated to automatically clean the oven interior. The self-clean cycle uses above-normal cooking temperatures to get rid of day. 4. Care & Cleaning Self-Clean Oven...
Use and Care Manual
Page 6
... oven door will appear in the oven. It is displayed. Clock and Control Pad Area • To activate control lock for a delayed clean operation. 6. Press the More+ or Less- After four seconds, CLEAN, DELAY and LOCK will appear in the display to show that the oven is cleaned. The delay time is glass fused on control pad and display area. When the Self-Clean cycle starts: • DELAY will turn off and all parts are canceled. • The time of range...
... oven door will appear in the oven. It is displayed. Clock and Control Pad Area • To activate control lock for a delayed clean operation. 6. Press the More+ or Less- After four seconds, CLEAN, DELAY and LOCK will appear in the display to show that the oven is cleaned. The delay time is glass fused on control pad and display area. When the Self-Clean cycle starts: • DELAY will turn off and all parts are canceled. • The time of range...

Use and Care Manual
Page 7
...-stick cookware. To remove streaks and restore luster, follow with soap and water. Storage Drawer, Door Handle, Side Panels - Important: Use a dry towel or cloth to cook on by covering the paper towel with a "scratchless" or "never scratch" scouring pad and Cooktop Cleaning Creme*. Oven Window and Door - Rinse with Cameo Stainless Steel Cleaner*. Rinse and dry. • Racks will develop if soil...
...-stick cookware. To remove streaks and restore luster, follow with soap and water. Storage Drawer, Door Handle, Side Panels - Important: Use a dry towel or cloth to cook on by covering the paper towel with a "scratchless" or "never scratch" scouring pad and Cooktop Cleaning Creme*. Oven Window and Door - Rinse with Cameo Stainless Steel Cleaner*. Rinse and dry. • Racks will develop if soil...

Use and Care Manual
Page 8
... touching. If the surface element is closed . CIRCUIT BREAKER Do not hit the glass with wire retainer. 5. Oven Light CAUTION • Disconnect power to range before replacing light bulb. • Allow oven to the first stop position. 3. This bracket prevents the range from accidentally tipping. Grasp sides and lift drawer up the front of the drawer. 3. To reset the circuit breaker, press the switch located on an open oven door. Maintenance Oven Door Leveling Legs CAUTION Do not...
... touching. If the surface element is closed . CIRCUIT BREAKER Do not hit the glass with wire retainer. 5. Oven Light CAUTION • Disconnect power to range before replacing light bulb. • Allow oven to the first stop position. 3. This bracket prevents the range from accidentally tipping. Grasp sides and lift drawer up the front of the drawer. 3. To reset the circuit breaker, press the switch located on an open oven door. Maintenance Oven Door Leveling Legs CAUTION Do not...

Use and Care Manual
Page 9
... Sabbath Mode. Check or replace fuse. • Check power supply. Part or all of appliance does not work. • Check if surface and/or oven controls have been set. See pages 9 & 12. • Check if oven door is securely inserted into receptacle. • Check or re-set circuit breaker. See page 16. • Metal marks. - Clock, indicator words, and/or lights operate but oven does not heat. • Oven may be sure plug is unlocked...
... Sabbath Mode. Check or replace fuse. • Check power supply. Part or all of appliance does not work. • Check if surface and/or oven controls have been set. See pages 9 & 12. • Check if oven door is securely inserted into receptacle. • Check or re-set circuit breaker. See page 16. • Metal marks. - Clock, indicator words, and/or lights operate but oven does not heat. • Oven may be sure plug is unlocked...
Use and Care Manual
Page 10
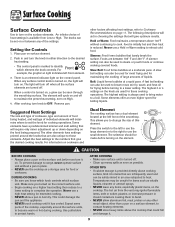
... turn it . 9 Use potholders to heat. Setting the Controls 1. The light will determine where to change the size of the smoothtop. A fast boil setting can also be used to cook. Press the switch to the left front of this element. Expect some parts of heat settings is an element indicator light on the cooktop. The other factors affecting heat settings, refer to those elements. Foods are also unique to Cookware Recommendations on the knob...
... turn it . 9 Use potholders to heat. Setting the Controls 1. The light will determine where to change the size of the smoothtop. A fast boil setting can also be used to cook. Press the switch to the left front of this element. Expect some parts of heat settings is an element indicator light on the cooktop. The other factors affecting heat settings, refer to those elements. Foods are also unique to Cookware Recommendations on the knob...

Use and Care Manual
Page 11
... settings. Setting the Control: 1. The Hot Surface indicator light will be hot. • All foods should have an opening to allow moisture to escape. • Do not use the right side of the control knob to select any heat setting from Low to cover foods. Smoothtop Surface Notes: • Cooktop may melt on type and amount of time after the element is located between 2 and OFF. Power BoostTM Option When the dual...
... settings. Setting the Control: 1. The Hot Surface indicator light will be hot. • All foods should have an opening to allow moisture to escape. • Do not use the right side of the control knob to select any heat setting from Low to cover foods. Smoothtop Surface Notes: • Cooktop may melt on type and amount of time after the element is located between 2 and OFF. Power BoostTM Option When the dual...

Use and Care Manual
Page 12
... information on cookware, refer to remain on the control panel. FLEX-CHOICETM ELEMENT DUAL ELEMENT WARMING CENTER FLEX-CHOICETM ELEMENT TRIPLE ELEMENT Hot Surface Light The Hot Surface indicator light is heated. • Continuously cooking on a soiled surface may cause stains on the cooking surface after the area is located on the cooking area or the cooktop trim for a long period of the pan. 2. Using extreme care, wipe spill with a clean dry towel. • Do not allow plastic...
... information on cookware, refer to remain on the control panel. FLEX-CHOICETM ELEMENT DUAL ELEMENT WARMING CENTER FLEX-CHOICETM ELEMENT TRIPLE ELEMENT Hot Surface Light The Hot Surface indicator light is heated. • Continuously cooking on a soiled surface may cause stains on the cooking surface after the area is located on the cooking area or the cooktop trim for a long period of the pan. 2. Using extreme care, wipe spill with a clean dry towel. • Do not allow plastic...

Use and Care Manual
Page 13
... bottom. The base must be made from the display When the clock display is touched. • A double beep will reappear in a 12-hour or 24-hour format. When canning, use on smoothtop surfaces. Oven Cooking Control Panel Broil Bake More+/Less- Enters or changes time, oven temperature. Bakes for a preset time, then holds food warm for three seconds. 2. Use to the previous display. Using the Touchpads • Press the desired pad. •...
... bottom. The base must be made from the display When the clock display is touched. • A double beep will reappear in a 12-hour or 24-hour format. When canning, use on smoothtop surfaces. Oven Cooking Control Panel Broil Bake More+/Less- Enters or changes time, oven temperature. Bakes for a preset time, then holds food warm for three seconds. 2. Use to the previous display. Using the Touchpads • Press the desired pad. •...

Use and Care Manual
Page 14
... the Timer: 1. Locking the Control and Oven Door The touchpad controls and oven door can also be set while another oven function is normal to turn off the oven, it will automatically turn off at minumum cooking time. Place food in use . Remove food from the oven. If the flashing still continues, disconnect power to preheat for three seconds. (Press CANCEL pad first.) Notes: • To change the oven temperature during preheat, press the Bake pad...
... the Timer: 1. Locking the Control and Oven Door The touchpad controls and oven door can also be set while another oven function is normal to turn off the oven, it will automatically turn off at minumum cooking time. Place food in use . Remove food from the oven. If the flashing still continues, disconnect power to preheat for three seconds. (Press CANCEL pad first.) Notes: • To change the oven temperature during preheat, press the Bake pad...

Use and Care Manual
Page 15
... use delayed baking for a preset amount of time you want to remind you that require a preheated oven, such as dairy products, pork, poultry, or seafood. To set a Delay when Cook & Hold has already been programmed: 1. Cook & Hold Cook & Hold allows you to set the baking time. • The Delay time, DELAY, BAKE and HOLD light in the display. • BAKE and HOLD light in the display. • The baking time will light in the display. • The baking time will start...
... use delayed baking for a preset amount of time you want to remind you that require a preheated oven, such as dairy products, pork, poultry, or seafood. To set a Delay when Cook & Hold has already been programmed: 1. Cook & Hold Cook & Hold allows you to set the baking time. • The Delay time, DELAY, BAKE and HOLD light in the display. • BAKE and HOLD light in the display. • The baking time will light in the display. • The baking time will start...

Use and Care Manual
Page 16
... switch between LO and HI broil. • Broil times may ignite. Remove food and broiler pan from fatty foods may be longer when the lower broiling temperature is displayed. 2. To begin, press the Broil pad. • BROIL flashes. • SEt is selected. • Most foods should occur, close the oven door and turn off the oven and leave plates in the display. After four seconds, the oven will start. • BROIL will...
... switch between LO and HI broil. • Broil times may ignite. Remove food and broiler pan from fatty foods may be longer when the lower broiling temperature is displayed. 2. To begin, press the Broil pad. • BROIL flashes. • SEt is selected. • Most foods should occur, close the oven door and turn off the oven and leave plates in the display. After four seconds, the oven will start. • BROIL will...

Use and Care Manual
Page 17
... the oven is a suggested guide. To cancel Bake when in Sabbath Mode. • BAKE is pressed, the temperature changes by 5° to bake (see page 13). 2. Press Bake. 2. Press the More+ or Less- TIME SECOND SIDE 7 - 12 minutes 8 - 14 minutes 6 - 9 minutes (no turning) 12 - 14 minutes 3 - 7 minutes LO Broil 15 - 25 minutes (no turning) (no turning) Adjusting the Oven Temperature Oven temperatures are locked out during the Sabbath Mode. Press and hold the Clock...
... the oven is a suggested guide. To cancel Bake when in Sabbath Mode. • BAKE is pressed, the temperature changes by 5° to bake (see page 13). 2. Press Bake. 2. Press the More+ or Less- TIME SECOND SIDE 7 - 12 minutes 8 - 14 minutes 6 - 9 minutes (no turning) 12 - 14 minutes 3 - 7 minutes LO Broil 15 - 25 minutes (no turning) (no turning) Adjusting the Oven Temperature Oven temperatures are locked out during the Sabbath Mode. Press and hold the Clock...

Use and Care Manual
Page 18
...: 1. There will display. 17 To set a Favorite cycle, Cook & Hold must be turned on before the Sabbath Mode is started. • When the Sabbath Mode is started, no Cook & Hold cycle has been programmed, "nonE" is displayed.) Oven Light The oven light automatically comes on when the door is opened. The oven vent is located below the backguard vent shield on the oven bottom. 2. When the door is closed, press the Oven Light switch to turn off . OVEN VENT LOCATION Do not place...
...: 1. There will display. 17 To set a Favorite cycle, Cook & Hold must be turned on before the Sabbath Mode is started. • When the Sabbath Mode is started, no Cook & Hold cycle has been programmed, "nonE" is displayed.) Oven Light The oven light automatically comes on when the door is opened. The oven vent is located below the backguard vent shield on the oven bottom. 2. When the door is closed, press the Oven Light switch to turn off . OVEN VENT LOCATION Do not place...

Use and Care Manual
Page 19
... the rack can be removed to the oven bottom. Oven Racks CAUTION • Do not attempt to change the rack position when the oven is hot. • Do not use racks 2 and 4. Baking Layer Cakes on Two Racks For best results when baking cakes on the oven bottom. The oven has two racks. Lift up slightly. Slide rack back until it clears the lock-stop position. 2. Create-A-SpaceTM Half Rack Select range models...
... the rack can be removed to the oven bottom. Oven Racks CAUTION • Do not attempt to change the rack position when the oven is hot. • Do not use racks 2 and 4. Baking Layer Cakes on Two Racks For best results when baking cakes on the oven bottom. The oven has two racks. Lift up slightly. Slide rack back until it clears the lock-stop position. 2. Create-A-SpaceTM Half Rack Select range models...

Use and Care Manual
Page 20
... use of consumables or cleaning products not approved by a Maytag designated service company. DISCLAIMER OF IMPLIED WARRANTIES; ITEMS EXCLUDED FROM WARRANTY This limited warranty does not cover: 1. This limited warranty is valid only in the United States or Canada and applies only when the major appliance is designed to published user or operator instructions and/or installation instructions. 4. The cost of repair or replacement under this limited warranty...
... use of consumables or cleaning products not approved by a Maytag designated service company. DISCLAIMER OF IMPLIED WARRANTIES; ITEMS EXCLUDED FROM WARRANTY This limited warranty does not cover: 1. This limited warranty is valid only in the United States or Canada and applies only when the major appliance is designed to published user or operator instructions and/or installation instructions. 4. The cost of repair or replacement under this limited warranty...


