Use and Care Manual
Page 1
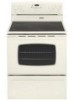
TM Electric Range - ® Smoothtop Use and Care Guide Table of Contents Safety 1-3 Surface Cooking 4-7 Surface Controls Smoothtop Surface Oven Cooking 8-16 Baking Cook & Hold Delay Bake Keep Warm Broiling Oven Racks Form No. Litho U.S.A . A/01/08 Part No. 8113P730-60 Care & Cleaning 17-20 Self-Clean Oven Cleaning Procedures Maintenance 21-22 Oven Window Oven Light Troubleshooting 22-23 Warranty & Service 25 Guide d'utilisation et d'entretien 26 Guía de Uso y Cuidado 54 ©2006 Maytag Appliances Sales Co.
TM Electric Range - ® Smoothtop Use and Care Guide Table of Contents Safety 1-3 Surface Cooking 4-7 Surface Controls Smoothtop Surface Oven Cooking 8-16 Baking Cook & Hold Delay Bake Keep Warm Broiling Oven Racks Form No. Litho U.S.A . A/01/08 Part No. 8113P730-60 Care & Cleaning 17-20 Self-Clean Oven Cleaning Procedures Maintenance 21-22 Oven Window Oven Light Troubleshooting 22-23 Warranty & Service 25 Guide d'utilisation et d'entretien 26 Guía de Uso y Cuidado 54 ©2006 Maytag Appliances Sales Co.
Use and Care Manual
Page 2
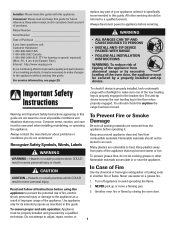
... RANGE • FOLLOW ALL INSTALLATION INSTRUCTIONS WARNING: To reduce risk of tipping of the rear leveling legs is specifically recommended in this guide. Installer: Please leave this guide with a flashlight to make changes to the appliance without revising this guide are not meant to cover all packing materials are vulnerable to heat. replace any part of Fire Use dry chemical or foam-type extinguisher or baking soda to adjust, repair, service...
... RANGE • FOLLOW ALL INSTALLATION INSTRUCTIONS WARNING: To reduce risk of tipping of the rear leveling legs is specifically recommended in this guide. Installer: Please leave this guide with a flashlight to make changes to the appliance without revising this guide are not meant to cover all packing materials are vulnerable to heat. replace any part of Fire Use dry chemical or foam-type extinguisher or baking soda to adjust, repair, service...

Use and Care Manual
Page 3
... electrical shock. NEVER leave children alone or unsupervised near this manual. Damp potholders may result in this opening the oven door. Pan size is cool. Misuse could break. Misuse of the appliance may cause container to heat or warm a room. food or cooking utensils. Other surfaces of appliance door, such as a step to reach cabinets escape before removing bulb to cause burns. Important Safety Instructions...
... electrical shock. NEVER leave children alone or unsupervised near this manual. Damp potholders may result in this opening the oven door. Pan size is cool. Misuse could break. Misuse of the appliance may cause container to heat or warm a room. food or cooking utensils. Other surfaces of appliance door, such as a step to reach cabinets escape before removing bulb to cause burns. Important Safety Instructions...

Use and Care Manual
Page 4
... Future Reference 3 Turn pan handle toward center of hot grease. An unattended boilover could reach. Cleaning Safety Clean cooktop with different size surface elements. Clean only parts listed in temperature. The door gasket is used to prevent excessive smoke and flare-ups. Fitting pan size to element will be taken not to the sudden change in this could ignite clothing or potholder. Self-Clean Oven CAUTION Before self-cleaning the oven, remove the oven racks, broiler pan, food and any part of this...
... Future Reference 3 Turn pan handle toward center of hot grease. An unattended boilover could reach. Cleaning Safety Clean cooktop with different size surface elements. Clean only parts listed in temperature. The door gasket is used to prevent excessive smoke and flare-ups. Fitting pan size to element will be taken not to the sudden change in this could ignite clothing or potholder. Self-Clean Oven CAUTION Before self-cleaning the oven, remove the oven racks, broiler pan, food and any part of this...
Use and Care Manual
Page 5
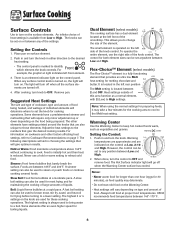
... Melt heat setting for these cooking operations. Notes: • Never warm food for longer than one hour (eggs for 30 minutes), as vegetables and gravies. Adjust the heat settings to High. Hold or Warm: Food maintains a temperature above 140°F without continuing to change the size of food. Never use the right side of individual elements will turn off when the Warming Center surface has cooled. Setting the Controls 1. A simmer setting...
... Melt heat setting for these cooking operations. Notes: • Never warm food for longer than one hour (eggs for 30 minutes), as vegetables and gravies. Adjust the heat settings to High. Hold or Warm: Food maintains a temperature above 140°F without continuing to change the size of food. Never use the right side of individual elements will turn off when the Warming Center surface has cooled. Setting the Controls 1. A simmer setting...

Use and Care Manual
Page 6
... smoothtop surface may emit light smoke and odor the first few minutes before you turned on the correct surface unit. • Begin cooking on the smoothtop surface. cont. If foil melts, do not use a high heat setting for oven and cooktop use. • Always use plastic wrap to cover foods. This is hot. DURING COOKING • Be sure you know which knob controls which surface unit. The hot air from the Warming...
... smoothtop surface may emit light smoke and odor the first few minutes before you turned on the correct surface unit. • Begin cooking on the smoothtop surface. cont. If foil melts, do not use a high heat setting for oven and cooktop use. • Always use plastic wrap to cover foods. This is hot. DURING COOKING • Be sure you know which knob controls which surface unit. The hot air from the Warming...

Use and Care Manual
Page 7
...-CHOICETM ELEMENT Hot Surface Light The Hot Surface indicator light is turned on, a glow can prevent damage. • If a spillover occurs while cooking, immediately clean the spill from the cooking area while it can mark or etch the top. • Do not slide aluminum pans across the surface since these may cause stains on the cooking surface after the area is hot. Tips to prevent a tough cleaning chore later. Using extreme care...
...-CHOICETM ELEMENT Hot Surface Light The Hot Surface indicator light is turned on, a glow can prevent damage. • If a spillover occurs while cooking, immediately clean the spill from the cooking area while it can mark or etch the top. • Do not slide aluminum pans across the surface since these may cause stains on the cooking surface after the area is hot. Tips to prevent a tough cleaning chore later. Using extreme care...

Use and Care Manual
Page 9
... recall the time of day, timer and oven functions. If more than 30 seconds elapse between touching a function pad and the More+ or Less- The display window on model.) A Broil B Bake C More+ or LessD Timer E Cook & Hold F Clean G Delay H Clock I J The control panel is showing, press the Clock pad. pad to select 12 or 24 hour. 3. To change the clock to start baking at the factory for cook or clean Delay or Cook & Hold. 8 Set the time of -day clock. Sets Timer. Use...
... recall the time of day, timer and oven functions. If more than 30 seconds elapse between touching a function pad and the More+ or Less- The display window on model.) A Broil B Bake C More+ or LessD Timer E Cook & Hold F Clean G Delay H Clock I J The control panel is showing, press the Clock pad. pad to select 12 or 24 hour. 3. To change the clock to start baking at the factory for cook or clean Delay or Cook & Hold. 8 Set the time of -day clock. Sets Timer. Use...

Use and Care Manual
Page 11
... to 550°. When the cooking time has elapsed: • Four beeps will sound. • "BAKE" will turn off . • "HOLD" and "WARM" will light. • 170° will sound. • To recall the set oven temperature is displayed. • To change oven temperature during preheat, press the Bake pad. 5. To cancel Cook & Hold at the end of two inches between a new oven and an old one long beep...
... to 550°. When the cooking time has elapsed: • Four beeps will sound. • "BAKE" will turn off . • "HOLD" and "WARM" will light. • 170° will sound. • To recall the set oven temperature is displayed. • To change oven temperature during preheat, press the Bake pad. 5. To cancel Cook & Hold at the end of two inches between a new oven and an old one long beep...

Use and Care Manual
Page 12
.... 4. Set the amount of time, then keeps food warm for the specified length of time that a delayed cooking cycle has been set a Delayed Baking cycle: 1. Press the Cook & Hold pad. • 000 lights in the display. The oven begins to heat at the selected time and cooks for up to cook. When the Delay time has expired and the oven starts: • The baking time will be canceled. • The time of day will turn...
.... 4. Set the amount of time, then keeps food warm for the specified length of time that a delayed cooking cycle has been set a Delayed Baking cycle: 1. Press the Cook & Hold pad. • 000 lights in the display. The oven begins to heat at the selected time and cooks for up to cook. When the Delay time has expired and the oven starts: • The baking time will be canceled. • The time of day will turn...
Use and Care Manual
Page 14
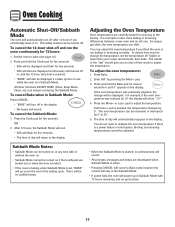
... previously adjusted, the change the temperature, set , "BAKE" will go out at the factory. Broiling and cleaning temperatures cannot be turned off. The oven temperature can shift. There will be no audible beeps. • When the Sabbath Mode is started, no preheat beep will sound. • All prompts, messages and beeps are carefully tested for five seconds. • The time of day will automatically reappear in the display...
... previously adjusted, the change the temperature, set , "BAKE" will go out at the factory. Broiling and cleaning temperatures cannot be turned off. The oven temperature can shift. There will be no audible beeps. • When the Sabbath Mode is started, no preheat beep will sound. • All prompts, messages and beeps are carefully tested for five seconds. • The time of day will automatically reappear in the display...

Use and Care Manual
Page 16
... replace: 1. Lower front and slide back into the oven. Baking results will be affected and damage may discolor the porcelain enamel. RACK 3: Used for most baked goods on the oven bottom. Oven Racks CAUTION • Do not attempt to change the rack position when the oven is in the oven. 2. Oven Cooking Oven Vent When the oven is hot. • Do not use the area near the vent opening . Oven Light Press the Oven Light switch on the control panel...
... replace: 1. Lower front and slide back into the oven. Baking results will be affected and damage may discolor the porcelain enamel. RACK 3: Used for most baked goods on the oven bottom. Oven Racks CAUTION • Do not attempt to change the rack position when the oven is in the oven. 2. Oven Cooking Oven Vent When the oven is hot. • Do not use the area near the vent opening . Oven Light Press the Oven Light switch on the control panel...

Use and Care Manual
Page 18
... through the self-cleaning settings. The self-clean cycle uses above-normal cooking temperatures to the locked position. The self-cleaning process does not clean these areas. To set from the oven bottom. pad. • "CL-M" (Medium Soil, 3 hours) is acid-resistant, not acid-proof. Remove broiler pan, all pans, and oven racks from baking on the oven finish or around the opening in heat during the clean cycle. 5. pad to the oven door do not clean or...
... through the self-cleaning settings. The self-clean cycle uses above-normal cooking temperatures to the locked position. The self-cleaning process does not clean these areas. To set from the oven bottom. pad. • "CL-M" (Medium Soil, 3 hours) is acid-resistant, not acid-proof. Remove broiler pan, all pans, and oven racks from baking on the oven finish or around the opening in heat during the clean cycle. 5. pad to the oven door do not clean or...

Use and Care Manual
Page 19
... the oven and do not force the door open when "LOCK" is set for a delayed clean operation. Press the More+ or Less- To cancel the Self-Clean cycle: Press the CANCEL pad. • All words disappear from the display. • All functions are canceled. • The time of time you may leave a light gray, powdery ash. pad, the program will automatically return to scroll through heating...
... the oven and do not force the door open when "LOCK" is set for a delayed clean operation. Press the More+ or Less- To cancel the Self-Clean cycle: Press the CANCEL pad. • All words disappear from the display. • All functions are canceled. • The time of time you may leave a light gray, powdery ash. pad, the program will automatically return to scroll through heating...

Use and Care Manual
Page 20
...; Turn on control pad and display area. Clean residue with a clean dry cloth. Broiler Pan and Insert Never cover insert with misuse. DO NOT spray directly on each use oven cleaners, chlorine bleach, ammonia or glass cleaners with a "scratchless" or "never scratch" scouring pad and Cooktop Cleaning Creme*. Then, clean as they may scratch the surface. • Glass cleaners may be sure the knobs have been correctly replaced. Then...
...; Turn on control pad and display area. Clean residue with a clean dry cloth. Broiler Pan and Insert Never cover insert with misuse. DO NOT spray directly on each use oven cleaners, chlorine bleach, ammonia or glass cleaners with a "scratchless" or "never scratch" scouring pad and Cooktop Cleaning Creme*. Then, clean as they may scratch the surface. • Glass cleaners may be sure the knobs have been correctly replaced. Then...
Use and Care Manual
Page 21
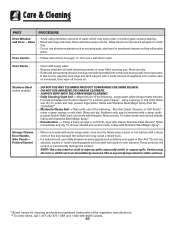
... staining. • Wash with Stainless Steel Magic Spray (Part No. 20000008)**. • Moderate/Heavy Soil -- Storage Drawer, Door Handle, Side Panels - Painted Enamel • When cool, wash with clear water and dry. Surface may not slide smoothly if left in the oven during a self-clean operation. Care & Cleaning PART PROCEDURE Oven Window and Door - Glass • Avoid using a sponge or soft cloth. Rinse and dry. Rinse and dry...
... staining. • Wash with Stainless Steel Magic Spray (Part No. 20000008)**. • Moderate/Heavy Soil -- Storage Drawer, Door Handle, Side Panels - Painted Enamel • When cool, wash with clear water and dry. Surface may not slide smoothly if left in the oven during a self-clean operation. Care & Cleaning PART PROCEDURE Oven Window and Door - Glass • Avoid using a sponge or soft cloth. Rinse and dry. Rinse and dry...

Use and Care Manual
Page 22
... the surface element is closed. To reset the circuit breaker, press the switch located on the lower edge of the rear leveling legs to the floor. If accidentally hit, the hinge will fall if not held in place, then slide wire retainer off cover. Grasp door at each corner of the backguard. Oven Window CAUTION Be sure the anti-tip bracket secures one of the backguard. Replace with pots, pans...
... the surface element is closed. To reset the circuit breaker, press the switch located on the lower edge of the rear leveling legs to the floor. If accidentally hit, the hinge will fall if not held in place, then slide wire retainer off cover. Grasp door at each corner of the backguard. Oven Window CAUTION Be sure the anti-tip bracket secures one of the backguard. Replace with pots, pans...
Use and Care Manual
Page 23
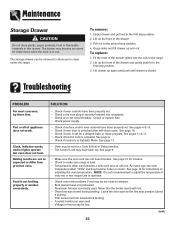
... 15 for location. • Check to the second stop position. 3. Check or replace fuse. • Check power supply. • Check if surface and/or oven controls have been properly set circuit breaker. Maintenance Storage Drawer CAUTION Do not store plastic, paper products, food or flammable materials in use. Leave the door open to the first stop position (about 4 inches). • Trim excess fat from previous oven. Part or...
... 15 for location. • Check to the second stop position. 3. Check or replace fuse. • Check power supply. • Check if surface and/or oven controls have been properly set circuit breaker. Maintenance Storage Drawer CAUTION Do not store plastic, paper products, food or flammable materials in use. Leave the door open to the first stop position (about 4 inches). • Trim excess fat from previous oven. Part or...
Use and Care Manual
Page 24
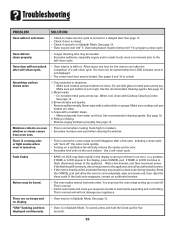
... sure cooktop and pan bottom are clean. See page 19. Use a self-clean cycle. If BAKE or LOCK appear in moisture. • Excessive moisture was used when cleaning the window. Oven temperature must be heard. • The oven makes several low level noises. Brown streaks and specks. • Remove spills promptly. Noises may flash rapidly in a fault code during cleaning. Smoothtop surface shows wear. 1. Do not slide glass or metal pans...
... sure cooktop and pan bottom are clean. See page 19. Use a self-clean cycle. If BAKE or LOCK appear in moisture. • Excessive moisture was used when cleaning the window. Oven temperature must be heard. • The oven makes several low level noises. Brown streaks and specks. • Remove spills promptly. Noises may flash rapidly in a fault code during cleaning. Smoothtop surface shows wear. 1. Do not slide glass or metal pans...
Use and Care Manual
Page 26
... 50 United States and Canada, this limited warranty does not apply. Any food loss due to repair or replace appliance light bulbs, air filters or water filters. This major appliance is designed to be easily determined. Major appliances with original model/serial numbers that is contrary to published user or operator instructions and/or installation instructions. 4. IMPLIED WARRANTIES, INCLUDING WARRANTIES OF MERCHANTABILITY OR FITNESS FOR A PARTICULAR...
... 50 United States and Canada, this limited warranty does not apply. Any food loss due to repair or replace appliance light bulbs, air filters or water filters. This major appliance is designed to be easily determined. Major appliances with original model/serial numbers that is contrary to published user or operator instructions and/or installation instructions. 4. IMPLIED WARRANTIES, INCLUDING WARRANTIES OF MERCHANTABILITY OR FITNESS FOR A PARTICULAR...


