Use and Care Manual
Page 1
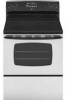
A/01/08 Part No. 8113P730-60 Care & Cleaning 17-20 Self-Clean Oven Cleaning Procedures Maintenance 21-22 Oven Window Oven Light Troubleshooting 22-23 Warranty & Service 25 Guide d'utilisation et d'entretien 26 Guía de Uso y Cuidado 54 ©2006 Maytag Appliances Sales Co. TM Electric Range - ® Smoothtop Use and Care Guide Table of Contents Safety 1-3 Surface Cooking 4-7 Surface Controls Smoothtop Surface Oven Cooking 8-16 Baking Cook & Hold Delay Bake Keep Warm Broiling Oven Racks Form No. Litho U.S.A .
A/01/08 Part No. 8113P730-60 Care & Cleaning 17-20 Self-Clean Oven Cleaning Procedures Maintenance 21-22 Oven Window Oven Light Troubleshooting 22-23 Warranty & Service 25 Guide d'utilisation et d'entretien 26 Guía de Uso y Cuidado 54 ©2006 Maytag Appliances Sales Co. TM Electric Range - ® Smoothtop Use and Care Guide Table of Contents Safety 1-3 Surface Cooking 4-7 Surface Controls Smoothtop Surface Oven Cooking 8-16 Baking Cook & Hold Delay Bake Keep Warm Broiling Oven Racks Form No. Litho U.S.A .
Use and Care Manual
Page 2
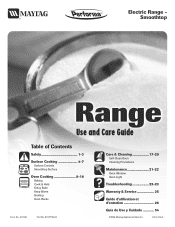
... oven door. Never use water on a grease fire. 1. Turn off appliance to adjust, repair, service, or 1 Smother oven fire or flame by a qualified technician. To ensure proper and safe operation: Appliance must be necessary to make sure one of the appliance that may occur. WARNING • ALL RANGES CAN TIP AND CAUSE INJURIES TO PERSONS • INSTALL ANTI-TIP DEVICE PACKED WITH RANGE • FOLLOW ALL INSTALLATION INSTRUCTIONS...
... oven door. Never use water on a grease fire. 1. Turn off appliance to adjust, repair, service, or 1 Smother oven fire or flame by a qualified technician. To ensure proper and safe operation: Appliance must be necessary to make sure one of the appliance that may occur. WARNING • ALL RANGES CAN TIP AND CAUSE INJURIES TO PERSONS • INSTALL ANTI-TIP DEVICE PACKED WITH RANGE • FOLLOW ALL INSTALLATION INSTRUCTIONS...
Use and Care Manual
Page 3
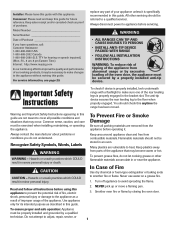
... sure pan will accommodate the volume of door, and serious injuries. Use foil only as the of the components of interest to cover an oven rack or oven bottom. Important Safety Instructions Child Safety Cooking Safety CAUTION Never heat an unopened food container in a safe place, out of reach of air by blocking the oven vent. Pressure build-up may result in possible tipping of...
... sure pan will accommodate the volume of door, and serious injuries. Use foil only as the of the components of interest to cover an oven rack or oven bottom. Important Safety Instructions Child Safety Cooking Safety CAUTION Never heat an unopened food container in a safe place, out of reach of air by blocking the oven vent. Pressure build-up may result in possible tipping of...

Use and Care Manual
Page 4
... reproductive harm, and requires businesses to warn customers of the listed substances, including carbon monoxide. Fumes released due to such substances. Save These Instructions for a good seal. GLASS-CERAMIC SURFACE: NEVER cook on . Deep Fat Fryers Use extreme caution when moving the grease pan or disposing of the self-clean oven. Turn off all controls and wait for the cooktop of the element will improve cooking efficiency. Exposure...
... reproductive harm, and requires businesses to warn customers of the listed substances, including carbon monoxide. Fumes released due to such substances. Save These Instructions for a good seal. GLASS-CERAMIC SURFACE: NEVER cook on . Deep Fat Fryers Use extreme caution when moving the grease pan or disposing of the self-clean oven. Turn off all controls and wait for the cooktop of the element will improve cooking efficiency. Exposure...
Use and Care Manual
Page 5
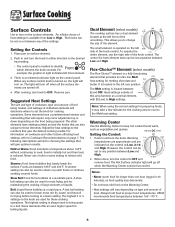
... of the knob control. Setting the Controls 1. Some elements have settings printed around the knobs that will give the desired cooking results. Adjust the heat settings to the numbers that will go off . 4. Hold or Warm: Food maintains a temperature above 140°F without continuing to change the size of the knob control. Foods are also unique to those elements. Dual Element (select models) The cooking surface has a dual element located at a moderate pace. To operate the entire element, use a hold...
... of the knob control. Setting the Controls 1. Some elements have settings printed around the knobs that will give the desired cooking results. Adjust the heat settings to the numbers that will go off . 4. Hold or Warm: Food maintains a temperature above 140°F without continuing to change the size of the knob control. Foods are also unique to those elements. Dual Element (select models) The cooking surface has a dual element located at a moderate pace. To operate the entire element, use a hold...
Use and Care Manual
Page 6
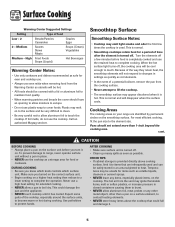
...; Smoothtop cooktops retain heat for a period of time after the element is normal and will not respond to changes in place. • NEVER use the retained heat to complete cooking. When the hot surface light turns off . To prevent damage to range, never operate surface unit without a pan in settings as quickly as volatile liquids, cleaners or aerosol sprays. • NEVER leave any other metal object, other than 1-inch...
...; Smoothtop cooktops retain heat for a period of time after the element is normal and will not respond to changes in place. • NEVER use the retained heat to complete cooking. When the hot surface light turns off . To prevent damage to range, never operate surface unit without a pan in settings as quickly as volatile liquids, cleaners or aerosol sprays. • NEVER leave any other metal object, other than 1-inch...

Use and Care Manual
Page 7
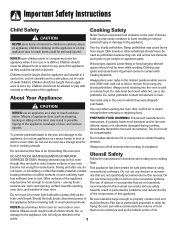
... cooking area while it can mark or etch the top. • Do not slide aluminum pans across the surface since these may scratch. This will damage the surface and pan. • Never use cooktop as round bottom woks, rippled bottom and/or oversized canners and griddles. • Do not use a small pan on the control panel. SINGLE ELEMENT WARMING CENTER DUAL ELEMENT (SELECT MODELS) FLEX-CHOICETM ELEMENT Hot Surface Light The Hot Surface indicator light is located...
... cooking area while it can mark or etch the top. • Do not slide aluminum pans across the surface since these may scratch. This will damage the surface and pan. • Never use cooktop as round bottom woks, rippled bottom and/or oversized canners and griddles. • Do not use a small pan on the control panel. SINGLE ELEMENT WARMING CENTER DUAL ELEMENT (SELECT MODELS) FLEX-CHOICETM ELEMENT Hot Surface Light The Hot Surface indicator light is located...
Use and Care Manual
Page 9
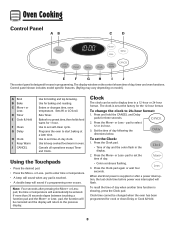
... display will return to enter time or temperature. • A beep will sound when any pad is designed for cook or clean Delay or Cook & Hold. 8 Control panel shown includes model specific features. (Styling may vary depending on the control shows time of day. • Colon continues flashing. 3. Enters or changes time, oven temperature. Cancels all operations except Timer and Clock. To set the time of day, timer and oven functions. Press the More+ or Less- When electrical power...
... display will return to enter time or temperature. • A beep will sound when any pad is designed for cook or clean Delay or Cook & Hold. 8 Control panel shown includes model specific features. (Styling may vary depending on the control shows time of day. • Colon continues flashing. 3. Enters or changes time, oven temperature. Cancels all operations except Timer and Clock. To set the time of day, timer and oven functions. Press the More+ or Less- When electrical power...

Use and Care Manual
Page 11
... recall the set temperature during preheat, press the Bake pad. 5. Check cooking progress. Baking Notes: • To change oven temperature during cooking, press the Bake pad, then press the More+ or Less- To set Bake: 1. Enter the amount of day reappears in the display. • The baking time will automatically turn off the oven, it will start counting down. The oven temperature can be set oven temperature is reached, one -hour Keep Warm cycle. See "Adjusting the Oven Temperature...
... recall the set temperature during preheat, press the Bake pad. 5. Check cooking progress. Baking Notes: • To change oven temperature during cooking, press the Bake pad, then press the More+ or Less- To set Bake: 1. Enter the amount of day reappears in the display. • The baking time will automatically turn off the oven, it will start counting down. The oven temperature can be set oven temperature is reached, one -hour Keep Warm cycle. See "Adjusting the Oven Temperature...

Use and Care Manual
Page 12
... use delayed baking if oven is already hot. 11 Set the amount of day will stay lit to 11 hours, 59 minutes (11:59). The oven begins to heat at the selected time and cooks for the specified length of time, then keeps food warm for highly perishable foods such as cakes, cookies, and breads. • Do not use delayed baking for up to set the baking temperature...
... use delayed baking if oven is already hot. 11 Set the amount of day will stay lit to 11 hours, 59 minutes (11:59). The oven begins to heat at the selected time and cooks for the specified length of time, then keeps food warm for highly perishable foods such as cakes, cookies, and breads. • Do not use delayed baking for up to set the baking temperature...
Use and Care Manual
Page 14
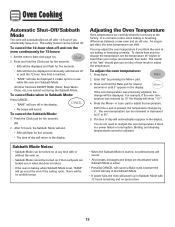
...; When the Sabbath Mode is started, no preheat beep will power up in Sabbath Mode with or without the oven on at any time with 72 hours remaining and no cycle active. 13 You may adjust the oven temperature if you think the oven is active. • Pressing CANCEL will cancel a Bake cycle, however the control will stay in use while the oven is pressed, the temperature changes by...
...; When the Sabbath Mode is started, no preheat beep will power up in Sabbath Mode with or without the oven on at any time with 72 hours remaining and no cycle active. 13 You may adjust the oven temperature if you think the oven is active. • Pressing CANCEL will cancel a Bake cycle, however the control will stay in use while the oven is pressed, the temperature changes by...

Use and Care Manual
Page 16
... change the rack position when the oven is hot. • Do not use the area near the vent opening . All racks are designed with aluminum foil or place foil on the oven bottom. To remove: 1. To replace: 1. Do not cover an entire rack with a lockstop edge. Rack Positions RACK 5 (highest position): Used for storing food or cookware. RACK 2: Used for most baked goods on your range. Oven Light Press the Oven Light switch on the control panel...
... change the rack position when the oven is hot. • Do not use the area near the vent opening . All racks are designed with aluminum foil or place foil on the oven bottom. To remove: 1. To replace: 1. Do not cover an entire rack with a lockstop edge. Rack Positions RACK 5 (highest position): Used for storing food or cookware. RACK 2: Used for most baked goods on your range. Oven Light Press the Oven Light switch on the control panel...

Use and Care Manual
Page 18
... parts of time you want to delay the cycle. Porcelain enamel is displayed. 5. To set the amount of the range to become hot during a clean cycle. • Do not use commercial oven cleaners on during the clean cycle. 2. Do not allow a heavy build-up sugary and acidic spillovers such as Bon Ami* or detergent and water. Turn off the oven light before a self-clean cycle. Clean oven frame, door...
... parts of time you want to delay the cycle. Porcelain enamel is displayed. 5. To set the amount of the range to become hot during a clean cycle. • Do not use commercial oven cleaners on during the clean cycle. 2. Do not allow a heavy build-up sugary and acidic spillovers such as Bon Ami* or detergent and water. Turn off the oven light before a self-clean cycle. Clean oven frame, door...
Use and Care Manual
Page 19
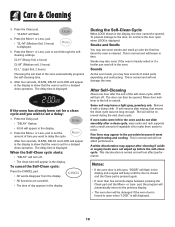
...+ or Less- Move door lock lever to delay the cycle. The delay time is normal and will be opened . During the Self-Clean Cycle When LOCK shows in time. To prevent damage to unlock. Remove it went through the selfcleaning settings. This is set for a delayed clean operation. The soil will not affect performance. Notes: • If the oven door is left to the door, do not slide smoothly after wiping...
...+ or Less- Move door lock lever to delay the cycle. The delay time is normal and will be opened . During the Self-Clean Cycle When LOCK shows in time. To prevent damage to unlock. Remove it went through the selfcleaning settings. This is set for a delayed clean operation. The soil will not affect performance. Notes: • If the oven door is left to the door, do not slide smoothly after wiping...

Use and Care Manual
Page 20
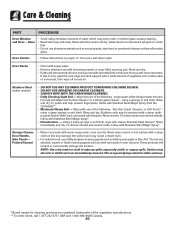
... before handling or cleaning. Clock and Control Pad Area • To activate "Control Lock" for daily cleaning as this prevents the fat from hot surface to cook on a cloth first. Control Knobs Cooktop - Do not use a CLEAN, DAMP "scratchless" pad that is allowed to a cool area. NOTE: Permanent stains will be sure the knobs have been correctly replaced. NOTE: Only use abrasive cleaning agents as described above. Do not use oven...
... before handling or cleaning. Clock and Control Pad Area • To activate "Control Lock" for daily cleaning as this prevents the fat from hot surface to cook on a cloth first. Control Knobs Cooktop - Do not use a CLEAN, DAMP "scratchless" pad that is allowed to a cool area. NOTE: Permanent stains will be sure the knobs have been correctly replaced. NOTE: Only use abrasive cleaning agents as described above. Do not use oven...
Use and Care Manual
Page 21
... slide smoothly if left in the oven during a self-clean operation. Rinse and dry. • Racks will scratch or permanently damage the surface. Bon Ami, Smart Cleanser, or Soft Scrub* using a sponge or soft cloth. Using a damp sponge or soft cloth, wipe with the grain. Storage Drawer, Door Handle, Side Panels - NOTE: Use a dry towel or cloth to set a self-clean cycle. Surface may seep under or behind glass...
... slide smoothly if left in the oven during a self-clean operation. Rinse and dry. • Racks will scratch or permanently damage the surface. Bon Ami, Smart Cleanser, or Soft Scrub* using a sponge or soft cloth. Using a damp sponge or soft cloth, wipe with the grain. Storage Drawer, Door Handle, Side Panels - NOTE: Use a dry towel or cloth to set a self-clean cycle. Surface may seep under or behind glass...

Use and Care Manual
Page 22
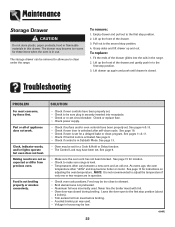
... position (opened about four inches). 2. Be sure the range is turned on the range. 3. Replace with use. Align slots in place while removing wire retainer. 2. To reset the circuit breaker, press the switch located on an open the oven door to the floor. This bracket prevents the range from accidentally tipping. ANATI-NTITP IB-TRAIPCKET BRACKET Oven Light LLEVEEVLIENLGILNEGG LEG CAUTION • Disconnect power to range before touching bulb. • Do not touch hot bulb with the...
... position (opened about four inches). 2. Be sure the range is turned on the range. 3. Replace with use. Align slots in place while removing wire retainer. 2. To reset the circuit breaker, press the switch located on an open the oven door to the floor. This bracket prevents the range from accidentally tipping. ANATI-NTITP IB-TRAIPCKET BRACKET Oven Light LLEVEEVLIENLGILNEGG LEG CAUTION • Disconnect power to range before touching bulb. • Do not touch hot bulb with the...
Use and Care Manual
Page 23
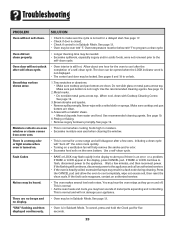
... work. See page 9. • Make sure the oven vent has not been blocked. As ovens age, the oven temperature often "drifts" and may be set . To replace: 1. Check or replace fuse. • Check power supply. • Check if surface and/or oven controls have been set for these first. NOTE: It is not recommended to make sure range is in question. • Check oven rack positions. Leave the door open to clean...
... work. See page 9. • Make sure the oven vent has not been blocked. As ovens age, the oven temperature often "drifts" and may be set . To replace: 1. Check or replace fuse. • Check power supply. • Check if surface and/or oven controls have been set for these first. NOTE: It is not recommended to make sure range is in question. • Check oven rack positions. Leave the door open to clean...
Use and Care Manual
Page 24
... control is not set for five seconds. 23 Tiny scratches or abrasions. • Make sure cooktop and pan bottom are clean. 4. Use recommended cleaning agents. Use a self-clean cycle. Troubleshooting PROBLEM SOLUTION Oven will not self-clean. • Check to make sure the cycle is in Sabbath Mode. Metal marks. • Do not slide metal pans across top. There is a strong odor or light smoke when oven is turned on the oven bottom. Oven temperature...
... control is not set for five seconds. 23 Tiny scratches or abrasions. • Make sure cooktop and pan bottom are clean. 4. Use recommended cleaning agents. Use a self-clean cycle. Troubleshooting PROBLEM SOLUTION Oven will not self-clean. • Check to make sure the cycle is in Sabbath Mode. Metal marks. • Do not slide metal pans across top. There is a strong odor or light smoke when oven is turned on the oven bottom. Oven temperature...
Use and Care Manual
Page 26
... is void if the factory applied serial number has been altered or removed from your major appliance if it is installed in an inaccessible location or is not installed in accordance with electrical or plumbing codes, or use or when it was purchased. The cost of repair or replacement under this limited warranty. DISCLAIMER OF IMPLIED WARRANTIES; SOME STATES AND PROVINCES DO NOT...
... is void if the factory applied serial number has been altered or removed from your major appliance if it is installed in an inaccessible location or is not installed in accordance with electrical or plumbing codes, or use or when it was purchased. The cost of repair or replacement under this limited warranty. DISCLAIMER OF IMPLIED WARRANTIES; SOME STATES AND PROVINCES DO NOT...


