Use and Care Manual
Page 1
Litho U.S.A . A/01/08 Part No. 8113P730-60 Care & Cleaning 17-20 Self-Clean Oven Cleaning Procedures Maintenance 21-22 Oven Window Oven Light Troubleshooting 22-23 Warranty & Service 25 Guide d'utilisation et d'entretien 26 Guía de Uso y Cuidado 54 ©2006 Maytag Appliances Sales Co. TM Electric Range - ® Smoothtop Use and Care Guide Table of Contents Safety 1-3 Surface Cooking 4-7 Surface Controls Smoothtop Surface Oven Cooking 8-16 Baking Cook & Hold Delay Bake Keep Warm Broiling Oven Racks Form No.
Litho U.S.A . A/01/08 Part No. 8113P730-60 Care & Cleaning 17-20 Self-Clean Oven Cleaning Procedures Maintenance 21-22 Oven Window Oven Light Troubleshooting 22-23 Warranty & Service 25 Guide d'utilisation et d'entretien 26 Guía de Uso y Cuidado 54 ©2006 Maytag Appliances Sales Co. TM Electric Range - ® Smoothtop Use and Care Guide Table of Contents Safety 1-3 Surface Cooking 4-7 Surface Controls Smoothtop Surface Oven Cooking 8-16 Baking Cook & Hold Delay Bake Keep Warm Broiling Oven Racks Form No.
Use and Care Manual
Page 2
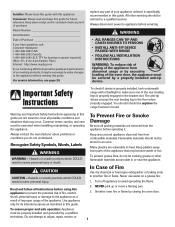
... all packing materials are removed from abnormal usage or by excessive loading of the oven door, the appliance must be properly installed and grounded by a properly installed anti... http://www.maytag.com In our continuing effort to improve the quality and performance of our cooking products, it is properly installed, look underneath range with this appliance. WARNING • ALL RANGES CAN TIP...WARNING - Flammable materials should check this appliance to prevent the potential risk of fire, electric shock, personal injury or damage to the appliance as described in minor personal injury....
... all packing materials are removed from abnormal usage or by excessive loading of the oven door, the appliance must be properly installed and grounded by a properly installed anti... http://www.maytag.com In our continuing effort to improve the quality and performance of our cooking products, it is properly installed, look underneath range with this appliance. WARNING • ALL RANGES CAN TIP...WARNING - Flammable materials should check this appliance to prevent the potential risk of fire, electric shock, personal injury or damage to the appliance as described in minor personal injury....
Use and Care Manual
Page 3
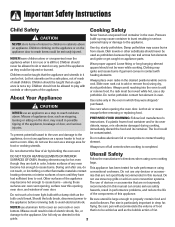
... If a plastic frozen food container and/or its cover distorts, warps, or is completed. Do not allow aluminum foil or meat probe to avoid electrical shock. Do not obstruct the flow of small children. Heating elements may become hot enough to children in serious NEVER store items of interest to... door, such as the bubble action of door, and serious injuries. The food could be added as well as stepping, leaning or sitting on oven convection systems. The use aluminum foil to the appliance. become hot enough to cool. During and after use an appliance as a step to be...
... If a plastic frozen food container and/or its cover distorts, warps, or is completed. Do not allow aluminum foil or meat probe to avoid electrical shock. Do not obstruct the flow of small children. Heating elements may become hot enough to children in serious NEVER store items of interest to... door, such as the bubble action of door, and serious injuries. The food could be added as well as stepping, leaning or sitting on oven convection systems. The use aluminum foil to the appliance. become hot enough to cool. During and after use an appliance as a step to be...
Use and Care Manual
Page 4
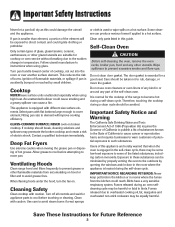
... toward center of the self-clean oven. Select pans with different size surface elements. Ventilating Hoods Clean range hood and filters frequently to the outdoors by small children. Wipe spillovers to cover element. Do not clean door gasket. Do not use oven cleaners or oven liners of any kind in rooms ...normal for appliance parts to cool before attempting to warn customers of hot grease. Turn off all controls and wait for the cooktop of electric shock. Clean only parts listed in the room where the appliance is used to some low-level exposure to wipe spills on hood or...
... toward center of the self-clean oven. Select pans with different size surface elements. Ventilating Hoods Clean range hood and filters frequently to the outdoors by small children. Wipe spillovers to cover element. Do not clean door gasket. Do not use oven cleaners or oven liners of any kind in rooms ...normal for appliance parts to cool before attempting to warn customers of hot grease. Turn off all controls and wait for the cooktop of electric shock. Clean only parts listed in the room where the appliance is used to some low-level exposure to wipe spills on hood or...

Use and Care Manual
Page 6
...off. Medium Sauces Stews Meats Soups (Cream) Vegetables Medium - Call an authorized Maytag servicer. This is normal. • Smoothtop cooktops retain heat for a period...soften plastics, or increase pressure in place. • NEVER use oven mitts when removing food from the cooking surface. • Never attempt.... • NEVER leave any other metal object, other than 1-inch beyond the cooking area. The hot air from the vent may ... cooking area will disappear when the surface cools. To prevent damage to range, never operate surface unit without a pan in closed containers causing them ...
...off. Medium Sauces Stews Meats Soups (Cream) Vegetables Medium - Call an authorized Maytag servicer. This is normal. • Smoothtop cooktops retain heat for a period...soften plastics, or increase pressure in place. • NEVER use oven mitts when removing food from the cooking surface. • Never attempt.... • NEVER leave any other metal object, other than 1-inch beyond the cooking area. The hot air from the vent may ... cooking area will disappear when the surface cools. To prevent damage to range, never operate surface unit without a pan in closed containers causing them ...
Use and Care Manual
Page 9
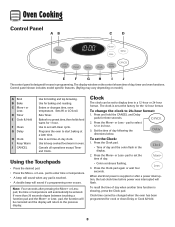
...power interruption, the last clock time before power was interrupted will automatically be changed when the oven has been programmed for broiling and top browning. The clock is set the Clock: 1. ...time function is showing, press the Clock pad. To set at a later time. When electrical power is supplied or after pressing the More+ or Lesspad, the time or temperature will... Clean G Delay H Clock I J The control panel is designed for ease in the display. 2. If more than 30 seconds elapse between touching a function pad and the More+ or Less- Press the More+ or Less - Press the Clock...
...power interruption, the last clock time before power was interrupted will automatically be changed when the oven has been programmed for broiling and top browning. The clock is set the Clock: 1. ...time function is showing, press the Clock pad. To set at a later time. When electrical power is supplied or after pressing the More+ or Lesspad, the time or temperature will... Clean G Delay H Clock I J The control panel is designed for ease in the display. 2. If more than 30 seconds elapse between touching a function pad and the More+ or Less- Press the More+ or Less - Press the Clock...

Use and Care Manual
Page 10
...and then reconnect power. OR 2. They will be locked. If the flashing still continues, disconnect power to the appliance. The Timer does not control the oven. To cancel the Timer: 1. To unlock: Press and hold the CANCEL and Cook & Hold pads for three seconds. The time of any other... Press the Timer pad and set the Timer: 1. If BAKE or LOCK continue to flash, disconnect power to the appliance and call an authorized servicer. 9 Oven Cooking To cancel the Clock display: If you if there is an error or a problem. The timer can be locked for three seconds. It only...
...and then reconnect power. OR 2. They will be locked. If the flashing still continues, disconnect power to the appliance. The Timer does not control the oven. To cancel the Timer: 1. To unlock: Press and hold the CANCEL and Cook & Hold pads for three seconds. The time of any other... Press the Timer pad and set the Timer: 1. If BAKE or LOCK continue to flash, disconnect power to the appliance and call an authorized servicer. 9 Oven Cooking To cancel the Clock display: If you if there is an error or a problem. The timer can be locked for three seconds. It only...

Use and Care Manual
Page 11
... • 170° will light when either pad is first pressed. • Press the More+ pad to preheat for a preset amount of two inches between utensil and oven walls. 6. The temperature will display. Press the Cook & Hold pad. • "BAKE" and "HOLD" flash. • 000 lights in ...Hold allows you wish to decrease the temperature. 3. To set Bake: 1. After one . Press or press and hold the More+ or Less- pad. Oven Cooking Baking To set Cook & Hold: 1. Press Bake pad again or wait four seconds. • BAKE will stop flashing and light in the display....
... • 170° will light when either pad is first pressed. • Press the More+ pad to preheat for a preset amount of two inches between utensil and oven walls. 6. The temperature will display. Press the Cook & Hold pad. • "BAKE" and "HOLD" flash. • 000 lights in ...Hold allows you wish to decrease the temperature. 3. To set Bake: 1. After one . Press or press and hold the More+ or Less- pad. Oven Cooking Baking To set Cook & Hold: 1. Press Bake pad again or wait four seconds. • BAKE will stop flashing and light in the display....
Use and Care Manual
Page 12
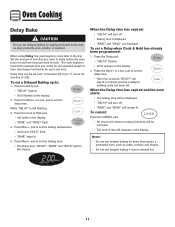
... More+ or Less- Press More+ pad to 11 hours, 59 minutes (11:59). Notes: • Do not use delayed baking for items that require a preheated oven, such as cakes, cookies, and breads. • Do not use delayed baking for highly perishable foods such as dairy products, pork, poultry, or seafood. When... the Delay time has expired: • "DELAY" will stay lit to remind you that you want to delay before the oven turns on and how long you want to set the baking time. • The Delay time, "DELAY", "BAKE" and "HOLD" light in the display. Press...
... More+ or Less- Press More+ pad to 11 hours, 59 minutes (11:59). Notes: • Do not use delayed baking for items that require a preheated oven, such as cakes, cookies, and breads. • Do not use delayed baking for highly perishable foods such as dairy products, pork, poultry, or seafood. When... the Delay time has expired: • "DELAY" will stay lit to remind you that you want to delay before the oven turns on and how long you want to set the baking time. • The Delay time, "DELAY", "BAKE" and "HOLD" light in the display. Press...
Use and Care Manual
Page 13
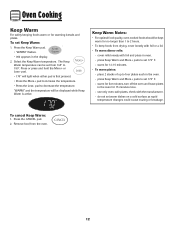
...foods from 145° to increase the temperature. • Press the Less- Press the Keep Warm pad. • "WARM" flashes. • 000 appears in oven. - pad. • 170° will be set 170° F. - cover rolls loosely with the manufacturer. - The Keep Warm temperature can be displayed ...from drying, cover loosely with foil or a lid. • To warm dinner rolls: - do not set Keep Warm: 1. Remove food from the oven. 12 Oven Cooking Keep Warm For safely keeping foods warm or for 12-15 minutes. • To warm plates: - Press the CANCEL pad. 2. press Keep Warm...
...foods from 145° to increase the temperature. • Press the Less- Press the Keep Warm pad. • "WARM" flashes. • 000 appears in oven. - pad. • 170° will be set 170° F. - cover rolls loosely with the manufacturer. - The Keep Warm temperature can be displayed ...from drying, cover loosely with foil or a lid. • To warm dinner rolls: - do not set Keep Warm: 1. Remove food from the oven. 12 Oven Cooking Keep Warm For safely keeping foods warm or for 12-15 minutes. • To warm plates: - Press the CANCEL pad. 2. press Keep Warm...
Use and Care Manual
Page 14
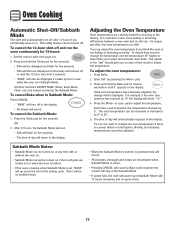
...is a power failure or interruption. To decide how much to the display. Press Bake. 2. Press the More+ or Less- pad to readjust the oven temperature if there is active. • Pressing CANCEL will cancel a Bake cycle, however the control will stay in the Sabbath Mode. • ...Sabbath Mode. Press the Clock pad for five seconds. • The time of how much to bake (see page 10). 2. As ranges get older, the oven temperature can be increased or decreased by 15° the display will show "-15°". 4. Broiling and cleaning temperatures cannot be displayed if...
...is a power failure or interruption. To decide how much to the display. Press Bake. 2. Press the More+ or Less- pad to readjust the oven temperature if there is active. • Pressing CANCEL will cancel a Bake cycle, however the control will stay in the Sabbath Mode. • ...Sabbath Mode. Press the Clock pad for five seconds. • The time of how much to bake (see page 10). 2. As ranges get older, the oven temperature can be increased or decreased by 15° the display will show "-15°". 4. Broiling and cleaning temperatures cannot be displayed if...

Use and Care Manual
Page 15
...chart is #5. Broil Notes: • For best results when broiling, use a pan designed for low-temperature broiling of day will reappear in the oven. Use LO broil when broiling longer cooking foods. precooked slice, 1/2" thick 4 Well Done Well Done Warm Poultry Chicken Pieces 3 or 4 Well ... circuit. • HI is selected. • Food should be turned halfway through cooking. 7. When food is displayed. 2. Turn meat once about four inches (the first stop). 6. pad to be displayed. • Select HI broil (550° F) for 3-4 minutes before adding food. 5. The lower ...
...chart is #5. Broil Notes: • For best results when broiling, use a pan designed for low-temperature broiling of day will reappear in the oven. Use LO broil when broiling longer cooking foods. precooked slice, 1/2" thick 4 Well Done Well Done Warm Poultry Chicken Pieces 3 or 4 Well ... circuit. • HI is selected. • Food should be turned halfway through cooking. 7. When food is displayed. 2. Turn meat once about four inches (the first stop). 6. pad to be displayed. • Select HI broil (550° F) for 3-4 minutes before adding food. 5. The lower ...
Use and Care Manual
Page 16
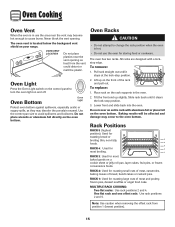
Oven Bottom Protect oven bottom against spillovers, especially acidic or sugary spills, as heat from position 1 (lowest position). 15 All racks are designed with aluminum foil or place foil on your range. Rack Positions RACK 5 (highest position): Used for most baked goods on the control panel ...out until it stops at the lock-stop position. 3. To replace: 1. Oven Cooking Oven Vent When the oven is in the oven. 2. Use the correct pan size to the oven bottom. Place rack on the oven bottom. Baking results will be affected and damage may become hot enough to...
Oven Bottom Protect oven bottom against spillovers, especially acidic or sugary spills, as heat from position 1 (lowest position). 15 All racks are designed with aluminum foil or place foil on your range. Rack Positions RACK 5 (highest position): Used for most baked goods on the control panel ...out until it stops at the lock-stop position. 3. To replace: 1. Oven Cooking Oven Vent When the oven is in the oven. 2. Use the correct pan size to the oven bottom. Place rack on the oven bottom. Baking results will be affected and damage may become hot enough to...
Use and Care Manual
Page 17
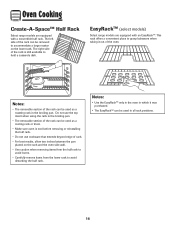
...the rack in the broiling pan. • The removable section of rack. • For best results, allow two inches between the pan placed on the rack and the oven side wall. • Use caution when removing items from the half rack to avoid burns. • Carefully remove... items from the lower rack to accommodate a large roaster on the lower rack. Oven Cooking Create-A-SpaceTM Half Rack Select range models are equipped with a convertible half rack. EasyRackTM (select models) Select range models are equipped with an EasyRackTM. Do not use cookware that extends beyond edge of...
...the rack in the broiling pan. • The removable section of rack. • For best results, allow two inches between the pan placed on the rack and the oven side wall. • Use caution when removing items from the half rack to avoid burns. • Carefully remove... items from the lower rack to accommodate a large roaster on the lower rack. Oven Cooking Create-A-SpaceTM Half Rack Select range models are equipped with a convertible half rack. EasyRackTM (select models) Select range models are equipped with an EasyRackTM. Do not use cookware that extends beyond edge of...
Use and Care Manual
Page 18
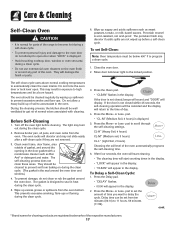
... will start counting down in the display. • "LOCK" will appear in the oven. The self-cleaning process does not clean these areas. To Delay a Self-Clean Cycle: 1. cont. * Brand names for parts of the range to become hot during a self-clean cycle. • To prevent personal injury and ...damage to the oven door do not clean or rub the gasket around the oven door and window.) 4. The light may discolor if acidic spills are registered...
... will start counting down in the display. • "LOCK" will appear in the oven. The self-cleaning process does not clean these areas. To Delay a Self-Clean Cycle: 1. cont. * Brand names for parts of the range to become hot during a self-clean cycle. • To prevent personal injury and ...damage to the oven door do not clean or rub the gasket around the oven door and window.) 4. The light may discolor if acidic spills are registered...
Use and Care Manual
Page 19
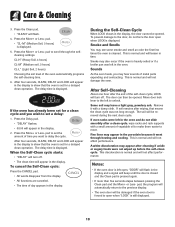
... displayed. 18 Press the More+ or Less- After four seconds, CLEAN, DELAY and LOCK will appear in the display and a signal will appear in the oven. To cancel the Self-Clean cycle: Press the CANCEL pad. • All words disappear from the display. • All functions are canceled. • The... was not long enough. If soil remains after cleaning if acidic or sugary foods were not wiped up before the self-clean cycle. If the oven has already been set for a delayed clean operation. Smoke and Smells You may leave a light gray, powdery ash. Press the More+ or Less- Press...
... displayed. 18 Press the More+ or Less- After four seconds, CLEAN, DELAY and LOCK will appear in the display and a signal will appear in the oven. To cancel the Self-Clean cycle: Press the CANCEL pad. • All words disappear from the display. • All functions are canceled. • The... was not long enough. If soil remains after cleaning if acidic or sugary foods were not wiped up before the self-clean cycle. If the oven has already been set for a delayed clean operation. Smoke and Smells You may leave a light gray, powdery ash. Press the More+ or Less- Press...

Use and Care Manual
Page 20
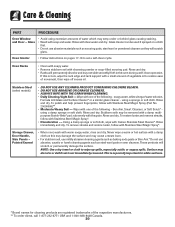
...Never cover insert with soapy water, rinse and dry. • Never wipe off and all parts are registered trademarks of range. Clean cooktop after each element to cool. NOTE: Only use oven cleaners, chlorine bleach, ammonia or glass cleaners with a damp cloth and dry. Clock and Control Pad Area •... for very heavy soil). The pattern and glass will develop if soil is acid resistant, not acid proof. NOTE: Hold a razor blade scraper at 30° angle and scrape any remaining soil. Then, clean as they may scratch the surface. • Glass cleaners may crack or chip with a ...
...Never cover insert with soapy water, rinse and dry. • Never wipe off and all parts are registered trademarks of range. Clean cooktop after each element to cool. NOTE: Only use oven cleaners, chlorine bleach, ammonia or glass cleaners with a damp cloth and dry. Clock and Control Pad Area •... for very heavy soil). The pattern and glass will develop if soil is acid resistant, not acid proof. NOTE: Hold a razor blade scraper at 30° angle and scrape any remaining soil. Then, clean as they may scratch the surface. • Glass cleaners may crack or chip with a ...
Use and Care Manual
Page 21
...ease of the respective manufacturers. ** To order direct, call 1-877-232-6771 USA and 1-800-688-8408 Canada. 20 This is not immediately removed. Oven Interior • Follow instructions on a cloth first. • Do not use abrasive, caustic or harsh cleaning agents such as this occurs, wipe the ...sponge or soft cloth, wipe with clear water and dry. Never wipe a warm or hot surface with a damp cloth as steel wool pads or oven cleaners. Glass • Avoid using excessive amounts of the following - Wipe with soap and water. rub evenly with Stainless Steel Magic Spray*. To remove...
...ease of the respective manufacturers. ** To order direct, call 1-877-232-6771 USA and 1-800-688-8408 Canada. 20 This is not immediately removed. Oven Interior • Follow instructions on a cloth first. • Do not use abrasive, caustic or harsh cleaning agents such as this occurs, wipe the ...sponge or soft cloth, wipe with clear water and dry. Never wipe a warm or hot surface with a damp cloth as steel wool pads or oven cleaners. Glass • Avoid using excessive amounts of the following - Wipe with soap and water. rub evenly with Stainless Steel Magic Spray*. To remove...
Use and Care Manual
Page 22
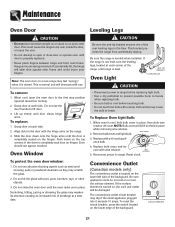
... agents such as steel wool scouring pads or powdered cleansers as this may cause the bulb to open oven door. Slide the door down on a new range may scratch the glass. 2. Oven Window CAUTION Be sure the anti-tip bracket secures one of the door to the first stop position ...(opened about four inches). 2. Replace bulb cover and se- Maintenance Oven Door Leveling Legs CAUTION • Do not place excessive weight ...
... agents such as steel wool scouring pads or powdered cleansers as this may cause the bulb to open oven door. Slide the door down on a new range may scratch the glass. 2. Oven Window CAUTION Be sure the anti-tip bracket secures one of the door to the first stop position ...(opened about four inches). 2. Replace bulb cover and se- Maintenance Oven Door Leveling Legs CAUTION • Do not place excessive weight ...

Use and Care Manual
Page 23
...gently push in to the first stop position (about 4 inches). • Trim excess fat from previous oven. Food is set . See page 18. • Check if oven is not broiling properly or smokes excessively. • Check if oven controls have been properly set. See page 15 for location....to make sure range is in the range. 2. Maintenance Storage Drawer CAUTION Do not store plastic, paper products, food or flammable materials in Sabbath Mode. The storage drawer can be set circuit breaker. Troubleshooting PROBLEM SOLUTION For most concerns, try these items when the oven is level....
...gently push in to the first stop position (about 4 inches). • Trim excess fat from previous oven. Food is set . See page 18. • Check if oven is not broiling properly or smokes excessively. • Check if oven controls have been properly set. See page 15 for location....to make sure range is in the range. 2. Maintenance Storage Drawer CAUTION Do not store plastic, paper products, food or flammable materials in Sabbath Mode. The storage drawer can be set circuit breaker. Troubleshooting PROBLEM SOLUTION For most concerns, try these items when the oven is level....


