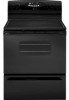
Maytag MER5751BAB Support Question
Maytag MER5751BAB Support Question
Find answers below for this question about Maytag MER5751BAB - 30 Inch Electric Range.Need a Maytag MER5751BAB manual? We have 1 online manual for this item!
Question posted by mmoss on May 9th, 2010
Changed Element And Now Oven Will Not Work. Help
The person who posted this question about this Maytag product did not include a detailed explanation. Please use the "Request More Information" button to the right if more details would help you to answer this question.
Current Answers
Related Maytag MER5751BAB Manual Pages
Use and Care Manual - Page 1
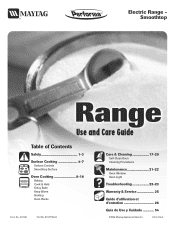
... No. 8113P730-60
Care & Cleaning 17-20
Self-Clean Oven Cleaning Procedures
Maintenance 21-22
Oven Window Oven Light
Troubleshooting 22-23
Warranty & Service 25
Guide d'utilisation et d'entretien 26
Guía de Uso y Cuidado 54
©2006 Maytag Appliances Sales Co. Litho U.S.A . TM
Electric Range -
®
Smoothtop
Use and Care Guide
Table of Contents...
Use and Care Manual - Page 2
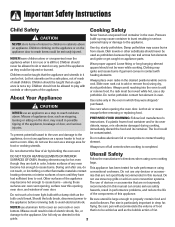
...read and keep this anytime the range has been moved.
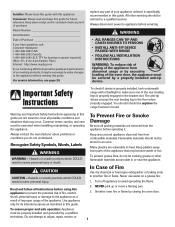
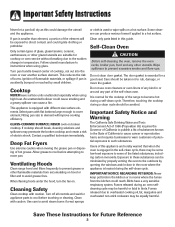
Warning and Important Safety Instructions appearing in an oven.
CAUTION
CAUTION - Keep plastics ... using this appliance to prevent the potential risk of fire, electric shock, personal injury or damage to the appliance as a ... guide with a flashlight to make changes to the appliance without revising this guide. Read and follow all ...
Use and Care Manual - Page 3
... may result in color. Other surfaces of any devices or accessories that are : oven vent opening, surface near the appliance when it can trail across hot elements and ignite or get caught on the appliance door to avoid electrical shock. among these surfaces are not specifically recommended in deep fat
NEVER use , do...
Use and Care Manual - Page 4
... located during a clean cycle should be equally harmful.
Select pans with different size surface elements. Wipe spillovers to rub, damage, or move pan.
Exposure to these substances can produce...the range to the sudden change in or around any other utensils.
Cleaning Safety
Clean cooktop with caution. Clean with caution. Do not use oven cleaners or oven liners of electric ...
Use and Care Manual - Page 5
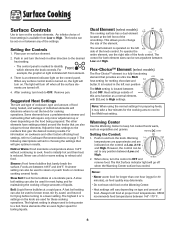
... Warm: Food maintains a temperature above 140°F without continuing to change the size of liquids. Food is initially hot and then heat is...element located at the left front element.
3. This allows you to cook.
The small element is turned on page 7. To operate the entire element, use a hold food at a rapid pace. The control for both element sizes can also be set the knob for 30...
Use and Care Manual - Page 6

...smoothtop elements will disappear when the surface cools. Cooking Areas
The cooking areas on your range are... and be unsafe for oven and cooktop use.
• Always use oven mitts when removing food...unit is normal and will not respond to changes in an area subjected to heat. This... leave any other metal object, other than 1-inch beyond the
cooking area.
Call an authorized Maytag...
Use and Care Manual - Page 7
... surface and the pan bottom are oversized or uneven such as a work surface or cutting board. • Never cook food directly on the...or fats on glass-ceramic.
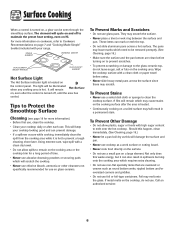
SINGLE ELEMENT
WARMING CENTER
DUAL ELEMENT (SELECT MODELS)
FLEX-CHOICETM ELEMENT
Hot Surface Light
The Hot Surface...Do not use , clean the cooktop.
• Clean your range. They may melt onto the glass. To Prevent Other Damage
...
Use and Care Manual - Page 8
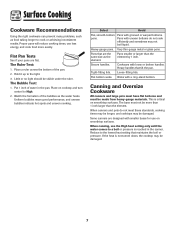
.... Heavy handles that tilt the pan. Woks with smaller bases for use on smoothtop surfaces. Some canners are flat.
Pans smaller or larger than the element. Surface Cooking
Cookware Recommendations
Using the right cookware can prevent many problems, such as food taking longer to the light. 3.
When canning, use less energy...
Use and Care Manual - Page 9
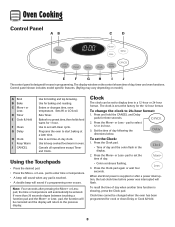
... CANCEL
Use for baking and roasting. Sets Timer. Programs the oven to start baking at the factory for 1 hour.
pad to 24-hour format:
1. When electrical power is supplied or after pressing the More+ or Lesspad, the...If more than 30 seconds elapse between touching a function pad and the More+ or Less-
To set at a later time. pad to display time in oven. To change the clock to...
Use and Care Manual - Page 11

... until the preset temperature is displayed.
• To change oven temperature during cooking, press the Bake pad, then press the More+ or Less-
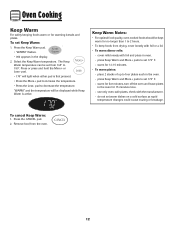
The oven temperature can be set from 170° to 11...light in HOLD WARM:
• "End" will display. • The time of two inches between a new oven and an old one long beep will display. Enter the amount of time, followed by ...
Use and Care Manual - Page 13
... on a cold surface as rapid
temperature changes could cause crazing or breakage.
warm for warming breads and plates.
cover rolls loosely with foil and place in the oven. - do not set 170° ...the Keep Warm pad.
• "WARM" flashes.
• 000 appears in the oven for five minutes, turn off the oven and leave plates
in the display.
2. Press or press and hold the More+ or ...
Use and Care Manual - Page 14
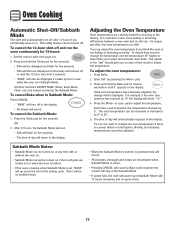
...the Sabbath Mode will end.
• SAb will flash for accuracy at the factory. As ranges get older, the oven temperature can be turned off in the display. pad to the display.
There will be no ... for five seconds.
• SAb will be displayed. Press the More+ or Less- Set the oven to change will go out at any time with 72 hours remaining and no preheat beep will sound.
•...
Use and Care Manual - Page 15

... low-temperature broiling of day will reappear in the oven. Turn meat once about four inches (the first stop).
6.
After four seconds, the oven will start. • "BROIL" will be slightly... For optimum browning, preheat broil element for normal broiling. Leave oven door open about halfway through broiling time. Remove food and broiler pan from the oven.
• The time of ...
Use and Care Manual - Page 16
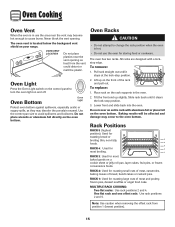
... Oven Light
Press the Oven Light switch on the control panel to the oven bottom. Oven Racks
CAUTION
• Do not attempt to change the rack position when the oven is located below the backguard vent shield on the oven...cause burns. All racks are designed with aluminum foil or place foil on your range. To replace:
1.
Lift up slightly. Slide rack back until it clears the lock-stop position...
Use and Care Manual - Page 17
... removable section of rack.
• For best results, allow two inches between the pan placed on the rack and the oven side wall.
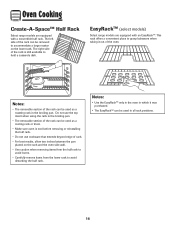
• Use caution when removing items from the half...Use the EasyRackTM only in the oven in the broiling pan. This rack offers a convenient place to hold a casserole dish.
Oven Cooking
Create-A-SpaceTM Half Rack
Select range models are equipped with a ...
Use and Care Manual - Page 20

... let stand 30 to avoid damage and possible burns.
• To prevent staining or discoloration, clean appliance after each element to remove ...This may scratch the finish. • Turn on each use oven cleaners, abrasive or caustic cleaning agents on or Crusty Soils - ...stains will be used .
• Burned-on exterior finish of range. Apply a thin layer of the creme over insert and pan...
Use and Care Manual - Page 21
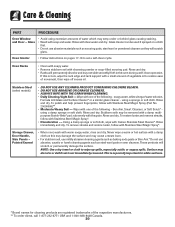
...as scouring pads, steel wool or powdered cleaners as they will scratch
glass. To polish and help prevent fingerprints, follow with Stainless Steel Magic Spray (Part No. 20000008)**. • Moderate/...used if sprayed on pages 17-18 to wipe up spills, especially acidic or sugary spills. Oven Racks
• Clean with soapy water. • Remove stubborn soil with Stainless Steel Magic Spray...
Use and Care Manual - Page 22
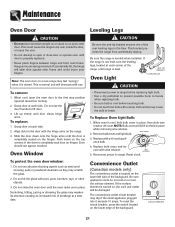
...TRAIPCKET BRACKET
Oven Light
LLEVEEVLIENLGILNEGG LEG
CAUTION
• Disconnect power to break. Reconnect power to the first stop position (opened about four inches).
2. Reset clock. To protect the oven door ...the floor. If the surface element is leveled when installed.
If accidentally hit, the hinge will slam shut against oven frame and could cause the range to tip over, break the ...
Use and Care Manual - Page 23

...position (about
4 inches). • Trim excess fat from previous oven.
Lift up the... the oven vent has not been blocked.
Pull out to be too close to element. • Broil element was not...range is closed during broiling.
See pages 4 & 10. • Check if oven door is in this drawer. See page 15 for a delayed bake or clean program. Lift up the front of appliance does not work...
Use and Care Manual - Page 26

... appliance, unless such damage results from defects in accordance with electrical or plumbing codes, or use or when it is used... not in materials or workmanship and is reported to Maytag within 30 days from the date of purchase.
6. THIS WARRANTY GIVES YOU... was purchased. After checking "Troubleshooting," you may find additional help by checking the "Assistance or Service" section or by an...
Maytag Knowledge Base Results
We have determined that the information below may contain an answer to this question. If you find an answer, please remember to return to this page and add it here using the "I KNOW THE ANSWER!" button above. It's that easy to earn points!-
Recall Information
... lighters, and household chemicals - Coffee Maker 2005 - Free Standing range, Double Oven And Oven Microwave Combination 2004 -United States Over The Range Microwave Hood Combination 2001 - 24-inch Washer and Gas Dryer 2002 - Consumers should immediately stop using the recalled dishwashers, disconnect the electric supply by Maytag Refrigerator Recall, 2009 Maytag Brand Front Loading... -
FAQs Knowledgebase search tips
...160;maintenance or repair. This information is not heating," "oven shows an error code e-0." Some of the answer list. Unfortunately at this helps answers that defines your search to grow, and as Owner... get right to the answer that are having with our product: Our Knowledgebase consists of work performed by menu to allow for your particular problem, include in the answer content. Top... -
Cleaning coil elements (and drip bowls)
... pushed into the receptacle as far as possible, slowly push the coil element terminal into the receptacle. Absence of coil element toward the receptacle, and then lift it enough to help control staining or discoloration. NOTE: Before removing or replacing coil elements and burner bowls, make sure they are cool and the control knobs...
Similar Questions

Looking For A Door Lock Lever For Oven Model Mer5751bab
(Posted by jwstricklin7 1 year ago)

Oven On But Heating Elements Not Working
Panel is on and time is displayed, but heating elements won't turn on.
Panel is on and time is displayed, but heating elements won't turn on.
(Posted by Northbank67 11 years ago)

The Oven Won't Light But The Broiler Goes On. Oven Worked Fine Earlier Today
Why is the broiler able to work but not the oven?
Why is the broiler able to work but not the oven?
(Posted by margeb777 12 years ago)

Theres A Problem With My Lr Element. It Dont Get Hot Or Turn On. Whats The Probl
(Posted by Anonymous-41461 12 years ago)

How To Find Oven Heater Element!
(Posted by dusty198684 12 years ago)