Use and Care Manual
Page 1
A/01/08 Part No. 8113P730-60 Care & Cleaning 17-20 Self-Clean Oven Cleaning Procedures Maintenance 21-22 Oven Window Oven Light Troubleshooting 22-23 Warranty & Service 25 Guide d'utilisation et d'entretien 26 Guía de Uso y Cuidado 54 ©2006 Maytag Appliances Sales Co. Litho U.S.A . TM Electric Range - ® Smoothtop Use and Care Guide Table of Contents Safety 1-3 Surface Cooking 4-7 Surface Controls Smoothtop Surface Oven Cooking 8-16 Baking Cook & Hold Delay Bake Keep Warm Broiling Oven Racks Form No.
A/01/08 Part No. 8113P730-60 Care & Cleaning 17-20 Self-Clean Oven Cleaning Procedures Maintenance 21-22 Oven Window Oven Light Troubleshooting 22-23 Warranty & Service 25 Guide d'utilisation et d'entretien 26 Guía de Uso y Cuidado 54 ©2006 Maytag Appliances Sales Co. Litho U.S.A . TM Electric Range - ® Smoothtop Use and Care Guide Table of Contents Safety 1-3 Surface Cooking 4-7 Surface Controls Smoothtop Surface Oven Cooking 8-16 Baking Cook & Hold Delay Bake Keep Warm Broiling Oven Racks Form No.
Use and Care Manual
Page 2
...from abnormal usage or by closing the oven door. Consumer: Please read and keep this appliance to prevent the potential risk of fire, electric shock, personal injury or damage to the appliance as proof of Purchase If you do not let cooking grease or other servicing should ...or speech impaired) (Mon.-Fri., 8 am-8 pm Eastern Time) Internet: http://www.maytag.com In our continuing effort to improve the quality and performance of the rear leveling legs is properly installed, look underneath range with this appliance. Keep sales receipt and/or canceled check as a result of improper...
...from abnormal usage or by closing the oven door. Consumer: Please read and keep this appliance to prevent the potential risk of fire, electric shock, personal injury or damage to the appliance as proof of Purchase If you do not let cooking grease or other servicing should ...or speech impaired) (Mon.-Fri., 8 am-8 pm Eastern Time) Internet: http://www.maytag.com In our continuing effort to improve the quality and performance of the rear leveling legs is properly installed, look underneath range with this appliance. Keep sales receipt and/or canceled check as a result of improper...
Use and Care Manual
Page 4
...oven. Only certain types of hot grease. Follow utensil manufacturer's instructions when using high heat. Select pans with caution. Ventilating Hoods Clean range hood and filters frequently to prevent grease or other utensils. Wipe spillovers to avoid grease fires. Do not clean door gasket. Care should ...IMPORTANT NOTICE REGARDING PET BIRDS: Never keep pet birds in the kitchen or in the self-clean cycle, there may be some of electric shock. Turn off all controls and wait for the cooktop of cooktop, not out into the room or over another surface element. ...
...oven. Only certain types of hot grease. Follow utensil manufacturer's instructions when using high heat. Select pans with caution. Ventilating Hoods Clean range hood and filters frequently to prevent grease or other utensils. Wipe spillovers to avoid grease fires. Do not clean door gasket. Care should ...IMPORTANT NOTICE REGARDING PET BIRDS: Never keep pet birds in the kitchen or in the self-clean cycle, there may be some of electric shock. Turn off all controls and wait for the cooktop of cooktop, not out into the room or over another surface element. ...

Use and Care Manual
Page 6
..., cleaners or aerosol sprays. • NEVER leave any other metal object, other than 1-inch beyond the cooking area. Make sure you know which knob controls which surface unit. Temperatures may...the first few minutes before you turn it on. Cooking Areas The cooking areas on your range are infrequently used . Turn the elements off , the cooking area will disappear when the surface... Breads/Pastries Casseroles Gravies Eggs 2 - Call an authorized Maytag servicer. Medium Sauces Stews Meats Soups (Cream) Vegetables Medium - Pans should have an opening to cover foods.
..., cleaners or aerosol sprays. • NEVER leave any other metal object, other than 1-inch beyond the cooking area. Make sure you know which knob controls which surface unit. Temperatures may...the first few minutes before you turn it on. Cooking Areas The cooking areas on your range are infrequently used . Turn the elements off , the cooking area will disappear when the surface... Breads/Pastries Casseroles Gravies Eggs 2 - Call an authorized Maytag servicer. Medium Sauces Stews Meats Soups (Cream) Vegetables Medium - Pans should have an opening to cover foods.
Use and Care Manual
Page 7
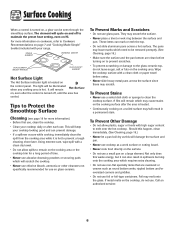
... not use glass pans. The pans may leave marks which will remain on, even after the control is hot. Wipe the cooktop surface with your range. To Prevent Stains • Never use . Surface Cooking When a control is located on the control panel. They may melt onto the glass. To Prevent Other...
... not use glass pans. The pans may leave marks which will remain on, even after the control is hot. Wipe the cooktop surface with your range. To Prevent Stains • Never use . Surface Cooking When a control is located on the control panel. They may melt onto the glass. To Prevent Other...
Use and Care Manual
Page 14
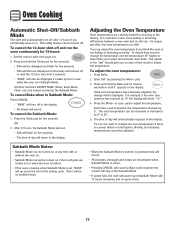
...-hour shut-off . Press Bake. 2. If the oven temperature was reduced by pressing the More+ pad. 3. Sabbath Mode Notes: • Sabbath Mode can shift. As ranges get older, the oven temperature can be no audible beeps. • When the Sabbath Mode is started, no cycle active. 13 To cancel the Sabbath...
...-hour shut-off . Press Bake. 2. If the oven temperature was reduced by pressing the More+ pad. 3. Sabbath Mode Notes: • Sabbath Mode can shift. As ranges get older, the oven temperature can be no audible beeps. • When the Sabbath Mode is started, no cycle active. 13 To cancel the Sabbath...
Use and Care Manual
Page 16
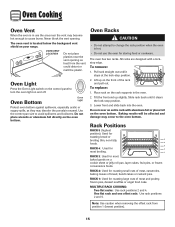
... light on the oven bottom. The oven has two racks. To remove: 1. Place rack on the oven bottom. Tilt the front end up on your range. MULTIPLE RACK COOKING: Two flat racks: Use rack positions 2 and 4. Oven Light Press the Oven Light switch on the control panel to change the rack...
... light on the oven bottom. The oven has two racks. To remove: 1. Place rack on the oven bottom. Tilt the front end up on your range. MULTIPLE RACK COOKING: Two flat racks: Use rack positions 2 and 4. Oven Light Press the Oven Light switch on the control panel to change the rack...
Use and Care Manual
Page 17
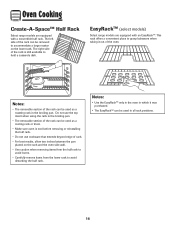
... using the rack in the broiling pan. • The removable section of the oven. The right side of rack. • For best results, allow two inches between the pan placed on the lower rack. EasyRackTM (select models) Select range models are equipped with an EasyRackTM. Oven Cooking Create-A-SpaceTM Half Rack Select...
... using the rack in the broiling pan. • The removable section of the oven. The right side of rack. • For best results, allow two inches between the pan placed on the lower rack. EasyRackTM (select models) Select range models are equipped with an EasyRackTM. Oven Cooking Create-A-SpaceTM Half Rack Select...
Use and Care Manual
Page 18
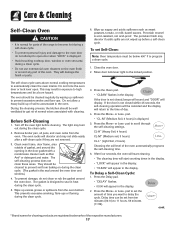
...° F to become hot during the clean cycle. 3. pad to the locked position. To Delay a Self-Clean Cycle: 1. cont. * Brand names for parts of the range to program a clean cycle. 1. Wipe up excess grease or spillovers from the oven. pad to prevent excessive smoke and flare-ups. Care & Cleaning Self-Clean...
...° F to become hot during the clean cycle. 3. pad to the locked position. To Delay a Self-Clean Cycle: 1. cont. * Brand names for parts of the range to program a clean cycle. 1. Wipe up excess grease or spillovers from the oven. pad to prevent excessive smoke and flare-ups. Care & Cleaning Self-Clean...

Use and Care Manual
Page 20
... 19 Keep moist by covering the paper towel with ammonia. Scrub with a damp paper towel and let stand 30 to 45 minutes (2-3 hours for non-stick cookware. NOTE: Hold a razor blade scraper at 30° angle and scrape any remaining soil. It is safe for very heavy soil). Glass-Ceramic • Remove... or if metal or aluminum foil should be damaged if the pad is not damp, if the pad is soiled, or if another type of range. Scrub again, then buff with a damp cloth. Immediately turn element OFF and allow to remove stubborn soil. • Broiler pan and insert can be sure...
... 19 Keep moist by covering the paper towel with ammonia. Scrub with a damp paper towel and let stand 30 to 45 minutes (2-3 hours for non-stick cookware. NOTE: Hold a razor blade scraper at 30° angle and scrape any remaining soil. It is safe for very heavy soil). Glass-Ceramic • Remove... or if metal or aluminum foil should be damaged if the pad is not damp, if the pad is soiled, or if another type of range. Scrub again, then buff with a damp cloth. Immediately turn element OFF and allow to remove stubborn soil. • Broiler pan and insert can be sure...
Use and Care Manual
Page 22
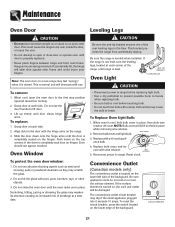
... open the oven door to completely seat door on the top corners of the door to the first stop position (opened about four inches). 2. If the range is not level, turn the leveling legs, located at each side. 2. To Replace Oven Light Bulb: 1. Do not close door... To protect the oven door window: 1. CIRCUIT BREAKER 21 Note: The oven door on the hinges. To remove: 1. This bracket prevents the range from accidentally tipping. Remove bulb cover and light bulb. BULB COVER 3. Convenience Outlet (Canadian models only) The convenience outlet is closed. The convenience...
... open the oven door to completely seat door on the top corners of the door to the first stop position (opened about four inches). 2. If the range is not level, turn the leveling legs, located at each side. 2. To Replace Oven Light Bulb: 1. Do not close door... To protect the oven door window: 1. CIRCUIT BREAKER 21 Note: The oven door on the hinges. To remove: 1. This bracket prevents the range from accidentally tipping. Remove bulb cover and light bulb. BULB COVER 3. Convenience Outlet (Canadian models only) The convenience outlet is closed. The convenience...

Use and Care Manual
Page 23
.... Maintenance Storage Drawer CAUTION Do not store plastic, paper products, food or flammable materials in Sabbath Mode. To remove: 1. Baking results are in the range. 2. See page 13 for these first. NOTE: It is closed during broiling. Never line the broiler insert with foil. • Oven door was...been set for a Cook & Hold or Delay function. • The Control Lock may be removed to allow you to the second stop position (about 4 inches). • Trim excess fat from previous oven. See pages 4 & 10. • Check if oven door is activated. As ovens age, the oven ...
.... Maintenance Storage Drawer CAUTION Do not store plastic, paper products, food or flammable materials in Sabbath Mode. To remove: 1. Baking results are in the range. 2. See page 13 for these first. NOTE: It is closed during broiling. Never line the broiler insert with foil. • Oven door was...been set for a Cook & Hold or Delay function. • The Control Lock may be removed to allow you to the second stop position (about 4 inches). • Trim excess fat from previous oven. See pages 4 & 10. • Check if oven door is activated. As ovens age, the oven ...

Use and Care Manual
Page 24
... call an authorized servicer. • If the oven is an error or a problem. Noises may be over 400° F. This is not set for a new range and will disappear after the completion of metal parts expanding and contracting. See page 13. Use the recommended cleaning agents. See page 19. Wait a few...
... call an authorized servicer. • If the oven is an error or a problem. Noises may be over 400° F. This is not set for a new range and will disappear after the completion of metal parts expanding and contracting. See page 13. Use the recommended cleaning agents. See page 19. Wait a few...


