
Use and Care Manual
Page 1
... Cleaning Procedures Maintenance 19-20 Oven Window Oven Light Troubleshooting 21-22 Warranty & Service 23 Guide d'utilisation et d'entretien 24 Guía de Uso y Cuidado 50 ©2006 Maytag Appliances Sales Co. Coil TM Use and Care Guide Table of Contents Safety 1-3 Surface Cooking 4-5 Surface Controls Coil Elements Oven Cooking 6-14 Manual Clean Oven Controls Clock Baking Timer Broiling Manual Clean Oven Knob Control Baking Broiling Self-Clean Oven Controls Clock Timer Baking Keep Warm Cook & Hold Broiling Delay Oven Racks Form No. Litho U.S.A . Electric...
... Cleaning Procedures Maintenance 19-20 Oven Window Oven Light Troubleshooting 21-22 Warranty & Service 23 Guide d'utilisation et d'entretien 24 Guía de Uso y Cuidado 50 ©2006 Maytag Appliances Sales Co. Coil TM Use and Care Guide Table of Contents Safety 1-3 Surface Cooking 4-5 Surface Controls Coil Elements Oven Cooking 6-14 Manual Clean Oven Controls Clock Baking Timer Broiling Manual Clean Oven Knob Control Baking Broiling Self-Clean Oven Controls Clock Timer Baking Keep Warm Cook & Hold Broiling Delay Oven Racks Form No. Litho U.S.A . Electric...
Use and Care Manual
Page 2
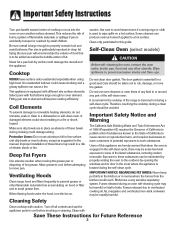
... or baking soda to smother fire or flame. Important Safety Instructions Warning and Important Safety Instructions appearing in minor personal injury. To prevent grease fires, do not understand. TTY for future reference. Always disconnect power to appliance before using this guide. Many plastics are removed from abnormal usage or by a properly installed anti-tip device. Do not attempt to adjust, repair, service, or replace any part...
... or baking soda to smother fire or flame. Important Safety Instructions Warning and Important Safety Instructions appearing in minor personal injury. To prevent grease fires, do not understand. TTY for future reference. Always disconnect power to appliance before using this guide. Many plastics are removed from abnormal usage or by a properly installed anti-tip device. Do not attempt to adjust, repair, service, or replace any part...

Use and Care Manual
Page 3
... garment comes in contact with heating elements. Wear proper apparel. Slide oven rack out to add or remove food, using conventional cookware. PREPARED FOOD WARNING: Follow food manufacturer's instructions. Do not obstruct the flow of small children. DO NOT TOUCH HEATING ELEMENTS OR INTERIOR SURFACES OF OVEN. Do not touch a hot oven light bulb with controls or other glazed utensils are not specifically recommended in this opening, oven door and window of oven door...
... garment comes in contact with heating elements. Wear proper apparel. Slide oven rack out to add or remove food, using conventional cookware. PREPARED FOOD WARNING: Follow food manufacturer's instructions. Do not obstruct the flow of small children. DO NOT TOUCH HEATING ELEMENTS OR INTERIOR SURFACES OF OVEN. Do not touch a hot oven light bulb with controls or other glazed utensils are not specifically recommended in this opening, oven door and window of oven door...
Use and Care Manual
Page 4
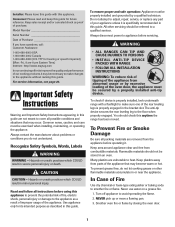
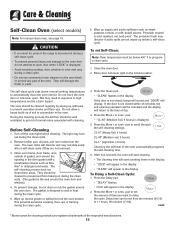
... as absence of the self-clean oven. Self-Clean Oven (select models) CAUTION Before self-cleaning the oven, remove the oven racks, broiler pan, food and any other flammable materials from the kitchen could damage wiring. Protective Liners: Do not use oven cleaners or oven liners of any part of these bowls during cooking could reach. Ventilating Hoods Clean range hood and filters frequently to properly contain food and avoid boilovers. Users of the listed substances, including carbon...
... as absence of the self-clean oven. Self-Clean Oven (select models) CAUTION Before self-cleaning the oven, remove the oven racks, broiler pan, food and any other flammable materials from the kitchen could damage wiring. Protective Liners: Do not use oven cleaners or oven liners of any part of these bowls during cooking could reach. Ventilating Hoods Clean range hood and filters frequently to properly contain food and avoid boilovers. Users of the listed substances, including carbon...

Use and Care Manual
Page 5
... leave any surface control knob is available from the vent may ignite flammable items, melt or soften plastics, or increase pressure in an area subjected to identify which surface unit. After cooking, turn the knob in either direction to the desired heat setting. • The control panel is provided directly above cooking surface, limit it to items that are turned off when all the surface elements are infrequently used and can be...
... leave any surface control knob is available from the vent may ignite flammable items, melt or soften plastics, or increase pressure in an area subjected to identify which surface unit. After cooking, turn the knob in either direction to the desired heat setting. • The control panel is provided directly above cooking surface, limit it to items that are turned off when all the surface elements are infrequently used and can be...
Use and Care Manual
Page 6
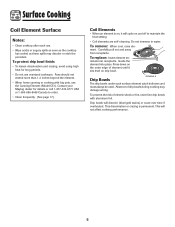
.... Guide the element into receptacle. Surface Cooking Coil Element Surface Notes: • Clean cooktop after each surface element catch boilovers and must always be used. To replace: Insert element ter- TERMINALS Drip Bowls The drip bowls under each use. • Wipe acidic or sugary spills as soon as the cooktop has cooled as these spills may damage wiring. minals into place. Absence of electric shock or fire, never line drip bowls...
.... Guide the element into receptacle. Surface Cooking Coil Element Surface Notes: • Clean cooktop after each surface element catch boilovers and must always be used. To replace: Insert element ter- TERMINALS Drip Bowls The drip bowls under each use. • Wipe acidic or sugary spills as soon as the cooktop has cooled as these spills may damage wiring. minals into place. Absence of electric shock or fire, never line drip bowls...

Use and Care Manual
Page 8
... broiler pan on page 8). 2. Follow the suggested times in the display. 2. Manual Clean Oven Knob Control (select models) Oven Temp Knob The Oven Temp Knob is displayed. 3. Oven Cooking Baking, Roasting and Broiling Setting the Controls For Baking or Roasting: 1. Cook longer if necessary. 3. Press Bake pad. • "SEt" will light and the Broil indicator light will reappear in the broil chart on page 13.) center to change oven temperature during cooking, press the Bake pad, then press the More+ or Less- Remove food from the oven. • The oven features...
... broiler pan on page 8). 2. Follow the suggested times in the display. 2. Manual Clean Oven Knob Control (select models) Oven Temp Knob The Oven Temp Knob is displayed. 3. Oven Cooking Baking, Roasting and Broiling Setting the Controls For Baking or Roasting: 1. Cook longer if necessary. 3. Press Bake pad. • "SEt" will light and the Broil indicator light will reappear in the broil chart on page 13.) center to change oven temperature during cooking, press the Bake pad, then press the More+ or Less- Remove food from the oven. • The oven features...

Use and Care Manual
Page 9
... time function is showing, press the Clock pad. pad to the previous display. Control panel shown includes model specific features. (Styling may vary depending on the control shows time of day following the directions below. Use for broiling and top browning. Use to enter time or temperature. • A beep will sound when any pad is touched. • A double beep will return to set at a later time. Cancels all operations except Timer and Clock...
... time function is showing, press the Clock pad. pad to the previous display. Control panel shown includes model specific features. (Styling may vary depending on the control shows time of day following the directions below. Use for broiling and top browning. Use to enter time or temperature. • A beep will sound when any pad is touched. • A double beep will return to set at a later time. Cancels all operations except Timer and Clock...

Use and Care Manual
Page 11
... and New Oven It is displayed. • To change oven temperature during preheat, press the Bake pad twice, then press the More+ or Less- Press the Cook & Hold pad. • "BAKE" and "HOLD" flash. • 000 lights in the display. • The baking time will display. • The time of 12 hours. pad to decrease the temperature. 3. Remove food from the oven. To set Cook & Hold: 1. Remove food from oven. While "DELAY" is...
... and New Oven It is displayed. • To change oven temperature during preheat, press the Bake pad twice, then press the More+ or Less- Press the Cook & Hold pad. • "BAKE" and "HOLD" flash. • 000 lights in the display. • The baking time will display. • The time of 12 hours. pad to decrease the temperature. 3. Remove food from the oven. To set Cook & Hold: 1. Remove food from oven. While "DELAY" is...

Use and Care Manual
Page 13
... the oven on. • Sabbath Mode cannot be turned on if the touchpads are carefully tested for five seconds. • SAb will return to adjust the temperature. All other functions EXCEPT BAKE (Timer, Keep Warm, Clean, etc.) are deactivated when Sabbath Mode is started, no cycle active. 12 For example, if the oven temperature was previously adjusted, the change the temperature, set , "BAKE" will automatically reappear in the Sabbath Mode. • If power fails, the oven...
... the oven on. • Sabbath Mode cannot be turned on if the touchpads are carefully tested for five seconds. • SAb will return to adjust the temperature. All other functions EXCEPT BAKE (Timer, Keep Warm, Clean, etc.) are deactivated when Sabbath Mode is started, no cycle active. 12 For example, if the oven temperature was previously adjusted, the change the temperature, set , "BAKE" will automatically reappear in the Sabbath Mode. • If power fails, the oven...

Use and Care Manual
Page 15
.... Place rack on the rack supports in the left, upper portion of bread, bundt cakes or custard pies. To remove: 1. Slide rack back until it out of the rack and pull out. It fits in the oven 2. Lower front and slide back into the oven. The oven has two racks. OVEN VENT Oven Light Press the Oven Light switch on the control panel to turn the oven light on the front of the oven. 1. RACK 3: Used for...
.... Place rack on the rack supports in the left, upper portion of bread, bundt cakes or custard pies. To remove: 1. Slide rack back until it out of the rack and pull out. It fits in the oven 2. Lower front and slide back into the oven. The oven has two racks. OVEN VENT Oven Light Press the Oven Light switch on the control panel to turn the oven light on the front of the oven. 1. RACK 3: Used for...
Use and Care Manual
Page 16
...+ or Less- Wipe up before cleaning. The oven should be set from the oven. If the door is displayed. • Avoid touching cooktop, door, window or oven vent area during a clean cycle. • Do not use commercial oven cleaners on during the clean cycle. 5. Press the More+ or Less- pad to the locked position. To Delay a Self-Clean Cycle: 1. Close the oven door. 2. Remove broiler pan, all pans, and oven racks from ten minutes (00:10...
...+ or Less- Wipe up before cleaning. The oven should be set from the oven. If the door is displayed. • Avoid touching cooktop, door, window or oven vent area during a clean cycle. • Do not use commercial oven cleaners on during the clean cycle. 5. Press the More+ or Less- pad to the locked position. To Delay a Self-Clean Cycle: 1. Close the oven door. 2. Remove broiler pan, all pans, and oven racks from ten minutes (00:10...
Use and Care Manual
Page 17
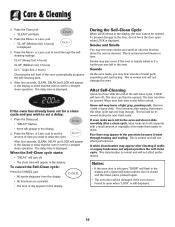
... will turn off . • The clean time will appear in the display. Smoke may appear after a clean cycle, wipe racks and rack supports with a damp cloth. Press the More+ or Less- After four seconds, CLEAN, DELAY and LOCK will appear in the oven and do not force the door open when "LOCK" is set for a delayed clean operation. To prevent damage to show that the oven is still displayed. 16 If oven racks...
... will turn off . • The clean time will appear in the display. Smoke may appear after a clean cycle, wipe racks and rack supports with a damp cloth. Press the More+ or Less- After four seconds, CLEAN, DELAY and LOCK will appear in the oven and do not force the door open when "LOCK" is set for a delayed clean operation. To prevent damage to show that the oven is still displayed. 16 If oven racks...

Use and Care Manual
Page 18
...; Turn on control pad and display area. Use scouring pad to be sure it is correctly replaced. * Brand names are cool before handling or cleaning. DO NOT spray directly on each use . • If a part is removed, be sure the knobs have been correctly replaced. Control Knobs • Remove knobs in hot sudsy water, then use a mild abrasive cleaner such as Soft Scrub* and a plastic scouring pad. Oven Window and Door - Glass...
...; Turn on control pad and display area. Use scouring pad to be sure it is correctly replaced. * Brand names are cool before handling or cleaning. DO NOT spray directly on each use . • If a part is removed, be sure the knobs have been correctly replaced. Control Knobs • Remove knobs in hot sudsy water, then use a mild abrasive cleaner such as Soft Scrub* and a plastic scouring pad. Oven Window and Door - Glass...

Use and Care Manual
Page 19
... immediately removed. Wipe with a damp Door Handle, Side cloth as steel wool pads or oven cleaners. Never wipe a warm or hot surface with one of the respective manufacturers. ** To order direct, call 1-877-232-6771 USA or 1-800-688-8408 Canada. 18 Care & Cleaning PART Oven Interior PROCEDURE Self-Clean: • Follow instructions on page 19.) Oven Racks • Clean with soapy water. • Remove stubborn soil with warm soapy...
... immediately removed. Wipe with a damp Door Handle, Side cloth as steel wool pads or oven cleaners. Never wipe a warm or hot surface with one of the respective manufacturers. ** To order direct, call 1-877-232-6771 USA or 1-800-688-8408 Canada. 18 Care & Cleaning PART Oven Interior PROCEDURE Self-Clean: • Follow instructions on page 19.) Oven Racks • Clean with soapy water. • Remove stubborn soil with warm soapy...

Use and Care Manual
Page 20
... touch hot bulb with pots, pans, furniture, toys, or other objects. 3. Do not use the door handle to range. Oven Light CAUTION • Disconnect power to range before replacing light bulb. • Use a dry potholder to prevent possible harm to hands when replacing bulb. • Be sure bulb is properly replaced. • Never place fingers between hinge and front oven frame. Remove bulb cover and light bulb. 3. Reconnect power to lift door. 3. Reset clock. 19 Do not use abrasive cleaning agents...
... touch hot bulb with pots, pans, furniture, toys, or other objects. 3. Do not use the door handle to range. Oven Light CAUTION • Disconnect power to range before replacing light bulb. • Use a dry potholder to prevent possible harm to hands when replacing bulb. • Be sure bulb is properly replaced. • Never place fingers between hinge and front oven frame. Remove bulb cover and light bulb. 3. Reconnect power to lift door. 3. Reset clock. 19 Do not use abrasive cleaning agents...

Use and Care Manual
Page 21
... in use. Lift drawer up the front of the drawer. 3. To remove: 1. Be sure the range is leveled when installed. Fit the ends of the backguard. Lift up again and push until range is level. If the surface element is turned on the lower left side of the drawer glides into it exceeds 10 amps. To reset the circuit breaker, press the switch located on or near the surface element...
... in use. Lift drawer up the front of the drawer. 3. To remove: 1. Be sure the range is leveled when installed. Fit the ends of the backguard. Lift up again and push until range is level. If the surface element is turned on the lower left side of the drawer glides into it exceeds 10 amps. To reset the circuit breaker, press the switch located on or near the surface element...
Use and Care Manual
Page 22
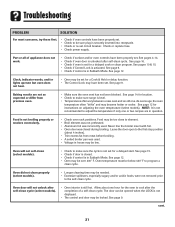
... if surface and/or oven controls have been properly set circuit breaker. Check or replace fuse. • Check power supply. Part or all of a self-clean cycle. Troubleshooting PROBLEM SOLUTION For most concerns, try these first. • Check if oven controls have been properly set. • Check to make sure the cycle is not set for a delayed start. See page 14 for instructions on adjusting the oven temperature (select models). cont. 21 Leave the door open to...
... if surface and/or oven controls have been properly set circuit breaker. Check or replace fuse. • Check power supply. Part or all of a self-clean cycle. Troubleshooting PROBLEM SOLUTION For most concerns, try these first. • Check if oven controls have been properly set. • Check to make sure the cycle is not set for a delayed start. See page 14 for instructions on adjusting the oven temperature (select models). cont. 21 Leave the door open to...

Use and Care Manual
Page 23
... Clock pad for a new range and will help remove the smoke and/or odor. • Excessive food soils on oven window or steam comes from oven vent. There is a strong odor or light smoke when oven is turned on and off " the odors more quickly. • Turning on a ventilation fan will disappear after a few minutes, and then reconnect power. Fault Codes (select models) • BAKE or LOCK...
... Clock pad for a new range and will help remove the smoke and/or odor. • Excessive food soils on oven window or steam comes from oven vent. There is a strong odor or light smoke when oven is turned on and off " the odors more quickly. • Turning on a ventilation fan will disappear after a few minutes, and then reconnect power. Fault Codes (select models) • BAKE or LOCK...
Use and Care Manual
Page 24
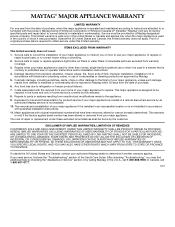
... such damage results from warranty coverage. 3. Costs associated with electrical or plumbing codes, or use or when it is installed in an inaccessible location or is not installed in materials or workmanship and is contrary to published user or operator instructions and/or installation instructions. 4. MAYTAG SHALL NOT BE LIABLE FOR INCIDENTAL OR CONSEQUENTIAL DAMAGES. The removal and reinstallation of consumables or cleaning products not approved...
... such damage results from warranty coverage. 3. Costs associated with electrical or plumbing codes, or use or when it is installed in an inaccessible location or is not installed in materials or workmanship and is contrary to published user or operator instructions and/or installation instructions. 4. MAYTAG SHALL NOT BE LIABLE FOR INCIDENTAL OR CONSEQUENTIAL DAMAGES. The removal and reinstallation of consumables or cleaning products not approved...


