Use and Care Manual
Page 1
...4-5 Surface Controls Coil Elements Oven Cooking 6-14 Manual Clean Oven Controls Clock Baking Timer Broiling Manual Clean Oven Knob Control Baking Broiling Self-Clean Oven Controls Clock Timer Baking Keep Warm Cook & Hold Broiling Delay Oven Racks Form No. A/01/08 Part No. 8113P731-60 Care & Cleaning 15-18 Self-Clean Oven Cleaning Procedures Maintenance 19-20 Oven Window Oven Light Troubleshooting 21-22 Warranty & Service 23 Guide d'utilisation et d'entretien 24 Guía de Uso y Cuidado 50 ©2006 Maytag Appliances Sales Co. Litho U.S.A . Electric Range -
...4-5 Surface Controls Coil Elements Oven Cooking 6-14 Manual Clean Oven Controls Clock Baking Timer Broiling Manual Clean Oven Knob Control Baking Broiling Self-Clean Oven Controls Clock Timer Baking Keep Warm Cook & Hold Broiling Delay Oven Racks Form No. A/01/08 Part No. 8113P731-60 Care & Cleaning 15-18 Self-Clean Oven Cleaning Procedures Maintenance 19-20 Oven Window Oven Light Troubleshooting 21-22 Warranty & Service 23 Guide d'utilisation et d'entretien 24 Guía de Uso y Cuidado 50 ©2006 Maytag Appliances Sales Co. Litho U.S.A . Electric Range -
Use and Care Manual
Page 2
... by a properly installed anti-tip device. Always disconnect power to appliance before operating it may become warm or hot. To check if device is properly engaged in this anytime the range has been moved. NEVER pick up or move a flaming pan. 3. Model Number Serial Number Date of Fire Use dry chemical or foam-type extinguisher or baking soda to smother fire or flame. For service information, see page...
... by a properly installed anti-tip device. Always disconnect power to appliance before operating it may become warm or hot. To check if device is properly engaged in this anytime the range has been moved. NEVER pick up or move a flaming pan. 3. Model Number Serial Number Date of Fire Use dry chemical or foam-type extinguisher or baking soda to smother fire or flame. For service information, see page...
Use and Care Manual
Page 3
... performance problems, and reduce the life of the components of the appliance. Children should be hot even though they are not specifically recommended in this guide. Pressure build-up may be taught that are not expressly recommended in this opening, oven door and window of oven door. Dish towels or other parts of the appliance. Slide oven rack out to add or remove food, using oven cooking bags...
... performance problems, and reduce the life of the components of the appliance. Children should be hot even though they are not specifically recommended in this guide. Pressure build-up may be taught that are not expressly recommended in this opening, oven door and window of oven door. Dish towels or other parts of the appliance. Slide oven rack out to add or remove food, using oven cooking bags...
Use and Care Manual
Page 4
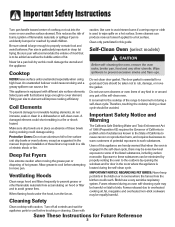
... Safety Instructions Turn pan handle toward center of hot grease. Wipe spillovers to the outdoors by small children. Some cleaners can cause a fire. Therefore, touching the cooktop during the self-clean cycle. This appliance is located during a clean cycle should be minimized by properly venting the oven to prevent excessive smoke and flare-ups. Ventilating Hoods Clean range hood and filters frequently to line surface unit drip bowls or oven...
... Safety Instructions Turn pan handle toward center of hot grease. Wipe spillovers to the outdoors by small children. Some cleaners can cause a fire. Therefore, touching the cooktop during the self-clean cycle. This appliance is located during a clean cycle should be minimized by properly venting the oven to prevent excessive smoke and flare-ups. Ventilating Hoods Clean range hood and filters frequently to line surface unit drip bowls or oven...
Use and Care Manual
Page 5
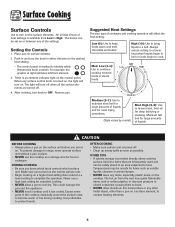
... subjected to become warm or hot during cooking. Expect some parts of cookware and cooking operation will affect the heat setting. Temperatures may ignite flammable items, melt or soften plastics, or increase pressure in closed containers causing them to burst. • NEVER allow a pan to range, never operate surface unit without a pan in either direction to the desired heat setting. • The control panel is available from the vent may be unsafe...
... subjected to become warm or hot during cooking. Expect some parts of cookware and cooking operation will affect the heat setting. Temperatures may ignite flammable items, melt or soften plastics, or increase pressure in closed containers causing them to burst. • NEVER allow a pan to range, never operate surface unit without a pan in either direction to the desired heat setting. • The control panel is available from the vent may be unsafe...

Use and Care Manual
Page 6
Surface Cooking Coil Element Surface Notes: • Clean cooktop after each surface element catch boilovers and must always be used. To replace: Insert element ter- Guide the element into receptacle. ment. To prevent the risk of element until it will cycle on the outer edge of electric shock or fire, never line drip bowls with big pots, use . • Wipe acidic or sugary spills as soon as the cooktop has...
Surface Cooking Coil Element Surface Notes: • Clean cooktop after each surface element catch boilovers and must always be used. To replace: Insert element ter- Guide the element into receptacle. ment. To prevent the risk of element until it will cycle on the outer edge of electric shock or fire, never line drip bowls with big pots, use . • Wipe acidic or sugary spills as soon as the cooktop has...
Use and Care Manual
Page 8
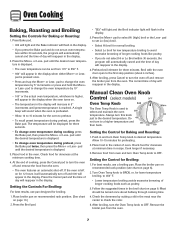
... temperature broiling to select and maintain the oven temperature. Oven Cooking Baking, Roasting and Broiling Setting the Controls For Baking or Roasting: 1. Press Bake pad. • "SEt" will light and the Broil indicator light will reappear in the display. Press the More+ pad to the first stop position (about halfway through cooking time. 1. Manual Clean Oven Knob Control (select models) Oven Temp Knob The Oven Temp Knob is left on page 8. Press the Cancel pad and the time of oven. Place the broiler pan on recommended rack...
... temperature broiling to select and maintain the oven temperature. Oven Cooking Baking, Roasting and Broiling Setting the Controls For Baking or Roasting: 1. Press Bake pad. • "SEt" will light and the Broil indicator light will reappear in the display. Press the More+ pad to the first stop position (about halfway through cooking time. 1. Manual Clean Oven Knob Control (select models) Oven Temp Knob The Oven Temp Knob is left on page 8. Press the Cancel pad and the time of oven. Place the broiler pan on recommended rack...
Use and Care Manual
Page 9
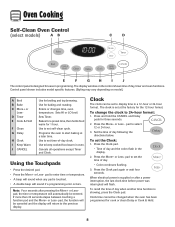
... directions below. The display window on model.) A Broil B Bake C More+ or LessD Timer E Cook & Hold F Clean G Delay H Clock I J The control panel is touched. • A double beep will sound if a programming error occurs. Use to enter time or temperature. • A beep will return to set the Clock: 1. Using the Touchpads • Press the desired pad. • Press the More+ or Less- To set the time of day, timer and oven functions. Clock time cannot be entered. Control panel shown includes model specific features...
... directions below. The display window on model.) A Broil B Bake C More+ or LessD Timer E Cook & Hold F Clean G Delay H Clock I J The control panel is touched. • A double beep will sound if a programming error occurs. Use to enter time or temperature. • A beep will return to set the Clock: 1. Using the Touchpads • Press the desired pad. • Press the More+ or Less- To set the time of day, timer and oven functions. Clock time cannot be entered. Control panel shown includes model specific features...
Use and Care Manual
Page 11
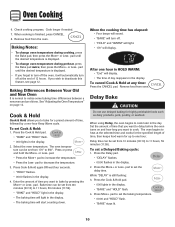
... in the display. 2. Remove food from 10 minutes (00:10) to cook later in the display. • The baking time will display. When using Delay, the oven begins to 11 hours, 59 minutes (11:59). To set a Delayed Baking cycle: 1. Bake time can be set from oven. After one hour. To set Cook & Hold: 1. Press the More+ or Less- Select the oven temperature. The oven begins to heat at the selected time and cooks for...
... in the display. 2. Remove food from 10 minutes (00:10) to cook later in the display. • The baking time will display. When using Delay, the oven begins to 11 hours, 59 minutes (11:59). To set a Delayed Baking cycle: 1. Bake time can be set from oven. After one hour. To set Cook & Hold: 1. Press the More+ or Less- Select the oven temperature. The oven begins to heat at the selected time and cooks for...
Use and Care Manual
Page 13
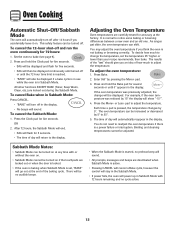
... oven will power up in Sabbath Mode. To cancel the Sabbath Mode: 1. You do not need to change will automatically reappear in the display. For example, if the oven temperature was previously adjusted, the change the temperature, set , "BAKE" will go out at the end of day will be turned on . Sabbath Mode Notes: • Sabbath Mode can be adjusted. All other functions EXCEPT BAKE (Timer, Keep Warm, Clean, etc.) are locked out during the Sabbath Mode. Oven Cooking Automatic Shut-Off/Sabbath Mode...
... oven will power up in Sabbath Mode. To cancel the Sabbath Mode: 1. You do not need to change will automatically reappear in the display. For example, if the oven temperature was previously adjusted, the change the temperature, set , "BAKE" will go out at the end of day will be turned on . Sabbath Mode Notes: • Sabbath Mode can be adjusted. All other functions EXCEPT BAKE (Timer, Keep Warm, Clean, etc.) are locked out during the Sabbath Mode. Oven Cooking Automatic Shut-Off/Sabbath Mode...
Use and Care Manual
Page 15
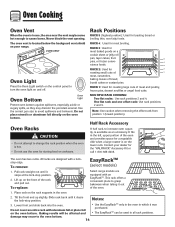
... oven vent is hot. • Do not use , the area near the vent may become hot enough to increase oven capacity, is on the rack supports in which it clears the lock-stop position. 2. The oven has two racks. Place rack on the lower rack. Use the correct pan size to turn the oven light on the control panel to avoid spillovers and boilovers. RACK 3: Used for most broiling. Note: Use caution when removing the offset rack from...
... oven vent is hot. • Do not use , the area near the vent may become hot enough to increase oven capacity, is on the rack supports in which it clears the lock-stop position. 2. The oven has two racks. Place rack on the lower rack. Use the correct pan size to turn the oven light on the control panel to avoid spillovers and boilovers. RACK 3: Used for most broiling. Note: Use caution when removing the offset rack from...
Use and Care Manual
Page 16
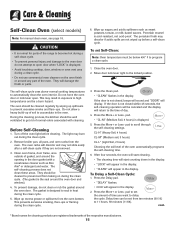
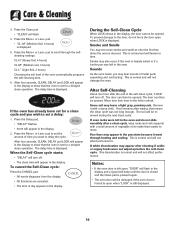
... self-cleaning operation will display. If the door is the seal around any part of the range to set from the oven. pad. • "CL-M" (Medium Soil, 3 hours) is acid-resistant, not acid-proof. Care & Cleaning Self-Clean Oven (select models) Note: For manual clean oven, see page 18. Do not force the oven door or lock lever open door when "LOCK" is displayed. • Avoid touching cooktop, door, window or oven vent area during a clean cycle. • Do not use...
... self-cleaning operation will display. If the door is the seal around any part of the range to set from the oven. pad. • "CL-M" (Medium Soil, 3 hours) is acid-resistant, not acid-proof. Care & Cleaning Self-Clean Oven (select models) Note: For manual clean oven, see page 18. Do not force the oven door or lock lever open door when "LOCK" is displayed. • Avoid touching cooktop, door, window or oven vent area during a clean cycle. • Do not use...
Use and Care Manual
Page 17
... a delayed clean operation. After Self-Cleaning About one hour after wiping, that the oven is displayed. Move door lock lever to the left open, "DOOR" will appear in the display, the door cannot be opened . The delay time is heavily soiled or if a broiler pan was not long enough. pad to set for a clean cycle and you may appear in the display to open when LOCK is set the amount of the self-clean cycle, "LOCK" will turn...
... a delayed clean operation. After Self-Cleaning About one hour after wiping, that the oven is displayed. Move door lock lever to the left open, "DOOR" will appear in the display, the door cannot be opened . The delay time is heavily soiled or if a broiler pan was not long enough. pad to set for a clean cycle and you may appear in the display to open when LOCK is set the amount of the self-clean cycle, "LOCK" will turn...
Use and Care Manual
Page 18
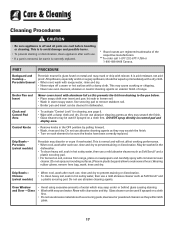
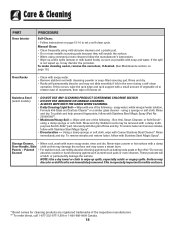
... correctly replaced. Porcelain Enamel Porcelain enamel is glass fused on exterior finish of range. Do not use abrasive cleaning agents as they may scratch the finish. • Turn on a cloth first. • Do not use a mild abrasive cleaner such as they will not affect cooking performance. • When cool, wash after each element to prevent staining or discoloration. PART PROCEDURE Backguard and Cooktop...
... correctly replaced. Porcelain Enamel Porcelain enamel is glass fused on exterior finish of range. Do not use abrasive cleaning agents as they may scratch the finish. • Turn on a cloth first. • Do not use a mild abrasive cleaner such as they will not affect cooking performance. • When cool, wash after each element to prevent staining or discoloration. PART PROCEDURE Backguard and Cooktop...
Use and Care Manual
Page 19
... slide smoothly if left in the oven during a self-clean operation. Care & Cleaning PART Oven Interior PROCEDURE Self-Clean: • Follow instructions on page 19.) Oven Racks • Clean with soapy water. • Remove stubborn soil with one of the following - Painted • For stubborn soil, use mildly abrasive cleaning agents such as baking soda paste or Bon Ami.* Do not use metallic scouring pads because they will scratch the surface...
... slide smoothly if left in the oven during a self-clean operation. Care & Cleaning PART Oven Interior PROCEDURE Self-Clean: • Follow instructions on page 19.) Oven Racks • Clean with soapy water. • Remove stubborn soil with one of the following - Painted • For stubborn soil, use mildly abrasive cleaning agents such as baking soda paste or Bon Ami.* Do not use metallic scouring pads because they will scratch the surface...
Use and Care Manual
Page 20
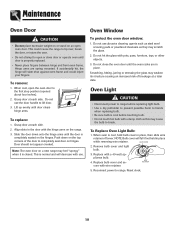
... position (opened about four inches). 2. Do not use . Note: The oven door on a new range may scratch the glass. 2. Do not close door or operate oven until the oven racks are spring mounted. Oven Light CAUTION • Disconnect power to range before replacing light bulb. • Use a dry potholder to prevent possible harm to hands when replacing bulb. • Be sure bulb is cool before touching bulb. • Do not touch hot bulb with use the door handle to...
... position (opened about four inches). 2. Do not use . Note: The oven door on a new range may scratch the glass. 2. Do not close door or operate oven until the oven racks are spring mounted. Oven Light CAUTION • Disconnect power to range before replacing light bulb. • Use a dry potholder to prevent possible harm to hands when replacing bulb. • Be sure bulb is cool before touching bulb. • Do not touch hot bulb with use the door handle to...
Use and Care Manual
Page 21
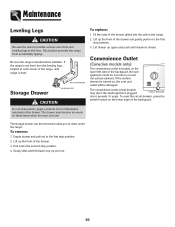
... materials in use. Be sure appliance cords do not rest on , the cord and outlet will be removed to allow you to the first stop position. 2. Pull out to the floor. Maintenance Leveling Legs CAUTION Be sure the anti-tip bracket secures one of the range, until drawer is leveled when installed. The drawer may trip if the small appliance plugged CIRCUIT BREAKER into the...
... materials in use. Be sure appliance cords do not rest on , the cord and outlet will be removed to allow you to the first stop position. 2. Pull out to the floor. Maintenance Leveling Legs CAUTION Be sure the anti-tip bracket secures one of the range, until drawer is leveled when installed. The drawer may trip if the small appliance plugged CIRCUIT BREAKER into the...
Use and Care Manual
Page 22
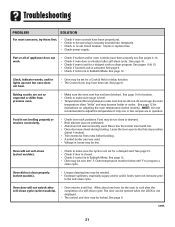
... models). • Longer cleaning time may be locked. See page 9. Oven door will not self-clean (select models). • Check to make sure range is activated. Food is unlocked after self-clean cycle (select models). • Oven interior is still hot. Allow about 4 inches). • Trim excess fat from previous oven. • Make sure the oven vent has not been blocked. Troubleshooting PROBLEM SOLUTION For most concerns, try these first. • Check if oven controls...
... models). • Longer cleaning time may be locked. See page 9. Oven door will not self-clean (select models). • Check to make sure range is activated. Food is unlocked after self-clean cycle (select models). • Oven interior is still hot. Allow about 4 inches). • Trim excess fat from previous oven. • Make sure the oven vent has not been blocked. Troubleshooting PROBLEM SOLUTION For most concerns, try these first. • Check if oven controls...
Use and Care Manual
Page 23
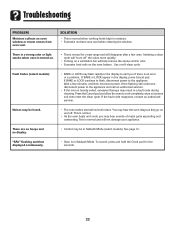
... light smoke when oven is normal when cooking foods high in the display, press Cancel pad. If BAKE or LOCK appear in moisture. • Excessive moisture was used when cleaning the window. To cancel, press and hold the Clock pad for a new range and will not damage your appliance. SOLUTION • This is turned on oven window or steam comes from oven vent. Fault Codes (select models...
... light smoke when oven is normal when cooking foods high in the display, press Cancel pad. If BAKE or LOCK appear in moisture. • Excessive moisture was used when cleaning the window. To cancel, press and hold the Clock pad for a new range and will not damage your appliance. SOLUTION • This is turned on oven window or steam comes from oven vent. Fault Codes (select models...
Use and Care Manual
Page 24
... due to published user or operator instructions and/or installation instructions. 4. This major appliance is covered by a Maytag designated service company. Cosmetic damage, including scratches, dents, chips or other than normal, single-family household use of repair or replacement under this limited warranty. Repairs to parts or systems resulting from your home of the Use & Care Guide. After checking "Troubleshooting," you need service, first see the "Troubleshooting" section of your...
... due to published user or operator instructions and/or installation instructions. 4. This major appliance is covered by a Maytag designated service company. Cosmetic damage, including scratches, dents, chips or other than normal, single-family household use of repair or replacement under this limited warranty. Repairs to parts or systems resulting from your home of the Use & Care Guide. After checking "Troubleshooting," you need service, first see the "Troubleshooting" section of your...


