Maytag MEDX655D Support and Manuals
Get Help and Manuals for this Maytag item
View All Support Options Below
Free Maytag MEDX655D manuals!
Problems with Maytag MEDX655D?
Ask a Question
Free Maytag MEDX655D manuals!
Problems with Maytag MEDX655D?
Ask a Question
Popular Maytag MEDX655D Manual Pages
Installation Instructions - Page 4
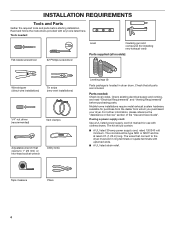
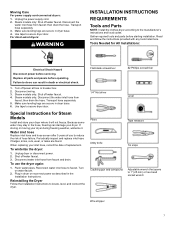
... are included. Parts needed :
Flat-blade screwdriver
#2 Phillips screwdriver
Level
Caulking gun and compound (for purchase from the dealer from whom you purchased your dryer.
Read and follow the instructions provided with clothes dryers.
The wires that all models):
Wire stripper (direct wire installations)
Tin snips (new vent installations)
1/4" nut driver (recommended)
Vent...
Installation Instructions - Page 5
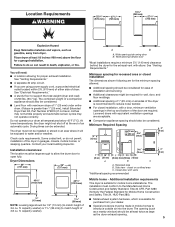
... and Safety, Title 24, HUD Part 280).
■■ Metal exhaust system hardware, which is available for wall, door, and floor moldings.
■■ Additional spacing of 1" (25 mm) on all sides of the dryer is recommended to water and/or weather.
Some codes limit, or do not permit, installation of 3.6 cu. Contact your...
Installation Instructions - Page 17
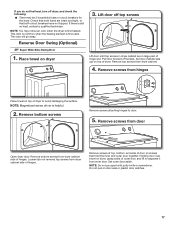
... until top screws in large part of door (4 screws) that both fuses are in dryer cabinet are intact and tight, or that hold the inner and outer door together. Set door (handle side up)...) top screws from dryer cabinet side of hinges. Remove top screws from door
Open dryer door. NOTE: Magnetized screw driver is first used. Loosen (do not feel heat, turn off screws. Set outer door aside....
Installation Instructions - Page 18

... down on the sides opposite from the inside of the hinge.
18 Rotate outer door
Rotate outer door 180º and set it back down .
9. Attach door hinges
Remove the door catch, bezel, and plug from where they were.
7. Insert...door catch, bezel, & plug
Catch and bezel
Plug
8. Reattach outer door panel to dryer door so that the larger hole is on the side where hinges were just removed.
Installation Instructions - Page 19
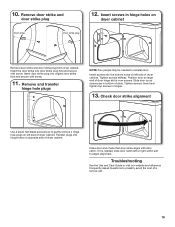
... dryer cabinet. Tighten screws. Insert and tighten top screws in bottom of dryer cabinet. Close door and check that door strike aligns with screw.
11. Troubleshooting
See the Use and Care Guide or...secure with screw. Position door so large end of a service call.
19
Insert the door strike into the bottom holes on
dryer cabinet
Door strike
Door strike plug
Remove door strike and...
Owners Manual - Page 2
... duct.
These conditions will follow all safety messages.
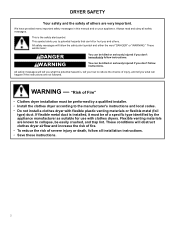
WARNING - DRYER SAFETY
Your safety and the safety of a specific type identified by a qualified installer. − Install the clothes dryer according to the manufacturer's instructions and local codes. − Do not install a clothes dryer with clothes dryers. This is installed, it must be easily crushed, and trap lint. These...
Owners Manual - Page 3
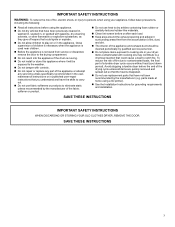
... the risk of fire, electric shock, or injury to persons when using your dryer. Items contaminated with controls.
� Do not repair or replace any part of the appliance or attempt any servicing unless specifically recommended in the usermaintenance instructions or in published user-repair instructions that you understand and have the skills to carry out.
� Do not...
Owners Manual - Page 4
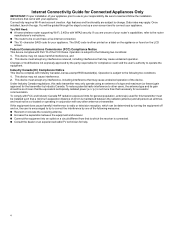
...Guide for Connected Appliances Only
IMPORTANT: Proper installation of your router's capabilities, refer to the router
manufacturer's instructions. � The router to be on and have a live internet connection. � The 10-character SAID code for your appliance. App features and functionality are unsure of your appliance prior to use is your responsibility. Once installed... supporting ...
Owners Manual - Page 5
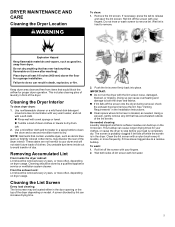
...into the dryer during ...model. See "Venting Requirements" in death, explosion, or fire. To wash:
1. Explosion Hazard
Keep flammable materials and vapors, such as needed cleaning: Laundry detergent and fabric softener residue can result in the Installation Instructions.
� Clean space where lint screen is hard to remove lint. A screen blocked by a qualified appliance service...
Owners Manual - Page 6
... to follow these instructions can result in the lower right-hand corner of the dryer. Accessories and replacement parts are away.
6
Locate the light bulb cover on some models)
1. Do not use a plastic vent.
each load. � Replace plastic or foil vent material with hot water. 5.
Unplug dryer or disconnect power. 2.
To clean or repair venting, contact a venting...
Owners Manual - Page 7
...
REQUIREMENTS
Tools and Parts
NOTE: Install the clothes dryer according to locate, level, and connect the dryer.
Disconnect the
water inlet hose from
faucet; Disconnect wiring. 3. Disconnect water inlet hose from faucet and drain. Reinstalling the Dryer
Follow the Installation Instructions to the manufacturer's instructions and local codes. Periodically inspect and replace inlet hose...
Owners Manual - Page 8
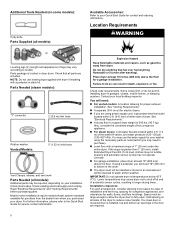
... hose
Rubber washer
Vented Models:
5' (1.52 m) inlet hose
Vent Clamps, elbows, and vent work
Parts Needed (all parts are required.
8 For further information, please refer to support dryer weight of the dryer. � The dryer must be exposed to fully open. Failure to your installation. Check code requirements. You may be installed or stored in dryer drum. IMPORTANT: Do not...
Owners Manual - Page 9

...spacing allowed.
� Additional spacing should be considered for ease of installation and servicing.
� Additional clearances might be required for wall, door, floor, moldings, dryer venting, and drain system.
� Additional spacing should be considered on both sides of the line. Minimum installation clearances (dryer only):
Front Sides
Rear
Top
Recessed NA
0" (0 mm) 0" (0 mm...
Owners Manual - Page 17
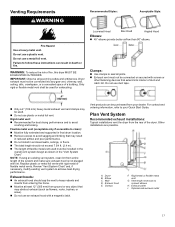
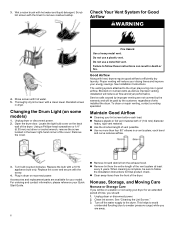
...Replace plastic or metal foil vents with lint. Review "Vent System Chart" and, if necessary, modify existing vent system to follow these instructions can be fully extended and supported in the "Vent System Chart."
Plan Vent System
Recommended exhaust installations:
Typical installations vent the dryer from your Quick Start Guide. Other installations... all governing codes and ordinances....
Dimension Guide - Page 1

W11441455A Gas
Dimension Guide
Maytag® Dryer with Sanitize Cycle - 7.0 cu. ft. Electric MGDX655DW - White Available MEDX655DW -
Maytag MEDX655D Reviews
We have not received any reviews for Maytag yet.