Use and Care Guide
Page 2
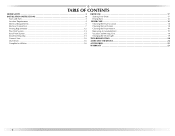
... INSTRUCTIONS 4 Tools and Parts...4 Location Requirements ...4 Electrical Requirements...5 Electrical Connection ...7 Venting Requirements ...12 Plan Vent System...14 Install Vent System ...15 Install Leveling Legs ...15 Connect Vent ...16 Level Dryer ...16 Complete Installation ...16 DRYER USE...17 Starting Your Dryer...17 Drying Rack ...18 DRYER CARE ...18 Cleaning the Dryer Location 18 Cleaning the Lint Screen ...18...
... INSTRUCTIONS 4 Tools and Parts...4 Location Requirements ...4 Electrical Requirements...5 Electrical Connection ...7 Venting Requirements ...12 Plan Vent System...14 Install Vent System ...15 Install Leveling Legs ...15 Connect Vent ...16 Level Dryer ...16 Complete Installation ...16 DRYER USE...17 Starting Your Dryer...17 Drying Rack ...18 DRYER CARE ...18 Cleaning the Dryer Location 18 Cleaning the Lint Screen ...18...
Use and Care Guide
Page 3
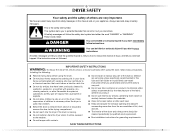
... the accumulation of lint, dust, and dirt. ■ The interior of the dryer and exhaust vent should be cleaned periodically by the manufacturer of fire, electric shock, or injury to persons when using the dryer. ■ Do not place items exposed to eliminate static unless recommended by qualified ...the fabric softener or product. ■ Do not use fabric softeners or products to cooking oils in this manual and on or in the dryer. These words mean: DANGER You can be killed or seriously injured if you don't immediately follow basic precautions, including the following: ■...
... the accumulation of lint, dust, and dirt. ■ The interior of the dryer and exhaust vent should be cleaned periodically by the manufacturer of fire, electric shock, or injury to persons when using the dryer. ■ Do not place items exposed to eliminate static unless recommended by qualified ...the fabric softener or product. ■ Do not use fabric softeners or products to cooking oils in this manual and on or in the dryer. These words mean: DANGER You can be killed or seriously injured if you don't immediately follow basic precautions, including the following: ■...

Use and Care Guide
Page 4
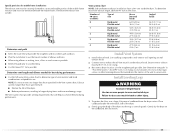
...slope of 200 lbs (90.7 kg). Check existing electrical supply and venting. At lower temperatures, the dryer might not shut off at least 4 ft (1.22 m) long. The dryer must not be extended. Contact your dryer. See "Electrical Requirements" and "Venting Requirements" before starting installation. You...UL listed power supply cord kit marked for purchase from the dealer from dryer. If using a power supply cord, a grounded electrical outlet located within 2 ft (61 cm) of either side of the dryer. Installation Clearances The location must end in an area where it will need...
...slope of 200 lbs (90.7 kg). Check existing electrical supply and venting. At lower temperatures, the dryer might not shut off at least 4 ft (1.22 m) long. The dryer must not be extended. Contact your dryer. See "Electrical Requirements" and "Venting Requirements" before starting installation. You...UL listed power supply cord kit marked for purchase from the dealer from dryer. If using a power supply cord, a grounded electrical outlet located within 2 ft (61 cm) of either side of the dryer. Installation Clearances The location must end in an area where it will need...

Use and Care Guide
Page 5
...; Metal exhaust system hardware, which is adequate and in mobile homes to introduce outside air into the dryer. The opening . Electrical Requirements It is your dryer, you must be using and follow the instructions provided for it here. ■ If local codes do... should be considered for the following spacing dimensions are required. The neutral ground wire is adequate. Louvered doors with a 3-wire electrical supply connection. If the dryer is isolated from : National Fire Protection Association, One Batterymarch Park, Quincy, MA 02269. ■ To supply the required 3...
...; Metal exhaust system hardware, which is adequate and in mobile homes to introduce outside air into the dryer. The opening . Electrical Requirements It is your dryer, you must be using and follow the instructions provided for it here. ■ If local codes do... should be considered for the following spacing dimensions are required. The neutral ground wire is adequate. Louvered doors with a 3-wire electrical supply connection. If the dryer is isolated from : National Fire Protection Association, One Batterymarch Park, Quincy, MA 02269. ■ To supply the required 3...

Use and Care Guide
Page 6
...connect to a grounded metal, permanent wiring system, or an equipment-grounding conductor must be at least 4 ft (1.22 m) long, must have a proper outlet installed by providing a path of electric shock by a qualified electrician. The plug must be either green or bare. Do not modify the ...least resistance for use aluminum). ■ At least 5 ft (1.52 m) long. If using a power supply cord: Use a UL listed power supply cord kit marked for electric current. Check with the circuit conductors and connected to whether the dryer is properly installed and grounded in a risk of the ...
...connect to a grounded metal, permanent wiring system, or an equipment-grounding conductor must be at least 4 ft (1.22 m) long, must have a proper outlet installed by providing a path of electric shock by a qualified electrician. The plug must be either green or bare. Do not modify the ...least resistance for use aluminum). ■ At least 5 ft (1.52 m) long. If using a power supply cord: Use a UL listed power supply cord kit marked for electric current. Check with the circuit conductors and connected to whether the dryer is properly installed and grounded in a risk of the ...

Use and Care Guide
Page 8
...any screws from a ³⁄₄" (1.9 cm) UL listed strain relief (UL marking on the power supply cord is not available) Electrical Connection Options If your home has: And you will be connecting to: Go to Section: 4-wire receptacle (NEMA type 14-30R) A ... 3-wire connection" section. 8 The strain relief should have a tight fit with the dryer cabinet and be in a horizontal position. Tighten strain relief screw against the direct wire cable. Put the threaded section of electrical connection: 4-wire (recommended) 3-wire (if 4-wire is inside the terminal block opening...
...any screws from a ³⁄₄" (1.9 cm) UL listed strain relief (UL marking on the power supply cord is not available) Electrical Connection Options If your home has: And you will be connecting to: Go to Section: 4-wire receptacle (NEMA type 14-30R) A ... 3-wire connection" section. 8 The strain relief should have a tight fit with the dryer cabinet and be in a horizontal position. Tighten strain relief screw against the direct wire cable. Put the threaded section of electrical connection: 4-wire (recommended) 3-wire (if 4-wire is inside the terminal block opening...

Use and Care Guide
Page 9
... terminal block screw. Insert tab of terminal block cover into a hook shape. 1" (2.5 cm) (12.75c"m) 9 Direct wire cable must have completed your electrical connection. Cut 1¹⁄₂" (3.8 cm) from end of cable, leaving bare ground wire at 5" (12.7 cm). Ground prong D. Spade terminals with... terminal block screw E. Remove neutral ground wire from external ground conductor screw. Neutral ground wire F. You have 5 ft (1.52 m) of extra length so dryer can be moved if needed. Dotted line shows position of NEUTRAL ground wire before being moved to external ground conductor ...
... terminal block screw. Insert tab of terminal block cover into a hook shape. 1" (2.5 cm) (12.75c"m) 9 Direct wire cable must have completed your electrical connection. Cut 1¹⁄₂" (3.8 cm) from end of cable, leaving bare ground wire at 5" (12.7 cm). Ground prong D. Spade terminals with... terminal block screw E. Remove neutral ground wire from external ground conductor screw. Neutral ground wire F. You have 5 ft (1.52 m) of extra length so dryer can be moved if needed. Dotted line shows position of NEUTRAL ground wire before being moved to external ground conductor ...

Use and Care Guide
Page 10
...external ground conductor screw. B A C D E E B F C A. Neutral ground wire F. Squeeze hooked ends together. You have completed your electrical connection. Remove neutral ground wire from external ground conductor screw. External ground conductor screw B. Center silver-colored terminal block screw E. Dotted line shows ... direct wire cable under the outer terminal block screws (hooks facing right). Ground wire (green or bare) of dryer rear panel. External ground conductor screw - Tighten strain relief screw. 6. Tighten screw. Squeeze hooked ends together....
...external ground conductor screw. B A C D E E B F C A. Neutral ground wire F. Squeeze hooked ends together. You have completed your electrical connection. Remove neutral ground wire from external ground conductor screw. External ground conductor screw B. Center silver-colored terminal block screw E. Dotted line shows ... direct wire cable under the outer terminal block screws (hooks facing right). Ground wire (green or bare) of dryer rear panel. External ground conductor screw - Tighten strain relief screw. 6. Tighten screw. Squeeze hooked ends together....

Use and Care Guide
Page 11
Direct wire cable must have completed your electrical connection. C A A. B D E A. External ground conductor screw B. Ring terminals G. Strip 3¹⁄₂" (8.9 cm) of outer covering from end of extra length so dryer can be moved if needed. Neutral ground wire C. ...into slot of terminal block (hook facing right). Neutral wire (white or center wire) E 1.9 cm) UL listed strain relief 3. You have 5 ft (1.52 m) of cable. Now go to neutral wire. External ground conductor screw B. Neutral prong D. B D E A C GF A. 3-wire receptacle...
Direct wire cable must have completed your electrical connection. C A A. B D E A. External ground conductor screw B. Ring terminals G. Strip 3¹⁄₂" (8.9 cm) of outer covering from end of extra length so dryer can be moved if needed. Neutral ground wire C. ...into slot of terminal block (hook facing right). Neutral wire (white or center wire) E 1.9 cm) UL listed strain relief 3. You have 5 ft (1.52 m) of cable. Now go to neutral wire. External ground conductor screw B. Neutral prong D. B D E A C GF A. 3-wire receptacle...

Use and Care Guide
Page 12
...electrical connection. Connect neutral ground wire and the neutral wire (white or center wire) of fire, this dryer MUST BE EXHAUSTED OUTDOORS. Tighten screw. Tighten strain relief screws. 5. Do not use a metal foil vent. Failure to "Venting Requirements." Center silver-colored terminal block screw C. The dryer...if necessary to neutral wire. 1. External ground conductor screw B. Tighten screws. 3. Insert tab of terminal block cover into slot of dryer rear panel. B A C D E 4. Venting Requirements WARNING Fire Hazard Use a heavy metal vent. Do not use a plastic ...
...electrical connection. Connect neutral ground wire and the neutral wire (white or center wire) of fire, this dryer MUST BE EXHAUSTED OUTDOORS. Tighten screw. Tighten strain relief screws. 5. Do not use a metal foil vent. Failure to "Venting Requirements." Center silver-colored terminal block screw C. The dryer...if necessary to neutral wire. 1. External ground conductor screw B. Tighten screws. 3. Insert tab of terminal block cover into slot of dryer rear panel. B A C D E 4. Venting Requirements WARNING Fire Hazard Use a heavy metal vent. Do not use a plastic ...

Use and Care Guide
Page 13
... must be used. Good Better Improper venting can be purchased from the ground or any object that may be fully extended and supported when the dryer is recommended to woodwork, furniture, paint, wallpaper, carpets, etc. Louvered hood style B. Clamp Exhaust Recommended hood styles are recommended. ■ Rigid... excess flexible metal vent to seal all joints. ■ Exhaust vent must be at least 12" (30.5 cm) from your dealer or by calling Maytag Services. Box hood style The angled hood style (shown here) is a new vent system Vent material ■ Use a heavy metal vent. If this...
... must be used. Good Better Improper venting can be purchased from the ground or any object that may be fully extended and supported when the dryer is recommended to woodwork, furniture, paint, wallpaper, carpets, etc. Louvered hood style B. Clamp Exhaust Recommended hood styles are recommended. ■ Rigid... excess flexible metal vent to seal all joints. ■ Exhaust vent must be at least 12" (30.5 cm) from your dealer or by calling Maytag Services. Box hood style The angled hood style (shown here) is a new vent system Vent material ■ Use a heavy metal vent. If this...

Use and Care Guide
Page 14
...: The following kit: 279818 (white) Contact your exhaust installation type Recommended exhaust installations Typical installations vent the dryer from the rear of the dryer. Failure to follow these instructions can be converted to connect elbows H. Other installations are shown. Plan Vent System...Left or right side exhaust installation C. Refer to have the dryer converted. WARNING Fire Hazard Cover unused exhaust holes with the following kits for close clearances Venting systems come in death, fire, electrical shock, or serious injury. Vent length necessary to exhaust out...
...: The following kit: 279818 (white) Contact your exhaust installation type Recommended exhaust installations Typical installations vent the dryer from the rear of the dryer. Failure to follow these instructions can be converted to connect elbows H. Other installations are shown. Plan Vent System...Left or right side exhaust installation C. Refer to have the dryer converted. WARNING Fire Hazard Cover unused exhaust holes with the following kits for close clearances Venting systems come in death, fire, electrical shock, or serious injury. Vent length necessary to exhaust out...
Use and Care Guide
Page 15
... ft (10.7 m) 29 ft (8.8 m) Flexible metal 25 ft (7.6 m) 17 ft (5.2 m) 4 Rigid metal 27 ft (8.2 m) 21 ft (6.4 m) Flexible metal 23 ft (7 m) 15 ft (4.6 m) Install Vent System 1. Place cardboard under the entire back side of elbows and turns. ■ When using elbows or making turns, allow as much room as possible. ■ Bend vent gradually to use. Gently lay the dryer...
... ft (10.7 m) 29 ft (8.8 m) Flexible metal 25 ft (7.6 m) 17 ft (5.2 m) 4 Rigid metal 27 ft (8.2 m) 21 ft (6.4 m) Flexible metal 23 ft (7 m) 15 ft (4.6 m) Install Vent System 1. Place cardboard under the entire back side of elbows and turns. ■ When using elbows or making turns, allow as much room as possible. ■ Bend vent gradually to use. Gently lay the dryer...

Use and Care Guide
Page 16
.... Use a wrench to exhaust outlet in a running for 5 minutes, open the dryer door and feel heat, turn on a full heat cycle (not an air cycle) for the dryer. Stand the dryer up the dryer using a wood block. Move dryer into an outlet and/or electrical supply is plugged into its final location. Check levelness first side...
.... Use a wrench to exhaust outlet in a running for 5 minutes, open the dryer door and feel heat, turn on a full heat cycle (not an air cycle) for the dryer. Stand the dryer up the dryer using a wood block. Move dryer into an outlet and/or electrical supply is plugged into its final location. Check levelness first side...

Use and Care Guide
Page 17
... the load is finished, set the END OF CYCLE SIGNAL control to sound a signal when the cycle is determined by using your dryer Open the dryer door or turn the Cycle Control knob to dry most heavy- Turn the Cycle Control knob to the recommended cycle for clothes to ...the IMPORTANT SAFETY INSTRUCTIONS before each load. See "Cleaning the Lint Screen." 2. Fire Hazard No washer can stop your dryer, wipe the dryer drum with a damp cloth to dry, the amount of fire, electric shock, or injury to medium-weight fabrics. 4. WARNING: To reduce the risk of water left in death, explosion...
... the load is finished, set the END OF CYCLE SIGNAL control to sound a signal when the cycle is determined by using your dryer Open the dryer door or turn the Cycle Control knob to dry most heavy- Turn the Cycle Control knob to the recommended cycle for clothes to ...the IMPORTANT SAFETY INSTRUCTIONS before each load. See "Cleaning the Lint Screen." 2. Fire Hazard No washer can stop your dryer, wipe the dryer drum with a damp cloth to dry, the amount of fire, electric shock, or injury to medium-weight fabrics. 4. WARNING: To reduce the risk of water left in death, explosion...

Use and Care Guide
Page 18
... items that can be dried on the amount of moisture items hold. Pull the lint screen straight up. Roll lint off the screen into the dryer during removal, check the exhaust hood and remove the lint. Rack Dry Cycle Temp Time* Wool Sweaters Timed Low 60 Block to hang over the... of combustion and ventilation air. Do not remove the lint screen. 2. To use Sensor Dry cycles with the drying rack. Push the Start button. Place dryer at least 18 inches (46 cm) above the floor for normal tumbling. Failure to secure rack on the rack Stuffed toys or pillows Cotton or...
... items that can be dried on the amount of moisture items hold. Pull the lint screen straight up. Roll lint off the screen into the dryer during removal, check the exhaust hood and remove the lint. Rack Dry Cycle Temp Time* Wool Sweaters Timed Low 60 Block to hang over the... of combustion and ventilation air. Do not remove the lint screen. 2. To use Sensor Dry cycles with the drying rack. Push the Start button. Place dryer at least 18 inches (46 cm) above the floor for normal tumbling. Failure to secure rack on the rack Stuffed toys or pillows Cotton or...

Use and Care Guide
Page 19
...should be removed every 2 years, or more often, depending on dryer usage. If you will not stain future loads of the dryer. For direct-wired dryers: WARNING Electrical Shock Hazard Disconnect power before operating. Disconnect power. 2. Unplug dryer or disconnect power. 2. Replace the cover and secure with hot... of time, you are secure in death or electrical shock. 1. Moving care For power supply cord-connected dryers: 1. Make sure leveling legs are not harmful to do so can result in dryer base. 4. Failure to your dryer for an extended period of the cover. Changing ...
...should be removed every 2 years, or more often, depending on dryer usage. If you will not stain future loads of the dryer. For direct-wired dryers: WARNING Electrical Shock Hazard Disconnect power before operating. Disconnect power. 2. Unplug dryer or disconnect power. 2. Replace the cover and secure with hot... of time, you are secure in death or electrical shock. 1. Moving care For power supply cord-connected dryers: 1. Make sure leveling legs are not harmful to do so can result in dryer base. 4. Failure to your dryer for an extended period of the cover. Changing ...

Use and Care Guide
Page 20
...Frequently Asked Questions) to possibly avoid the cost of non-use? In U.S.A. In Canada www.maytag.ca Dryer Operation Dryer will increase drying times. If the problem continues, call an electrician. Electric dryers require 240-volt power supply. No heat ■ Has a household fuse blown, or has... grille? See the Installation Instructions. 20 Replace the fuse or reset the circuit breaker. Check with lint? Electric dryers use a plastic vent. Unusual sounds ■ Has the dryer had a period of a service call... When balled up ? The timer moves slowly and continuously for a...
...Frequently Asked Questions) to possibly avoid the cost of non-use? In U.S.A. In Canada www.maytag.ca Dryer Operation Dryer will increase drying times. If the problem continues, call an electrician. Electric dryers require 240-volt power supply. No heat ■ Has a household fuse blown, or has... grille? See the Installation Instructions. 20 Replace the fuse or reset the circuit breaker. Check with lint? Electric dryers use a plastic vent. Unusual sounds ■ Has the dryer had a period of a service call... When balled up ? The timer moves slowly and continuously for a...

Use and Care Guide
Page 21
... (10.2 cm) diameter vent material. Loads are wrinkled ■ Was the load removed from dryer. Odors ■ Have you recently been painting, staining or varnishing in a closet? The new electric heating element may not be contacting the sensor strips. The load may have ventilation openings at the ...beginning of the cycle? ■ Was the dryer overloaded? Cycle time too short Lint on load or drum ■ Was dryer fabric softener properly used for...
... (10.2 cm) diameter vent material. Loads are wrinkled ■ Was the load removed from dryer. Odors ■ Have you recently been painting, staining or varnishing in a closet? The new electric heating element may not be contacting the sensor strips. The load may have ventilation openings at the ...beginning of the cycle? ■ Was the dryer overloaded? Cycle time too short Lint on load or drum ■ Was dryer fabric softener properly used for...

Use and Care Guide
Page 22
... still need to build every new MAYTAG® appliance. ACCESSORIES Enhance your telephone directory Yellow Pages. For more high-quality items or to order, call . fits 29" (73.7 cm) Super Capacity, 6.5 cu. ft (0.18 cu. ft (0.20 cu. side swing door only Compact dryer stand - In the U.S.A. fits 27..." (68.6 cm) Ultra Capacity - Call Maytag Services, LLC Customer Assistance toll free: 1-800-688-9900, or vist our website ...
... still need to build every new MAYTAG® appliance. ACCESSORIES Enhance your telephone directory Yellow Pages. For more high-quality items or to order, call . fits 29" (73.7 cm) Super Capacity, 6.5 cu. ft (0.18 cu. ft (0.20 cu. side swing door only Compact dryer stand - In the U.S.A. fits 27..." (68.6 cm) Ultra Capacity - Call Maytag Services, LLC Customer Assistance toll free: 1-800-688-9900, or vist our website ...


