Use and Care Guide
Page 4
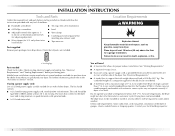
...for installing new exhaust vent) ■ Tape measure Parts supplied Remove parts packages from dryer. Check that opens to water and/or weather. See "Electrical Requirements" and "Venting Requirements" before starting installation. The kit should be type SRD or SRDT and be considered. ■ ...A level floor with a maximum slope of the dryer in an area where it will need &#...
...for installing new exhaust vent) ■ Tape measure Parts supplied Remove parts packages from dryer. Check that opens to water and/or weather. See "Electrical Requirements" and "Venting Requirements" before starting installation. The kit should be type SRD or SRDT and be considered. ■ ...A level floor with a maximum slope of the dryer in an area where it will need &#...

Use and Care Guide
Page 19
...door catch (C). Remove door strike plug (B). Be sure the vent is first heated. When the dryer has been running or "On" position. ■ Start button has been pushed firmly. ■ Dryer is plugged into hinge holes on left or right within slot to keep cardboard spacer centered between ...the side where hinges were just removed. 7. Insert plugs into an outlet and/or electrical supply is on. ■ Household fuse is intact and tight, or circuit breaker has not tripped. ■ Dryer door is needed, slide door catch left side of cabinet. Check that door strike aligns...
...door catch (C). Remove door strike plug (B). Be sure the vent is first heated. When the dryer has been running or "On" position. ■ Start button has been pushed firmly. ■ Dryer is plugged into hinge holes on left or right within slot to keep cardboard spacer centered between ...the side where hinges were just removed. 7. Insert plugs into an outlet and/or electrical supply is on. ■ Household fuse is intact and tight, or circuit breaker has not tripped. ■ Dryer door is needed, slide door catch left side of cabinet. Check that door strike aligns...
Use and Care Guide
Page 20
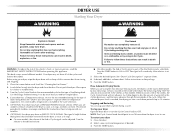
... PREVENT feature selector. When the selected dryness level is part of fire, electric shock, or injury to tumble freely. 3. Push the START button. The signal is set it (even after washing). See "Dryer Cycle Descriptions" (separate sheet). 8. Select a new cycle and temperature (if.... Close the door. 2. Fire Hazard No washer can stop your dryer anytime during a cycle. See "Cleaning the Lint Screen." 2. On some models, temperature is selectable. WARNING DRYER USE Starting Your Dryer WARNING Explosion Hazard Keep flammable materials and vapors, such as it (...
... PREVENT feature selector. When the selected dryness level is part of fire, electric shock, or injury to tumble freely. 3. Push the START button. The signal is set it (even after washing). See "Dryer Cycle Descriptions" (separate sheet). 8. Select a new cycle and temperature (if.... Close the door. 2. Fire Hazard No washer can stop your dryer anytime during a cycle. See "Cleaning the Lint Screen." 2. On some models, temperature is selectable. WARNING DRYER USE Starting Your Dryer WARNING Explosion Hazard Keep flammable materials and vapors, such as it (...
Use and Care Guide
Page 21
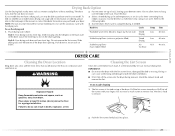
... garage installation. The drum turns, but the rack does not move. 2. Push down to dry items such as gasoline, away from dryer. DRYER CARE Cleaning the Dryer Location Keep dryer area clear and free from whom you . Do not rinse or wash screen to the following table. Refer to remove lint. Slide ...no heat) 60 min. 60 min. 90 min. Style 1: Your drying rack has front legs. Pull the lint screen toward you purchased your model. Start the dryer. Put wet items on top of rack, leaving space between items. Do not allow items to shape, lay flat on a clothesline or by lint can...
... garage installation. The drum turns, but the rack does not move. 2. Push down to dry items such as gasoline, away from dryer. DRYER CARE Cleaning the Dryer Location Keep dryer area clear and free from whom you . Do not rinse or wash screen to the following table. Refer to remove lint. Slide ...no heat) 60 min. 60 min. 90 min. Style 1: Your drying rack has front legs. Pull the lint screen toward you purchased your model. Start the dryer. Put wet items on top of rack, leaving space between items. Do not allow items to shape, lay flat on a clothesline or by lint can...
Use and Care Guide
Page 23
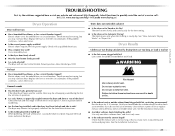
...air movement, clean exhaust system of non-use it only once. ■ Is the exhaust vent the correct length? Electric dryers use 2 household fuses or circuit breakers. The dryer will not run ■ Has a household fuse blown, or has a circuit breaker tripped? The drum may be ...load. Hold your hand under the outside exhaust hood clogged with lint? See the Installation Instructions. 23 In Canada www.maytag.ca Dryer Operation Dryer will not start in "Dryer Use." If the problem continues, call an electrician. ■ Is the correct power supply available? The timer moves...
...air movement, clean exhaust system of non-use it only once. ■ Is the exhaust vent the correct length? Electric dryers use 2 household fuses or circuit breakers. The dryer will not run ■ Has a household fuse blown, or has a circuit breaker tripped? The drum may be ...load. Hold your hand under the outside exhaust hood clogged with lint? See the Installation Instructions. 23 In Canada www.maytag.ca Dryer Operation Dryer will not start in "Dryer Use." If the problem continues, call an electrician. ■ Is the correct power supply available? The timer moves...


