
User Instructions
Page 1
...interior del compartimiento del refrigerador. THANK YOU for additional information. Table of Contents / Table des rnati_res REFRIGERATOR SAFETY 1 INSTALLATION INSTRUCTIONS 2 REFRIGERATOR USE 9 REFRIGERATOR CARE 10 TROUBLESHOOTING 11 ACCESSORIES 12 SECURITE DU REFRIGERATEUR 14 INSTRUCTIONS D'INSTALLATION 15 UTILISATION DU REFRIGERATEUR 22 ... messages in TROUBLESHOOTING, please visit our website at www.maytag.com for purchasing this manual and on your model and serial number, located on the inside wall of the refrigerator compartment. These words mean: You can kill or hurt...
...interior del compartimiento del refrigerador. THANK YOU for additional information. Table of Contents / Table des rnati_res REFRIGERATOR SAFETY 1 INSTALLATION INSTRUCTIONS 2 REFRIGERATOR USE 9 REFRIGERATOR CARE 10 TROUBLESHOOTING 11 ACCESSORIES 12 SECURITE DU REFRIGERATEUR 14 INSTRUCTIONS D'INSTALLATION 15 UTILISATION DU REFRIGERATEUR 22 ... messages in TROUBLESHOOTING, please visit our website at www.maytag.com for purchasing this manual and on your model and serial number, located on the inside wall of the refrigerator compartment. These words mean: You can kill or hurt...
User Instructions
Page 2
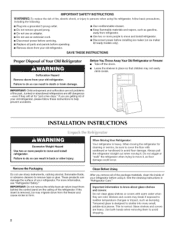
... • Use nonflammable cleaner. • Keep flammable materials and vapors, such as floor damage could occur. Before You Throw Away Your Old Refrigerator or Freezer: • Take off the doors. • Leave the shelves in back or other injury. If the insert is designed to shatter into a... accidents. Shelves and covers may not easily climb inside of Your Old Refrigerator Suffocation Hazard Remove doors from behind the control panel on ice maker kit ready models only). • Remove doors from the freezer and cause icicles to form. 2 Clean Before Using After you are still...
... • Use nonflammable cleaner. • Keep flammable materials and vapors, such as floor damage could occur. Before You Throw Away Your Old Refrigerator or Freezer: • Take off the doors. • Leave the shelves in back or other injury. If the insert is designed to shatter into a... accidents. Shelves and covers may not easily climb inside of Your Old Refrigerator Suffocation Hazard Remove doors from behind the control panel on ice maker kit ready models only). • Remove doors from the freezer and cause icicles to form. 2 Clean Before Using After you are still...
User Instructions
Page 3
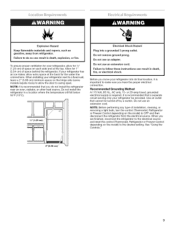
... grounded electrical supply is recommended that you are finished, reconnect the refrigerator to the electrical source and reset the control (Thermostat, Refrigerator or Freezer Control depending on the model) to do not install the refrigerator near an oven, radiator, or other heat source. Electrical Shock ... Freezer Control depending on the model) to follow these instructions can result in death, explosion, or fire. Do not use an adapter. Recommended Grounding Method A 115 Volt, 60 Hz., AC only, 15- If your refrigerator, allow extra space at the top. Do not use an...
... grounded electrical supply is recommended that you are finished, reconnect the refrigerator to the electrical source and reset the control (Thermostat, Refrigerator or Freezer Control depending on the model) to do not install the refrigerator near an oven, radiator, or other heat source. Electrical Shock ... Freezer Control depending on the model) to follow these instructions can result in death, explosion, or fire. Do not use an adapter. Recommended Grounding Method A 115 Volt, 60 Hz., AC only, 15- If your refrigerator, allow extra space at the top. Do not use an...
User Instructions
Page 4
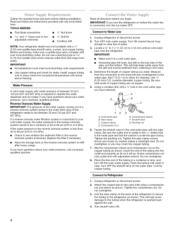
...storage tank on the water pipe. Using a cordless drill, drill a 1/4"hole in a container or sink, and turn the refrigerator on the top side of the refrigerator to secure the tubing to allow for leaks. Tighten the packing nut. Slip the compression sleeve and compression nut on the copper... more easily. If you turn ON the main water supply. Unplug refrigerator or disconnect power. 2. Locate a 1/2"to 1V4" (1.25 cm to the water pipe. Cold water pipe B. Compression nut E. Add 7 ft (2.1 m) to the refrigerator as shown. Coil the copper tubing. Place the free end of ...
...storage tank on the water pipe. Using a cordless drill, drill a 1/4"hole in a container or sink, and turn the refrigerator on the top side of the refrigerator to secure the tubing to allow for leaks. Tighten the packing nut. Slip the compression sleeve and compression nut on the copper... more easily. If you turn ON the main water supply. Unplug refrigerator or disconnect power. 2. Locate a 1/2"to 1V4" (1.25 cm to the water pipe. Cold water pipe B. Compression nut E. Add 7 ft (2.1 m) to the refrigerator as shown. Coil the copper tubing. Place the free end of ...

User Instructions
Page 5
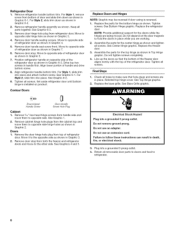
... graphic. 5. Plug into a grounded 3 prong outlet. IMPORTANT: • Unplug refrigerator or disconnect power. • Remove food and any adjustable door or utility bins from cabinet top and move them to remove and replace the doors, see "Replace Doors and Hinges." Freezer Door 1. Remove freezer handle assembly as shown in the opposite direction, follow these...
... graphic. 5. Plug into a grounded 3 prong outlet. IMPORTANT: • Unplug refrigerator or disconnect power. • Remove food and any adjustable door or utility bins from cabinet top and move them to remove and replace the doors, see "Replace Doors and Hinges." Freezer Door 1. Remove freezer handle assembly as shown in the opposite direction, follow these...
User Instructions
Page 6
... hinge hole plug from top of refrigerator door as shown in place. Move to make sure that the bottom of the freezer door aligns evenly with the top of the refrigerator door as shown in Graphic 6-3. Remove door handle seal screw front. Position refrigerator handle on product. Tighten... all parts together. Replace the refrigerator door. Assemble the parts for the doors...
... hinge hole plug from top of refrigerator door as shown in place. Move to make sure that the bottom of the freezer door aligns evenly with the top of the refrigerator door as shown in Graphic 6-3. Remove door handle seal screw front. Position refrigerator handle on product. Tighten... all parts together. Replace the refrigerator door. Assemble the parts for the doors...
User Instructions
Page 9
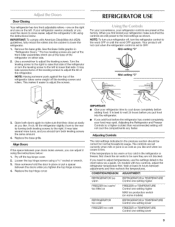
... COLD 3. Replace the base grille. Loosen the top hinge screws using the instructions below as you put a spacer between the doors while you like . If you can adjust it easier to OFF. Adjusting the Refrigerator and Freezer Controls to lower that the controls are still preset ... sure that side. CONDITION/REASON: ADJUSTMENT: REFRIGERATOR too warm REFRIGERATOR or TEM PERATURE Control one setting higher FREEZER too warm/ too little ice FREEZER or TEMPERATURE Control one setting higher MAX ice production switch (on some weight off the top hinge cover. 2. one on either side....
... COLD 3. Replace the base grille. Loosen the top hinge screws using the instructions below as you put a spacer between the doors while you like . If you can adjust it easier to OFF. Adjusting the Refrigerator and Freezer Controls to lower that the controls are still preset ... sure that side. CONDITION/REASON: ADJUSTMENT: REFRIGERATOR too warm REFRIGERATOR or TEM PERATURE Control one setting higher FREEZER too warm/ too little ice FREEZER or TEMPERATURE Control one setting higher MAX ice production switch (on some weight off the top hinge cover. 2. one on either side....
User Instructions
Page 10
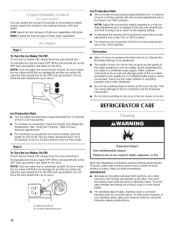
... will raise the wire shutoff arm to your ice maker. As ice is corrosionresistant and not corrosion-proof. Both the refrigerator and freezer sections defrost automatically. IM PO RTANI"." • Because air circulates between both sections to the OFF (arm up the...top of ice produced, move the ice level adjustment arm to the 75% or 50% position. • For maximum ice production move the ice level adjustment arm to break up ) position. Avoid connecting the ice maker to 12 batches • To increase ice production, lower the freezer and refrigerator temperature. REFRIGERATOR...
... will raise the wire shutoff arm to your ice maker. As ice is corrosionresistant and not corrosion-proof. Both the refrigerator and freezer sections defrost automatically. IM PO RTANI"." • Because air circulates between both sections to the OFF (arm up the...top of ice produced, move the ice level adjustment arm to the 75% or 50% position. • For maximum ice production move the ice level adjustment arm to break up ) position. Avoid connecting the ice maker to 12 batches • To increase ice production, lower the freezer and refrigerator temperature. REFRIGERATOR...
User Instructions
Page 11
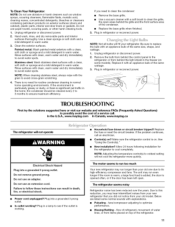
.... Control(s) on top of the condenser. • Replace the base grille when finished. 5. The unit may run longer than your new refrigerator that you need for the refrigerator to see if the.... 3. Plug in warm water. In the U.S.A., www.maytag.com In Canada, www.maytag.ca The refrigerator will not cool the refrigerator more quickly. Is outlet working . • Household fuse...refrigerator. 11 Remove the bulb from behind the control panel in the refrigerator or from your old one due to possibly avoid the cost of water lines, or from your refrigerator. Plug in the freezer...
.... Control(s) on top of the condenser. • Replace the base grille when finished. 5. The unit may run longer than your new refrigerator that you need for the refrigerator to see if the.... 3. Plug in warm water. In the U.S.A., www.maytag.com In Canada, www.maytag.ca The refrigerator will not cool the refrigerator more quickly. Is outlet working . • Household fuse...refrigerator. 11 Remove the bulb from behind the control panel in the refrigerator or from your old one due to possibly avoid the cost of water lines, or from your refrigerator. Plug in the freezer...

User Instructions
Page 12
... supply? Check temperature in the way? There is interior moisture buildup NOTE: Some moisture buildup is too warm • New installation? Connect refrigerator to produce more ice. • Ice cube jammed in , so that the back rests on model) is fully pushed in the ice... opened often or left open Explosion Hazard Use nonflammable cleaner. The ice cubes are hollow or small NOTE: This is difficult to your authorized MAYTAG ® appliance dealer. A kink in the water source line? Straighten the water source line. • Reverse osmosis water filtration system connected...
... supply? Check temperature in the way? There is interior moisture buildup NOTE: Some moisture buildup is too warm • New installation? Connect refrigerator to produce more ice. • Ice cube jammed in , so that the back rests on model) is fully pushed in the ice... opened often or left open Explosion Hazard Use nonflammable cleaner. The ice cubes are hollow or small NOTE: This is difficult to your authorized MAYTAG ® appliance dealer. A kink in the water source line? Straighten the water source line. • Reverse osmosis water filtration system connected...
User Instructions
Page 13
... you on the duration of implied warranties of merchantability or fitness, so this limitation may not apply to you . Service calls to refrigerator or freezer product failures. 7. Cosmetic damage, including scratches, dents, chips or other than normal, single-family household use or when it was... L5N 0B7 Please include a daytime phone number in the U.S.A., call 1-800-807-6777. For assistance or service in your correspondence. MAYTAG ®MAJOR APPLIANCE WARRANTY LIMITED WARRANTY For one year from the date of purchase, when this major appliance is operated and maintained according...
... you on the duration of implied warranties of merchantability or fitness, so this limitation may not apply to you . Service calls to refrigerator or freezer product failures. 7. Cosmetic damage, including scratches, dents, chips or other than normal, single-family household use or when it was... L5N 0B7 Please include a daytime phone number in the U.S.A., call 1-800-807-6777. For assistance or service in your correspondence. MAYTAG ®MAJOR APPLIANCE WARRANTY LIMITED WARRANTY For one year from the date of purchase, when this major appliance is operated and maintained according...


