
Owners Manual
Page 7
...; Is there proper air circulation around bakeware? Use aluminum foil to possibly avoid the cost of the crust and/or reduce baking temperature. Double-check the recipe in the display? Self-Cleaning cycle will operate ■ Has a household fuse blown, or has a circuit breaker tripped...suggested here or visit our website and reference Frequently Asked Questions (FAQs) to cover the edge of a service call. www.maytag.com Nothing will not operate ■ Is the oven door open or unlocked? See "Control Display" in longer cooking times. ■ Are baked items too brown on the ...
...; Is there proper air circulation around bakeware? Use aluminum foil to possibly avoid the cost of the crust and/or reduce baking temperature. Double-check the recipe in the display? Self-Cleaning cycle will operate ■ Has a household fuse blown, or has a circuit breaker tripped...suggested here or visit our website and reference Frequently Asked Questions (FAQs) to cover the edge of a service call. www.maytag.com Nothing will not operate ■ Is the oven door open or unlocked? See "Control Display" in longer cooking times. ■ Are baked items too brown on the ...

Installation Instructions
Page 1
...INSTRUCTIONS 24" (61.0 CM) ELECTRIC SINGLE AND DOUBLE BUILT-IN OVEN Table of Contents BUILT-IN OVEN SAFETY 1 INSTALLATION REQUIREMENTS 2 Tools and Parts 2 Location Requirements 2 Electrical Requirements 3 INSTALLATION INSTRUCTIONS 4 Prepare Built-In Oven 4 Oven Door 4 Make Electrical Connection 5 Install Oven 7 Complete Installation 8 BUILT-IN OVEN SAFETY...if the instructions are very important. Always read and obey all safety messages. IMPORTANT: Save for local electrical inspector's use. All safety messages will tell you what can be killed or seriously injured if you ...
...INSTRUCTIONS 24" (61.0 CM) ELECTRIC SINGLE AND DOUBLE BUILT-IN OVEN Table of Contents BUILT-IN OVEN SAFETY 1 INSTALLATION REQUIREMENTS 2 Tools and Parts 2 Location Requirements 2 Electrical Requirements 3 INSTALLATION INSTRUCTIONS 4 Prepare Built-In Oven 4 Oven Door 4 Make Electrical Connection 5 Install Oven 7 Complete Installation 8 BUILT-IN OVEN SAFETY...if the instructions are very important. Always read and obey all safety messages. IMPORTANT: Save for local electrical inspector's use. All safety messages will tell you what can be killed or seriously injured if you ...

Installation Instructions
Page 2
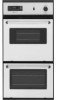
... Parts supplied ■ 0.188 x 2.1" screws - single oven (4), double oven (6) Check local codes. See "Electrical Requirements." Product Dimensions - recessed width B. 29⁵⁄₈" (75.3 cm) max. Single Oven Single Oven Installed in the upper right corner, 4" (10.2 cm)...installation. Location Requirements IMPORTANT: Observe all governing codes and ordinances. ■ Cabinet opening dimensions that all electrical connections be located in Cabinet A B F D E C A. 24" (61 cm) min. Floor must be used. overall height C. 23⁷⁄₈" (...
... Parts supplied ■ 0.188 x 2.1" screws - single oven (4), double oven (6) Check local codes. See "Electrical Requirements." Product Dimensions - recessed width B. 29⁵⁄₈" (75.3 cm) max. Single Oven Single Oven Installed in the upper right corner, 4" (10.2 cm)...installation. Location Requirements IMPORTANT: Observe all governing codes and ordinances. ■ Cabinet opening dimensions that all electrical connections be located in Cabinet A B F D E C A. 24" (61 cm) min. Floor must be used. overall height C. 23⁷⁄₈" (...

Installation Instructions
Page 3
...is recommended that a qualified electrical installer determine that the electrical connection and wire size are not sure the oven is located at the bottom right-hand oven surface. Double Oven Double Oven Installed in accordance with the National Electrical Code, ANSI/ NFPA 70-...cutout height Cabinet Side View - Oven front D. Double Oven A B E D C A. 22¹⁄₄" (56.5 cm) max. bottom of cutout to a grounded metal, permanent wiring system. See the following illustration. 3 Double or Single Oven A B E C D A. 24"(61 cm) min. Recessed oven E. Be sure that the ...
...is recommended that a qualified electrical installer determine that the electrical connection and wire size are not sure the oven is located at the bottom right-hand oven surface. Double Oven Double Oven Installed in accordance with the National Electrical Code, ANSI/ NFPA 70-...cutout height Cabinet Side View - Oven front D. Double Oven A B E D C A. 22¹⁄₄" (56.5 cm) max. bottom of cutout to a grounded metal, permanent wiring system. See the following illustration. 3 Double or Single Oven A B E C D A. 24"(61 cm) min. Recessed oven E. Be sure that the ...

Installation Instructions
Page 4
... follow the procedure below: 1. INSTALLATION INSTRUCTIONS Prepare Built-In Oven 1. Locate existing wiring to move and install oven. Model/serial number plate Double Oven A. Excessive Weight Hazard Use two or more people to avoid drilling into the notches on the final location for lifting. 3. See "Make Electrical Connection" section. ■ Flexible conduit from inside the...
... follow the procedure below: 1. INSTALLATION INSTRUCTIONS Prepare Built-In Oven 1. Locate existing wiring to move and install oven. Model/serial number plate Double Oven A. Excessive Weight Hazard Use two or more people to avoid drilling into the notches on the final location for lifting. 3. See "Make Electrical Connection" section. ■ Flexible conduit from inside the...

Installation Instructions
Page 5
... follow these instructions can result in death, fire, or electrical shock. Tighten screws on conduit connector. 7. Route the flexible conduit from the oven to the junction box. ½" (1.3 cm) 3-wire 3-wire Cable from Home A Power Supply A. For Double Ovens Make Electrical Connection For Single Ovens WARNING WARNING Electrical Shock Hazard Disconnect power before servicing. Use 12 gauge...
... follow these instructions can result in death, fire, or electrical shock. Tighten screws on conduit connector. 7. Route the flexible conduit from the oven to the junction box. ½" (1.3 cm) 3-wire 3-wire Cable from Home A Power Supply A. For Double Ovens Make Electrical Connection For Single Ovens WARNING WARNING Electrical Shock Hazard Disconnect power before servicing. Use 12 gauge...

Installation Instructions
Page 7
... decorative trim. Failure to grip. To avoid cabinet damage, use the 0.140" diameter (number 28) drill bit to move and install oven. Using 2 or more people to predrill the pilot holes before driving screws. Decorative trim B. Insert screw. 4. Reconnect power. 11....through holes in back or other injury. Replace oven racks. 5. Close door. 9. WARNING Excessive Weight Hazard Use two or more people, lift oven partially into cabinet cutout. Repeat for double oven) provided. A Use the oven opening as you purchased your oven. 7 Gently push the door downward until the...
... decorative trim. Failure to grip. To avoid cabinet damage, use the 0.140" diameter (number 28) drill bit to move and install oven. Using 2 or more people to predrill the pilot holes before driving screws. Decorative trim B. Insert screw. 4. Reconnect power. 11....through holes in back or other injury. Replace oven racks. 5. Close door. 9. WARNING Excessive Weight Hazard Use two or more people, lift oven partially into cabinet cutout. Repeat for double oven) provided. A Use the oven opening as you purchased your oven. 7 Gently push the door downward until the...


