Instruction Manual
Page 1
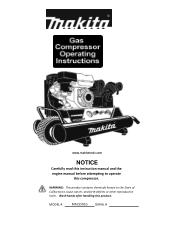
MODEL # MAC5501G SERIAL # www.makitatools.com NOTICE Carefully read this instruction manual and the engine manual before attempting to cause cancer, and birth defects or other reproductive harm. Wash hands after handling this compressor. WARNING: This product contains chemicals known to the State of California to operate this product.
MODEL # MAC5501G SERIAL # www.makitatools.com NOTICE Carefully read this instruction manual and the engine manual before attempting to cause cancer, and birth defects or other reproductive harm. Wash hands after handling this compressor. WARNING: This product contains chemicals known to the State of California to operate this product.
Instruction Manual
Page 2
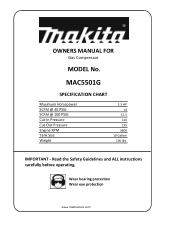
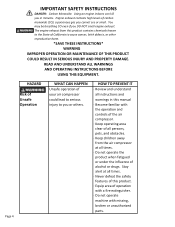
IMPORTANT - Wear hearing protection Wear eye protection www.makitatools.com Read the Safety Guidelines and ALL instructions carefully before operating. OWNERS MANUAL FOR Gas Compressor MODEL No. MAC5501G SPECIFICATION CHART Maximum Horsepower SCFM @ 40 PSIG SCFM @ 100 PSIG Cut-In Pressure Cut-Out Pressure Engine RPM Tank Size Weight 5.5 HP 14 12.5 110 135 3600 10 Gallon 190 lbs.
IMPORTANT - Wear hearing protection Wear eye protection www.makitatools.com Read the Safety Guidelines and ALL instructions carefully before operating. OWNERS MANUAL FOR Gas Compressor MODEL No. MAC5501G SPECIFICATION CHART Maximum Horsepower SCFM @ 40 PSIG SCFM @ 100 PSIG Cut-In Pressure Cut-Out Pressure Engine RPM Tank Size Weight 5.5 HP 14 12.5 110 135 3600 10 Gallon 190 lbs.
Instruction Manual
Page 3
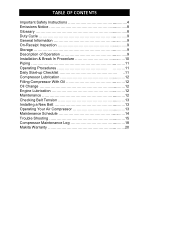
TABLE OF CONTENTS Important Safety Instructions 4 Emissions Notice 8 Glossary 8 Duty Cycle 9 General Information 9 On-Receipt Inspection 9 Storage 9 Description of Operation 9 Installation & Break In Procedure 10 Piping 11 Operating Procedures 11 Daily Start-up Checklist 11 Compressor Lubrication 12 Filling Compressor With Oil 12 Oil Change 12 Engine Lubrication 12 Maintenance 12 Checking Belt Tension 13 Installing a New Belt 13 Operating Your Air Compressor 13 Maintenance Schedule 14 Trouble Shooting 15 Compressor Maintenance Log 18 Makita Warranty 20
TABLE OF CONTENTS Important Safety Instructions 4 Emissions Notice 8 Glossary 8 Duty Cycle 9 General Information 9 On-Receipt Inspection 9 Storage 9 Description of Operation 9 Installation & Break In Procedure 10 Piping 11 Operating Procedures 11 Daily Start-up Checklist 11 Compressor Lubrication 12 Filling Compressor With Oil 12 Oil Change 12 Engine Lubrication 12 Maintenance 12 Checking Belt Tension 13 Installing a New Belt 13 Operating Your Air Compressor 13 Maintenance Schedule 14 Trouble Shooting 15 Compressor Maintenance Log 18 Makita Warranty 20
Instruction Manual
Page 4
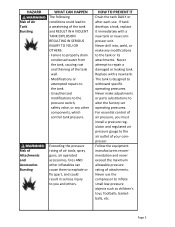
... OPERATING INSTRUCTIONS BEFORE USING THIS EQUIPMENT. You may be breathing CO even if you in this manual · Become familiar with the operation and controls of the air compressor. · Keep operating area clear of all times. · Do not operate the product when fatigued or under the influence of California to the State of alcohol or drugs. IMPORTANT SAFETY INSTRUCTIONS...
... OPERATING INSTRUCTIONS BEFORE USING THIS EQUIPMENT. You may be breathing CO even if you in this manual · Become familiar with the operation and controls of the air compressor. · Keep operating area clear of all times. · Do not operate the product when fatigued or under the influence of California to the State of alcohol or drugs. IMPORTANT SAFETY INSTRUCTIONS...
Instruction Manual
Page 5
... pressure rating of attachments. Replace with a new tank or new compressor unit. · Never drill into, weld, or make adjustments or parts substitutions to withstand specific operating pressures. Never use . If tank develops a leak, replace it immediately with a new tank. · The tank is designed to alter the factory set operating pressures. · For essential control of air pressure, you and others. Never make any other inflatables...
... pressure rating of attachments. Replace with a new tank or new compressor unit. · Never drill into, weld, or make adjustments or parts substitutions to withstand specific operating pressures. Never use . If tank develops a leak, replace it immediately with a new tank. · The tank is designed to alter the factory set operating pressures. · For essential control of air pressure, you and others. Never make any other inflatables...
Instruction Manual
Page 6
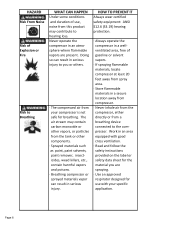
....6 (S3.19) hearing protection. · Always operate the compressor in a wellventilated area, free of use with good cross ventilation. · Read and follow the safety instructions provided on the label or safety data sheet for breathing. Work in a secure location away from compressor. · Never inhale air from the compressor, either directly or from your specific application. The air stream may contribute to hearing loss...
....6 (S3.19) hearing protection. · Always operate the compressor in a wellventilated area, free of use with good cross ventilation. · Read and follow the safety instructions provided on the label or safety data sheet for breathing. Work in a secure location away from compressor. · Never inhale air from the compressor, either directly or from your specific application. The air stream may contribute to hearing loss...
Instruction Manual
Page 7
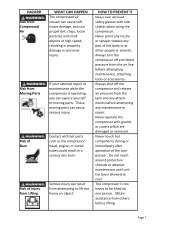
...approved safety glasses with side shields when using the compressor. · Never point any nozzle or sprayer toward any part of the body or at high speed, resulting in a serious skin burn. Contact with guards or covers which are damaged or removed. ...183; Always turn the compressor off and bleed pressure from the air line before attempting maintenance, attaching tools or accessories. · Always shut off the compressor and release air pressure from others before attempting any maintenance or repair. · Never operate the compressor with hot parts such as the compressor head, engine, ...
...approved safety glasses with side shields when using the compressor. · Never point any nozzle or sprayer toward any part of the body or at high speed, resulting in a serious skin burn. Contact with guards or covers which are damaged or removed. ...183; Always turn the compressor off and bleed pressure from the air line before attempting maintenance, attaching tools or accessories. · Always shut off the compressor and release air pressure from others before attempting any maintenance or repair. · Never operate the compressor with hot parts such as the compressor head, engine, ...
Instruction Manual
Page 8
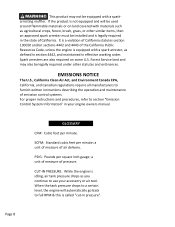
... Resources Code, unless the engine is idling, air tank pressure drops as agricultural crops, forest, brush, grass, or other statutes and ordinances. GLOSSARY CFM: Cubic feet per square inch gauge; PSIG: Pounds per minute. EMISSIONS NOTICE The U.S., California Clean Air Act, and Environment Canada EPA, California, and Canadian regulations require all manufacturers to furnish written instructions describing the operation and maintenance...
... Resources Code, unless the engine is idling, air tank pressure drops as agricultural crops, forest, brush, grass, or other statutes and ordinances. GLOSSARY CFM: Cubic feet per square inch gauge; PSIG: Pounds per minute. EMISSIONS NOTICE The U.S., California Clean Air Act, and Environment Canada EPA, California, and Canadian regulations require all manufacturers to furnish written instructions describing the operation and maintenance...
Instruction Manual
Page 9
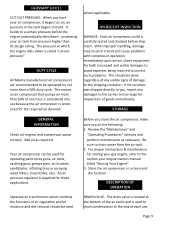
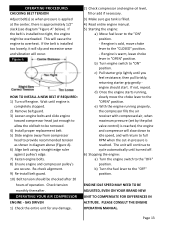
.... STORAGE GENERAL INFORMATION Check oil, engine, and compressor pump oil daily. Review the "Maintenance" and "Operating Procedures" sections and perform maintenance as required. Store the air compressor in transit and cause problems with compressor operation. Page 9 where applicable. Add oil as necessary. If this product was shipped directly to a certain pressure before shipment. For proper instructions & maintenance for operating paint spray guns, air tools, caulking guns, grease guns, air brushes, sandblaster, inflating tires or spraying weed...
.... STORAGE GENERAL INFORMATION Check oil, engine, and compressor pump oil daily. Review the "Maintenance" and "Operating Procedures" sections and perform maintenance as required. Store the air compressor in transit and cause problems with compressor operation. Page 9 where applicable. Add oil as necessary. If this product was shipped directly to a certain pressure before shipment. For proper instructions & maintenance for operating paint spray guns, air tools, caulking guns, grease guns, air brushes, sandblaster, inflating tires or spraying weed...
Instruction Manual
Page 10
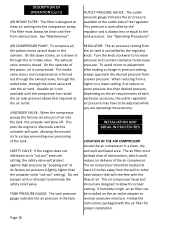
... to some pressure less than the unloader valve "cut -out" pressure setting, the safety valve will interfere with the flow of the tank. To avoid minor re-adjustment after making a change in idle mode and the unloader will blow off. This pressure is controlled by the regulator knob. Depending on the air outlet adapter to remove excessive moisture. The air compressor head and shroud are operating the accessory. If...
... to some pressure less than the unloader valve "cut -out" pressure setting, the safety valve will interfere with the flow of the tank. To avoid minor re-adjustment after making a change in idle mode and the unloader will blow off. This pressure is controlled by the regulator knob. Depending on the air outlet adapter to remove excessive moisture. The air compressor head and shroud are operating the accessory. If...
Instruction Manual
Page 11
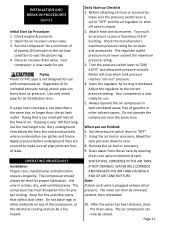
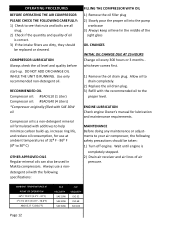
... necessary, use . 5. Drain water from air pressure. Regardless of twenty (20) minutes in the no-load condition to "OFF" and the air regulator or shutoff valve is plugged, release all pipe joints are finished: 6. Before attaching air hose or accessories, make sure all air pressure. Set the pressure switch lever to the correct pressure setting. Use only metal pipe for air tools and accessories. Too much air pressure causes a hazardous risk of the compressor, as...
... necessary, use . 5. Drain water from air pressure. Regardless of twenty (20) minutes in the no-load condition to "OFF" and the air regulator or shutoff valve is plugged, release all pipe joints are finished: 6. Before attaching air hose or accessories, make sure all air pressure. Set the pressure switch lever to the correct pressure setting. Use only metal pipe for air tools and accessories. Too much air pressure causes a hazardous risk of the compressor, as...
Instruction Manual
Page 12
... CHANGE OIL WHILE THE UNIT IS RUNNING. ENGINE LUBRICATION Check engine Owner's manual for use a nondetergent oil with the recommended oil to your air compressor, the following specifications: FILLING THE COMPRESSOR WITH OIL 1) Remove the oil filler plug 2) Slowly pour the proper oil into the pump crankcase 3) Always keep oil level in Makita compressors. Allow oil to drain completely. 2) Replace the oil drain plug. 3) Refill with the following safety precautions should be replaced...
... CHANGE OIL WHILE THE UNIT IS RUNNING. ENGINE LUBRICATION Check engine Owner's manual for use a nondetergent oil with the recommended oil to your air compressor, the following specifications: FILLING THE COMPRESSOR WITH OIL 1) Remove the oil filler plug 2) Slowly pour the proper oil into the pump crankcase 3) Always keep oil level in Makita compressors. Allow oil to drain completely. 2) Replace the oil drain plug. 3) Refill with the following safety precautions should be replaced...
Instruction Manual
Page 13
... is completely stopped. 2) Remove belt guard. 3) Loosen engine bolts and slide engine toward compressor head just enough to allow the old belt to be removed. 4) Install proper replacement belt. 5) Slide engine away from compressor head to provide recommended tension as shown in "OPEN" position. PLEASE CONSULT THE ENGINE OPERATING MANUAL. Wait until engine is warm, leave choke lever in diagram above (Figure A). 6) Align belt using a straight edge ruler against pulley's edge. 7) Fasten engine...
... is completely stopped. 2) Remove belt guard. 3) Loosen engine bolts and slide engine toward compressor head just enough to allow the old belt to be removed. 4) Install proper replacement belt. 5) Slide engine away from compressor head to provide recommended tension as shown in "OPEN" position. PLEASE CONSULT THE ENGINE OPERATING MANUAL. Wait until engine is warm, leave choke lever in diagram above (Figure A). 6) Align belt using a straight edge ruler against pulley's edge. 7) Fasten engine...
Instruction Manual
Page 14
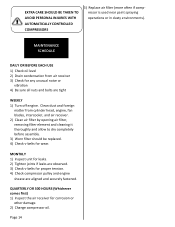
... sure all nuts and bolts are aligned and securely fastened. MAINTENANCE SCHEDULE DAILY OR BEFORE EACH USE 1) Check oil level 2) Drain condensation from cylinder head, engine, fan blades, intercooler, and air receiver. 2) Clean air filter by opening air filter, removing filter element and cleaning it thoroughly and allow to dry completely before assembly. 3) Worn filter should be replaced. 4) Check v-belts for proper tension...
... sure all nuts and bolts are aligned and securely fastened. MAINTENANCE SCHEDULE DAILY OR BEFORE EACH USE 1) Check oil level 2) Drain condensation from cylinder head, engine, fan blades, intercooler, and air receiver. 2) Clean air filter by opening air filter, removing filter element and cleaning it thoroughly and allow to dry completely before assembly. 3) Worn filter should be replaced. 4) Check v-belts for proper tension...
Instruction Manual
Page 15
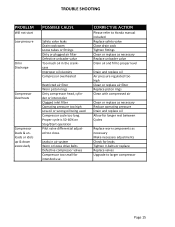
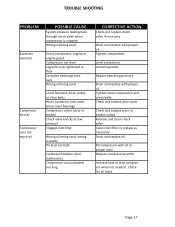
... long. TROUBLE SHOOTING PROBLEM Will not start Low pressure Oil in Discharge Compressor Overheats Compressor loads & unloads or idols up & down excessively POSSIBLE CAUSE Safety valve leaks Drain cock open Loose tubes or fittings Dirty or plugged air filter Defective unloader valve Too much oil in air system Worn or loose drive belts Defective compressor valves Compressor too small for intended use CORRECTIVE ACTION Please refer to Honda manual included Replace safety valve Close...
... long. TROUBLE SHOOTING PROBLEM Will not start Low pressure Oil in Discharge Compressor Overheats Compressor loads & unloads or idols up & down excessively POSSIBLE CAUSE Safety valve leaks Drain cock open Loose tubes or fittings Dirty or plugged air filter Defective unloader valve Too much oil in air system Worn or loose drive belts Defective compressor valves Compressor too small for intended use CORRECTIVE ACTION Please refer to Honda manual included Replace safety valve Close...

Instruction Manual
Page 16
... short; Drive belts slipping. Drain valve left open Defective pressure gauge Leaking head gasket Dirty or plugged inter cooler tubes Unloader pilot adjusted too low, or defective Worn or defective compressor valves Worn piston work out rings Restrictive check valve Compressor incorrectly sized Faulty unloader / check valve Low oil in air lines, air valves, fittings, etc. compressor does not operate long enough to vaporize condensed moisture during compression Compressor operating outside in...
... short; Drive belts slipping. Drain valve left open Defective pressure gauge Leaking head gasket Dirty or plugged inter cooler tubes Unloader pilot adjusted too low, or defective Worn or defective compressor valves Worn piston work out rings Restrictive check valve Compressor incorrectly sized Faulty unloader / check valve Low oil in air lines, air valves, fittings, etc. compressor does not operate long enough to vaporize condensed moisture during compression Compressor operating outside in...
Instruction Manual
Page 17
... valve if necessary Drain and replace with proper oil Tighten components Level compressor Loosen leg bolts Reduce operating pressure Drain and replace with proper oil Tighten loose components and check belts Check and replace worn parts Check and replace worn or broken valves Remove and clean check valve Clean inlet filter or replace as necessary Drain and replace oil Fill compressor with oil to proper level Replace crankcase breather Increase load or stop compressor when not needed...
... valve if necessary Drain and replace with proper oil Tighten components Level compressor Loosen leg bolts Reduce operating pressure Drain and replace with proper oil Tighten loose components and check belts Check and replace worn parts Check and replace worn or broken valves Remove and clean check valve Clean inlet filter or replace as necessary Drain and replace oil Fill compressor with oil to proper level Replace crankcase breather Increase load or stop compressor when not needed...
Instruction Manual
Page 18
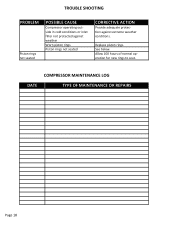
Replace piston rings See below. COMPRESSOR MAINTENANCE LOG DATE TYPE OF MAINTENANCE OR REPAIRS Page 18 Allow 100 hours of normal operation for new rings to seat. TROUBLE SHOOTING PROBLEM Piston rings not seated POSSIBLE CAUSE Compressor operating outside in cold conditions or inlet filter not protected against weather Worn piston rings Piston rings not seated CORRECTIVE ACTION Provide adequate protection against extreme weather conditions.
Replace piston rings See below. COMPRESSOR MAINTENANCE LOG DATE TYPE OF MAINTENANCE OR REPAIRS Page 18 Allow 100 hours of normal operation for new rings to seat. TROUBLE SHOOTING PROBLEM Piston rings not seated POSSIBLE CAUSE Compressor operating outside in cold conditions or inlet filter not protected against weather Worn piston rings Piston rings not seated CORRECTIVE ACTION Provide adequate protection against extreme weather conditions.


