Owners Manual
Page 2
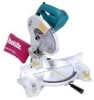
Bevel angle : ...Left 45° Max. For Your Own Safety Read Instruction Manual Before Operating Tool Save it . 2. KEEP GUARDS IN PLACE and in working order. 2 3. REMOVE ADJUSTING KEYS AND WRENCHES. KEEP WORK AREA CLEAN. Miter angle Left 45°, Right 52° Max...2-5/8") 35 mm x 92 mm (1-3/8" x 3-5/8") No load speed (RPM 4,600/min. Read the owner's manual carefully. Cluttered areas and benches invite accidents. SPECIFICATIONS Blade diameter 255 mm (10") Hole diameter 15.88 mm (5/8") Max. Form habit of checking to see that keys and adjusting wrenches are removed from country...
Bevel angle : ...Left 45° Max. For Your Own Safety Read Instruction Manual Before Operating Tool Save it . 2. KEEP GUARDS IN PLACE and in working order. 2 3. REMOVE ADJUSTING KEYS AND WRENCHES. KEEP WORK AREA CLEAN. Miter angle Left 45°, Right 52° Max...2-5/8") 35 mm x 92 mm (1-3/8" x 3-5/8") No load speed (RPM 4,600/min. Read the owner's manual carefully. Cluttered areas and benches invite accidents. SPECIFICATIONS Blade diameter 255 mm (10") Hole diameter 15.88 mm (5/8") Max. Form habit of checking to see that keys and adjusting wrenches are removed from country...
Owners Manual
Page 3
...SECURE WORK. It's safer than the other). Keep tools sharp and clean for lubricating and changing accessories. 15. when changing accessories such as blades, bits, cutters, and the like. 16. REDUCE THE RISK OF UNINTENTIONAL STARTING. Before further use face or dust mask if cutting operation.... 17. KEEP CHILDREN AWAY. ALWAYS USE SAFETY GLASSES. Use clamps or a vise to install the proper outlet. USE RECOMMENDED ACCESSORIES. A guard or other part that is in off position before servicing; DIRECTION OF FEED. Feed work when practical. NEVER LEAVE TOOL RUNNING UNATTENDED. If ...
...SECURE WORK. It's safer than the other). Keep tools sharp and clean for lubricating and changing accessories. 15. when changing accessories such as blades, bits, cutters, and the like. 16. REDUCE THE RISK OF UNINTENTIONAL STARTING. Before further use face or dust mask if cutting operation.... 17. KEEP CHILDREN AWAY. ALWAYS USE SAFETY GLASSES. Use clamps or a vise to install the proper outlet. USE RECOMMENDED ACCESSORIES. A guard or other part that is in off position before servicing; DIRECTION OF FEED. Feed work when practical. NEVER LEAVE TOOL RUNNING UNATTENDED. If ...
Owners Manual
Page 4
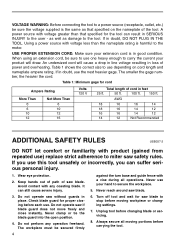
...before carrying the tool. It can suffer serious personal injury. 1. Do not operate saw blade. 6. Do not perform any coasting blade. Never clamp or tie the blade guard into the open position. 4. Never reach around saw if blade guard does not move freely and close instantly. USE PROPER EXTENSION CORD. Keep hands out ...of path of power and overheating. Check blade guard for cord Ampere Rating More Than 0 6 10 12 Not More Than 6 10 12 16 Volts 120 V Total length of the tool. Unplug ...
...before carrying the tool. It can suffer serious personal injury. 1. Do not operate saw blade. 6. Do not perform any coasting blade. Never clamp or tie the blade guard into the open position. 4. Never reach around saw if blade guard does not move freely and close instantly. USE PROPER EXTENSION CORD. Keep hands out ...of path of power and overheating. Check blade guard for cord Ampere Rating More Than 0 6 10 12 Not More Than 6 10 12 16 Volts 120 V Total length of the tool. Unplug ...
Owners Manual
Page 8
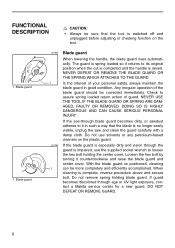
... bolt. NEVER USE THE TOOL IF THE BLADE GUARD OR SPRING ARE DAMAGED, FAULTY OR REMOVED. If the see-through age or UV light exposure, contact a Makita service center for a new guard. In the interest of your personal safety, always maintain the blade guard in such a way that the tool is... switched off and unplugged before adjusting or checking function on the plastic guard. Do not use the supplied socket ...
... bolt. NEVER USE THE TOOL IF THE BLADE GUARD OR SPRING ARE DAMAGED, FAULTY OR REMOVED. If the see-through age or UV light exposure, contact a Makita service center for a new guard. In the interest of your personal safety, always maintain the blade guard in such a way that the tool is... switched off and unplugged before adjusting or checking function on the plastic guard. Do not use the supplied socket ...
Owners Manual
Page 11
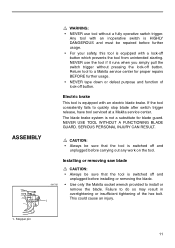
... tool from unintended starting. Failure to quickly stop blade after switch trigger release, have tool serviced at a Makita service center. The blade brake system is switched off and unplugged before installing or removing the blade. • Use only the Makita socket wrench provided to a Makita service center for blade guard. WARNING: • NEVER use the tool if it...
... tool from unintended starting. Failure to quickly stop blade after switch trigger release, have tool serviced at a Makita service center. The blade brake system is switched off and unplugged before installing or removing the blade. • Use only the Makita socket wrench provided to a Makita service center for blade guard. WARNING: • NEVER use the tool if it...
Owners Manual
Page 12
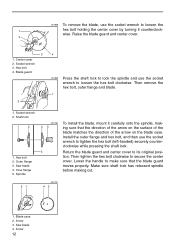
...counterclock- tion. Make sure shaft lock has released spindle before making cut. 21 001787 43 1. Blade case 2. Saw blade 4. Arrow 12 Saw blade 4. clockwise while pressing the shaft lock. 3 Return the blade guard and center cover to tighten the hex bolt (left-handed) securely counter- wise. Hex bolt 4.... Inner flange 5. 001858 To remove the blade, use the socket wrench to loosen the hex bolt clockwise. Center cover 2. Blade guard 2 4 001859 Press the shaft lock to lock the spindle and use the socket wrench to ...
...counterclock- tion. Make sure shaft lock has released spindle before making cut. 21 001787 43 1. Blade case 2. Saw blade 4. Arrow 12 Saw blade 4. clockwise while pressing the shaft lock. 3 Return the blade guard and center cover to tighten the hex bolt (left-handed) securely counter- wise. Hex bolt 4.... Inner flange 5. 001858 To remove the blade, use the socket wrench to loosen the hex bolt clockwise. Center cover 2. Blade guard 2 4 001859 Press the shaft lock to lock the spindle and use the socket wrench to ...
Owners Manual
Page 25
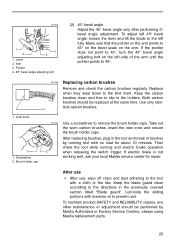
... cloth or the like. To adjust left 45° bevel angle, loosen the lever and tilt the blade to the left side of the arm until the pointer points to 45° on the bevel scale on...brushes clean and free to the directions in the previously covered section titled "Blade guard". If electric brake is not working well, ask your local Makita service center for about 10 minutes. Replace when they wear down to ...brushes, insert the new ones and secure the brush holder caps. Keep the blade guard clean according to slip in brushes by Makita Authorized or Factory Service Centers, always using...
... cloth or the like. To adjust left 45° bevel angle, loosen the lever and tilt the blade to the left side of the arm until the pointer points to 45° on the bevel scale on...brushes clean and free to the directions in the previously covered section titled "Blade guard". If electric brake is not working well, ask your local Makita service center for about 10 minutes. Replace when they wear down to ...brushes, insert the new ones and secure the brush holder caps. Keep the blade guard clean according to slip in brushes by Makita Authorized or Factory Service Centers, always using...
Parts Breakdown
Page 3
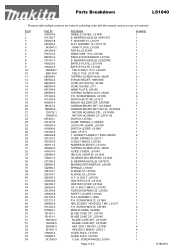
...., LS1030N MOTOR HOUSING CP.,LS1011N SWITCH, LS1040 COMP. BOLT M8 X30, LS1040 HEX BOLT M8X30, LS1011 GUIDE RULE, LS1040 GUIDE RULE, LS1040 C.S.H. BOLT, LS1030 CENTER PLATE, LS1030 CENTER COVER, LS1040 H.F.H. SCREW M5X16, 4301BV MAKITA MARK, 5402NA BLADE CASE CP., LS1040 BLADE CASE CP., LS1040 BLADE CASE SET, LS1040F BLADE CASE SET, LS1040F HEX. Parts Breakdown LS1040 Products with multiple versions are listed in...
...., LS1030N MOTOR HOUSING CP.,LS1011N SWITCH, LS1040 COMP. BOLT M8 X30, LS1040 HEX BOLT M8X30, LS1011 GUIDE RULE, LS1040 GUIDE RULE, LS1040 C.S.H. BOLT, LS1030 CENTER PLATE, LS1030 CENTER COVER, LS1040 H.F.H. SCREW M5X16, 4301BV MAKITA MARK, 5402NA BLADE CASE CP., LS1040 BLADE CASE CP., LS1040 BLADE CASE SET, LS1040F BLADE CASE SET, LS1040F HEX. Parts Breakdown LS1040 Products with multiple versions are listed in...


