Instruction Manual
Page 2
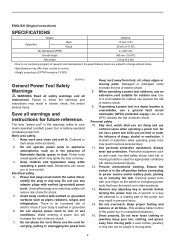
..., or hearing protection used for outdoor use reduces the risk of electric shock. 9. When operating a power tool outdoors, use an extension cord suitable for appropriate conditions will reduce risk of electric shock. 5. Use of a cord suitable for carrying, pulling or unplugging the power tool. Use personal protective equipment. Ensure the switch is earthed or grounded. 6. Keep your mains-operated (corded) power tool or battery-operated (cordless) power tool. ENGLISH (Original instructions) SPECIFICATIONS Model DS4012 Capacities Steel Wood 13...
..., or hearing protection used for outdoor use reduces the risk of electric shock. 9. When operating a power tool outdoors, use an extension cord suitable for appropriate conditions will reduce risk of electric shock. 5. Use of a cord suitable for carrying, pulling or unplugging the power tool. Use personal protective equipment. Ensure the switch is earthed or grounded. 6. Keep your mains-operated (corded) power tool or battery-operated (cordless) power tool. ENGLISH (Original instructions) SPECIFICATIONS Model DS4012 Capacities Steel Wood 13...
Instruction Manual
Page 3
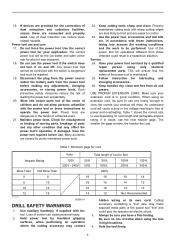
... hidden wiring or its own cord. Follow instruction for cord Volts Total length of control can reduce dustrelated hazards. Table 1 shows the correct size to operate the power tool. If devices are connected and properly used. Properly maintained cutting tools with the power tool or these instructions to use one is maintained. 25. Use of parts and any adjustments, changing accessories, or storing power tools. When using an extension cord, be performed. The smaller the gage number...
... hidden wiring or its own cord. Follow instruction for cord Volts Total length of control can reduce dustrelated hazards. Table 1 shows the correct size to operate the power tool. If devices are connected and properly used. Properly maintained cutting tools with the power tool or these instructions to use one is maintained. 25. Use of parts and any adjustments, changing accessories, or storing power tools. When using an extension cord, be performed. The smaller the gage number...
Instruction Manual
Page 4
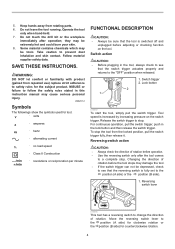
... not touch the drill bit or the workpiece immediately after the tool comes to change the direction of rotation before adjusting or checking function on the switch trigger. Tool speed is switched off and unplugged before the tool stops may be depressed, check to see that the reversing switch is fully set to stop the tool from rotating parts. 6. they may damage the tool. • If the switch trigger can not...
... not touch the drill bit or the workpiece immediately after the tool comes to change the direction of rotation before adjusting or checking function on the switch trigger. Tool speed is switched off and unplugged before the tool stops may be depressed, check to see that the reversing switch is fully set to stop the tool from rotating parts. 6. they may damage the tool. • If the switch trigger can not...
Instruction Manual
Page 5
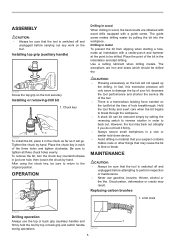
... hidden nails or other things that may result. CAUTION: • Pressing excessively on the tool/bit at the point to be drilled. Installing or removing drill bit 1. Be sure to the original position. To remove the bit, turn the chuck key counterclockwise in the chuck as far as it in just one hole, then loosen the chuck by top or back grip and switch handle during operations. 001145 5 Replacing carbon brushes 1. ASSEMBLY...
... hidden nails or other things that may result. CAUTION: • Pressing excessively on the tool/bit at the point to be drilled. Installing or removing drill bit 1. Be sure to the original position. To remove the bit, turn the chuck key counterclockwise in the chuck as far as it in just one hole, then loosen the chuck by top or back grip and switch handle during operations. 001145 5 Replacing carbon brushes 1. ASSEMBLY...
Instruction Manual
Page 6
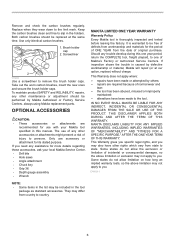
... use accessory or attachment for its stated purpose. Remove and check the carbon brushes regularly. Take out the worn carbon brushes, insert the new ones and secure the brush holder caps. Replace when they wear down to remove the brush holder caps. Keep the carbon brushes clean and free to the tool. Only use with your local Makita Service Center. • Drill bits • Hole saws • Angle attachment • Chuck key • Grip 36 • Depth gauge assembly • Wrench MAKITA...
... use accessory or attachment for its stated purpose. Remove and check the carbon brushes regularly. Take out the worn carbon brushes, insert the new ones and secure the brush holder caps. Replace when they wear down to remove the brush holder caps. Keep the carbon brushes clean and free to the tool. Only use with your local Makita Service Center. • Drill bits • Hole saws • Angle attachment • Chuck key • Grip 36 • Depth gauge assembly • Wrench MAKITA...


