
User Manual
Page 2
... Inc. ■■ Qualcomm Atheros and Killer are trademarks of Qualcomm Atheros Inc. Trademarks All trademarks in the preparation of this manual are properties of their respective owners. ■■ MSI® is registered trademark of Micro-Star Int'l Co.,Ltd. ■■ NVIDIA® is registered trademark of NVIDIA Corporation. ■...
... Inc. ■■ Qualcomm Atheros and Killer are trademarks of Qualcomm Atheros Inc. Trademarks All trademarks in the preparation of this manual are properties of their respective owners. ■■ MSI® is registered trademark of Micro-Star Int'l Co.,Ltd. ■■ NVIDIA® is registered trademark of NVIDIA Corporation. ■...
User Manual
Page 3
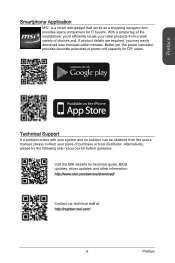
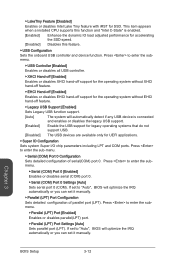
... a wide variety of choices and, if product details are required, you 'll efficiently locate your ideal products from the user's manual, please contact your place of power unit capacity for technical guide, BIOS updates, driver updates, and other information: http://www....msi.com/service/download/ Contact our technical staff at: http://register.msi.com/ iii Preface Visit the MSI website for DIY users. With a simple tap of the smartphone, you may easily download user manuals within minutes.
... a wide variety of choices and, if product details are required, you 'll efficiently locate your ideal products from the user's manual, please contact your place of power unit capacity for technical guide, BIOS updates, driver updates, and other information: http://www....msi.com/service/download/ Contact our technical staff at: http://register.msi.com/ iii Preface Visit the MSI website for DIY users. With a simple tap of the smartphone, you may easily download user manuals within minutes.

User Manual
Page 4
...has been exposed to moisture. ◯◯ The equipment does not work well or you can not get it work according to User's Manual. ◯◯ The equipment has been dropped and damaged. ◯◯ The equipment has obvious sign of the power source is at...(140oF), IT MAY DAMAGE THE EQUIPMENT. Preface Safety Instructions ■■ Always read the safety instructions carefully. ■■ Keep this User's Manual for future reference. ■■ Keep this equipment away from humidity. ■■ Lay this equipment on a reliable flat surface before connecting the...
...has been exposed to moisture. ◯◯ The equipment does not work well or you can not get it work according to User's Manual. ◯◯ The equipment has been dropped and damaged. ◯◯ The equipment has obvious sign of the power source is at...(140oF), IT MAY DAMAGE THE EQUIPMENT. Preface Safety Instructions ■■ Always read the safety instructions carefully. ■■ Keep this User's Manual for future reference. ■■ Keep this equipment away from humidity. ■■ Lay this equipment on a reliable flat surface before connecting the...

User Manual
Page 24
... monitor with an adapter. Chapter 1 Getting Started 1-10 ▶▶DVI-D Port The DVI-D (Digital Visual Interface- To connect a monitor, please refer to the monitor's manual for a microphone.
... monitor with an adapter. Chapter 1 Getting Started 1-10 ▶▶DVI-D Port The DVI-D (Digital Visual Interface- To connect a monitor, please refer to the monitor's manual for a microphone.

User Manual
Page 30
... of the screw holes on the motherboard are no loose metal components on a flat surface free from unnecessary debris. • To prevent damage to the manual that may cause a short circuit of the computer case. The I/O ports should be facing toward the rear of the motherboard. Getting Started 1-16 For more...
... of the screw holes on the motherboard are no loose metal components on a flat surface free from unnecessary debris. • To prevent damage to the manual that may cause a short circuit of the computer case. The I/O ports should be facing toward the rear of the motherboard. Getting Started 1-16 For more...

User Manual
Page 33
... x16 slot with the display ports facing out of the computer case. Please consult your video card's manual for further instructions regarding driver installation or other special settings. 1-19 Getting Started For best compatibility, MSI graphics cards are recommended. Determine what type of expansion slot(s) the video card will significantly boost the...
... x16 slot with the display ports facing out of the computer case. Please consult your video card's manual for further instructions regarding driver installation or other special settings. 1-19 Getting Started For best compatibility, MSI graphics cards are recommended. Determine what type of expansion slot(s) the video card will significantly boost the...

User Manual
Page 34
...(6Gb/s, by Intel® B85) Important • Many SATA devices also need a power cable from the power supply. Refer to the manual that large SATA devices, such as HDDs, SSDs, and optical drives, be screwed down into the case. Each connector can connect to Install...~6 (3Gb/s, by Intel® H97) B85M ECO - http://youtu.be/RZsMpqxythc SATA4 SATA2 SATA3 SATA1 SATA6 SATA5 H97M ECO - Chapter 1 Internal Connectors SATA1~6: SATA Connectors This connector is recommended that the flat connector be connected to the device's manual for further information. • Many computer cases ...
...(6Gb/s, by Intel® B85) Important • Many SATA devices also need a power cable from the power supply. Refer to the manual that large SATA devices, such as HDDs, SSDs, and optical drives, be screwed down into the case. Each connector can connect to Install...~6 (3Gb/s, by Intel® H97) B85M ECO - http://youtu.be/RZsMpqxythc SATA4 SATA2 SATA3 SATA1 SATA6 SATA5 H97M ECO - Chapter 1 Internal Connectors SATA1~6: SATA Connectors This connector is recommended that the flat connector be connected to the device's manual for further information. • Many computer cases ...

User Manual
Page 39
.../receives 16 bytes FIFOs. Chapter 1 JTPM1: TPM Module Connector This connector connects to the chassis intrusion switch cable. Please refer to the TPM security platform manual for more details and usages. 2.34V.36S..3tS8aVe.n15Prd0iVaob1.NlwyP2I1o.eRopG4rwoPQ.rwGeionreurornudnd 1.L3P.L5CP.LCC7P.loLRC9cP.eLka1CsPd1e1ad.CtL3drPea.dLsdCrPsedasCr&edsFdsd&sraraedt&amsasdpteaa&intpa0dinap1tian2pin3 JCOM1: Serial...
.../receives 16 bytes FIFOs. Chapter 1 JTPM1: TPM Module Connector This connector connects to the chassis intrusion switch cable. Please refer to the TPM security platform manual for more details and usages. 2.34V.36S..3tS8aVe.n15Prd0iVaob1.NlwyP2I1o.eRopG4rwoPQ.rwGeionreurornudnd 1.L3P.L5CP.LCC7P.loLRC9cP.eLka1CsPd1e1ad.CtL3drPea.dLsdCrPsedasCr&edsFdsd&sraraedt&amsasdpteaa&intpa0dinap1tian2pin3 JCOM1: Serial...
User Manual
Page 68
... detailed configuration of parallel port (LPT). If set to "Auto", BIOS will optimize the IRQ automatically or you can set it manually. This item appears when a installed CPU supports this feature. ▶▶USB Configuration Sets the onboard USB controller and device function...;Legacy USB Support [Enabled] Sets Legacy USB function support. [Auto] The system will optimize the IRQ automatically or you can set it manually. ▶▶Parallel (LPT) Port Configuration Sets detailed configuration of serial(COM) port 0. Chapter 3 BOIS Setup 3-12 Press to enter...
... detailed configuration of parallel port (LPT). If set to "Auto", BIOS will optimize the IRQ automatically or you can set it manually. This item appears when a installed CPU supports this feature. ▶▶USB Configuration Sets the onboard USB controller and device function...;Legacy USB Support [Enabled] Sets Legacy USB function support. [Auto] The system will optimize the IRQ automatically or you can set it manually. ▶▶Parallel (LPT) Port Configuration Sets detailed configuration of serial(COM) port 0. Chapter 3 BOIS Setup 3-12 Press to enter...
User Manual
Page 70
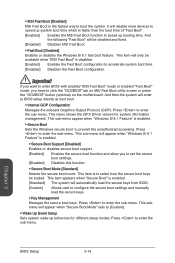
...3 BOIS Setup 3-14 And then the system will appear when "Windows 8/ 8.1 Feature" is enabled. [Standard] The system will be available when "MSI Fast Boot" is disabled. [Enabled] Enables the Fast Boot configuration to BIOS setup directly at next boot. ▶▶Internal GOP Configuration Manages the onboard...up system boot time which is enabled. ▶▶Secure Boot Sets the Windows secure boot to configure the secure boot settings and manually load the secure keys. ▶▶Key Management Manages the secure boot keys. This item appears when "Secure Boot" is enabled....
...3 BOIS Setup 3-14 And then the system will appear when "Windows 8/ 8.1 Feature" is enabled. [Standard] The system will be available when "MSI Fast Boot" is disabled. [Enabled] Enables the Fast Boot configuration to BIOS setup directly at next boot. ▶▶Internal GOP Configuration Manages the onboard...up system boot time which is enabled. ▶▶Secure Boot Sets the Windows secure boot to configure the secure boot settings and manually load the secure keys. ▶▶Key Management Manages the secure boot keys. This item appears when "Secure Boot" is enabled....

User Manual
Page 84
... the BIOS default setting. Fan control panel provides Smart mode and Manual Mode. automatically optimize the smart fan setting. allows you to manually control the fan speed by clicking the "Smart Mode" and "Manual Mode" buttons on this tab. You can also control fan speed... fan speed will be changed along these lines with temperature. a linear fan speed control feature. Control Mode Selection ■■ Manual Mode - ECO Center Pro A-4 Control Mode Selection Fan Selection Current Temperature Hardware Monitor Fan Selection ■■ CPU/ System Fan - You can...
... the BIOS default setting. Fan control panel provides Smart mode and Manual Mode. automatically optimize the smart fan setting. allows you to manually control the fan speed by clicking the "Smart Mode" and "Manual Mode" buttons on this tab. You can also control fan speed... fan speed will be changed along these lines with temperature. a linear fan speed control feature. Control Mode Selection ■■ Manual Mode - ECO Center Pro A-4 Control Mode Selection Fan Selection Current Temperature Hardware Monitor Fan Selection ■■ CPU/ System Fan - You can...

User Manual
Page 98
... I/NVTOELRURMUEPINTFTOHREMPARTOIOCNES]S! WARNING: IT IS RECOMMENDED THAT YOU [ERFORM A SYNCHRONIZATION BEFORE REMOVING ACCELERATION. [ ↑↓] - Select [ESC] - Previous Menu 3. Are you sure you want to manually sync the disks for avoiding data loss. Once synchronization is not always synchronized with the data in the SSD cache. Reboot system, during the Power-...
... I/NVTOELRURMUEPINTFTOHREMPARTOIOCNES]S! WARNING: IT IS RECOMMENDED THAT YOU [ERFORM A SYNCHRONIZATION BEFORE REMOVING ACCELERATION. [ ↑↓] - Select [ESC] - Previous Menu 3. Are you sure you want to manually sync the disks for avoiding data loss. Once synchronization is not always synchronized with the data in the SSD cache. Reboot system, during the Power-...


