User Manual
Page 3
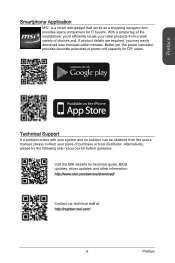
... for further guidance. Alternatively, please try the following help resources for technical guide, BIOS updates, driver updates, and other information: http://www.msi.com/service/download/ Contact our technical staff at: http://register.msi.com/ iii Preface Smartphone Application MSI+ is a smart web gadget that works as a shopping navigator and provides specs comparison for...
... for further guidance. Alternatively, please try the following help resources for technical guide, BIOS updates, driver updates, and other information: http://www.msi.com/service/download/ Contact our technical staff at: http://register.msi.com/ iii Preface Smartphone Application MSI+ is a smart web gadget that works as a shopping navigator and provides specs comparison for...
User Manual
Page 12
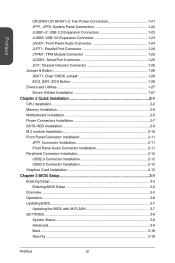
... Serial Port Connector 1-25 JCI1: Chassis Intrusion Connector 1-25 Jumper & Button 1-26 JBAT1: Clear CMOS Jumper 1-26 ECO_SW1: ECO Button 1-26 Drivers and Utilities 1-27 Driver/ Utilities Installation 1-27 Chapter 2 Quick Installation 2-1 CPU Installation 2-2 Memory Installation 2-4 ...2-12 USB3.0 Connector Installation 2-12 Graphics Card Installation 2-13 Chapter 3 BIOS Setup 3-1 Entering Setup 3-2 Entering BIOS Setup 3-2 Overview 3-3 Operation 3-6 Updating BIOS 3-7 Updating the BIOS with M-FLASH 3-7 SETTINGS 3-8 System Status 3-8 Advanced 3-9 Boot 3-16 Security 3-16 Preface...
... Serial Port Connector 1-25 JCI1: Chassis Intrusion Connector 1-25 Jumper & Button 1-26 JBAT1: Clear CMOS Jumper 1-26 ECO_SW1: ECO Button 1-26 Drivers and Utilities 1-27 Driver/ Utilities Installation 1-27 Chapter 2 Quick Installation 2-1 CPU Installation 2-2 Memory Installation 2-4 ...2-12 USB3.0 Connector Installation 2-12 Graphics Card Installation 2-13 Chapter 3 BIOS Setup 3-1 Entering Setup 3-2 Entering BIOS Setup 3-2 Overview 3-3 Operation 3-6 Updating BIOS 3-7 Updating the BIOS with M-FLASH 3-7 SETTINGS 3-8 System Status 3-8 Advanced 3-9 Boot 3-16 Security 3-16 Preface...

User Manual
Page 13
Preface Save & Exit 3-17 ECO 3-18 M-FLASH 3-22 ECO PROFILE 3-23 HARDWARE MONITOR 3-24 Appendix A ECO Center Pro A-1 Requirement A-2 ECO Power Tab A-2 Mode Selection A-2 Power Toggle A-3 Default Button A-3 Apply Button A-3 Save as a BIOS default setting A-3 Power Management Tab A-3 Default Button A-3 Apply Button A-3 Hardware Monitor Tab A-4 Fan Selection A-4 Control Mode Selection A-4 Default Button A-4 Appendix B Intel RAID (optional...
Preface Save & Exit 3-17 ECO 3-18 M-FLASH 3-22 ECO PROFILE 3-23 HARDWARE MONITOR 3-24 Appendix A ECO Center Pro A-1 Requirement A-2 ECO Power Tab A-2 Mode Selection A-2 Power Toggle A-3 Default Button A-3 Apply Button A-3 Save as a BIOS default setting A-3 Power Management Tab A-3 Default Button A-3 Apply Button A-3 Hardware Monitor Tab A-4 Fan Selection A-4 Control Mode Selection A-4 Default Button A-4 Appendix B Intel RAID (optional...
User Manual
Page 19
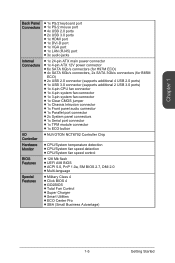
...main power connector ■■1x 4-pin ATX 12V power connector ■■6x SATA 6Gb/s connectors (for H97M ECO) ■■4x SATA 6Gb/s connectors, 2x SATA 3Gb/s connectors (for B85M ECO) ■■2x USB 2.0 connector (supports additional 4 USB 2.0 ports) ■■1x USB 3.0 connector ... fan speed control ■■128 Mb flash ■■UEFI AMI BIOS ■■ACPI 5.0, PnP 1.0a, SM BIOS 2.7, DMI 2.0 ■■Multi-language ■■Military Class 4 ■■Click BIOS 4 ■■GO2BIOS ■■Total Fan Control ■■Super...
...main power connector ■■1x 4-pin ATX 12V power connector ■■6x SATA 6Gb/s connectors (for H97M ECO) ■■4x SATA 6Gb/s connectors, 2x SATA 3Gb/s connectors (for B85M ECO) ■■2x USB 2.0 connector (supports additional 4 USB 2.0 ports) ■■1x USB 3.0 connector ... fan speed control ■■128 Mb flash ■■UEFI AMI BIOS ■■ACPI 5.0, PnP 1.0a, SM BIOS 2.7, DMI 2.0 ■■Multi-language ■■Military Class 4 ■■Click BIOS 4 ■■GO2BIOS ■■Total Fan Control ■■Super...

User Manual
Page 39
... 1.D3.CS5DO.G7Ur.RTo9uT.RnSdI JCI1: Chassis Intrusion Connector This connector connects to a TPM (Trusted Platform Module). To clear the warning, you must enter the BIOS utility and clear the record. 2.C1.IGNTroRuUnd 1-25 Getting Started Chapter 1 JTPM1: TPM Module Connector This connector connects to the chassis intrusion switch cable. Please...
... 1.D3.CS5DO.G7Ur.RTo9uT.RnSdI JCI1: Chassis Intrusion Connector This connector connects to a TPM (Trusted Platform Module). To clear the warning, you must enter the BIOS utility and clear the record. 2.C1.IGNTroRuUnd 1-25 Getting Started Chapter 1 JTPM1: TPM Module Connector This connector connects to the chassis intrusion switch cable. Please...

User Manual
Page 57
... Using your system for detailed information. • Please clear the CMOS data and restore the default settings if the system becomes unbootable after changing BIOS settings. (Refer to the Clear CMOS jumper/ button section to clear the CMOS data, select the "Restore Defaults" and press in this chapter ... from the product you to setup and configure your system. Important • The items under continuous update for sharing with friends. Chapter 3 BIOS Setup CLICK BIOS is a revolutionary UEFI interface that allows you purchased. Users can browse webpages, check mail and use .
... Using your system for detailed information. • Please clear the CMOS data and restore the default settings if the system becomes unbootable after changing BIOS settings. (Refer to the Clear CMOS jumper/ button section to clear the CMOS data, select the "Restore Defaults" and press in this chapter ... from the product you to setup and configure your system. Important • The items under continuous update for sharing with friends. Chapter 3 BIOS Setup CLICK BIOS is a revolutionary UEFI interface that allows you purchased. Users can browse webpages, check mail and use .

User Manual
Page 58
... Boot" utility screen or press the physical "GO2BIOS" button (optional) on "MSI Fast Boot" utility screen. Click "GO2BIOS" tab on the motherboard to enable the system going to BIOS setup directly at next boot. Entering BIOS Setup Power on the screen during the system booting up, and requests you to run ... system will start the Power On Self Test (POST) process. When the message below appears on the screen, press key to enter BIOS: Press to run BIOS setup, or to clear the CMOS data, select the "Restore Defaults" and press in normal conditions. Entering Setup The default settings offer...
... Boot" utility screen or press the physical "GO2BIOS" button (optional) on "MSI Fast Boot" utility screen. Click "GO2BIOS" tab on the motherboard to enable the system going to BIOS setup directly at next boot. Entering BIOS Setup Power on the screen during the system booting up, and requests you to run ... system will start the Power On Self Test (POST) process. When the message below appears on the screen, press key to enter BIOS: Press to run BIOS setup, or to clear the CMOS data, select the "Restore Defaults" and press in normal conditions. Entering Setup The default settings offer...

User Manual
Page 59
... the way to update BIOS with a USB flash disk. ■■ ECO PROFILE -This menu is displayed. Temperature monitor My Favorites Virtual ECO Button Language System information Boot device priority bar BIOS menu selection BIOS menu selection Menu display ▶▶BIOS menu selection The following screen... is used to specify the parameters for chipset and boot devices. ■■ ECO - It provides the information of system. ■■ BOARD EXPLORER - Chapter 3 3-3 BIOS Setup Uses this menu to set the speeds of fans and monitor voltages of the ...
... the way to update BIOS with a USB flash disk. ■■ ECO PROFILE -This menu is displayed. Temperature monitor My Favorites Virtual ECO Button Language System information Boot device priority bar BIOS menu selection BIOS menu selection Menu display ▶▶BIOS menu selection The following screen... is used to specify the parameters for chipset and boot devices. ■■ ECO - It provides the information of system. ■■ BOARD EXPLORER - Chapter 3 3-3 BIOS Setup Uses this menu to set the speeds of fans and monitor voltages of the ...

User Manual
Page 60
When enabled, this button. Allows you to add the frequently-used BIOS setting items. ■■ Default HomePage - Chapter 3 BOIS Setup 3-4 Allows you to select a BIOS menu (e.g. Settings, ECO...,etc) as the BIOS home page. ■■ Favorite1~5 - High priority Low priority ▶▶System ...Allows you to change the boot priority. ▶▶Virtual ECO Button Enables or disables the ECO function by clicking on this button will be light. ▶▶Menu display This area provides BIOS setting items and information to be configured. ▶▶...
When enabled, this button. Allows you to add the frequently-used BIOS setting items. ■■ Default HomePage - Chapter 3 BOIS Setup 3-4 Allows you to select a BIOS menu (e.g. Settings, ECO...,etc) as the BIOS home page. ■■ Favorite1~5 - High priority Low priority ▶▶System ...Allows you to change the boot priority. ▶▶Virtual ECO Button Enables or disables the ECO function by clicking on this button will be light. ▶▶Menu display This area provides BIOS setting items and information to be configured. ▶▶...

User Manual
Page 61
... from Favorite 1~5 1. Highlight an item and then click the arrow buttons (or press the up/ down arrow keys) to delete the BIOS item. Enter the Favorite 1~5 menu. 2. Right-click (or press "F2" key) and then click "Delete" to change the item order. 4. Right-click (or... press "F2" key) and then choose a favorite menu (Favorite 1~5) to delete the BIOS item Changing the order of BIOS items on Favorite 1~5 1. Click "Delete" to add the BIOS item. Adding BIOS item to Favorite 1~5 1. Right-click (or press "F2" key) and then click "Menu lock". 3.
... from Favorite 1~5 1. Highlight an item and then click the arrow buttons (or press the up/ down arrow keys) to delete the BIOS item. Enter the Favorite 1~5 menu. 2. Right-click (or press "F2" key) and then click "Delete" to change the item order. 4. Right-click (or... press "F2" key) and then choose a favorite menu (Favorite 1~5) to delete the BIOS item Changing the order of BIOS items on Favorite 1~5 1. Click "Delete" to add the BIOS item. Adding BIOS item to Favorite 1~5 1. Right-click (or press "F2" key) and then click "Menu lock". 3.

User Manual
Page 62
... changes Decrease the numeric value or make changes General Help Favorites assistant Enter My Favorites menu CPU Specifications Enter Memory-Z Load optimized defaults Load ECO Profile Save ECO Profile Save Change and Reset Save a screenshot to a FAT/FAT32 USB drive Chapter 3 BOIS Setup 3-6 Hot key Mouse Description Select Item . The following table...
... changes Decrease the numeric value or make changes General Help Favorites assistant Enter My Favorites menu CPU Specifications Enter Memory-Z Load optimized defaults Load ECO Profile Save ECO Profile Save Change and Reset Save a screenshot to a FAT/FAT32 USB drive Chapter 3 BOIS Setup 3-6 Hot key Mouse Description Select Item . The following table...

User Manual
Page 63
.... 2. Restart the system, and then press "Del" key to begin the BIOS update. 4. After the flashing process is 100% complete, the system will restart. Insert the USB flash disk that matches your motherboard model from MSI website. Enter the M-FLASH menu and then select the "Select one file to... update BIOS and ME", and then select the BIOS update file to enter the BIOS Setup during POST. 3. Important Only the FAT32/ NTFS format USB flash...
.... 2. Restart the system, and then press "Del" key to begin the BIOS update. 4. After the flashing process is 100% complete, the system will restart. Insert the USB flash disk that matches your motherboard model from MSI website. Enter the M-FLASH menu and then select the "Select one file to... update BIOS and ME", and then select the BIOS update file to enter the BIOS Setup during POST. 3. Important Only the FAT32/ NTFS format USB flash...

User Manual
Page 64
... BOIS Setup 3-8 Day of the week, from 1 to switch between date elements. through Dec. The year can be adjusted by BIOS. Use tab key to Sat, determined by users. ▶▶System Time Sets the system time. The date from Sun to switch...9654;▶SATA Port Show the information of the device and motherboard. ▶▶System Information Shows detailed system information, including CPU type, BIOS version, and Memory (read only). ▶▶DMI Information Shows system information, desktop Board Information and chassis Information. (Read only). The...
... BOIS Setup 3-8 Day of the week, from 1 to switch between date elements. through Dec. The year can be adjusted by BIOS. Use tab key to Sat, determined by users. ▶▶System Time Sets the system time. The date from Sun to switch...9654;▶SATA Port Show the information of the device and motherboard. ▶▶System Information Shows detailed system information, including CPU type, BIOS version, and Memory (read only). ▶▶DMI Information Shows system information, desktop Board Information and chassis Information. (Read only). The...
User Manual
Page 65
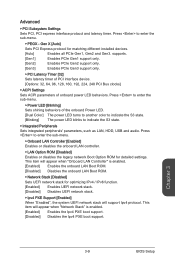
... - This item will appear when "Onboard LAN Controller" is enabled. [Enabled] Enables the Ipv4 PXE boot support. [Disabled] Disables the Ipv4 PXE boot support. Chapter 3 3-9 BIOS Setup Gen X [Auto] Sets PCI Express protocol for matching different installed devices. [Auto] Enables all PCIe Gen1, Gen2 and Gen3. Press to enter the sub...
... - This item will appear when "Onboard LAN Controller" is enabled. [Enabled] Enables the Ipv4 PXE boot support. [Disabled] Disables the Ipv4 PXE boot support. Chapter 3 3-9 BIOS Setup Gen X [Auto] Sets PCI Express protocol for matching different installed devices. [Auto] Enables all PCIe Gen1, Gen2 and Gen3. Press to enter the sub...

User Manual
Page 67
.... This item will restore the screen when wakened. [Enabled] Enables this function. [Disabled] Disables this function. ▶▶RapidStart Display Type [BIOS Save/Restore] Selects the screen type of SSD for iRST. [Disabled] Disables this function. ▶▶Entry After [10 minutes] Sets a...saved before the system enters sleep mode. The screen will appear when "Intel(R) Rapid Start Technology" is enabled. Chapter 3 3-11 BIOS Setup Important The partition size must be larger then the amount of memory. ▶▶Hybrid Hard Disk Support [Disabled] Enables or ...
.... This item will restore the screen when wakened. [Enabled] Enables this function. [Disabled] Disables this function. ▶▶RapidStart Display Type [BIOS Save/Restore] Selects the screen type of SSD for iRST. [Disabled] Disables this function. ▶▶Entry After [10 minutes] Sets a...saved before the system enters sleep mode. The screen will appear when "Intel(R) Rapid Start Technology" is enabled. Chapter 3 3-11 BIOS Setup Important The partition size must be larger then the amount of memory. ▶▶Hybrid Hard Disk Support [Disabled] Enables or ...
User Manual
Page 68
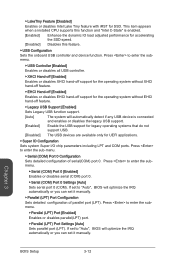
...automatically detect if any USB device is enabled. [Enabled] Enhance the dynamic IO load adjusted performance for SSD. If set to "Auto", BIOS will optimize the IRQ automatically or you can set it manually. This item appears when a installed CPU supports this function and "Intel C-.... [Disabled] Disables this feature. ▶▶USB Configuration Sets the onboard USB controller and device function. If set to "Auto", BIOS will optimize the IRQ automatically or you can set it manually. ▶▶Parallel (LPT) Port Configuration Sets detailed configuration of serial(COM)...
...automatically detect if any USB device is enabled. [Enabled] Enhance the dynamic IO load adjusted performance for SSD. If set to "Auto", BIOS will optimize the IRQ automatically or you can set it manually. This item appears when a installed CPU supports this function and "Intel C-.... [Disabled] Disables this feature. ▶▶USB Configuration Sets the onboard USB controller and device function. If set to "Auto", BIOS will optimize the IRQ automatically or you can set it manually. ▶▶Parallel (LPT) Port Configuration Sets detailed configuration of serial(COM)...

User Manual
Page 69
... technology. [Disabled] Disables Intel smart connect technology. ▶▶Power Management Setup Sets system Power Management of EuP2013 and AC Power Loss behaviors. Chapter 3 3-13 BIOS Setup Press to enter the sub-menu. ▶▶EuP 2013 [Disabled] Enables or disables the system power consumption according to EuP2013 regulation. [Enabled] Optimize...
... technology. [Disabled] Disables Intel smart connect technology. ▶▶Power Management Setup Sets system Power Management of EuP2013 and AC Power Loss behaviors. Chapter 3 3-13 BIOS Setup Press to enter the sub-menu. ▶▶EuP 2013 [Disabled] Enables or disables the system power consumption according to EuP2013 regulation. [Enabled] Optimize...
User Manual
Page 70
... loaded. It will disable more devices to select how the secure boot keys be available when "MSI Fast Boot" is to speed up booting time. Important If you want to enter BIOS with enabled "MSI Fast Boot" mode or enabled "Fast Boot" mode, you to accelerate system boot time. [Disabled...] Disables the Fast Boot configuration. Press to click the "GO2BIOS" tab on MSI Fast Boot utility screen or press the "GO2BIOS" button...
... loaded. It will disable more devices to select how the secure boot keys be available when "MSI Fast Boot" is to speed up booting time. Important If you want to enter BIOS with enabled "MSI Fast Boot" mode or enabled "Fast Boot" mode, you to accelerate system boot time. [Disabled...] Disables the Fast Boot configuration. Press to click the "GO2BIOS" tab on MSI Fast Boot utility screen or press the "GO2BIOS" button...

User Manual
Page 71
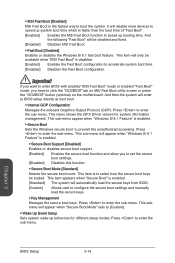
... Jumpers, you will automatically resume (boot up) on a scheduled time/ date. [Disabled] Disables this function. Chapter 3 3-15 BIOS Setup ▶▶Wake Up Event By [BIOS] Selects the wake up event by BIOS or operating system. [BIOS] Activates the following items, and use these items to set the jumpers to enabled . ▶▶Resume...
... Jumpers, you will automatically resume (boot up) on a scheduled time/ date. [Disabled] Disables this function. Chapter 3 3-15 BIOS Setup ▶▶Wake Up Event By [BIOS] Selects the wake up event by BIOS or operating system. [BIOS] Activates the following items, and use these items to set the jumpers to enabled . ▶▶Resume...

User Manual
Page 72
... configured automatically by long pressing the power button about 4 seconds when the system is off. [Enabled] The system boots straight to the BIOS setup by BIOS when "Windows 8/ 8.1 Feature" is off. [Disabled] Disables this function. ▶▶AUTO CLR_CMOS [Disabled] Enables or disables auto-clear... pressing the power button about 2~4 seconds when the system is enabled. [UEFI] Enables UEFI BIOS boot mode support only. [LEGACY+UEFI] Enables both Legacy BIOS boot mode and UEFI BIOS boot mode. ▶▶FIXED BOOT ORDER Priorities Sets device priority for system boot. ▶...
... configured automatically by long pressing the power button about 4 seconds when the system is off. [Enabled] The system boots straight to the BIOS setup by BIOS when "Windows 8/ 8.1 Feature" is off. [Disabled] Disables this function. ▶▶AUTO CLR_CMOS [Disabled] Enables or disables auto-clear... pressing the power button about 2~4 seconds when the system is enabled. [UEFI] Enables UEFI BIOS boot mode support only. [LEGACY+UEFI] Enables both Legacy BIOS boot mode and UEFI BIOS boot mode. ▶▶FIXED BOOT ORDER Priorities Sets device priority for system boot. ▶...


