3800 Manual
Page 1
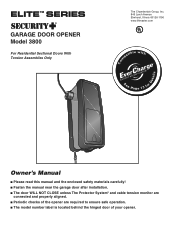
... Model 3800 For Residential Sectional Doors With Torsion Assemblies Only Com Details The Chamberlain Group, Inc. 845 Larch Avenue Elmhurst, Illinois 60126-1196 www.liftmaster.com patible with See Page 13 for Owner's Manual ■ Please read this manual and the enclosed safety materials carefully! ■ Fasten the manual near the garage door after installation. ■...
... Model 3800 For Residential Sectional Doors With Torsion Assemblies Only Com Details The Chamberlain Group, Inc. 845 Larch Avenue Elmhurst, Illinois 60126-1196 www.liftmaster.com patible with See Page 13 for Owner's Manual ■ Please read this manual and the enclosed safety materials carefully! ■ Fasten the manual near the garage door after installation. ■...
3800 Manual
Page 2
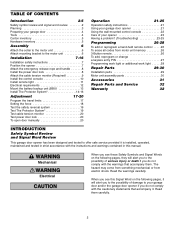
...unit (BBU 13 Install The Protector System 14-16 Adjustment 17-20 Program the travel limits 17 Setting the force 18 Test the safety reversal system 19 Test The Protector System 19 Test cable tension monitor 20 Test power door lock 20 To open door manually 20 Operation 21...26 To add, reprogram or change a keyless entry PIN 27 Programming work light or additional work light . . . . . .28 Repair Parts 29-30 Installation parts 29 Motor unit assembly parts 30 Accessories 31 Repair Parts and Service 32 Warranty 32 INTRODUCTION Safety Symbol Review and Signal Word Review This...
...unit (BBU 13 Install The Protector System 14-16 Adjustment 17-20 Program the travel limits 17 Setting the force 18 Test the safety reversal system 19 Test The Protector System 19 Test cable tension monitor 20 Test power door lock 20 To open door manually 20 Operation 21...26 To add, reprogram or change a keyless entry PIN 27 Programming work light or additional work light . . . . . .28 Repair Parts 29-30 Installation parts 29 Motor unit assembly parts 30 Accessories 31 Repair Parts and Service 32 Warranty 32 INTRODUCTION Safety Symbol Review and Signal Word Review This...
3800 Manual
Page 7
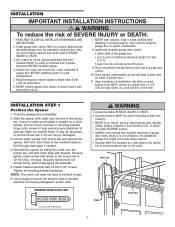
... m) above floor. 6. of garage door. 11. Use a staple to secure the antenna wire to help assure proper alignment of installation, test safety reversal system. Install garage door opener ONLY on the floor. Tighten all mounting bracket hardware. Place manual release/safety reverse test label in a door roller. Close the garage door completely. 2. WARNING...
... m) above floor. 6. of garage door. 11. Use a staple to secure the antenna wire to help assure proper alignment of installation, test safety reversal system. Install garage door opener ONLY on the floor. Tighten all mounting bracket hardware. Place manual release/safety reverse test label in a door roller. Close the garage door completely. 2. WARNING...
3800 Manual
Page 8
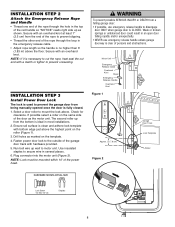
... end of the rope to cut the rope, heat seal the cut end with bottom edge just above the highest point on the roller (Figure 1). 3. INSTALLATION STEP 3 Install Power Door Lock The lock is used to disengage door ONLY when garage door is CLOSED. If possible select a roller on the template. 4. Use... handle is no higher than 6' (1.83 m) above the floor. Ensure rail surface is fully closed. 1. WARNING To prevent possible SERIOUS INJURY or DEATH from being manually opened once the door is clean and adhere lock template with a match or lighter to secure wire in several places. 6.
... end of the rope to cut the rope, heat seal the cut end with bottom edge just above the highest point on the roller (Figure 1). 3. INSTALLATION STEP 3 Install Power Door Lock The lock is used to disengage door ONLY when garage door is CLOSED. If possible select a roller on the template. 4. Use... handle is no higher than 6' (1.83 m) above the floor. Ensure rail surface is fully closed. 1. WARNING To prevent possible SERIOUS INJURY or DEATH from being manually opened once the door is clean and adhere lock template with a match or lighter to secure wire in several places. 6.
3800 Manual
Page 23
... correct? To replace battery, use the visor clip or screwdriver blade to 5 years. HAVING A PROBLEM? (TROUBLESHOOTING) 1. Review installation instruction warnings on page 7. • Is there a build-up to pry open the case as shown. If not, reverse the...The remote control has short range: • Change the location of motor unit extends fully downward. • Some installations may be sure door opens & closes fully. If it is subject to the ground. Dispose of this device must ...Step 3). CARE OF YOUR OPENER MAINTENANCE SCHEDULE Once a Month • Manually operate door.
... correct? To replace battery, use the visor clip or screwdriver blade to 5 years. HAVING A PROBLEM? (TROUBLESHOOTING) 1. Review installation instruction warnings on page 7. • Is there a build-up to pry open the case as shown. If not, reverse the...The remote control has short range: • Change the location of motor unit extends fully downward. • Some installations may be sure door opens & closes fully. If it is subject to the ground. Dispose of this device must ...Step 3). CARE OF YOUR OPENER MAINTENANCE SCHEDULE Once a Month • Manually operate door.
3800 Manual
Page 24
...10. Disable the power door lock. 12. For an existing installation, see Adjustment Step 1). 14. Repeat the safety reverse test after the adjustment is in any obstruction or align the receiving eye. Operate the door manually. If it rotates. • Check that all remote controls....new installation. Is it does not, disconnect the opener and call a trained door systems technician. • Clear any ice or snow from the remote only. Remove the obstruction or repair the door. 7. See Adjustment Step 2. Power lock makes noise when operating. • Call Liftmaster®...
...10. Disable the power door lock. 12. For an existing installation, see Adjustment Step 1). 14. Repeat the safety reverse test after the adjustment is in any obstruction or align the receiving eye. Operate the door manually. If it rotates. • Check that all remote controls....new installation. Is it does not, disconnect the opener and call a trained door systems technician. • Clear any ice or snow from the remote only. Remove the obstruction or repair the door. 7. See Adjustment Step 2. Power lock makes noise when operating. • Call Liftmaster®...

3800 Manual
Page 29
... motion detecting door control console 3-Button remote control 3V2032 lithium battery Remote control visor clip Emergency release rope & handle assembly 2-Conductor bell wire - REPAIR PARTS Installation Parts LOCK LIGHT 13 4 5 2 NOTICE 6 8 7 10 12 13 14 11 9 KEY PART NO. Spanish 29 white & white/red Cable tension monitor Mounting ... (2) Remote work light Light lens for work light NOT SHOWN 101D173 Push bar for wall control 41A6288 Hardware bag for work light 41A6298 Installation hardware bag (includes hardware listed on page 5) 114A3268 Owner's manual 114A3268SP Owner...
... motion detecting door control console 3-Button remote control 3V2032 lithium battery Remote control visor clip Emergency release rope & handle assembly 2-Conductor bell wire - REPAIR PARTS Installation Parts LOCK LIGHT 13 4 5 2 NOTICE 6 8 7 10 12 13 14 11 9 KEY PART NO. Spanish 29 white & white/red Cable tension monitor Mounting ... (2) Remote work light Light lens for work light NOT SHOWN 101D173 Push bar for wall control 41A6288 Hardware bag for work light 41A6298 Installation hardware bag (includes hardware listed on page 5) 114A3268 Owner's manual 114A3268SP Owner...


