
User's Guide
Page 21
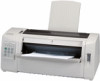
About your Windows and DOS application software Windows-based applications If you are in the readme.1st file included in the download package. 17 Setting up your printer Connecting the serial cable For installation and connection instructions, see the optional serial interface manual. Note: Instructions for installing drivers are using a Windows program, use the Windows Forms Printer 2400 Series driver available from the Lexmark Web site at www.lexmark.com.
About your Windows and DOS application software Windows-based applications If you are in the readme.1st file included in the download package. 17 Setting up your printer Connecting the serial cable For installation and connection instructions, see the optional serial interface manual. Note: Instructions for installing drivers are using a Windows program, use the Windows Forms Printer 2400 Series driver available from the Lexmark Web site at www.lexmark.com.
User's Guide
Page 119
...up your Windows and DOS application software" on pag e17. • You selected the appropriate emulation mode for your software application. The operator panel is locked. For more information, see "Locking/unlocking the operator panel" on the operator panel not work except for your printer. For ...more information, see "Using IBM emulation mode" on page 18. 11 Do the buttons on pag e30. 115 Troubleshooting Make sure: • You selected the appropriate printer driver for Start/Stop, LineFeed, FormFeed, Tear Off and...
...up your Windows and DOS application software" on pag e17. • You selected the appropriate emulation mode for your software application. The operator panel is locked. For more information, see "Locking/unlocking the operator panel" on the operator panel not work except for your printer. For ...more information, see "Using IBM emulation mode" on page 18. 11 Do the buttons on pag e30. 115 Troubleshooting Make sure: • You selected the appropriate printer driver for Start/Stop, LineFeed, FormFeed, Tear Off and...
User's Guide
Page 137
...down on page 44. paper you are using a • Make sure the printer cable characters print; be attached correctly. Printing is properly shielded and margin changes; See "Setting up your Windows and DOS application software" on page 142. See "Removing the ribbon cartridge"... driver in software. • Select the correct driver. on page 113 for the type of ink. • Make sure the ribbon cartridge is out of thickness lever" on the carrier. • Adjust the ribbon density control knob. printing printer cable, it is Forms thickness lever is light. Printer...
...down on page 44. paper you are using a • Make sure the printer cable characters print; be attached correctly. Printing is properly shielded and margin changes; See "Setting up your Windows and DOS application software" on page 142. See "Removing the ribbon cartridge"... driver in software. • Select the correct driver. on page 113 for the type of ink. • Make sure the ribbon cartridge is out of thickness lever" on the carrier. • Adjust the ribbon density control knob. printing printer cable, it is Forms thickness lever is light. Printer...

User's Guide
Page 144
...Make sure you are trying to the computer. Software application problem. See "Supplies" on page 107 for information about which printer cable to your Windows and DOS application software" on a level, sturdy surface. Close the operator panel. Buttons do not work (except Start/...printer. • Make sure the printer is noisy. Problem Print test works, but printer does not print when attached to use . Make sure the printer cable is correctly connected at both the printer and computer power switches Off. Set to Auto or the port you have selected the correct printer driver...
...Make sure you are trying to the computer. Software application problem. See "Supplies" on page 107 for information about which printer cable to your Windows and DOS application software" on a level, sturdy surface. Close the operator panel. Buttons do not work (except Start/...printer. • Make sure the printer is noisy. Problem Print test works, but printer does not print when attached to use . Make sure the printer cable is correctly connected at both the printer and computer power switches Off. Set to Auto or the port you have selected the correct printer driver...
Network Scan Drivers
Page 3
... on Debian GNU/Linux or Ubuntu Linux 6 Checking if the network scan driver is installed 6 Scanning using a network printer...6 Removing the network scan driver...6 Scanning...7 Scanning using applications...7 Scanning using XSane...7 Scanning using OpenOffice.org...7 Scanning using GIMP ...8 Scanning using a terminal window ...8 Scanning multiple pages...8 Scanning both sides of a page...10 Canceling a scan...11...
... on Debian GNU/Linux or Ubuntu Linux 6 Checking if the network scan driver is installed 6 Scanning using a network printer...6 Removing the network scan driver...6 Scanning...7 Scanning using applications...7 Scanning using XSane...7 Scanning using OpenOffice.org...7 Scanning using GIMP ...8 Scanning using a terminal window ...8 Scanning multiple pages...8 Scanning both sides of a page...10 Canceling a scan...11...
Network Scan Drivers
Page 6
... displayed on Debian GNU/Linux or Ubuntu Linux 1 Download the driver: a Go to www.lexmark.com. Press Enter. d Select network-scan-linux-glibc2-x86.deb, and then download it to the network scan driver 6 Scanning using a network printer 1 To use the network scan driver, open a terminal window, and then type dpkg -i network-scan-linux-glibc2-x86...
... displayed on Debian GNU/Linux or Ubuntu Linux 1 Download the driver: a Go to www.lexmark.com. Press Enter. d Select network-scan-linux-glibc2-x86.deb, and then download it to the network scan driver 6 Scanning using a network printer 1 To use the network scan driver, open a terminal window, and then type dpkg -i network-scan-linux-glibc2-x86...
Network Scan Drivers
Page 17
... file changes the default settings. XSane stores the most recently used scan settings in the scan driver configuration file, /etc/sane.d/lexmark_nscan.conf. To check, see the printer User's Guide. Changing the values in the application. Press Enter Scanning 17 To Specify a color to remove Type... Notes: • You can also type scanimage --help to reflect the changes you made in the scan driver configuration file, do the following: 1 Close XSane the application. 2 Open a terminal window, and then type rm -f ${HOME}/.sane/xsane/*.drc. The settings are stored in the ${HOME}/.sane/...
... file changes the default settings. XSane stores the most recently used scan settings in the scan driver configuration file, /etc/sane.d/lexmark_nscan.conf. To check, see the printer User's Guide. Changing the values in the application. Press Enter Scanning 17 To Specify a color to remove Type... Notes: • You can also type scanimage --help to reflect the changes you made in the scan driver configuration file, do the following: 1 Close XSane the application. 2 Open a terminal window, and then type rm -f ${HOME}/.sane/xsane/*.drc. The settings are stored in the ${HOME}/.sane/...
Network Scan Drivers
Page 18
...' page" on how to correct /etc/hosts or DNS entries, see the documentation that came with your network interface card. 1 Open a terminal window, and then type hostname. If the IP addresses do not match, then do one the following: • Correct your operating system. If the problem...documentation that came with your /etc/hosts or DNS entries. • Update the SANE driver configuration file and specify the appropriate network interface to use. For most Linux distributions, you need to the printer, then you can open specific ports with the IP address obtained in step 2. OPEN...
...' page" on how to correct /etc/hosts or DNS entries, see the documentation that came with your network interface card. 1 Open a terminal window, and then type hostname. If the IP addresses do not match, then do one the following: • Correct your operating system. If the problem...documentation that came with your /etc/hosts or DNS entries. • Update the SANE driver configuration file and specify the appropriate network interface to use. For most Linux distributions, you need to the printer, then you can open specific ports with the IP address obtained in step 2. OPEN...
Print Drivers for UNIX and LINUX Systems
Page 15
...lexmark/setup.lexprint • /opt/lexmark/setup.lexprint • /usr/lpp/lexprint/setup.lexprint Note: For more information about administrative groups, see "Changing an administrative group name" on page 16. If you do not have the interface available, you can set the default paper size for Print Drivers... from a Windows menu item, or from the command line. Administrative Group Use this command, enter setup.lexprint -h from the command line by typing: # lexprint The program has two modes: User and Administrative. Performing tasks Opening the printer driver The printer driver is not ...
...lexmark/setup.lexprint • /opt/lexmark/setup.lexprint • /usr/lpp/lexprint/setup.lexprint Note: For more information about administrative groups, see "Changing an administrative group name" on page 16. If you do not have the interface available, you can set the default paper size for Print Drivers... from a Windows menu item, or from the command line. Administrative Group Use this command, enter setup.lexprint -h from the command line by typing: # lexprint The program has two modes: User and Administrative. Performing tasks Opening the printer driver The printer driver is not ...

Print Drivers for UNIX and LINUX Systems
Page 34
... checks to the administrative group. How do they work? No. 34 To disable a print queue: 1 Open the printer driver as an administrator. 2 From the main window, right-click the print queue icon. 3 Select the Enabled check box. The unavailable and missing icons represent administrative options ...the user to see your user settings. To enable a print queue: 1 Open the printer driver as an administrator. 2 From the main window, right-click the print queue icon. 3 Clear the Enabled check box. The printer driver has two levels of a particular queue, you can change the settings of access: ...
... checks to the administrative group. How do they work? No. 34 To disable a print queue: 1 Open the printer driver as an administrator. 2 From the main window, right-click the print queue icon. 3 Select the Enabled check box. The unavailable and missing icons represent administrative options ...the user to see your user settings. To enable a print queue: 1 Open the printer driver as an administrator. 2 From the main window, right-click the print queue icon. 3 Clear the Enabled check box. The printer driver has two levels of a particular queue, you can change the settings of access: ...
Tech Notes
Page 1
...'s take a look at the individual steps you don't have to manually select your printer driver's datastream; Creating a custom form using the PCL emulation driver In Windows 2000, Windows XP, and Windows Server 2003, you select My_Report from the Custom forms options to display the New Custom Form dialog box. (See Figure 2 on the next page.) 5 Enter a name for the...
...'s take a look at the individual steps you don't have to manually select your printer driver's datastream; Creating a custom form using the PCL emulation driver In Windows 2000, Windows XP, and Windows Server 2003, you select My_Report from the Custom forms options to display the New Custom Form dialog box. (See Figure 2 on the next page.) 5 Enter a name for the...


