
User's Guide
Page 3
Contents Contents Chapter 1: About your printer 1 Features and functions 2 Printer description 7 Printing the demonstration sample 10 Connecting the printer to your computer 14 Setting up your Windows and DOS application software 17 Chapter 2: Using the operator panel 21 Operator panel layers 22 Setting the printer online or offline 28 Advancing the paper 29 Using Tear Off 29... Converting the push tractor to pull tractor position 36 Converting the pull tractor to the push tractor position 40 Chapter 4: Loading paper 43 Setting the forms thickness lever 44 Loading continuous...
Contents Contents Chapter 1: About your printer 1 Features and functions 2 Printer description 7 Printing the demonstration sample 10 Connecting the printer to your computer 14 Setting up your Windows and DOS application software 17 Chapter 2: Using the operator panel 21 Operator panel layers 22 Setting the printer online or offline 28 Advancing the paper 29 Using Tear Off 29... Converting the push tractor to pull tractor position 36 Converting the pull tractor to the push tractor position 40 Chapter 4: Loading paper 43 Setting the forms thickness lever 44 Loading continuous...
User's Guide
Page 119
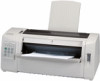
.../Unload? Make sure: • You selected the appropriate printer driver for your printer. For more information, see "Locking/unlocking the operator panel" on pag e17. • You selected the appropriate emulation mode for your Windows and DOS application software" on pag e30. 115 Troubleshooting 10 Are you experiencing unexpected printing results? For more information...
.../Unload? Make sure: • You selected the appropriate printer driver for your printer. For more information, see "Locking/unlocking the operator panel" on pag e17. • You selected the appropriate emulation mode for your Windows and DOS application software" on pag e30. 115 Troubleshooting 10 Are you experiencing unexpected printing results? For more information...
Card Stock & Label Guide
Page 10
...normally nest or create excessive paper dust and debris. Back splits and pop-out windows are removed before packaging. Thermography inks are recommended. If perforations tent, or crease...form and prevent tearing at the perforation line, the perfs may be abrasion resistant to reduce ink dust and ink contamination in .) from each edge of the perforation affects initial pick strength. Lexmark printers... smear the toner on the corners of forms. Edges should be receptive to toner to create shapes in a jam. General information 10 Perforations should be ironed so the print ...
...normally nest or create excessive paper dust and debris. Back splits and pop-out windows are removed before packaging. Thermography inks are recommended. If perforations tent, or crease...form and prevent tearing at the perforation line, the perfs may be abrasion resistant to reduce ink dust and ink contamination in .) from each edge of the perforation affects initial pick strength. Lexmark printers... smear the toner on the corners of forms. Edges should be receptive to toner to create shapes in a jam. General information 10 Perforations should be ironed so the print ...
Network Scan Drivers
Page 3
... if the network scan driver is installed 6 Scanning using a network printer...6 Removing the network scan driver...6 Scanning...7 Scanning using applications...7 Scanning using XSane...7 Scanning using OpenOffice.org...7 Scanning using GIMP ...8 Scanning using a terminal window ...8 Scanning multiple pages...8 Scanning both sides of a page...10 Canceling a scan...11 Adjusting scan settings...12 Adjusting scan settings...
... if the network scan driver is installed 6 Scanning using a network printer...6 Removing the network scan driver...6 Scanning...7 Scanning using applications...7 Scanning using XSane...7 Scanning using OpenOffice.org...7 Scanning using GIMP ...8 Scanning using a terminal window ...8 Scanning multiple pages...8 Scanning both sides of a page...10 Canceling a scan...11 Adjusting scan settings...12 Adjusting scan settings...
Network Scan Drivers
Page 8
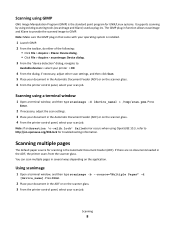
... loaded in the ADF or on the scanner glass. 3 From the printer control panel, select your scan job. Press Enter. 2 Place your document in the ADF, the printer scans from the scanner glass. Using scanimage 1 Open a terminal window, and then type scanimage -b --source="Multiple Pages" -d [device_name]. ...3 Place your document in several ways depending on the application. Note: If an Assertion 'c->xlib.lock' failed error occurs when using OpenSUSE 10.3, refer to http://en.opensuse.org/Xlib.lock for scanning is the Automatic Document Feeder (ADF). Scanning 8 The GIMP plug-in function...
... loaded in the ADF or on the scanner glass. 3 From the printer control panel, select your scan job. Press Enter. 2 Place your document in the ADF, the printer scans from the scanner glass. Using scanimage 1 Open a terminal window, and then type scanimage -b --source="Multiple Pages" -d [device_name]. ...3 Place your document in several ways depending on the application. Note: If an Assertion 'c->xlib.lock' failed error occurs when using OpenSUSE 10.3, refer to http://en.opensuse.org/Xlib.lock for scanning is the Automatic Document Feeder (ADF). Scanning 8 The GIMP plug-in function...
Network Scan Drivers
Page 10
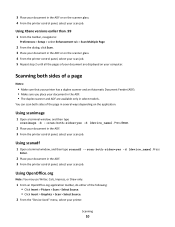
Scanning 10 Using scanimage 1 Open a terminal window, and then type scanimage -b --scan-both -sides=yes -d [device_name]. Using scanadf 1 Open a terminal window, and then type scanadf --scan-both -sides=yes -d [device_name]. Using OpenOffice.org Note: You may use... Writer, Calc, Impress, or Draw only. 1 From an OpenOffice.org application toolbar, do either of your document are available only in select models. Scanning both sides of a page Notes: • Make sure that your printer...
Scanning 10 Using scanimage 1 Open a terminal window, and then type scanimage -b --scan-both -sides=yes -d [device_name]. Using scanadf 1 Open a terminal window, and then type scanadf --scan-both -sides=yes -d [device_name]. Using OpenOffice.org Note: You may use... Writer, Calc, Impress, or Draw only. 1 From an OpenOffice.org application toolbar, do either of your document are available only in select models. Scanning both sides of a page Notes: • Make sure that your printer...
Network Scan Drivers
Page 11
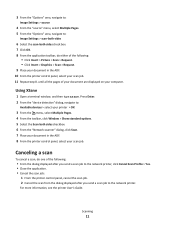
... "Options" area, navigate to: Image Settings > source 4 From the "source" menu, select Multiple Pages. 5 From the "Options" area, navigate to the network printer. Scanning 11 Using XSane 1 Open a terminal window, and then type xsane. Canceling a scan To cancel a scan, do either of the following : • From the dialog displayed after you send... to : Image Settings > scan-both-sides 6 Select the scan-both sides checkbox. 6 From the "Network:scanner" dialog, click Scan. 7 Place your document in the ADF. 10 From the printer control panel, select your scan job. 11 Repeat step 8.
... "Options" area, navigate to: Image Settings > source 4 From the "source" menu, select Multiple Pages. 5 From the "Options" area, navigate to the network printer. Scanning 11 Using XSane 1 Open a terminal window, and then type xsane. Canceling a scan To cancel a scan, do either of the following : • From the dialog displayed after you send... to : Image Settings > scan-both-sides 6 Select the scan-both sides checkbox. 6 From the "Network:scanner" dialog, click Scan. 7 Place your document in the ADF. 10 From the printer control panel, select your scan job. 11 Repeat step 8.


