
Setup Sheet
Page 1
E120n 1 3 Setup Installazione Asennus Installation Instalação Installasjon 安裝 Instalación Installatie Instalacja 설치 Network En red Nätverk Verkko Réseau Rete Netværk Nettverk Netzwerk Rede Netwerk Sieciowe 網路連接 2 1 2 4 5 6 7 1 2 8 9 1 2 *23S0846* P/N 23S0846 E.C. 23S011 © 2006 Lexmark International, Inc. All rights reserved. Printed in China 10 3 2 1 Federal...
E120n 1 3 Setup Installazione Asennus Installation Instalação Installasjon 安裝 Instalación Installatie Instalacja 설치 Network En red Nätverk Verkko Réseau Rete Netværk Nettverk Netzwerk Rede Netwerk Sieciowe 網路連接 2 1 2 4 5 6 7 1 2 8 9 1 2 *23S0846* P/N 23S0846 E.C. 23S011 © 2006 Lexmark International, Inc. All rights reserved. Printed in China 10 3 2 1 Federal...

Quick Reference
Page 3
... printed on the menu settings page. Printing the menu settings and network setup page 3 To restore the printer to the printer. The printer automatically prints the menu settings and network setup pages. The network setup page confirms the network Status is "Connected" and lists the current network settings. Restoring factory defaults This function will return most of the...
... printed on the menu settings page. Printing the menu settings and network setup page 3 To restore the printer to the printer. The printer automatically prints the menu settings and network setup pages. The network setup page confirms the network Status is "Connected" and lists the current network settings. Restoring factory defaults This function will return most of the...

Quick Reference
Page 11
...media has been located and removed. 6 Close the front door by pressing firmly in the center of the front door with your printer for helpful information about network printing. Note: It may be necessary to remove the toner cartridge and place it on a flat, clean surface to the Software... and Documentation CD that came with your administrator or Help desk if you have questions about using and maintaining your printer. • Contact ...
...media has been located and removed. 6 Close the front door by pressing firmly in the center of the front door with your printer for helpful information about network printing. Note: It may be necessary to remove the toner cartridge and place it on a flat, clean surface to the Software... and Documentation CD that came with your administrator or Help desk if you have questions about using and maintaining your printer. • Contact ...

Quick Reference
Page 3
... ENA connection lost Insufficient collation area Load media Print side two of a duplex job Memory full Network interface errors Host interface disabled Jam at the input sensor Jam between the input and exit sensors Jam at printer exit sensor Jam in Tray 1 / priority feeder Resource save off Short paper Toner low Long...
... ENA connection lost Insufficient collation area Load media Print side two of a duplex job Memory full Network interface errors Host interface disabled Jam at the input sensor Jam between the input and exit sensors Jam at printer exit sensor Jam in Tray 1 / priority feeder Resource save off Short paper Toner low Long...
Quick Reference
Page 4
...defaults This function will return most of the User's Guide. To restore the printer to their factory values. Printing the menu settings and network setup page 4 Using the printer resident Web page The Lexmark™ E120n has a resident Web page, which can be found on the menu settings page.... Printing the menu settings and network setup page To print the menu settings and network setup pages, press from...
...defaults This function will return most of the User's Guide. To restore the printer to their factory values. Printing the menu settings and network setup page 4 Using the printer resident Web page The Lexmark™ E120n has a resident Web page, which can be found on the menu settings page.... Printing the menu settings and network setup page To print the menu settings and network setup pages, press from...

Quick Reference
Page 12
... print media has been located and removed. 6 Close the front door by pressing firmly in the center of the front door with your printer for helpful information about network printing. Note: It may be necessary to remove the toner cartridge and place it on a flat, clean surface to the Software and Documentation...
... print media has been located and removed. 6 Close the front door by pressing firmly in the center of the front door with your printer for helpful information about network printing. Note: It may be necessary to remove the toner cartridge and place it on a flat, clean surface to the Software and Documentation...

User's Guide
Page 3
...panel lights 10 Operator panel codes for the Lexmark E120 12 Overview of the Lexmark E120n operator panel 25 Understanding the Lexmark E120n operator panel lights 26 Operator panel codes for the Lexmark E120n 28 Using the printer resident Web page ...43 Printing the menu settings and network setup page 44 Restoring factory defaults ...44 ...62 From a Macintosh computer ...63 Printing on letterhead ...63 From a Windows computer ...63 From a Macintosh computer ...63 Canceling a print job ...64 From printer operator panel ...64 From a Windows computer ...64 From a Macintosh computer ...64 3
...panel lights 10 Operator panel codes for the Lexmark E120 12 Overview of the Lexmark E120n operator panel 25 Understanding the Lexmark E120n operator panel lights 26 Operator panel codes for the Lexmark E120n 28 Using the printer resident Web page ...43 Printing the menu settings and network setup page 44 Restoring factory defaults ...44 ...62 From a Macintosh computer ...63 Printing on letterhead ...63 From a Windows computer ...63 From a Macintosh computer ...63 Canceling a print job ...64 From printer operator panel ...64 From a Windows computer ...64 From a Macintosh computer ...64 3

User's Guide
Page 5
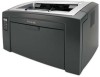
... from Tray 1 to complete a print job. 1 Overview The printer is available in two models: Lexmark E120 (base model) with 600 dpi to 1200 IQ resolution,16 MB of standard memory, a USB port, and an integrated Ethernet adapter. and Lexmark E120n network model) with 600 dpi (dots per inch) to assist with ...smooth paper stacking in the 50-sheet output bin. There is emptied, and then pick from the priority tray until the supply is a paper support on top of the printer, which can be ...
... from Tray 1 to complete a print job. 1 Overview The printer is available in two models: Lexmark E120 (base model) with 600 dpi to 1200 IQ resolution,16 MB of standard memory, a USB port, and an integrated Ethernet adapter. and Lexmark E120n network model) with 600 dpi (dots per inch) to assist with ...smooth paper stacking in the 50-sheet output bin. There is emptied, and then pick from the priority tray until the supply is a paper support on top of the printer, which can be ...

User's Guide
Page 6
... lights and two buttons. Continue Ready / Data Cancel Error Overview 6 The network model (Lexmark E120n) has an Ethernet port located just below the USB port. The USB port and a cable lock access point can also be found at the rear of the printer, on the left. Overview The power button and the power cord...
... lights and two buttons. Continue Ready / Data Cancel Error Overview 6 The network model (Lexmark E120n) has an Ethernet port located just below the USB port. The USB port and a cable lock access point can also be found at the rear of the printer, on the left. Overview The power button and the power cord...

User's Guide
Page 7
Cancel Ready / Data Load / Remove Paper Error Continue Toner Low/ Replace PC Kit Paper Jam • Press and release Continue to resume printing. • Press the Continue button from the Ready state to print menu and network setup pages. • Press and release Cancel to cancel the current job. • Press and hold Cancel until all lights come on the E120n model. Overview The network model (Lexmark E120n) has six lights and two buttons. Overview 7 Note: The Continue button also functions as a light on to reset.
Cancel Ready / Data Load / Remove Paper Error Continue Toner Low/ Replace PC Kit Paper Jam • Press and release Continue to resume printing. • Press the Continue button from the Ready state to print menu and network setup pages. • Press and release Cancel to cancel the current job. • Press and hold Cancel until all lights come on the E120n model. Overview The network model (Lexmark E120n) has six lights and two buttons. Overview 7 Note: The Continue button also functions as a light on to reset.

User's Guide
Page 8
2 Using the operator panels Section Overview of the Lexmark E120 operator panel Understanding the Lexmark E120 operator panel lights Operator panel codes for the Lexmark E120 Overview of the Lexmark E120n operator panel Understanding the Lexmark E120n operator panel lights Operator panel codes for the Lexmark E120n Using the printer resident Web page Printing the menu settings and network setup page Restoring factory defaults Page 9 10 12 25 26 28 43 44 44 Using the operator panels 8
2 Using the operator panels Section Overview of the Lexmark E120 operator panel Understanding the Lexmark E120 operator panel lights Operator panel codes for the Lexmark E120 Overview of the Lexmark E120n operator panel Understanding the Lexmark E120n operator panel lights Operator panel codes for the Lexmark E120n Using the printer resident Web page Printing the menu settings and network setup page Restoring factory defaults Page 9 10 12 25 26 28 43 44 44 Using the operator panels 8

User's Guide
Page 18
...try printing the page again. Primary light sequence Note: This error is , too large for printer memory). If not successful: • Press to clear message. • Re-establish connection with the external network adapter. Solution: • Press to clear message and continue processing the job (some print ...connection to On in the future: • Reduce complexity of the page by reducing the amount of the Lexmark E120 operator panel 18 To avoid this error in the Local Printer Setup Utility (see the secondary light sequence. Ready / Data-Blinks five times Message: During power-on cycle....
...try printing the page again. Primary light sequence Note: This error is , too large for printer memory). If not successful: • Press to clear message. • Re-establish connection with the external network adapter. Solution: • Press to clear message and continue processing the job (some print ...connection to On in the future: • Reduce complexity of the page by reducing the amount of the Lexmark E120 operator panel 18 To avoid this error in the Local Printer Setup Utility (see the secondary light sequence. Ready / Data-Blinks five times Message: During power-on cycle....

User's Guide
Page 21
... at the input sensor, at the exit sensor, or between the input and exit sensors. Ready / Data-Blinks five times Message: Printer USB or network port disabled. To determine the jam location, view the secondary light sequence. Light sequence: Error-Blinking Secondary light sequence: Press twice quickly... the USB Buffer item in the printer paper path Note: All jams show the same primary code. Printer discards all jobs previously sent. • Enable the USB port by selecting a value other than Disabled for instructions. Overview of the Lexmark E120 operator panel 21 Primary light ...
... at the input sensor, at the exit sensor, or between the input and exit sensors. Ready / Data-Blinks five times Message: Printer USB or network port disabled. To determine the jam location, view the secondary light sequence. Light sequence: Error-Blinking Secondary light sequence: Press twice quickly... the USB Buffer item in the printer paper path Note: All jams show the same primary code. Printer discards all jobs previously sent. • Enable the USB port by selecting a value other than Disabled for instructions. Overview of the Lexmark E120 operator panel 21 Primary light ...

User's Guide
Page 27
... Memory full Network interface errors Host interface disabled Jam at the input sensor Jam between the input and exit sensors Jam at printer exit sensor Jam in Tray 1 / priority feeder Resource save off Short paper Toner low Long-life photoconductor kit life warning Replace long-life photoconductor kit Overview of the Lexmark E120n operator...
... Memory full Network interface errors Host interface disabled Jam at the input sensor Jam between the input and exit sensors Jam at printer exit sensor Jam in Tray 1 / priority feeder Resource save off Short paper Toner low Long-life photoconductor kit life warning Replace long-life photoconductor kit Overview of the Lexmark E120n operator...

User's Guide
Page 35
... error is only detected during power-on cycle, the printer detected the connection to clear message. • Re-establish connection with the external network adapter. Overview of the Lexmark E120n operator panel 35 Using the operator panels ENA connection lost . Solution: • Press to the external network adapter was lost Light sequence: • Continue-On...
... error is only detected during power-on cycle, the printer detected the connection to clear message. • Re-establish connection with the external network adapter. Overview of the Lexmark E120n operator panel 35 Using the operator panels ENA connection lost . Solution: • Press to the external network adapter was lost Light sequence: • Continue-On...

User's Guide
Page 38
...-On • Load / Remove Paper-Blinking • Paper Jam-Blinking • Error-On Primary light sequence Secondary light sequence Message: Printer USB or network port has been disabled. Overview of the Lexmark E120n operator panel 38 Secondary light sequence Host interface disabled Light sequence: • Continue-On • Error-On Secondary light sequence: Press...
...-On • Load / Remove Paper-Blinking • Paper Jam-Blinking • Error-On Primary light sequence Secondary light sequence Message: Printer USB or network port has been disabled. Overview of the Lexmark E120n operator panel 38 Secondary light sequence Host interface disabled Light sequence: • Continue-On • Error-On Secondary light sequence: Press...

User's Guide
Page 44
... defaults This function will return most of the printer's configuration, such as current memory and engine code levels. The network setup page confirms the network Status is "Connected" and lists the current network settings. Printing the menu settings and network setup page 44 Using the operator panels The Lexmark E120n (network model), has a resident Web page, which can...
... defaults This function will return most of the printer's configuration, such as current memory and engine code levels. The network setup page confirms the network Status is "Connected" and lists the current network settings. Printing the menu settings and network setup page 44 Using the operator panels The Lexmark E120n (network model), has a resident Web page, which can...

User's Guide
Page 67
The settings range from 1 (very light) to degrade as shown. Printing is still possible for the Lexmark E120, or see Printing the menu settings and network setup page on page 24 for a short time while the sequence is displayed, however print quality continues to 10 (very... appear at specific locations on page 23 for the Lexmark E120, or see Software and Documentation CD for the Lexmark E120n). Replace the long-life photoconductor kit when streaks or background shadings appear on the left in the printer driver. Assessing supply needs The following these suggestions: ...
The settings range from 1 (very light) to degrade as shown. Printing is still possible for the Lexmark E120, or see Printing the menu settings and network setup page on page 24 for a short time while the sequence is displayed, however print quality continues to 10 (very... appear at specific locations on page 23 for the Lexmark E120, or see Software and Documentation CD for the Lexmark E120n). Replace the long-life photoconductor kit when streaks or background shadings appear on the left in the printer driver. Assessing supply needs The following these suggestions: ...
User's Guide
Page 86
... 18, 34 D defaults, restore 44 defective cartridge 17, 34 dual-action slide 5 duplex 20, 37, 61 E E120 6 E120n 6 envelopes 47 Error light 14, 15, 16, 17, 21, 22, 24, 30, 31, 32, 33, 39, 40...and exit sensors 39 in the printer paper path 21 in Tray 1 / priority feeder 22 jams clearing 53 preventing 52 L labels 47 letterhead 47, 63 Lexmark Cartridge Collection Program 74 Lexmark Return Program 74 lights 10, ... See operator panel light sequences multiple page printing 62 N network model 5, 6, 44 network settings page 44 N-up printing 62 O Open door 33 operator panel 13 base model 6 light sequences ...
... 18, 34 D defaults, restore 44 defective cartridge 17, 34 dual-action slide 5 duplex 20, 37, 61 E E120 6 E120n 6 envelopes 47 Error light 14, 15, 16, 17, 21, 22, 24, 30, 31, 32, 33, 39, 40...and exit sensors 39 in the printer paper path 21 in Tray 1 / priority feeder 22 jams clearing 53 preventing 52 L labels 47 letterhead 47, 63 Lexmark Cartridge Collection Program 74 Lexmark Return Program 74 lights 10, ... See operator panel light sequences multiple page printing 62 N network model 5, 6, 44 network settings page 44 N-up printing 62 O Open door 33 operator panel 13 base model 6 light sequences ...

User's Guide
Page 87
...23, 24, 42, 43 Unsupported toner cartridge 43 Waiting 13, 30 lights 10, 26 network model 7 P paper 46 choosing 46 loading 51 Paper jam at printer exit sensor 40 at the input sensor 39 between printer input and exit sensor 39 power button 6 preprinted forms 47 print media 5 choosing 46 loading... 46 sizes 46 storing 46 types 46 print quality problems 76, 78 printer models 5 printer resident Web page 43 printing duplex 61 letterhead 63 menu settings 44 multi-page (N-up) 62 network settings 44 Printing Font List or Menu Settings Page 15, 31 priority feeder 51 priority tray ...
...23, 24, 42, 43 Unsupported toner cartridge 43 Waiting 13, 30 lights 10, 26 network model 7 P paper 46 choosing 46 loading 51 Paper jam at printer exit sensor 40 at the input sensor 39 between printer input and exit sensor 39 power button 6 preprinted forms 47 print media 5 choosing 46 loading... 46 sizes 46 storing 46 types 46 print quality problems 76, 78 printer models 5 printer resident Web page 43 printing duplex 61 letterhead 63 menu settings 44 multi-page (N-up) 62 network settings 44 Printing Font List or Menu Settings Page 15, 31 priority feeder 51 priority tray ...


