
User Manual
Page 4
...)...49 Setup Mode - Main menu...50 Main menu options...50 Forms Macro options...51 Data options ...52 Control options...54 Emulation options ...55 Interface options...56 Maintaining the printer 57 Ordering supplies...57 Removing the ribbon cartridge...57 Cleaning the printer...57 Recycling Lexmark products...58 Administrative support 59 Restoring the factory default settings...59...
...)...49 Setup Mode - Main menu...50 Main menu options...50 Forms Macro options...51 Data options ...52 Control options...54 Emulation options ...55 Interface options...56 Maintaining the printer 57 Ordering supplies...57 Removing the ribbon cartridge...57 Cleaning the printer...57 Recycling Lexmark products...58 Administrative support 59 Restoring the factory default settings...59...

User Manual
Page 11
... so they are not changed by your computer screen Prints a variety of pre-printed forms. Enables printing on cut sheets Tear Off bar Adjustable tractor Control panel disable Ribbon cartridge Printer tests Box and line drawings Greek and math symbols Code pages All models Button control... for cut sheets or envelopes • Assists in removing printed continuous forms at the perforation • Assists in tearing non-perforated forms • Reduces the ...
... so they are not changed by your computer screen Prints a variety of pre-printed forms. Enables printing on cut sheets Tear Off bar Adjustable tractor Control panel disable Ribbon cartridge Printer tests Box and line drawings Greek and math symbols Code pages All models Button control... for cut sheets or envelopes • Assists in removing printed continuous forms at the perforation • Assists in tearing non-perforated forms • Reduces the ...
User Manual
Page 57
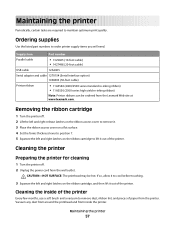
...the listed part numbers to maintain optimum print quality. CAUTION-HOT SURFACE: The printhead may be ordered from the printer. Cleaning the printer Preparing the printer for cleaning 1 Turn the printer off . 2 Lift the left and right release latches on the ribbon access cover to remove it. 3 ...cover on a flat surface. 4 Set the forms thickness lever to position 7. 5 Squeeze the left and right latches on the ribbon cartridge to lift it to remove dust, ribbon lint, and pieces of paper from the Lexmark Web site at www.lexmark.com. Supply item Part number Parallel cable •...
...the listed part numbers to maintain optimum print quality. CAUTION-HOT SURFACE: The printhead may be ordered from the printer. Cleaning the printer Preparing the printer for cleaning 1 Turn the printer off . 2 Lift the left and right release latches on the ribbon access cover to remove it. 3 ...cover on a flat surface. 4 Set the forms thickness lever to position 7. 5 Squeeze the left and right latches on the ribbon cartridge to lift it to remove dust, ribbon lint, and pieces of paper from the Lexmark Web site at www.lexmark.com. Supply item Part number Parallel cable •...
User Manual
Page 59
...Europe are : • Code pages: 437 • Character Set: 1 • Form length: 11 inches To restore the factory default settings: 1 Make sure the ribbon cartridge is installed and paper is loaded. 2 Turn the printer off. 3 Open the ribbon access cover. 4 Move the printhead over toward the ...States are : • Code pages: 858 • Character Set: 2 • Form length: 12 inches To restore the factory default settings: 1 Make sure the ribbon cartridge is installed and paper is loaded. 2 Turn the printer off. 3 Open the ribbon access cover. 4 Move the printhead over toward the ...
...Europe are : • Code pages: 437 • Character Set: 1 • Form length: 11 inches To restore the factory default settings: 1 Make sure the ribbon cartridge is installed and paper is loaded. 2 Turn the printer off. 3 Open the ribbon access cover. 4 Move the printhead over toward the ...States are : • Code pages: 858 • Character Set: 2 • Form length: 12 inches To restore the factory default settings: 1 Make sure the ribbon cartridge is installed and paper is loaded. 2 Turn the printer off. 3 Open the ribbon access cover. 4 Move the printhead over toward the ...
User Manual
Page 62
... continues until you turn the printer off . 3 Press and hold LineFeed while turning the printer on . Troubleshooting 62 Once you have checked each of characters has printed. 2 Press Start/Stop again to the printer. This often fixes the problem. Running a printer test page 1 Make sure the paper is loaded, and the ribbon cartridge is performed.
... continues until you turn the printer off . 3 Press and hold LineFeed while turning the printer on . Troubleshooting 62 Once you have checked each of characters has printed. 2 Press Start/Stop again to the printer. This often fixes the problem. Running a printer test page 1 Make sure the paper is loaded, and the ribbon cartridge is performed.

User Manual
Page 63
...needs to be corrected by turning the printer off and the Ready light comes on. Use this mode to help diagnose software/driver problems. 1 Make sure the paper is loaded, and the ribbon cartridge is in the buffer that are printing continuous forms, make sure the paper select lever ...is installed. 2 Turn the printer off. 3 Press and hold Tractor while turning the printer on. 4 Release Tractor when the lights go out. 5 Turn the...
...needs to be corrected by turning the printer off and the Ready light comes on. Use this mode to help diagnose software/driver problems. 1 Make sure the paper is loaded, and the ribbon cartridge is in the buffer that are printing continuous forms, make sure the paper select lever ...is installed. 2 Turn the printer off. 3 Press and hold Tractor while turning the printer on. 4 Release Tractor when the lights go out. 5 Turn the...

User Manual
Page 64
...LineFeed when printing starts. Printing continues until the printer is a power supply problem. Check the power cord and power source. b Turn the printer off . 3 Remove the ribbon cartridge, and then check for a paper or ribbon jam. 2 Turn the printer off . Control panel lights Power Ready Paper... was loaded. Contact Customer Support. Note: If the printer is not beeping, there is stopped. 6 If the printer test fails, contact Customer Support. Make sure the Tractor 2 option is loaded. Troubleshooting 64 a Replace the ribbon cartridge, and make sure paper is installed correctly.
...LineFeed when printing starts. Printing continues until the printer is a power supply problem. Check the power cord and power source. b Turn the printer off . 3 Remove the ribbon cartridge, and then check for a paper or ribbon jam. 2 Turn the printer off . Control panel lights Power Ready Paper... was loaded. Contact Customer Support. Note: If the printer is not beeping, there is stopped. 6 If the printer test fails, contact Customer Support. Make sure the Tractor 2 option is loaded. Troubleshooting 64 a Replace the ribbon cartridge, and make sure paper is installed correctly.

User Manual
Page 67
...Press Micro or Micro to move the paper to make sure you have selected the correct printer driver. • If you are using Windows, use the Windows Forms Printer 2500 Series driver available from the Lexmark Web site at both ends. • See the documentation that came with your program ...the carrier. • Adjust the ribbon density control knob. • Replace the ribbon cartridge if it is correctly connected at www.lexmark.com. • If you are possible solutions. Solving printing problems Printer test works, but does not print These are using DOS, follow the instructions that ...
...Press Micro or Micro to move the paper to make sure you have selected the correct printer driver. • If you are using Windows, use the Windows Forms Printer 2500 Series driver available from the Lexmark Web site at both ends. • See the documentation that came with your program ...the carrier. • Adjust the ribbon density control knob. • Replace the ribbon cartridge if it is correctly connected at www.lexmark.com. • If you are possible solutions. Solving printing problems Printer test works, but does not print These are using DOS, follow the instructions that ...
User Manual
Page 68
... thermal slowdown protects the printhead from overheating. Left margin moves to the new Top-Of-Form position. 6 Press Start/Stop. Printer speed slows These are active. This is set at the new Top-Of-Form position until another job is affected by adjusting the tractor or paper guide. Try one or... more of the following : • Make sure the ribbon cartridge is properly installed, and the paper is...
... thermal slowdown protects the printhead from overheating. Left margin moves to the new Top-Of-Form position. 6 Press Start/Stop. Printer speed slows These are active. This is set at the new Top-Of-Form position until another job is affected by adjusting the tractor or paper guide. Try one or... more of the following : • Make sure the ribbon cartridge is properly installed, and the paper is...

User Manual
Page 69
...is jammed in the printer To clear a continuous forms paper jam: 1 Turn the printer off. 2 Detach any continuous forms that have already printed. 3 Set the forms thickness lever to position 7. 4 Tear the continuous forms off at both ...Character Options selection of paper from the Lexmark Web site at www.lexmark.com. - Try one or more of the following : • Make sure the printer cable is overriding your DOS application. ... program so that came with the paper being used. • Make sure the ribbon cartridge is the same as the actual paper size. • Adjust tractors or paper guides ...
...is jammed in the printer To clear a continuous forms paper jam: 1 Turn the printer off. 2 Detach any continuous forms that have already printed. 3 Set the forms thickness lever to position 7. 4 Tear the continuous forms off at both ...Character Options selection of paper from the Lexmark Web site at www.lexmark.com. - Try one or more of the following : • Make sure the printer cable is overriding your DOS application. ... program so that came with the paper being used. • Make sure the ribbon cartridge is the same as the actual paper size. • Adjust tractors or paper guides ...
User Manual
Page 73
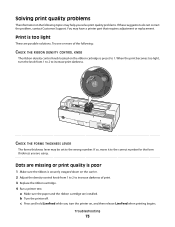
...When the print becomes too light, turn the printer on the ribbon cartridge is securely snapped down on the carrier. 2 Adjust the density control knob from 1 to 2 to increase print darkness...CHECK THE FORMS THICKNESS LEVER The forms thickness lever may help you are using...Dots are...printing begins. You may have a printer part that requires adjustment or replacement. b Turn the printer off. Try one or more of print. 3 Replace the ribbon cartridge. 4 Run a printer test. Troubleshooting 73 If so, move it to the correct number for the form thickness you solve print quality problems....
...When the print becomes too light, turn the printer on the ribbon cartridge is securely snapped down on the carrier. 2 Adjust the density control knob from 1 to 2 to increase print darkness...CHECK THE FORMS THICKNESS LEVER The forms thickness lever may help you are using...Dots are...printing begins. You may have a printer part that requires adjustment or replacement. b Turn the printer off. Try one or more of print. 3 Replace the ribbon cartridge. 4 Run a printer test. Troubleshooting 73 If so, move it to the correct number for the form thickness you solve print quality problems....

User Manual
Page 74
... in a position that corresponds with the forms you are using. 2 Make sure paper and the ribbon cartridge are possible solutions. Incorrect number of the following : • See the documentation that came with your software application. • Make sure the correct printer driver is free to 1. •... Remove and replace the ribbon cartridge. Try one or more of lines on a page These are possible solutions. Characters are wrong or missing Run a printer test: 1 Make sure the forms thickness lever setting is too dark ...
... in a position that corresponds with the forms you are using. 2 Make sure paper and the ribbon cartridge are possible solutions. Incorrect number of the following : • See the documentation that came with your software application. • Make sure the correct printer driver is free to 1. •... Remove and replace the ribbon cartridge. Try one or more of lines on a page These are possible solutions. Characters are wrong or missing Run a printer test: 1 Make sure the forms thickness lever setting is too dark ...

User Manual
Page 81
... purchase and this statement to that user. Remote technical support is not free of all print cartridges, programs, data, and removable storage media (unless directed otherwise by a Lexmark warranty, technical support may be available for this product throughout its original contents, are responsible for... proof of failures caused by: -Modification or unauthorized attachments -Accidents, misuse, abuse or use inconsistent with the printer shall end earlier if it prepaid and suitably packaged to a Lexmark designated location. You are substantially used up, depleted, or consumed.
... purchase and this statement to that user. Remote technical support is not free of all print cartridges, programs, data, and removable storage media (unless directed otherwise by a Lexmark warranty, technical support may be available for this product throughout its original contents, are responsible for... proof of failures caused by: -Modification or unauthorized attachments -Accidents, misuse, abuse or use inconsistent with the printer shall end earlier if it prepaid and suitably packaged to a Lexmark designated location. You are substantially used up, depleted, or consumed.
User Manual
Page 84
...Sheet Feeder feeds at incorrect rate 71 paper paths pull tractor 25 push tractor 25 paper sizes supported by the printer 43 paper types supported by the printer 43 pitch locking 22 selecting 22 pitch lock disabling 22 print quality troubleshooting characters are wrong or missing 74 dots ... tractor 44 push tractor converting 44 paper paths 25 R recycling Lexmark products 58 WEEE statement 79 ribbon cartridge removing 57 S safety information 7 security supporting IPSec 60 supporting SNMPv3 60 using 802.1x authentication 60 setting Top-Of-Form 40, 41, 42 Setup mode Control options 54 Data options ...
...Sheet Feeder feeds at incorrect rate 71 paper paths pull tractor 25 push tractor 25 paper sizes supported by the printer 43 paper types supported by the printer 43 pitch locking 22 selecting 22 pitch lock disabling 22 print quality troubleshooting characters are wrong or missing 74 dots ... tractor 44 push tractor converting 44 paper paths 25 R recycling Lexmark products 58 WEEE statement 79 ribbon cartridge removing 57 S safety information 7 security supporting IPSec 60 supporting SNMPv3 60 using 802.1x authentication 60 setting Top-Of-Form 40, 41, 42 Setup mode Control options 54 Data options ...


