
User Manual
Page 5
...Configuring RAID . . . . . 57 RAID Level 57 Configuring the system BIOS to enable SATA RAID functionality 57 Creating RAID volumes 57 Deleting RAID volumes 58 Chapter 6. Troubleshooting and diagnostics 63 Basic troubleshooting 63 Diagnostic programs 64 Lenovo ThinkVantage Toolbox 64 Lenovo System... using rescue media 49 Creating rescue media 49 Using rescue media 50 Creating and using a recovery repair diskette . . . 50 © Copyright Lenovo 2010 Creating a recovery repair diskette . . . . . 51 Using a recovery repair diskette 51 Installing or reinstalling device drivers . . ....
...Configuring RAID . . . . . 57 RAID Level 57 Configuring the system BIOS to enable SATA RAID functionality 57 Creating RAID volumes 57 Deleting RAID volumes 58 Chapter 6. Troubleshooting and diagnostics 63 Basic troubleshooting 63 Diagnostic programs 64 Lenovo ThinkVantage Toolbox 64 Lenovo System... using rescue media 49 Creating rescue media 49 Using rescue media 50 Creating and using a recovery repair diskette . . . 50 © Copyright Lenovo 2010 Creating a recovery repair diskette . . . . . 51 Using a recovery repair diskette 51 Installing or reinstalling device drivers . . ....

User Manual
Page 65
... selections. Mirrored disk array - Select Configure SATA as and press Enter. 4. Press F10 to enable SATA RAID functionality. Configuring the system BIOS to enable SATA RAID functionality This section describes how to configure the system BIOS to save the new settings and exit the Setup ...select Create RAID Volume and press Enter. 3. Striped disk array - Use the up and down arrow keys to "Replacing the secondary hard disk drive" on page 29. Type a proper RAID Volume name in the Name field and press Tab. © Copyright Lenovo 2010 57 To enable SATA RAID functionality,...
... selections. Mirrored disk array - Select Configure SATA as and press Enter. 4. Press F10 to enable SATA RAID functionality. Configuring the system BIOS to enable SATA RAID functionality This section describes how to configure the system BIOS to save the new settings and exit the Setup ...select Create RAID Volume and press Enter. 3. Striped disk array - Use the up and down arrow keys to "Replacing the secondary hard disk drive" on page 29. Type a proper RAID Volume name in the Name field and press Tab. © Copyright Lenovo 2010 57 To enable SATA RAID functionality,...

User Manual
Page 66
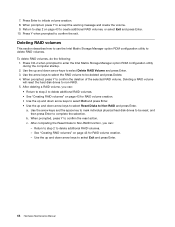
... creation. Return to step 2 to accept the warning message and create the volume. 9. When prompted, press Y to delete additional RAID volumes. - Deleting a RAID volume will reset the hard disk drives to initiate volume creation. 8. After completing the Reset Disks to select Exit and press Enter. 58 ... the arrow keys and the space key to mark individual physical hard disk drives to select Exit and press Enter. Type a volume size in the RAID Level field and press Tab. 5. v Use the up and down arrow keys to be deleted and press Delete. 4. When prompted, press Y to confirm ...
... creation. Return to step 2 to accept the warning message and create the volume. 9. When prompted, press Y to delete additional RAID volumes. - Deleting a RAID volume will reset the hard disk drives to initiate volume creation. 8. After completing the Reset Disks to select Exit and press Enter. 58 ... the arrow keys and the space key to mark individual physical hard disk drives to select Exit and press Enter. Type a volume size in the RAID Level field and press Tab. 5. v Use the up and down arrow keys to be deleted and press Delete. 4. When prompted, press Y to confirm ...

Hardware Maintenance Manual - ThinkStation E20
Page 5
... Chapter 5. Symptom-to enable SATA RAID functionality 43 Creating RAID volumes 43 Deleting RAID volumes 44 Chapter 8. Safety information 3 General safety 3 Electrical safety 3 Voltage-selection switch 5 Safety inspection guide 5 Handling electrostatic discharge-sensitive devices 6 Grounding requirements 6 Safety notices (multi-lingual translations) . . . . . 6 Chapter 3. Diagnostics 33 Lenovo ThinkVantage Toolbox 33 Lenovo System Toolbox 33 PC-Doctor for...
... Chapter 5. Symptom-to enable SATA RAID functionality 43 Creating RAID volumes 43 Deleting RAID volumes 44 Chapter 8. Safety information 3 General safety 3 Electrical safety 3 Voltage-selection switch 5 Safety inspection guide 5 Handling electrostatic discharge-sensitive devices 6 Grounding requirements 6 Safety notices (multi-lingual translations) . . . . . 6 Chapter 3. Diagnostics 33 Lenovo ThinkVantage Toolbox 33 Lenovo System Toolbox 33 PC-Doctor for...

Hardware Maintenance Manual - ThinkStation E20
Page 49
...settings and exit the Setup Utility program. Type a proper RAID Volume name in the Capacity field and press Tab. © Copyright Lenovo 2010, 2011 43 Type a volume size in the Name field and press Tab. 4. RAID Level Your computer must have the minimum number of Independent ...Disks (RAID) for your Linux software provider. To enable SATA RAID functionality, do the following : 1. If appropriate...
...settings and exit the Setup Utility program. Type a proper RAID Volume name in the Capacity field and press Tab. © Copyright Lenovo 2010, 2011 43 Type a volume size in the Name field and press Tab. 4. RAID Level Your computer must have the minimum number of Independent ...Disks (RAID) for your Linux software provider. To enable SATA RAID functionality, do the following : 1. If appropriate...
Hardware Maintenance Manual - ThinkStation E20
Page 50
... individual physical hard disk drives to be deleted and press Delete. 4. b. Use the up and down arrow keys to delete RAID volumes. c. Deleting RAID volumes This section describes how to use the Intel Matrix Storage Manager option ROM configuration utility to select Exit and press Enter. ... to step 2 to confirm the reset action. When prompted, press Y to delete additional RAID volumes. - Press Enter to be reset, and then press Enter to non-RAID. 5. Use the arrow keys to select the RAID volume to initiate volume creation. 8. Press Y when prompted to enter the Intel Matrix Storage...
... individual physical hard disk drives to be deleted and press Delete. 4. b. Use the up and down arrow keys to delete RAID volumes. c. Deleting RAID volumes This section describes how to use the Intel Matrix Storage Manager option ROM configuration utility to select Exit and press Enter. ... to step 2 to confirm the reset action. When prompted, press Y to delete additional RAID volumes. - Press Enter to be reset, and then press Enter to non-RAID. 5. Use the arrow keys to select the RAID volume to initiate volume creation. 8. Press Y when prompted to enter the Intel Matrix Storage...

Hardware Maintenance Manual - ThinkStation E20
Page 63
...-000-XXX Audio port Interface Test Passed FRU/Action 1. Re-run test. 3. See "Updating (flashing) the BIOS" on page 165. 3. RAID signal cable 2. Restart the test to "Undetermined problems" on page 67. 1. Replace the component that is called out in warning statement. 4. ...No action Chapter 8. Replace the component that is called out in warning statement. 4. No action 1. RAID adapter card, if installed 4. Symptom-to reset the log file. 1. If a component is called out is connected and/or enabled. See Chapter...
...-000-XXX Audio port Interface Test Passed FRU/Action 1. Re-run test. 3. See "Updating (flashing) the BIOS" on page 165. 3. RAID signal cable 2. Restart the test to "Undetermined problems" on page 67. 1. Replace the component that is called out in warning statement. 4. ...No action Chapter 8. Replace the component that is called out in warning statement. 4. No action 1. RAID adapter card, if installed 4. Symptom-to reset the log file. 1. If a component is called out is connected and/or enabled. See Chapter...

(Simplified Chinese) User Guide
Page 5
...tCr{Ch8 55 !qt/h8 55 !qY1t/h8 55 !qr|Dt/h83r 56 _6hC 56 Kv Setup Utility Lr 56 Z 5 B dC RAID 57 RAID 6p 57 dC53 BIOS TtC SATA RAID &\ . . . . 57 4( RAID m 57 >} RAID m 58 Z 6 B |B53Lr 59 9C53Lr 59 SbL|B BIOS 59 SYw53|B BIOS 60 S POST/BIOS |B'\PV4 60 Z 7 B JOoOMoOLr... 61 y>JOoO 61 oOLr 62 Lenovo ThinkVantage Toolbox 62 Lenovo System Toolbox 62 PC-Doctor for Rescue and Recovery . . . . . 62 PC-Doctor for DOS ...
...tCr{Ch8 55 !qt/h8 55 !qY1t/h8 55 !qr|Dt/h83r 56 _6hC 56 Kv Setup Utility Lr 56 Z 5 B dC RAID 57 RAID 6p 57 dC53 BIOS TtC SATA RAID &\ . . . . 57 4( RAID m 57 >} RAID m 58 Z 6 B |B53Lr 59 9C53Lr 59 SbL|B BIOS 59 SYw53|B BIOS 60 S POST/BIOS |B'\PV4 60 Z 7 B JOoOMoOLr... 61 y>JOoO 61 oOLr 62 Lenovo ThinkVantage Toolbox 62 Lenovo System Toolbox 62 PC-Doctor for Rescue and Recovery . . . . . 62 PC-Doctor for DOS ...

(Simplified Chinese) User Guide
Page 65
.../Zd,1a>xk Intel Matrix Storage Manager option ROM dC 5CLr1,k4 Ctrl+I# ":*!qc;`Dom2L}/w44( RAID m# 2. 9CrOMrB=r|!q Create RAID Volume,;s4 Enter |# © Copyright Lenovo 2010 57 nY=v2L}/w - Z 5 B dC RAID >BhvKgNdCFczD@"EL_`sP(RAID)# ":>BPXZdC RAID DE";JCZ Windows 73#*q!Z Linux 73B dC RAID DE",k*5 Linux m~)&L# RAID 6p kTTB\'VD RAID 6p,Fczd8D SATA 2L}/w}?Xko=nM...
.../Zd,1a>xk Intel Matrix Storage Manager option ROM dC 5CLr1,k4 Ctrl+I# ":*!qc;`Dom2L}/w44( RAID m# 2. 9CrOMrB=r|!q Create RAID Volume,;s4 Enter |# © Copyright Lenovo 2010 57 nY=v2L}/w - Z 5 B dC RAID >BhvKgNdCFczD@"EL_`sP(RAID)# ":>BPXZdC RAID DE";JCZ Windows 73#*q!Z Linux 73B dC RAID DE",k*5 Linux m~)&L# RAID 6p kTTB\'VD RAID 6p,Fczd8D SATA 2L}/w}?Xko=nM...

(Simplified Chinese) User Guide
Page 66
... ROM dC5 CLr1,k4 Ctrl+I# 2. 9CrOMrB=r|!q Delete RAID Volume,;s4 Enter |# 3. 9C=r|!q*>}D RAID m,;s4 Delete |# 4. 4=a>s,4 Y |,7O*>}y!D RAID m#>} RAID ma92L}/ wXC*G RAID 4,# 5. >} RAID ms,IT: v 5X=h 2,>}d{ RAID m# v kNDZ 57 3D:4( RAID m;,q!PX4( RAID mDE"# v 9CrOMrB=r|!q Exit,;s4 Enter |# v 9CrOMrB=r|!q Reset Disks to Non-RAID Yws,IT: - 5X=h 2,>}d{ RAID m# - Z Name VNdkOJD RAID m{,;s4 Tab |# 4. 9C=r|Z RAID Level VNP!q RAID 6p,;s4 Tab |# 5. g{OJ,9C=r|Z Stripe Size...
... ROM dC5 CLr1,k4 Ctrl+I# 2. 9CrOMrB=r|!q Delete RAID Volume,;s4 Enter |# 3. 9C=r|!q*>}D RAID m,;s4 Delete |# 4. 4=a>s,4 Y |,7O*>}y!D RAID m#>} RAID ma92L}/ wXC*G RAID 4,# 5. >} RAID ms,IT: v 5X=h 2,>}d{ RAID m# v kNDZ 57 3D:4( RAID m;,q!PX4( RAID mDE"# v 9CrOMrB=r|!q Exit,;s4 Enter |# v 9CrOMrB=r|!q Reset Disks to Non-RAID Yws,IT: - 5X=h 2,>}d{ RAID m# - Z Name VNdkOJD RAID m{,;s4 Tab |# 4. 9C=r|Z RAID Level VNP!q RAID 6p,;s4 Tab |# 5. g{OJ,9C=r|Z Stripe Size...

(Korean) User Guide
Page 75
V: L e! *@B RAID 8:! |Q $8B Windows /f!8 {kKOY. & 5 e RAID 8: L e!-B D;M! Linux /f!- RAID 8:! RAID(Redundant Array of Independent Disks)& 8:OB f }! kQ $8B Linux RA.~n &xw kQ $8& &xUOY.
V: L e! *@B RAID 8:! |Q $8B Windows /f!8 {kKOY. & 5 e RAID 8: L e!-B D;M! Linux /f!- RAID 8:! RAID(Redundant Array of Independent Disks)& 8:OB f }! kQ $8B Linux RA.~n &xw kQ $8& &xUOY.

(Japanese) User Guide
Page 73
F10 Setup Utility © Copyright Lenovo 2010 65 ୈ 5 ষ RAID ͷߏ RAID RAID Windows Linux RAID Linux RAID Ϩϕϧ RAID SATA v RAID Ϩϕϧ 0 - ࠷ 2 v RAID Ϩϕϧ 1 2 100 32 SATA RAID BIOS ͷߏ ͜͜ͰɺSATA RAID BIOS SATA RAID 1 Setup Utility 59 ϖʔδ Setup Utility 2. ʮDevices ATA Drives Setup (ATA 3. ʮConfigure SATA as (SATA Enter 4. ʮRAID Enter 5.
F10 Setup Utility © Copyright Lenovo 2010 65 ୈ 5 ষ RAID ͷߏ RAID RAID Windows Linux RAID Linux RAID Ϩϕϧ RAID SATA v RAID Ϩϕϧ 0 - ࠷ 2 v RAID Ϩϕϧ 1 2 100 32 SATA RAID BIOS ͷߏ ͜͜ͰɺSATA RAID BIOS SATA RAID 1 Setup Utility 59 ϖʔδ Setup Utility 2. ʮDevices ATA Drives Setup (ATA 3. ʮConfigure SATA as (SATA Enter 4. ʮRAID Enter 5.

(Japanese) User Guide
Page 74
... ROM 2 Create RAID Volume (RAID Enter 3. ʮName RAID Tab 4. ʮRAID Level (RAID RAID Tab 5 Stripe Size Tab 6. ʮCapacity Tab 7. RAID ͜͜ͰɺIntel Matrix Storage Manager option ROM RAID RAID 1 CtrlʯʴʮI ʯΩʔΛԡ͠ ͯ Intel Matrix Storage Manager option ROM 2 Delete RAID Volume (RAID Enter 3 Delete 4 Y RAID RAID Non-RAID 66
... ROM 2 Create RAID Volume (RAID Enter 3. ʮName RAID Tab 4. ʮRAID Level (RAID RAID Tab 5 Stripe Size Tab 6. ʮCapacity Tab 7. RAID ͜͜ͰɺIntel Matrix Storage Manager option ROM RAID RAID 1 CtrlʯʴʮI ʯΩʔΛԡ͠ ͯ Intel Matrix Storage Manager option ROM 2 Delete RAID Volume (RAID Enter 3 Delete 4 Y RAID RAID Non-RAID 66

(Greek) User Guide
Page 71
RAID SATA RAID: v RAID 0 striped disk array) v RAID 1 mirrored disk array 100 redundancy). 31. SATA RAID 1 Setup Utility Setup Utility 57. 2 Devices → ATA Drives Setup. 3 Configure SATA as Enter. 4 RAID Enter. 5 F10 Setup Utility. RAID Configuration Utility) του Intel Matrix Storage Manager Option ROM RAID (RAID volumes). © Copyright Lenovo 2010 63 BIOS SATA RAID BIOS SATA RAID. 5 RAID Redundant Array of Independent Disks (RAID RAID Windows RAID Linux Linux.
RAID SATA RAID: v RAID 0 striped disk array) v RAID 1 mirrored disk array 100 redundancy). 31. SATA RAID 1 Setup Utility Setup Utility 57. 2 Devices → ATA Drives Setup. 3 Configure SATA as Enter. 4 RAID Enter. 5 F10 Setup Utility. RAID Configuration Utility) του Intel Matrix Storage Manager Option ROM RAID (RAID volumes). © Copyright Lenovo 2010 63 BIOS SATA RAID BIOS SATA RAID. 5 RAID Redundant Array of Independent Disks (RAID RAID Windows RAID Linux Linux.

(Greek) User Guide
Page 72
... ROM. 2 Create RAID Volume RAID Enter. 3 RAID Name Tab. 4 RAID RAID Level RAID Tab. 5 Stripe Size Tab. 6 Capacity Tab. 7 Enter 8 Y 9 2 RAID Exit Enter. 10 Y RAID Configuration Utility) του Intel Matrix Storage Manager Option ROM RAID (RAID volumes). v Reset Disks to Non-RAID RAID Enter. 64 RAID 1 Ctrl+I Intel Matrix Storage Manager Option ROM. 2 Delete RAID Volume RAID Enter. 3 RAID Delete. 4 Y τ µου RAID RAID RAID RAID. 5 RAID v 2 RAID.
... ROM. 2 Create RAID Volume RAID Enter. 3 RAID Name Tab. 4 RAID RAID Level RAID Tab. 5 Stripe Size Tab. 6 Capacity Tab. 7 Enter 8 Y 9 2 RAID Exit Enter. 10 Y RAID Configuration Utility) του Intel Matrix Storage Manager Option ROM RAID (RAID volumes). v Reset Disks to Non-RAID RAID Enter. 64 RAID 1 Ctrl+I Intel Matrix Storage Manager Option ROM. 2 Delete RAID Volume RAID Enter. 3 RAID Delete. 4 Y τ µου RAID RAID RAID RAID. 5 RAID v 2 RAID.

(Arabic) User guide
Page 66
Mirrored Disk Array BIOS SATA RAID BIOS SATA SATA RAID Setup Utility Setup Utility ATA Drives Setup ← Devices Configure SATA as Enter RAID Enter F10 Setup Utility Striped Disk Array RAID Level 1 - RAID Redundant Array of Independent Disks (RAID RAID Windows RAID Linux Linux RAID SATA RAID • RAID Level 0 -
Mirrored Disk Array BIOS SATA RAID BIOS SATA SATA RAID Setup Utility Setup Utility ATA Drives Setup ← Devices Configure SATA as Enter RAID Enter F10 Setup Utility Striped Disk Array RAID Level 1 - RAID Redundant Array of Independent Disks (RAID RAID Windows RAID Linux Linux RAID SATA RAID • RAID Level 0 -
(Arabic) User guide
Page 67
... Create RAID Volume Enter RAID Name Tab RAID RAID Level Tab Stripe Size Tab Capacity Tab Enter Y RAID Exit Enter Y RAID Intel Matrix Storage Manager option ROM configuration utility RAID RAID Ctrl+I Intel Matrix Storage Manager option ROM configuration utility Delete RAID Volume Enter RAID Delete Y RAID RAID non-RAID RAID RAID RAID RAID Exit...
... Create RAID Volume Enter RAID Name Tab RAID RAID Level Tab Stripe Size Tab Capacity Tab Enter Y RAID Exit Enter Y RAID Intel Matrix Storage Manager option ROM configuration utility RAID RAID Ctrl+I Intel Matrix Storage Manager option ROM configuration utility Delete RAID Volume Enter RAID Delete Y RAID RAID non-RAID RAID RAID RAID RAID Exit...
(Traditional Chinese) User Guide
Page 5
... tmt BIOS H SATA RAID 57 RAID 57 Rú RAID 58 6 ≤st 59 t 59 ≤s (Flashing) BIOS 59 q@ t ≤s (Flashing) BIOS 60 q POST/BIOS ≤s 60 7 ° PE 63 63 E 64 Lenovo ThinkVantage Toolbox 64 Lenovo System Toolbox 64 PC-Doctor for Rescue and Recovery . . . . . 64 PC-Doctor for DOS 65 M 66 66 D 66 8 oΩ...
... tmt BIOS H SATA RAID 57 RAID 57 Rú RAID 58 6 ≤st 59 t 59 ≤s (Flashing) BIOS 59 q@ t ≤s (Flashing) BIOS 60 q POST/BIOS ≤s 60 7 ° PE 63 63 E 64 Lenovo ThinkVantage Toolbox 64 Lenovo System Toolbox 64 PC-Doctor for Rescue and Recovery . . . . . 64 PC-Doctor for DOS 65 M 66 66 D 66 8 oΩ...

(Traditional Chinese) User Guide
Page 65
...ϕ uRAID vW AMß÷ Tab ΣC © Copyright Lenovo 2010 57 q }C - Γw - αBúte v RAID h 1 - ΦM }C - Γw - ∩ ¬ αH 100% pGnw Uw A \ 29 qAHF HUΣ RAID h G y≤½ Uw zC tmt BIOS H SATA RAID \α í p≤tmt BIOS H SATA RAID \αC : ΣLW ΦVΣ iμ∩ C pGn SATA...
...ϕ uRAID vW AMß÷ Tab ΣC © Copyright Lenovo 2010 57 q }C - Γw - αBúte v RAID h 1 - ΦM }C - Γw - ∩ ¬ αH 100% pGnw Uw A \ 29 qAHF HUΣ RAID h G y≤½ Uw zC tmt BIOS H SATA RAID \α í p≤tmt BIOS H SATA RAID \αC : ΣLW ΦVΣ iμ∩ C pGn SATA...


