
(English) Rescue and Recovery 4.5 Deployment Guide
Page 3
... 47 Enabling the Rescue and Recovery desktop . 47 Scenario 2 - Best practices 45 Scenario 1 - User tasks 75 Windows 7 75 Create rescue media 75 Rescue and Recovery user interface switching . . 75 © Copyright Lenovo 2008, 2011 i Working with BitLocker 10 Chapter 3. Installation 3 Installation considerations 3 Installing the Rescue and Recovery program . . . . 3 Installation requirements 4 Installation components 4 Installation...
... 47 Enabling the Rescue and Recovery desktop . 47 Scenario 2 - Best practices 45 Scenario 1 - User tasks 75 Windows 7 75 Create rescue media 75 Rescue and Recovery user interface switching . . 75 © Copyright Lenovo 2008, 2011 i Working with BitLocker 10 Chapter 3. Installation 3 Installation considerations 3 Installing the Rescue and Recovery program . . . . 3 Installation requirements 4 Installation components 4 Installation...
(English) Rescue and Recovery 4.5 Deployment Guide
Page 9
... the user interface. However, it does not support the Windows 7 operating system that require a Windows password are managed with InstallShield 10.5 Premier as setting property values from an Admin Backup" on the Lenovo Web page at the same time is named rnrdeploy.xml. The Windows Installer program supports upgrading the Rescue and Recovery 4.30 program...
... the user interface. However, it does not support the Windows 7 operating system that require a Windows password are managed with InstallShield 10.5 Premier as setting property values from an Admin Backup" on the Lenovo Web page at the same time is named rnrdeploy.xml. The Windows Installer program supports upgrading the Rescue and Recovery 4.30 program...
(English) Rescue and Recovery 4.5 Deployment Guide
Page 16
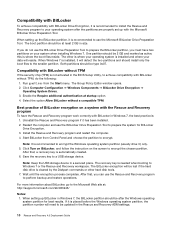
...is installed and where your data will detect the two partitions and should be updated in the Rescue and Recovery ADM settings. 10 Rescue and Recovery 4.5 Deployment Guide Compatibility with BitLocker without TPM If the security chip (TPM) is not activated in size... operations. The BitLocker encryption will need to use the BitLocker Drive Preparation Tool to a USB storage device. Click Computer Configuration ➙ Windows Components ➙ BitLocker Drive Encryption ➙ Operating System Drives. 3. Both partitions should be type 0x07. Restart the computer and use...
...is installed and where your data will detect the two partitions and should be updated in the Rescue and Recovery ADM settings. 10 Rescue and Recovery 4.5 Deployment Guide Compatibility with BitLocker without TPM If the security chip (TPM) is not activated in size... operations. The BitLocker encryption will need to use the BitLocker Drive Preparation Tool to a USB storage device. Click Computer Configuration ➙ Windows Components ➙ BitLocker Drive Encryption ➙ Operating System Drives. 3. Both partitions should be type 0x07. Restart the computer and use...
(English) Rescue and Recovery 4.5 Deployment Guide
Page 22
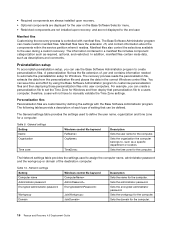
... a description of each type of the destination computer: Table 10. Sets the domain for a computer: Table 9. You can create a personalization file to set the Time Zone for Windows and then deploy that personalization file to assign the computer name...then deploying those personalization files onto user computers. Network settings Setting Computer name Administrator password Encrypted administrator password Workgroup Domain Windows control file keyword ComputerName= AdminPassword= EncryptedAdminPassword= JoinWorkgroup= JoinDomain= Description Sets the name for the computer. The Base...
... a description of each type of the destination computer: Table 10. Sets the domain for a computer: Table 9. You can create a personalization file to set the Time Zone for Windows and then deploy that personalization file to assign the computer name...then deploying those personalization files onto user computers. Network settings Setting Computer name Administrator password Encrypted administrator password Workgroup Domain Windows control file keyword ComputerName= AdminPassword= EncryptedAdminPassword= JoinWorkgroup= JoinDomain= Description Sets the name for the computer. The Base...
(English) Rescue and Recovery 4.5 Deployment Guide
Page 23
... deploy. Configurations 17 If /BOOTSP, /MAN or /PER is also specified, the deploy wizard is supported under WinPE and the Windows environment: TBSADMIN.EXE [/DEPLOY [/SILENT] [/BOOTSP=YES|NO] [/MANIFEST=""] [/PERSONALIZATION=""]] The following executable supports a command line interface ... or her system. The executable returns the following sections provide customization information for the Base Software Administrator program. Table 10. Command line interface The following table provides the switches for Rescue and Recovery backups. Switches Switch /DEPLOY /SILENT ...
... deploy. Configurations 17 If /BOOTSP, /MAN or /PER is also specified, the deploy wizard is supported under WinPE and the Windows environment: TBSADMIN.EXE [/DEPLOY [/SILENT] [/BOOTSP=YES|NO] [/MANIFEST=""] [/PERSONALIZATION=""]] The following executable supports a command line interface ... or her system. The executable returns the following sections provide customization information for the Base Software Administrator program. Table 10. Command line interface The following table provides the switches for Rescue and Recovery backups. Switches Switch /DEPLOY /SILENT ...
(English) Rescue and Recovery 4.5 Deployment Guide
Page 25
...with Sysprep Backup/Restore, because the Password Persistence information does not exist in disables Windows RE by the Rescue and Recovery program based on the Microsoft Web site at HKLM\Software\Lenovo\MND. Conversely, when using Sysprep. The NetPath entry is the build ID.) Chapter... registry settings located at : http://technet.microsoft.com/en-us/library/dd744388(WS.10).aspx Restore a Sysprep Backup Password Persistence cannot work correctly. The following : 1. For more information about Windows RE in the base backup These instructions are the username and password entries. The...
...with Sysprep Backup/Restore, because the Password Persistence information does not exist in disables Windows RE by the Rescue and Recovery program based on the Microsoft Web site at HKLM\Software\Lenovo\MND. Conversely, when using Sysprep. The NetPath entry is the build ID.) Chapter... registry settings located at : http://technet.microsoft.com/en-us/library/dd744388(WS.10).aspx Restore a Sysprep Backup Password Persistence cannot work correctly. The following : 1. For more information about Windows RE in the base backup These instructions are the username and password entries. The...

(English) Rescue and Recovery 4.5 Deployment Guide
Page 27
... the Rescue and Recovery program using the power button. 10. Note: The operating system will fail when doing a...Sysprep Base Backup to Local Hard Drive : Type the following command on one line cd "\Program Files\Lenovo\Rescue and Recovery" rrcmd sysprepbackup location=L name="Sysprep Base Backup" If you must set the registry entry... MSIEXE, type the following installation-log generation code: /L*v %temp%\rrinstall.txt b. Supported Sysprep multiple drive configurations Windows PE drive enumeration may be different than C:\ Primary, you want to exclude .mpg and .jpg files from the...
... the Rescue and Recovery program using the power button. 10. Note: The operating system will fail when doing a...Sysprep Base Backup to Local Hard Drive : Type the following command on one line cd "\Program Files\Lenovo\Rescue and Recovery" rrcmd sysprepbackup location=L name="Sysprep Base Backup" If you must set the registry entry... MSIEXE, type the following installation-log generation code: /L*v %temp%\rrinstall.txt b. Supported Sysprep multiple drive configurations Windows PE drive enumeration may be different than C:\ Primary, you want to exclude .mpg and .jpg files from the...

(English) Rescue and Recovery 4.5 Deployment Guide
Page 39
... Text can be changed . The following is used for the Rescue and Recovery environment. Entry type parameters Parameter 0 1 2 3 4 5 6 7 8 9 10 Button type Empty field. It is an example of each entry has the same basic elements. Although functions are displayed in the left panel. Left... environment variable, %errorlevel%. Define a help for Web links that the computer must be in a certain language. Display a restart message window before starting the application. Change the value to direct the GUI to present a message to the user that have CGI scripts to be...
... Text can be changed . The following is used for the Rescue and Recovery environment. Entry type parameters Parameter 0 1 2 3 4 5 6 7 8 9 10 Button type Empty field. It is an example of each entry has the same basic elements. Although functions are displayed in the left panel. Left... environment variable, %errorlevel%. Define a help for Web links that the computer must be in a certain language. Display a restart message window before starting the application. Change the value to direct the GUI to present a message to the user that have CGI scripts to be...

(English) Rescue and Recovery 4.5 Deployment Guide
Page 54
...put ECHO. Boot to see the change pause c:\Program Files\Lenovo\Common\BMGR\bmgr32.exe /bw /r Create getlist.txt: \preboot\usrintfc\pdaguien.ini Scenario 2 - ECHO. Installing with WIM files and Windows 7 Windows 7 deployment is based on the Windows 7 operating system: 1. Launch Diskpart 3. Run bootsect /nt52...and edit it. ImageX utilizes file based imaging with ImageX. Select Disk 4. Format disk such as c: /fs:ntfs /q /y /v:WinXP 10. Create desired primary partition of sector-based image formats. UPDATE_RR.CMD script @ECHO OFF ::Obtain the PDAGUIen.ini file from the RR ...
...put ECHO. Boot to see the change pause c:\Program Files\Lenovo\Common\BMGR\bmgr32.exe /bw /r Create getlist.txt: \preboot\usrintfc\pdaguien.ini Scenario 2 - ECHO. Installing with WIM files and Windows 7 Windows 7 deployment is based on the Windows 7 operating system: 1. Launch Diskpart 3. Run bootsect /nt52...and edit it. ImageX utilizes file based imaging with ImageX. Select Disk 4. Format disk such as c: /fs:ntfs /q /y /v:WinXP 10. Create desired primary partition of sector-based image formats. UPDATE_RR.CMD script @ECHO OFF ::Obtain the PDAGUIen.ini file from the RR ...
(English) Rescue and Recovery 4.5 Deployment Guide
Page 55
...to hide the Advanced menu in the File Name field on the Settings tab of the Advanced Menu Properties dialog box. 10. From the Windows Start menu, run regedit. 13. Click the Add button and then select the rnr.adm file. Under the ThinkVantage ... under the Computer Configuration. Click the Administrative Templates tab under Computer Configuration. 4. Click OK on the following registry key: HKLM\Software\Policies\Lenovo\Rescue and Recovery. 14. Corporate Active Directory Rollout For a corporate Active Directory rollout, complete the following steps: 1. Go to ThinkVantage &#...
...to hide the Advanced menu in the File Name field on the Settings tab of the Advanced Menu Properties dialog box. 10. From the Windows Start menu, run regedit. 13. Click the Add button and then select the rnr.adm file. Under the ThinkVantage ... under the Computer Configuration. Click the Administrative Templates tab under Computer Configuration. 4. Click OK on the following registry key: HKLM\Software\Policies\Lenovo\Rescue and Recovery. 14. Corporate Active Directory Rollout For a corporate Active Directory rollout, complete the following steps: 1. Go to ThinkVantage &#...
(English) Rescue and Recovery 4.5 Deployment Guide
Page 56
... Active Directory, enable Antidote Delivery Manager. Type diskpart, then press Enter. 4. Format Partition 2 and leave Partition 1 unformatted. 10. Diskpart>sel par 1 c. Diskpart>format fs=ntfs label="SYSTEM_DRV" quick 13. Press Shift + F10 to be run and ...see "RRCMD command-line interface" on Partition 2. 50 Rescue and Recovery 4.5 Deployment Guide Diskpart>sel disk 0 b. Start your computer from the Windows 7 installation disc again and proceed to the drive selection menu. 7. b. Select either of the name parameter to create backups to the drive selection...
... Active Directory, enable Antidote Delivery Manager. Type diskpart, then press Enter. 4. Format Partition 2 and leave Partition 1 unformatted. 10. Diskpart>sel par 1 c. Diskpart>format fs=ntfs label="SYSTEM_DRV" quick 13. Press Shift + F10 to be run and ...see "RRCMD command-line interface" on Partition 2. 50 Rescue and Recovery 4.5 Deployment Guide Diskpart>sel disk 0 b. Start your computer from the Windows 7 installation disc again and proceed to the drive selection menu. 7. b. Select either of the name parameter to create backups to the drive selection...
(English) Rescue and Recovery 4.5 Deployment Guide
Page 67
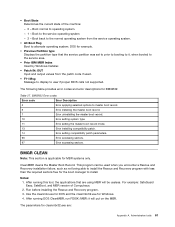
... using MBR will put on the MBR. Notes: 1. it , when booted to the service area. • Prior IBM MBR Index Used by Windows Installer. • Patch IN: OUT Input and output values from the service operating system. • Alt Boot Flag Boot to operating system. -... 1 - Boot to master boot record. 6 Error installing the master boot record. 7 Error uninstalling the master boot record. 10 Error setting system type. 11 Error setting the master boot record mode. 13 Error installing compatibility patch. 14 Error setting compatibility patch parameters. 96 ...
... using MBR will put on the MBR. Notes: 1. it , when booted to the service area. • Prior IBM MBR Index Used by Windows Installer. • Patch IN: OUT Input and output values from the service operating system. • Alt Boot Flag Boot to operating system. -... 1 - Boot to master boot record. 6 Error installing the master boot record. 7 Error uninstalling the master boot record. 10 Error setting system type. 11 Error setting the master boot record mode. 13 Error installing compatibility patch. 14 Error setting compatibility patch parameters. 96 ...

(English) Power Manager Deployment Guide
Page 19
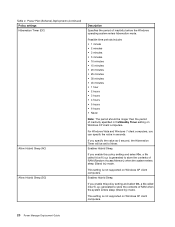
Possible time periods include: • 1 minute (Windows XP only) • 2 minutes (Windows XP only) • 3 minutes (Windows XP only) • 5 minutes (Windows XP only) • 10 minutes (Windows XP only) • 15 minutes • 20 minutes • 25 minutes • ... levels. This setting is not supported on Windows 7 client computers. Possible time periods include: • 1 minute (Windows XP only) • 2 minutes (Windows XP only) • 3 minutes (Windows XP only) • 5 minutes (Windows XP only) • 10 minutes (Windows XP only) • 15 minutes •...
Possible time periods include: • 1 minute (Windows XP only) • 2 minutes (Windows XP only) • 3 minutes (Windows XP only) • 5 minutes (Windows XP only) • 10 minutes (Windows XP only) • 15 minutes • 20 minutes • 25 minutes • ... levels. This setting is not supported on Windows 7 client computers. Possible time periods include: • 1 minute (Windows XP only) • 2 minutes (Windows XP only) • 3 minutes (Windows XP only) • 5 minutes (Windows XP only) • 10 minutes (Windows XP only) • 15 minutes •...

(English) Power Manager Deployment Guide
Page 20
... Graphics (AC) Description Specifies the period of inactivity in AC mode. Possible time periods include: • 1 minute (Windows XP only) • 2 minutes (Windows XP only) • 3 minutes (Windows XP only) • 5 minutes (Windows XP only) • 10 minutes (Windows XP only) • 15 minutes • 20 minutes • 25 minutes • 30 minutes • 45 minutes...
... Graphics (AC) Description Specifies the period of inactivity in AC mode. Possible time periods include: • 1 minute (Windows XP only) • 2 minutes (Windows XP only) • 3 minutes (Windows XP only) • 5 minutes (Windows XP only) • 10 minutes (Windows XP only) • 15 minutes • 20 minutes • 25 minutes • 30 minutes • 45 minutes...

(English) Power Manager Deployment Guide
Page 21
... select a time period. 2. This setting is not supported on Windows XP client computers. This setting is not supported on Windows XP client computers. Possible time periods include: • 2 minutes • 5 minutes • 10 minutes • 15 minutes • 30 minutes • 45...8226; 1 hour • 2 hours • 3 hours • Never Notes: 1. For Windows XP client computers, possible time periods include: • 1 minute • 2 minutes • 3 minutes • 5 minutes • 10 minutes • 15 minutes • 20 minutes • 25 minutes • 30 minutes ...
... select a time period. 2. This setting is not supported on Windows XP client computers. This setting is not supported on Windows XP client computers. Possible time periods include: • 2 minutes • 5 minutes • 10 minutes • 15 minutes • 30 minutes • 45...8226; 1 hour • 2 hours • 3 hours • Never Notes: 1. For Windows XP client computers, possible time periods include: • 1 minute • 2 minutes • 3 minutes • 5 minutes • 10 minutes • 15 minutes • 20 minutes • 25 minutes • 30 minutes ...

(English) Power Manager Deployment Guide
Page 22
... • 2 hours • 3 hours • 4 hours • 5 hours • Never For Windows Vista and Windows 7 client computers, you specify the value as 0 second, the Monitor off the display. For Windows XP client computers, possible time periods include: • 3 minutes • 5 minutes • 10 minutes • 15 minutes • 20 minutes • 25 minutes •...
... • 2 hours • 3 hours • 4 hours • 5 hours • Never For Windows Vista and Windows 7 client computers, you specify the value as 0 second, the Monitor off the display. For Windows XP client computers, possible time periods include: • 3 minutes • 5 minutes • 10 minutes • 15 minutes • 20 minutes • 25 minutes •...

(English) Power Manager Deployment Guide
Page 23
... Never. If you specify the value as 0 second, the HDD off the hard disk drive. For Windows XP client computers, possible time periods include: • 3 minutes • 5 minutes • 10 minutes • 15 minutes • 20 minutes • 25 minutes • 30 minutes •...; 45 minutes • 1 hour • 2 hours • 3 hours • 4 hours • 5 hours • Never For Windows Vista and Windows 7 client computers, you specify the value as...
... Never. If you specify the value as 0 second, the HDD off the hard disk drive. For Windows XP client computers, possible time periods include: • 3 minutes • 5 minutes • 10 minutes • 15 minutes • 20 minutes • 25 minutes • 30 minutes •...; 45 minutes • 1 hour • 2 hours • 3 hours • 4 hours • 5 hours • Never For Windows Vista and Windows 7 client computers, you specify the value as...

(English) Power Manager Deployment Guide
Page 24
...) Policy settings Standby Timer (AC) Standby Timer (DC) Description Specifies the period of inactivity before Windows enters the sleep mode. For Windows XP client computers, possible time periods include: • 1 minute • 2 minutes • 3 minutes • 5 minutes • 10 minutes • 15 minutes • 20 minutes • 25 minutes • 30 minutes •...
...) Policy settings Standby Timer (AC) Standby Timer (DC) Description Specifies the period of inactivity before Windows enters the sleep mode. For Windows XP client computers, possible time periods include: • 1 minute • 2 minutes • 3 minutes • 5 minutes • 10 minutes • 15 minutes • 20 minutes • 25 minutes • 30 minutes •...

(English) Power Manager Deployment Guide
Page 25
...0 second, the Standby Timer will be set to Never. Possible time periods include: • 1 minute • 2 minutes • 3 minutes • 5 minutes • 10 minutes • 15 minutes • 20 minutes • 25 minutes • 30 minutes • 45 minutes • 1 hour • 2 hours • 3 hours...Never. If you specify the value as 0 second, the Hibernation Timer will be longer than the period of inactivity before the Windows operating system enters hibernation mode. Working with Active Directory and ADM or ADMX files 19 Chapter 3. Specifies the period of inactivity ...
...0 second, the Standby Timer will be set to Never. Possible time periods include: • 1 minute • 2 minutes • 3 minutes • 5 minutes • 10 minutes • 15 minutes • 20 minutes • 25 minutes • 30 minutes • 45 minutes • 1 hour • 2 hours • 3 hours...Never. If you specify the value as 0 second, the Hibernation Timer will be longer than the period of inactivity before the Windows operating system enters hibernation mode. Working with Active Directory and ADM or ADMX files 19 Chapter 3. Specifies the period of inactivity ...
(English) Power Manager Deployment Guide
Page 26
... Hybrid Sleep. For Windows Vista and Windows 7 client computers, you enable this policy setting and select On, a file called hiberfil.sys generated to store the contents of inactivity specified in seconds. This setting is generated to Never. Possible time periods include: • 1 minute • 2 minutes • 3 minutes • 5 minutes • 10 minutes •...
... Hybrid Sleep. For Windows Vista and Windows 7 client computers, you enable this policy setting and select On, a file called hiberfil.sys generated to store the contents of inactivity specified in seconds. This setting is generated to Never. Possible time periods include: • 1 minute • 2 minutes • 3 minutes • 5 minutes • 10 minutes •...


