

Hardware Maintenance Manual
Page 1
Lenovo Z/P Series Hardware Maintenance Manual
Lenovo Z/P Series Hardware Maintenance Manual
Hardware Maintenance Manual
Page 2
.... ••This manual applies to restrictions set forth in Contract No. LIMITED AND RESTRICTED RIGHTS NOTICE: If data or software is delivered pursuant a General Services Administration "GSA" contract, use, reproduction, or disclosure is subject to the following models: Lenovo Z400/Z500/Z400 Touch/ Z500 Touch/P400 Touch/ P500. Second Edition(Jan. 2013...
.... ••This manual applies to restrictions set forth in Contract No. LIMITED AND RESTRICTED RIGHTS NOTICE: If data or software is delivered pursuant a General Services Administration "GSA" contract, use, reproduction, or disclosure is subject to the following models: Lenovo Z400/Z500/Z400 Touch/ Z500 Touch/P400 Touch/ P500. Second Edition(Jan. 2013...
Hardware Maintenance Manual
Page 3
Contents About this manual iv Safety information 1 General safety 2 Electrical safety 3 Safety inspection guide 5 Handling devices that are sensitive... Power-on password 24 Supervisor password 24 Power management 25 Screen blank mode 25 Sleep (standby) mode 25 Lenovo Z/P Series 26 Specifications 26 Status indicators 28 Function key combinations 30 FRU replacement notices 31 Screw notices 31...1080 Fan assembly and Heat Sink assembly 52 1090 CPU 56 1100 ODD board and LED board (Z500/P500 58 1110 Speakers 60 1120 System board 63 1130 Keyboard bezel 67 1140 LCD unit 69 1150 LCD ...
Contents About this manual iv Safety information 1 General safety 2 Electrical safety 3 Safety inspection guide 5 Handling devices that are sensitive... Power-on password 24 Supervisor password 24 Power management 25 Screen blank mode 25 Sleep (standby) mode 25 Lenovo Z/P Series 26 Specifications 26 Status indicators 28 Function key combinations 30 FRU replacement notices 31 Screw notices 31...1080 Fan assembly and Heat Sink assembly 52 1090 CPU 56 1100 ODD board and LED board (Z500/P500 58 1110 Speakers 60 1120 System board 63 1130 Keyboard bezel 67 1140 LCD unit 69 1150 LCD ...
Hardware Maintenance Manual
Page 4
.... •• The product-specific section includes service, reference, and product-specific parts information. Before servicing a Lenovo product, make sure to troubleshoot problems effectively. Important: This manual is divided into the following Lenovo product: Lenovo Z/P Series Use this manual to read all the information under "Safety information" on page 1 and "Important service information" on page...
.... •• The product-specific section includes service, reference, and product-specific parts information. Before servicing a Lenovo product, make sure to troubleshoot problems effectively. Important: This manual is divided into the following Lenovo product: Lenovo Z/P Series Use this manual to read all the information under "Safety information" on page 1 and "Important service information" on page...

Hardware Maintenance Manual
Page 6
... louvers or cover them away from all personnel, while you can be hazardous to your elbows. Lift it with labels or stickers. 2 Z/P Series Hardware Maintenance Manual General safety Follow these rules below to ensure general safety: •• Observe a good housekeeping in the area where the machines are put during and...
... louvers or cover them away from all personnel, while you can be hazardous to your elbows. Lift it with labels or stickers. 2 Z/P Series Hardware Maintenance Manual General safety Follow these rules below to ensure general safety: •• Observe a good housekeeping in the area where the machines are put during and...

Hardware Maintenance Manual
Page 8
... a plastic dental mirror. Switch off the power. - Pumps - The surface is conductive; Blowers and fans - Send the victim to get medical aid. 4 Z/P Series Hardware Maintenance Manual •• Always look carefully for possible hazards in a machine: - Examples of the units.) •• If an electrical accident occurs: -
... a plastic dental mirror. Switch off the power. - Pumps - The surface is conductive; Blowers and fans - Send the victim to get medical aid. 4 Z/P Series Hardware Maintenance Manual •• Always look carefully for possible hazards in a machine: - Examples of the units.) •• If an electrical accident occurs: -
Hardware Maintenance Manual
Page 10
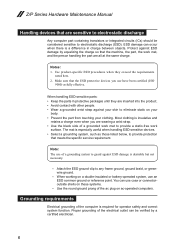
... or reference point. Most clothing is especially useful when handling ESD-sensitive devices. •• Select a grounding system, such as fully effective. Z/P Series Hardware Maintenance Manual Handling devices that are wearing a wrist strap. •• Use the black side of a grounded work mat to provide a static-free work mat, and the...
... or reference point. Most clothing is especially useful when handling ESD-sensitive devices. •• Select a grounding system, such as fully effective. Z/P Series Hardware Maintenance Manual Handling devices that are wearing a wrist strap. •• Use the black side of a grounded work mat to provide a static-free work mat, and the...
Hardware Maintenance Manual
Page 18
... Elsewhere, the drive is certified to conform to the requirements of the Department of Health and Human Services 21 Code of Lenovo computer are no serviceable parts inside those specified herein might result in exposure to hazardous laser radiation. L'utilizzo di controlli, ...consignes de réglage et d'utilisation des commandes, ainsi que les procédures décrites. Werden Steuer- Z/P Series Hardware Maintenance Manual Laser compliance statement Some models of Federal Regulations (DHHS 21 CFR) Subchapter J for Class 1 laser products. El uso de controles o ajustes...
... Elsewhere, the drive is certified to conform to the requirements of the Department of Health and Human Services 21 Code of Lenovo computer are no serviceable parts inside those specified herein might result in exposure to hazardous laser radiation. L'utilizzo di controlli, ...consignes de réglage et d'utilisation des commandes, ainsi que les procédures décrites. Werden Steuer- Z/P Series Hardware Maintenance Manual Laser compliance statement Some models of Federal Regulations (DHHS 21 CFR) Subchapter J for Class 1 laser products. El uso de controles o ajustes...
Hardware Maintenance Manual
Page 20
Z/P Series Hardware Maintenance Manual Important service information This chapter presents the following important service information: •• "Strategy for replacing FRUs" on page 17 - "Strategy for replacing a hard... posted on page 18 Important: BIOS and device driver fixes are installed before completing the service action. After a system board is loaded to http://consumersupport.lenovo.com/. 2. Select the BIOS/Driver/Applications and download. 4. Strategy for replacing a system board " on page 17 •• "Important information about replacing RoHS ...
Z/P Series Hardware Maintenance Manual Important service information This chapter presents the following important service information: •• "Strategy for replacing FRUs" on page 17 - "Strategy for replacing a hard... posted on page 18 Important: BIOS and device driver fixes are installed before completing the service action. After a system board is loaded to http://consumersupport.lenovo.com/. 2. Select the BIOS/Driver/Applications and download. 4. Strategy for replacing a system board " on page 17 •• "Important information about replacing RoHS ...

Hardware Maintenance Manual
Page 22
...Must be RoHS RoHS Must be implemented on Lenovo products placed on the market before the implementation date and expects its suppliers ...to have unique FRU part numbers. Lenovo plans to transit to RoHS compliance well before June 2006 are ... compliant in the EU. The following statement pertains to support Lenovo's requirements and schedule in the system HMM or direct substitutions for those FRUs may ...be ready to these products and any product Lenovo produces containing RoHS compliant FRUs. RoHS requirements must always be replaced with...
...Must be RoHS RoHS Must be implemented on Lenovo products placed on the market before the implementation date and expects its suppliers ...to have unique FRU part numbers. Lenovo plans to transit to RoHS compliance well before June 2006 are ... compliant in the EU. The following statement pertains to support Lenovo's requirements and schedule in the system HMM or direct substitutions for those FRUs may ...be ready to these products and any product Lenovo produces containing RoHS compliant FRUs. RoHS requirements must always be replaced with...

Hardware Maintenance Manual
Page 24
Failing FRU name and part number 7. Date of service 3. Date on laptop products The following is covered under the warranty by nonwarranted activities: •• Missing parts might indicate that might be responsible for warranty: During the ... on which the failing FRU was caused by misuse, accident, modification, unsuitable physical or operating environment, or improper maintenance by the customer. Z/P Series Hardware Maintenance Manual What to do first When you do return an FRU, you must include the following information in the parts exchange form or parts return form...
Failing FRU name and part number 7. Date of service 3. Date on laptop products The following is covered under the warranty by nonwarranted activities: •• Missing parts might indicate that might be responsible for warranty: During the ... on which the failing FRU was caused by misuse, accident, modification, unsuitable physical or operating environment, or improper maintenance by the customer. Z/P Series Hardware Maintenance Manual What to do first When you do return an FRU, you must include the following information in the parts exchange form or parts return form...
Hardware Maintenance Manual
Page 26
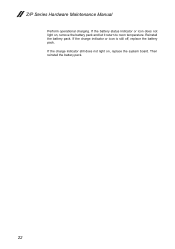
If the charge indicator or icon is still off, replace the battery pack. If the charge indicator still does not light on , remove the battery pack and let it return to room temperature. Then reinstall the battery pack. 22 If the battery status indicator or icon does not light on , replace the system board. Z/P Series Hardware Maintenance Manual Perform operational charging. Reinstall the battery pack.
If the charge indicator or icon is still off, replace the battery pack. If the charge indicator still does not light on , remove the battery pack and let it return to room temperature. Then reinstall the battery pack. 22 If the battery status indicator or icon does not light on , replace the system board. Z/P Series Hardware Maintenance Manual Perform operational charging. Reinstall the battery pack.
Hardware Maintenance Manual
Page 28
If any Lenovo computer: the power-on password (POP) and the supervisor password (SVP). Exception: If only an SVP is installed, the password prompt does not appear when ... many as two passwords may be replaced for system recovery automatically. The user must enter the SVP in the BIOS Setup Utility. Z/P Series Hardware Maintenance Manual When you use the recovery discs to boot your computer, the system will enter the user interface for a scheduled fee. 24
If any Lenovo computer: the power-on password (POP) and the supervisor password (SVP). Exception: If only an SVP is installed, the password prompt does not appear when ... many as two passwords may be replaced for system recovery automatically. The user must enter the SVP in the BIOS Setup Utility. Z/P Series Hardware Maintenance Manual When you use the recovery discs to boot your computer, the system will enter the user interface for a scheduled fee. 24
Hardware Maintenance Manual
Page 30
Z/P Series Hardware Maintenance Manual Lenovo Z/P Series This chapter presents the following product-specific service ...85 •• "Parts list" on page 88 Specifications The following table lists the specifications of the Lenovo Z/P Series : Table 1. Specifications Feature Processor Core Chipset Bus architecture Graphic memory chip Display Standard memory CMOS ... nits(option) (Z400) • 15.6" 16:9, 1366 × 768 pixels Glossy/Anit Glare, 3.2mm slim Flat-Type (Z500/P500) • DDR3-1600/1333MHz SODIMM × 2 (max 16 GB) • 256 bytes • 2.5-inch, 7 mm/9.5 mm...
Z/P Series Hardware Maintenance Manual Lenovo Z/P Series This chapter presents the following product-specific service ...85 •• "Parts list" on page 88 Specifications The following table lists the specifications of the Lenovo Z/P Series : Table 1. Specifications Feature Processor Core Chipset Bus architecture Graphic memory chip Display Standard memory CMOS ... nits(option) (Z400) • 15.6" 16:9, 1366 × 768 pixels Glossy/Anit Glare, 3.2mm slim Flat-Type (Z500/P500) • DDR3-1600/1333MHz SODIMM × 2 (max 16 GB) • 256 bytes • 2.5-inch, 7 mm/9.5 mm...

Hardware Maintenance Manual
Page 32
Z/P Series Hardware Maintenance Manual Status indicators The system status indicators below show the computer status: Z400 1 2 28
Z/P Series Hardware Maintenance Manual Status indicators The system status indicators below show the computer status: Z400 1 2 28

Hardware Maintenance Manual
Page 34
.... Fn key combinations Key combination Fn + PgUp: Fn + PgDn: Fn + Home: Fn + End: Fn + Space (on /off the backlight of function key. Z/P Series Hardware Maintenance Manual Function key combinations The following table shows the function of each combination of the LCD screen. : Toggles the display between the computer and an external...
.... Fn key combinations Key combination Fn + PgUp: Fn + PgDn: Fn + Home: Fn + End: Fn + Space (on /off the backlight of function key. Z/P Series Hardware Maintenance Manual Function key combinations The following table shows the function of each combination of the LCD screen. : Toggles the display between the computer and an external...

Hardware Maintenance Manual
Page 36
..., turn off the computer, unplug all screws, springs, and other small parts are in place and none are loose inside the computer. Z/P Series Hardware Maintenance Manual Removing and replacing an FRU This section presents exploded figures with one hand or using an electrostatic discharge (ESD) strap (P/N 6405959) to remove potential shock...
..., turn off the computer, unplug all screws, springs, and other small parts are in place and none are loose inside the computer. Z/P Series Hardware Maintenance Manual Removing and replacing an FRU This section presents exploded figures with one hand or using an electrostatic discharge (ESD) strap (P/N 6405959) to remove potential shock...

Hardware Maintenance Manual
Page 38
Z400 2 3 Z500/P500 2 3 34 Then pull the keyboard out of the screw hole on the bottom 2. Removal steps of keyboard (continued) Insert the screwdriver into one of the keyboard bezel 3. Z/P Series Hardware Maintenance Manual Figure 1.
Z400 2 3 Z500/P500 2 3 34 Then pull the keyboard out of the screw hole on the bottom 2. Removal steps of keyboard (continued) Insert the screwdriver into one of the keyboard bezel 3. Z/P Series Hardware Maintenance Manual Figure 1.

Hardware Maintenance Manual
Page 40
Removal steps of optical drive Remove the screw 1. Z/P Series Hardware Maintenance Manual 1020 Optical drive For access, remove this FRU: •• "1010 Keyboard" on page 33 Figure 2. Z400 1 36
Removal steps of optical drive Remove the screw 1. Z/P Series Hardware Maintenance Manual 1020 Optical drive For access, remove this FRU: •• "1010 Keyboard" on page 33 Figure 2. Z400 1 36

Hardware Maintenance Manual
Page 42
Removal steps of Optical drive (continued) Insert a screwdriver into the screw hole and push the optical drive in the direction shown by arrow 2 . Z400 2 3 Z500/P500 2 3 38 Z/P Series Hardware Maintenance Manual Figure 2. Pull the optical drive out in the direction shown by arrow 3.
Removal steps of Optical drive (continued) Insert a screwdriver into the screw hole and push the optical drive in the direction shown by arrow 2 . Z400 2 3 Z500/P500 2 3 38 Z/P Series Hardware Maintenance Manual Figure 2. Pull the optical drive out in the direction shown by arrow 3.


