IdeaPad Z560 Memory - Lenovo
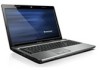
IdeaPad Z560 Memory
View Results Below
Free Lenovo IdeaPad Z560 manuals!
Problems with Lenovo IdeaPad Z560?
Ask a Question
Free Lenovo IdeaPad Z560 manuals!
Problems with Lenovo IdeaPad Z560?
Ask a Question
Related Manual Pages


Similar Questions

How To Increase The Dediceted Vedio Memory?
I have lenovo z5170. i 7 ..i have amd radeon r9 m375 ..4 gb graphics .but the display show 0 mb dedi...
I have lenovo z5170. i 7 ..i have amd radeon r9 m375 ..4 gb graphics .but the display show 0 mb dedi...
(Posted by rajparikh17 8 years ago)

Using Memory Card
when i insert my memory card in my lenovo G475 it does not open or read the card.what could be the p...
when i insert my memory card in my lenovo G475 it does not open or read the card.what could be the p...
(Posted by rutarogerald 9 years ago)

Related Terms
The following terms were also used when searching for IdeaPad Z560 Memory - Lenovo:- ideapad z560
- lenovo ideapad z560
- lenovo ideapadz560
- ideapad z560 laptop
- lenovo ideapad z560 review
- ideapad z560 review
- ideapad z560 i5
- ideapad z560 laptop review
- ideapad z560 series
- lenovo ideapad z560 laptop
- ideapad z560 cnet
- ideapad z560 intel core i5
- lenovo ideapad z560 series
- ideapad z560 amazon
- ideapad z560 hdmi
- ideapad z560 laptop reviews
- ideapad z560 specs
- lenovo ideapad z560 cnet
- lenovo ideapad z560 hdmi
- lenovo ideapad z560 i5
- lenovo ideapad z560 intel core i5
- ideapad z560 coupon
- ideapad z560 pictures
- ideapad z560 speakers
- ideapad z560 weight
- ideapad z560 0914
- ideapad z560 0914 3yu
- ideapad z560 0914-3yu
- ideapad z560 15.6
- ideapad z560 ac adapter
- ideapad z560 any good
- ideapad z560 audio drivers
- ideapad z560 battery
- ideapad z560 battery life
- ideapad z560 battery price
- ideapad z560 battery replacement
- ideapad z560 best price
- ideapad z560 bios
- ideapad z560 bios driver
- ideapad z560 bios key
- ideapad z560 bios update
- ideapad z560 blue
- ideapad z560 bluetooth
- ideapad z560 camera
- ideapad z560 camera driver
- ideapad z560 charger
- ideapad z560 cpu cooling fan
- ideapad z560 cpu cooling fan replacing
- ideapad z560 docking station
- ideapad z560 driver
- ideapad z560 driver download
- ideapad z560 drivers
- ideapad z560 drivers for windows 7
- ideapad z560 drivers for windows 8
- ideapad z560 drivers windows 7
- ideapad z560 extended battery
- ideapad z560 factory reset
- ideapad z560 factory restore
- ideapad z560 fan
- ideapad z560 graphics card
- ideapad z560 hard drive
- ideapad z560 hard drive replacement
- ideapad z560 hinge
- ideapad z560 i3
- ideapad z560 intel core i5-480m
- ideapad z560 keyboard
- ideapad z560 keyboard replacement
- ideapad z560 laptop battery life
- ideapad z560 laptop computer
- ideapad z560 laptop computer review
- ideapad z560 laptop i5
- ideapad z560 laptop lenovo
- ideapad z560 laptop price in india
- ideapad z560 laptop review lenovo
- ideapad z560 lcd front bezel
- ideapad z560 lenovo
- ideapad z560 lenovo review
- ideapad z560 linux
- ideapad z560 manual
- ideapad z560 max memory
- ideapad z560 max ram
- ideapad z560 memory
- ideapad z560 memory upgrade
- ideapad z560 model 20060 specifications
- ideapad z560 motherboard
- ideapad z560 original battery
- ideapad z560 parts
- ideapad z560 pdf
- ideapad z560 port replicator
- ideapad z560 power adapter
- ideapad z560 power cord
- ideapad z560 price
- ideapad z560 price in india
- ideapad z560 price india
- ideapad z560 radio switch
- ideapad z560 ram
- ideapad z560 ram upgrade
- ideapad z560 ratings
- ideapad z560 recovery
- ideapad z560 recovery disk
- ideapad z560 replacement battery
- ideapad z560 replacement keyboard
- ideapad z560 replacement lcd
- ideapad z560 replacement screen
- ideapad z560 resolution
- ideapad z560 restore factory settings
- ideapad z560 reviews
- ideapad z560 screen
- ideapad z560 screen replacement
- ideapad z560 skype
- ideapad z560 specifications
- ideapad z560 support
- ideapad z560 touchpad
- ideapad z560 ubuntu
- ideapad z560 user manual
- ideapad z560 webcam software
- ideapad z560 wifi card
- ideapad z560 wifi driver
- ideapad z560 windows 10
- ideapad z560 windows 7 restore disk
- ideapad z560 windows 8
- ideapad z560 windows 8 drivers
- lenovo ideapad z560 0914
- lenovo ideapad z560 0914 3yu
- lenovo ideapad z560 0914-3yu
- lenovo ideapad z560 ac adapter
- lenovo ideapad z560 any good
- lenovo ideapad z560 battery
- lenovo ideapad z560 battery life
- lenovo ideapad z560 battery price
- lenovo ideapad z560 battery replacement
- lenovo ideapad z560 bios
- lenovo ideapad z560 bios driver
- lenovo ideapad z560 bios key
- lenovo ideapad z560 bios update
- lenovo ideapad z560 bluetooth
- lenovo ideapad z560 camera
- lenovo ideapad z560 camera driver
- lenovo ideapad z560 charger
- lenovo ideapad z560 core i5
- lenovo ideapad z560 cpu cooling fan
- lenovo ideapad z560 cpu cooling fan replacing
- lenovo ideapad z560 docking station
- lenovo ideapad z560 driver
- lenovo ideapad z560 driver download
- lenovo ideapad z560 drivers
- lenovo ideapad z560 drivers for windows 7
- lenovo ideapad z560 drivers for windows 8
- lenovo ideapad z560 drivers windows 7
- lenovo ideapad z560 factory reset
- lenovo ideapad z560 factory restore
- lenovo ideapad z560 fan
- lenovo ideapad z560 graphics card
- lenovo ideapad z560 hard drive
- lenovo ideapad z560 hard drive replacement
- lenovo ideapad z560 hinge
- lenovo ideapad z560 i3
- lenovo ideapad z560 intel core i5-480m
- lenovo ideapad z560 keyboard
- lenovo ideapad z560 keyboard replacement
- lenovo ideapad z560 laptop price in india
- lenovo ideapad z560 laptop review
- lenovo ideapad z560 lcd front bezel
- lenovo ideapad z560 manual
- lenovo ideapad z560 max memory
- lenovo ideapad z560 max ram
- lenovo ideapad z560 memory
- lenovo ideapad z560 memory upgrade
- lenovo ideapad z560 model 20060 specifications
- lenovo ideapad z560 motherboard
- lenovo ideapad z560 original battery
- lenovo ideapad z560 parts
- lenovo ideapad z560 pdf
- lenovo ideapad z560 port replicator
- lenovo ideapad z560 power adapter
- lenovo ideapad z560 power cord
- lenovo ideapad z560 price
- lenovo ideapad z560 ram
- lenovo ideapad z560 ram upgrade
- lenovo ideapad z560 recovery
- lenovo ideapad z560 recovery disk
- lenovo ideapad z560 replacement battery
- lenovo ideapad z560 replacement keyboard
- lenovo ideapad z560 replacement lcd
- lenovo ideapad z560 replacement screen
- lenovo ideapad z560 resolution
- lenovo ideapad z560 restore factory settings
- lenovo ideapad z560 reviews
- lenovo ideapad z560 screen
- lenovo ideapad z560 screen replacement
- lenovo ideapad z560 speakers
- lenovo ideapad z560 specifications
- lenovo ideapad z560 specs
- lenovo ideapad z560 support
- lenovo ideapad z560 touchpad
- lenovo ideapad z560 user manual
- lenovo ideapad z560 webcam software
- lenovo ideapad z560 wifi card
- lenovo ideapad z560 wifi driver
- lenovo ideapad z560 windows 7 restore disk