User Guide
Page 5
...the Setup Utility . . . 43 Starting the Setup Utility program 43 Viewing and changing settings 43 Using passwords 43 Password considerations 44 Power-On Password 44 Privileged Access Password 44 Hard Disk User Password 44 Setting, changing, and deleting a password . . . 44 ... a POST/BIOS update failure . . . 48 Chapter 6. Notices 61 Television output notice 62 Trademarks 62 Index 63 © Copyright Lenovo 2009 iii Product overview 1 Features 1 Specifications 4 Software overview 5 Software provided with your Windows operating system 5 Locations 6 Locating connectors ...
...the Setup Utility . . . 43 Starting the Setup Utility program 43 Viewing and changing settings 43 Using passwords 43 Password considerations 44 Power-On Password 44 Privileged Access Password 44 Hard Disk User Password 44 Setting, changing, and deleting a password . . . 44 ... a POST/BIOS update failure . . . 48 Chapter 6. Notices 61 Television output notice 62 Trademarks 62 Index 63 © Copyright Lenovo 2009 iii Product overview 1 Features 1 Specifications 4 Software overview 5 Software provided with your Windows operating system 5 Locations 6 Locating connectors ...

User Guide
Page 10
.../1000 Mbps integrated Ethernet controller v PCI (Peripheral Component Interconnect) V.90 Data/Fax modem (some models) System management features v Ability to store power-on self-test (POST) hardware test results v Automatic power-on startup v ASF 2.0 (Alert Standard Format) v Intel Active Management Technology (AMT) (some models) v Intel matrix storage manager v Preboot Execution Environment (PXE...
.../1000 Mbps integrated Ethernet controller v PCI (Peripheral Component Interconnect) V.90 Data/Fax modem (some models) System management features v Ability to store power-on self-test (POST) hardware test results v Automatic power-on startup v ASF 2.0 (Alert Standard Format) v Intel Active Management Technology (AMT) (some models) v Intel matrix storage manager v Preboot Execution Environment (PXE...

User Guide
Page 11
... compatibility at the time this booklet. Computer models without diskette drive, keyboard, or mouse v Support for compatibility1 (varies by Lenovo as compatible with preinstalled software. Additional operating systems might not be identified by model type) v Linux® v Microsoft Windows... Hard Disk User Password v Keyboard with fingerprint reader (some models, see the ThinkVantage® Productivity Center program for more information) v Power-On Password (POP) and Privileged Access Password (PAP) for BIOS access v Serial and parallel port I/O control v Startup sequence control...
... compatibility at the time this booklet. Computer models without diskette drive, keyboard, or mouse v Support for compatibility1 (varies by Lenovo as compatible with preinstalled software. Additional operating systems might not be identified by model type) v Linux® v Microsoft Windows... Hard Disk User Password v Keyboard with fingerprint reader (some models, see the ThinkVantage® Productivity Center program for more information) v Power-On Password (POP) and Privileged Access Password (PAP) for BIOS access v Serial and parallel port I/O control v Startup sequence control...
User Guide
Page 13
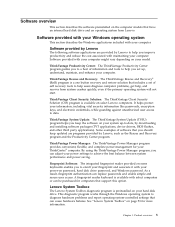
... password. This diagnostic program works through the Windows operating system to enroll your fingerprint and associate it with your ThinkCentre® computer. ThinkVantage Productivity Center: The ThinkVantage Productivity Center program guides you to a host of information and ... of self recovery tools to data. As a result, fingerprint authentication can adjust your power settings to help , and recover from Lenovo. Chapter 1. Software provided by Lenovo The following software applications are programs provided by downloading and installing software packages (TVT applications...
... password. This diagnostic program works through the Windows operating system to enroll your fingerprint and associate it with your ThinkCentre® computer. ThinkVantage Productivity Center: The ThinkVantage Productivity Center program guides you to a host of information and ... of self recovery tools to data. As a result, fingerprint authentication can adjust your power settings to help , and recover from Lenovo. Chapter 1. Software provided by Lenovo The following software applications are programs provided by downloading and installing software packages (TVT applications...

User Guide
Page 15
... lock slot 8 Cover-release button 9 PCI adapter card slot 10 Audio line-out connector 11 Microphone connector 12 USB connectors (3) 13 DisplayPort connector 14 AC power adapter connector Chapter 1.
... lock slot 8 Cover-release button 9 PCI adapter card slot 10 Audio line-out connector 11 Microphone connector 12 USB connectors (3) 13 DisplayPort connector 14 AC power adapter connector Chapter 1.

User Guide
Page 16
... to attach an Ethernet cable for a local area network (LAN). When you want to attach a device that requires a Universal Serial Bus (USB) connector, such as powered stereo speakers (speakers with built-in amplifiers), headphones, multimedia keyboards, or the audio line-in connector on a stereo system or other pointing devices that use...
... to attach an Ethernet cable for a local area network (LAN). When you want to attach a device that requires a Universal Serial Bus (USB) connector, such as powered stereo speakers (speakers with built-in amplifiers), headphones, multimedia keyboards, or the audio line-in connector on a stereo system or other pointing devices that use...

User Guide
Page 18
... card slot 10 Front USB connector 2 11 Intrusion switch connector/Cover presence switch connector 12 Front I/O and LED/Switch header 13 eSATA connector 14 Internal power distribution connector 15 Fan connector 10 User Guide Figure 4 shows the location of devices. It provides basic computer functions and supports a variety of the parts...
... card slot 10 Front USB connector 2 11 Intrusion switch connector/Cover presence switch connector 12 Front I/O and LED/Switch header 13 eSATA connector 14 Internal power distribution connector 15 Fan connector 10 User Guide Figure 4 shows the location of devices. It provides basic computer functions and supports a variety of the parts...

User Guide
Page 20
...4. Remove any media from electrical outlets. 3. Installing external options External speakers, a printer, or a scanner can be very hot. Turn off all power cords from the drives, shut down your computer. See "Locating connectors on the front of your computer" on page 6 and "Locating connectors on ... to help you must install additional software in addition to open the computer cover: 1. Important Be sure to the computer. This includes power cords, input/output (I/O) cables, and any software or device drivers that lock the computer cover-release button, such as a cable lock...
...4. Remove any media from electrical outlets. 3. Installing external options External speakers, a printer, or a scanner can be very hot. Turn off all power cords from the drives, shut down your computer. See "Locating connectors on the front of your computer" on page 6 and "Locating connectors on ... to help you must install additional software in addition to open the computer cover: 1. Important Be sure to the computer. This includes power cords, input/output (I/O) cables, and any software or device drivers that lock the computer cover-release button, such as a cable lock...

User Guide
Page 23
...-installed software, refer to remove. See "Opening the computer cover" on how to the factory-installed state. Disconnect the signal cable and the power cable from the chassis. 5. Chapter 2. Important When you receive a new hard disk drive, you to restore the contents of the hard disk... that came with your computer has one. Remove the hard disk drive from the optical drive. 3. To obtain a copy of the ThinkCentre Safety and Warranty Guide, go to: http://www.lenovo.com/support This section provides instructions on page 12. 2. Installing options and replacing hardware 15
...-installed software, refer to remove. See "Opening the computer cover" on how to the factory-installed state. Disconnect the signal cable and the power cable from the chassis. 5. Chapter 2. Important When you receive a new hard disk drive, you to restore the contents of the hard disk... that came with your computer has one. Remove the hard disk drive from the optical drive. 3. To obtain a copy of the ThinkCentre Safety and Warranty Guide, go to: http://www.lenovo.com/support This section provides instructions on page 12. 2. Installing options and replacing hardware 15

User Guide
Page 24
... 8. Go to the optical drive. 11. Do not touch the circuit board 5 on the bottom of the ThinkCentre Safety and Warranty Guide, go to: http://www.lenovo.com/support This section provides instructions on page 30. Replacing the optical drive Attention Do not open your computer. ...To obtain a copy of the hard disk drive. To replace the optical drive: 1. Reconnect the power cable to "Completing the parts replacement...
... 8. Go to the optical drive. 11. Do not touch the circuit board 5 on the bottom of the ThinkCentre Safety and Warranty Guide, go to: http://www.lenovo.com/support This section provides instructions on page 30. Replacing the optical drive Attention Do not open your computer. ...To obtain a copy of the hard disk drive. To replace the optical drive: 1. Reconnect the power cable to "Completing the parts replacement...

User Guide
Page 25
Disconnect the signal cable and the power cable from the failing optical drive and install it completely. Installing options and replacing hardware 17 Figure 11. Remove the optical drive retainer from the ...
Disconnect the signal cable and the power cable from the failing optical drive and install it completely. Installing options and replacing hardware 17 Figure 11. Remove the optical drive retainer from the ...

User Guide
Page 26
... the signal cable and the power cable to "Completing the parts replacement" on page 30. Replacing the battery Attention Do not open your computer or attempt any repair before reading and understanding the "Important safety information" in the ThinkCentre Safety and Warranty Guide that maintains... charging or maintenance throughout its life; A battery keeps this information active when you turn off the computer. Refer to : http://www.lenovo.com/support Your computer has a special type of memory that came with the corresponding holes in features, such as parallel-port assignments (...
... the signal cable and the power cable to "Completing the parts replacement" on page 30. Replacing the battery Attention Do not open your computer or attempt any repair before reading and understanding the "Important safety information" in the ThinkCentre Safety and Warranty Guide that maintains... charging or maintenance throughout its life; A battery keeps this information active when you turn off the computer. Refer to : http://www.lenovo.com/support Your computer has a special type of memory that came with the corresponding holes in features, such as parallel-port assignments (...

User Guide
Page 35
... hardware 27 To obtain a copy of your computer. Locate the power adapter connector. Go to : http://www.lenovo.com/support This section provides instructions on the bottom of the bezel with the screw. 7. Chapter 2. See "Locating connectors on the rear of the ThinkCentre Safety and Warranty Guide, go to "Completing the parts replacement...
... hardware 27 To obtain a copy of your computer. Locate the power adapter connector. Go to : http://www.lenovo.com/support This section provides instructions on the bottom of the bezel with the screw. 7. Chapter 2. See "Locating connectors on the rear of the ThinkCentre Safety and Warranty Guide, go to "Completing the parts replacement...

User Guide
Page 36
Go to the power adapter connector on page 30. 28 User Guide Connect the new AC power adapter cable to "Completing the parts replacement" on the chassis and the electrical outlet. Figure 24. Connecting the AC power adapter 6. 5.
Go to the power adapter connector on page 30. 28 User Guide Connect the new AC power adapter cable to "Completing the parts replacement" on the chassis and the electrical outlet. Figure 24. Connecting the AC power adapter 6. 5.

User Guide
Page 37
... and the computer. To obtain a copy of the ThinkCentre Safety and Warranty Guide, go to: http://www.lenovo.com/support This section provides instructions on the front of the ThinkCentre Safety and Warranty Guide, go to: http://www.lenovo.com/support This section provides instructions on how to ..."Completing the parts replacement" on page 6. To obtain a copy of your operating system, and turn off all power cords from the drives, shut...
... and the computer. To obtain a copy of the ThinkCentre Safety and Warranty Guide, go to: http://www.lenovo.com/support This section provides instructions on the front of the ThinkCentre Safety and Warranty Guide, go to: http://www.lenovo.com/support This section provides instructions on how to ..."Completing the parts replacement" on page 6. To obtain a copy of your operating system, and turn off all power cords from the drives, shut...

User Guide
Page 38
...computer" on page 6. See "Locating components" on the rear of your computer. Unplug all components have been reassembled correctly and that all power cords from the computer. 5. Locate the connector for the location of your computer: 1. Depending on where your mouse is connected, see ..."Locating connectors on page 9 for the mouse. To close the computer cover and reconnect cables, such as power cords. Connect a new mouse cable to "Completing the parts replacement." Depending on the computer. 6. Go to the appropriate connector on the ...
...computer" on page 6. See "Locating components" on the rear of your computer. Unplug all components have been reassembled correctly and that all power cords from the computer. 5. Locate the connector for the location of your computer: 1. Depending on where your mouse is connected, see ..."Locating connectors on page 9 for the mouse. To close the computer cover and reconnect cables, such as power cords. Connect a new mouse cable to "Completing the parts replacement." Depending on the computer. 6. Go to the appropriate connector on the ...

User Guide
Page 39
... hinges and sides of your computer" on page 7. Installing options and replacing hardware 31 Cable routing Important Correctly route all power supply cables to the computer. Reconnect the external cables and power cords to avoid interference when closing the computer cover. Figure 28. If a computer cable lock is installed, lock the computer...
... hinges and sides of your computer" on page 7. Installing options and replacing hardware 31 Cable routing Important Correctly route all power supply cables to the computer. Reconnect the external cables and power cords to avoid interference when closing the computer cover. Figure 28. If a computer cable lock is installed, lock the computer...

User Guide
Page 42
... 10. 3. See "Locating parts on the system board" on page 30. 34 User Guide Close the computer cover and connect the power cord. Erasing lost or forgotten passwords (clearing CMOS) This section contains instructions on the system board. Move the Clear CMOS/Recovery jumper back.../Recovery jumper on erasing some lost or forgotten passwords: 1. Repeat step 1 through step 2 on page 30. 5. Close the computer cover and connect the power cord. Turn off . 6. See "Completing the parts replacement" on page 34. 7. To erase lost or forgotten passwords, such as a user password. ...
... 10. 3. See "Locating parts on the system board" on page 30. 34 User Guide Close the computer cover and connect the power cord. Erasing lost or forgotten passwords (clearing CMOS) This section contains instructions on the system board. Move the Clear CMOS/Recovery jumper back.../Recovery jumper on erasing some lost or forgotten passwords: 1. Repeat step 1 through step 2 on page 30. 5. Close the computer cover and connect the power cord. Turn off . 6. See "Completing the parts replacement" on page 34. 7. To erase lost or forgotten passwords, such as a user password. ...

User Guide
Page 51
... at the bottom of each screen. The Setup Utility program might override any passwords, read the following sections. © Copyright Lenovo 2009 43 When working with the Setup Utility program menu, you must use your computer, regardless of which operating system you are available... Setup Utility program is already on when you type your computer and data. If your computer is used to your password. If a Power-On Password or a Privileged Access Password has been set passwords to prevent unauthorized persons from gaining access to perform various tasks are using...
... at the bottom of each screen. The Setup Utility program might override any passwords, read the following sections. © Copyright Lenovo 2009 43 When working with the Setup Utility program menu, you must use your computer, regardless of which operating system you are available... Setup Utility program is already on when you type your computer and data. If your computer is used to your password. If a Power-On Password or a Privileged Access Password has been set passwords to prevent unauthorized persons from gaining access to perform various tasks are using...

User Guide
Page 52
... character v Setup Utility program and hard disk drive passwords are set , it deters unauthorized persons from your previous password Power-On Password When a Power-On Password is recommended to 12 alphabetic and numeric characters. For more information, see "Password considerations." 1. Start the ...your user name v Not be a common word or a common name v Be significantly different from changing configuration settings. If both the Power-On and Privileged Access passwords are not case sensitive v Not be your name or your Privileged Access Password. If you are responsible for...
... character v Setup Utility program and hard disk drive passwords are set , it deters unauthorized persons from your previous password Power-On Password When a Power-On Password is recommended to 12 alphabetic and numeric characters. For more information, see "Password considerations." 1. Start the ...your user name v Not be a common word or a common name v Be significantly different from changing configuration settings. If both the Power-On and Privileged Access passwords are not case sensitive v Not be your name or your Privileged Access Password. If you are responsible for...


